rear view mirror HYUNDAI PALISADE 2021 Owners Manual
[x] Cancel search | Manufacturer: HYUNDAI, Model Year: 2021, Model line: PALISADE, Model: HYUNDAI PALISADE 2021Pages: 612, PDF Size: 33.36 MB
Page 97 of 612
Convenient features of your vehicle
Accessing your vehicle .........................................3-4
Remote Key.........................................................................3-4
Smart Key ............................................................................3-8
Immobilizer System .........................................................3-14
Door locks .............................................................3-15
Operating Door Locks from Outside the Vehicle ....3-15
Operating Door Locks from Inside the Vehicle .......3-16
Automatic Door Lock and Unlock Features .............3-19
Child-Protector Rear Door Locks ...............................3-20
Electronic Child Safety Lock System .........................3-20
Safe Exit Assist (SEA) System .....................................3-21
Rear Occupant Alert (ROA) System ...........................3-23
Theft-alarm system.............................................3-26
Driver position memory system .........................3-27
Storing Positions into Memory ....................................3-27
Recalling Positions from Memory...............................3-28
Resetting the Driver's Seat Memory System...........3-28
Easy Access Function ....................................................3-29
Steering wheel......................................................3-30
Electric Power Steering (EPS) .....................................3-30
Tilt Steering / Telescopic Steering .............................3-31
Horn ....................................................................................3-31
Heated Steering Wheel ..................................................3-32
Mirrors ...................................................................3-33
Inside Rearview Mirror ..................................................3-33
Side View Mirrors ...........................................................3-39
Reverse Parking Aid Function......................................3-41
Windows ................................................................3-42
Power Windows ...............................................................3-43
Sunroof..................................................................3-46
Sunroof ..............................................................................3-46
Dual wide sunroof...........................................................3-46
Sunshade ...........................................................................3-47
Sunroof Opening and Closing ......................................3-48
Sliding the Sunroof .........................................................3-48
Tilting the Sunroof (Front) ...........................................3-49
Resetting the Sunroof ...................................................3-50
Resetting the rear sunshade........................................3-51
Sunroof Open Warning ..................................................3-52
Exterior features .................................................3-53
Hood ...................................................................................3-53
Non-Powered Liftgate ...................................................3-54
Power Liftgate .................................................................3-56
Smart Liftgate ..................................................................3-62
Fuel Filler Door ................................................................3-66
3
Page 124 of 612
3-28
Convenient features of your vehicle
Recalling Positions from
Memory
1. Shift to P (Park) while the ignition
switch is in the ON position.
2. Press the desired memory button
(1 or 2). The system will beep
once, and then the driver's seat
position, side view mirror position,
instrument panel illumination
intensity and head-up display
height/brightness will automatical-
ly adjust to the stored positions.
3. "Driver 1 (or 2) settings applied"
will appear on the cluster LCD dis-
play.
Information
• While recalling the "1" memory
position, pressing the SET or 1 but-
ton temporarily stops the adjust-
ment of the recalled memory posi-
tion. Pressing the 2 button recalls
the "2" memory position.
• While recalling the "2" memory
position, pressing the SET or 2 but-
ton temporarily stops the adjust-
ment of the recalled memory posi-
tion. Pressing the 1 button recalls
the "1" memory position.• While recalling the stored positions,
pressing one of the control buttons
for the driver's seat, side view mir-
ror, instrument panel illumination
or head-up display will cause the
movement of that component to stop
and move in the direction that the
control button is pressed.
Resetting the Driver's Seat
Memory System
Take the following procedures to reset
the driver's seat memory system,
when it does not operate properly.
To reset the driver's seat memo-
ry system
1. Place the ignition switch to the ON
position, shift to P (Park), and
open the driver's door.
2. Operate the control switch to set
the driver's seat and seatback to
the foremost position.
3. Simultaneously press the SET
button and push forward the seat
movement switch over 2 seconds.
While resetting the driver's seat
memory system
1. It starts with the notification sound.
2. The driver's seat and seatback is
adjusted to the rearward position
with the notification sound.
3. The driver's seat and seatback is
re-adjusted to the default position
(central position) with the notifica-
tion sound.
However, in the following cases, the
resetting procedure and the notifica-
tion sound may stop.
- The memory button is pressed.
- The control switch is operated.
- The driving speed exceeds 2 mph
(3 km/h).
- The driver's door is closed.
i
Page 129 of 612
3-33
Convenient features of your vehicle
3
M MI
IR
RR
RO
OR
RS
S
Inside Rearview Mirror
Before driving your vehicle, check to
see that your inside rearview mirror
is properly positioned. Adjust the
rearview mirror so that the view
through the rear window is properly
centered.
When cleaning the mirror, use a
paper towel or similar material
dampened with glass cleaner. Do
not spray glass cleaner directly on
the mirror as this may cause the
liquid cleaner to enter the mirror
housing.
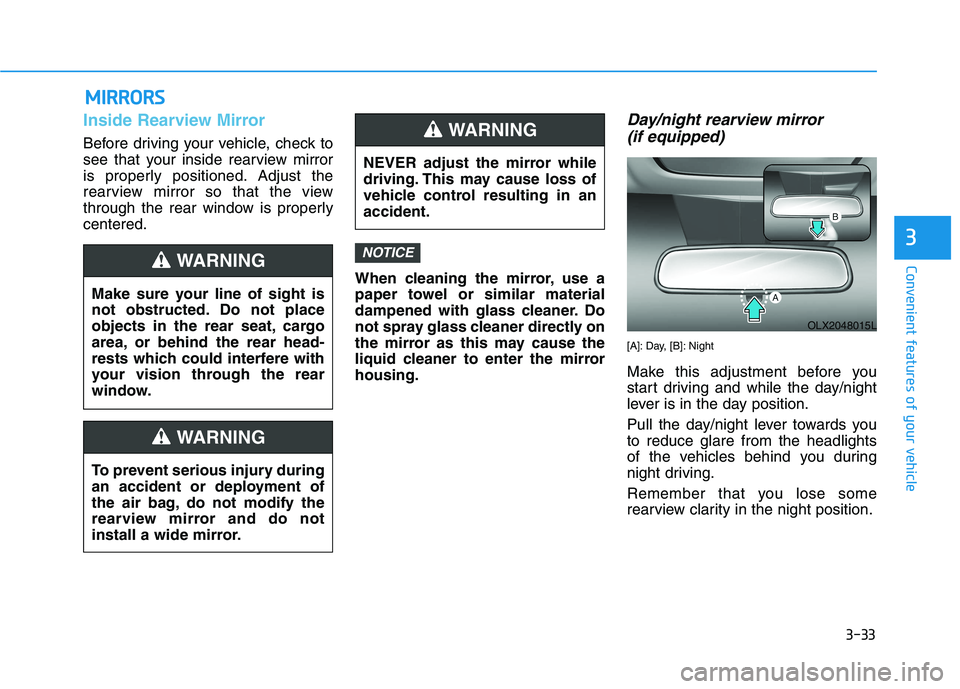
Day/night rearview mirror
(if equipped)
[A]: Day, [B]: Night
Make this adjustment before you
start driving and while the day/night
lever is in the day position.
Pull the day/night lever towards you
to reduce glare from the headlights
of the vehicles behind you during
night driving.
Remember that you lose some
rearview clarity in the night position.
NOTICE
NEVER adjust the mirror while
driving. This may cause loss of
vehicle control resulting in an
accident.
WARNING
Make sure your line of sight is
not obstructed. Do not place
objects in the rear seat, cargo
area, or behind the rear head-
rests which could interfere with
your vision through the rear
window.
WARNING
To prevent serious injury during
an accident or deployment of
the air bag, do not modify the
rearview mirror and do not
install a wide mirror.
WARNING
OLX2048015L
Page 130 of 612
3-34
Convenient features of your vehicle
Electrochromatic Mirror (ECM)
(if equipped)
Some vehicles come equipped with
an electrochromic mirror that helps
control glare while driving at night or
under low light driving conditions.
When the engine is running, the
glare is automatically controlled by
the sensor mounted in the rearview
mirror. The sensor detects the light
level around the vehicle, and auto-
matically adjusts to control the head-
lamp glare from vehicles behind you.
Whenever the shift button is placed
in R (Reverse), the mirror will auto-
matically go to the brightest setting in
order to improve the driver’s view
behind the vehicle.
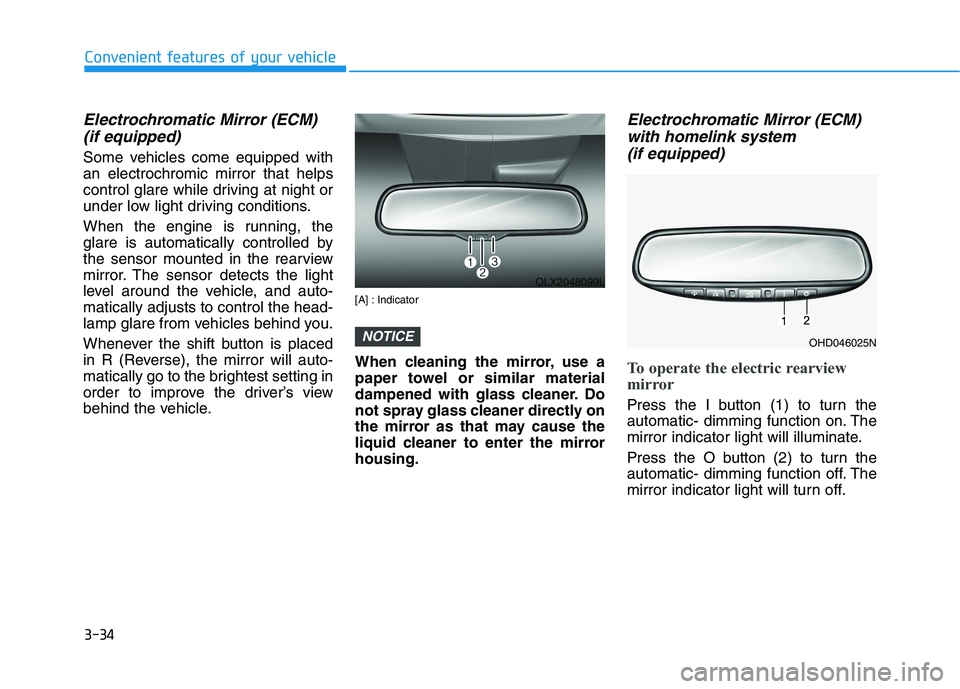
[A] : Indicator
When cleaning the mirror, use a
paper towel or similar material
dampened with glass cleaner. Do
not spray glass cleaner directly on
the mirror as that may cause the
liquid cleaner to enter the mirror
housing.
Electrochromatic Mirror (ECM)
with homelink system
(if equipped)
To operate the electric rearview
mirror
Press the I button (1) to turn the
automatic- dimming function on. The
mirror indicator light will illuminate.
Press the O button (2) to turn the
automatic- dimming function off. The
mirror indicator light will turn off.
NOTICE
OLX2048099L
OHD046025N
Page 135 of 612
3-39
Convenient features of your vehicle
3
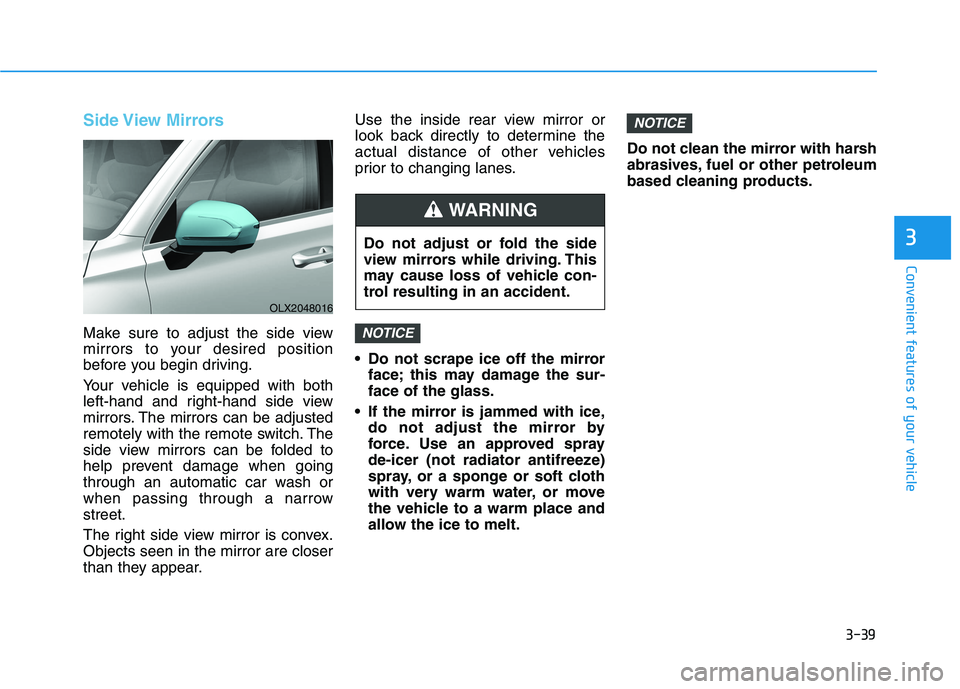
Side View Mirrors
Make sure to adjust the side view
mirrors to your desired position
before you begin driving.
Your vehicle is equipped with both
left-hand and right-hand side view
mirrors. The mirrors can be adjusted
remotely with the remote switch. The
side view mirrors can be folded to
help prevent damage when going
through an automatic car wash or
when passing through a narrow
street.
The right side view mirror is convex.
Objects seen in the mirror are closer
than they appear.Use the inside rear view mirror or
look back directly to determine the
actual distance of other vehicles
prior to changing lanes.
Do not scrape ice off the mirror
face; this may damage the sur-
face of the glass.
If the mirror is jammed with ice,
do not adjust the mirror by
force. Use an approved spray
de-icer (not radiator antifreeze)
spray, or a sponge or soft cloth
with very warm water, or move
the vehicle to a warm place and
allow the ice to melt.Do not clean the mirror with harsh
abrasives, fuel or other petroleum
based cleaning products.
NOTICE
NOTICE
OLX2048016
Do not adjust or fold the side
view mirrors while driving. This
may cause loss of vehicle con-
trol resulting in an accident.
WARNING
Page 282 of 612
3-186
Convenient features of your vehicle
For maximum defrost perform-
ance, set the temperature control
knob to the highest temperature
setting (rotated all the way to the
right) and the fan speed control to
the highest setting.
If warm air to the floor is desired
while defrosting or defogging, set the
mode to the floor-defrost position.
Before driving, clear all snow and
ice from the windshield, rear win-
dow, side view mirrors, and all side
windows.
Clear all snow and ice from the
hood and air inlet in the cowl grill to
improve heater and defroster effi-
ciency and to reduce the probability
of fogging up the inside of the wind-
shield.
If the engine temperature is still
cold after starting, then a brief
engine warm up period may be
required for the vented air flow to
become warm or hot.Manual Climate Control System
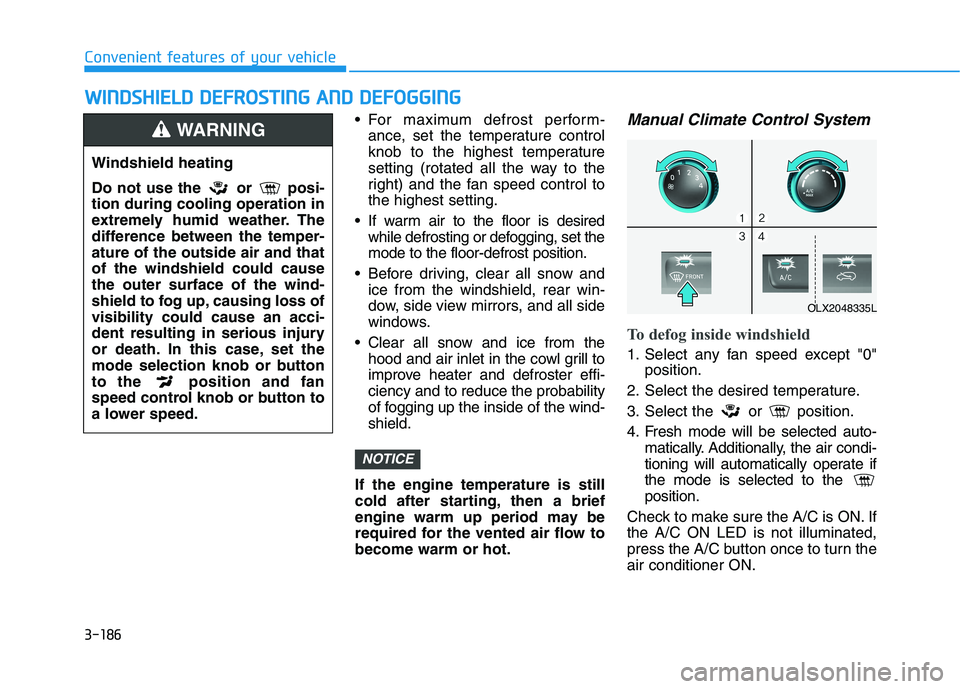
To defog inside windshield
1. Select any fan speed except "0"
position.
2. Select the desired temperature.
3. Select the or position.
4. Fresh mode will be selected auto-
matically. Additionally, the air condi-
tioning will automatically operate if
the mode is selected to the
position.
Check to make sure the A/C is ON. If
the A/C ON LED is not illuminated,
press the A/C button once to turn the
air conditioner ON.
NOTICE
W WI
IN
ND
DS
SH
HI
IE
EL
LD
D
D
DE
EF
FR
RO
OS
ST
TI
IN
NG
G
A
AN
ND
D
D
DE
EF
FO
OG
GG
GI
IN
NG
G
Windshield heating
Do not use the or posi-
tion during cooling operation in
extremely humid weather. The
difference between the temper-
ature of the outside air and that
of the windshield could cause
the outer surface of the wind-
shield to fog up, causing loss of
visibility could cause an acci-
dent resulting in serious injury
or death. In this case, set the
mode selection knob or button
to the position and fan
speed control knob or button to
a lower speed.
WARNING
OLX2048335L
Page 286 of 612
3-190
Convenient features of your vehicle
Rear Window Defroster
To prevent damage to the rear
window defroster conducting ele-
ments bonded to the inside sur-
face of the rear window, never use
sharp instruments or window
cleaners containing abrasives to
clean the window.
If you want to defrost and defog
the front windshield, refer to the
"Windshield Defrosting and
Defogging" section in this chapter.The defroster heats
the window to remove
frost, fog and thin ice
from the interior and
exterior of the rear win-
dow, while the engine
is running.
To activate the rear window
defroster, press the rear window
defroster button located in the center
control panel. The indicator on the
rear window defroster button illumi-
nates when the defroster is ON.
To turn off the defroster, press the
rear window defroster button again.
Information
• If there is heavy accumulation of
snow on the rear window, brush it
off before operating the rear
defroster.
• The rear window defroster automat-
ically turns off after approximately
20 minutes or when the ignition
switch is in the LOCK/OFF posi-
tion.
Side view mirror defroster
If your vehicle is equipped with the
side view mirror defrosters, they will
operate at the same time you turn on
the rear window defroster.
i
NOTICE
Page 292 of 612
3-196
Convenient features of your vehicle
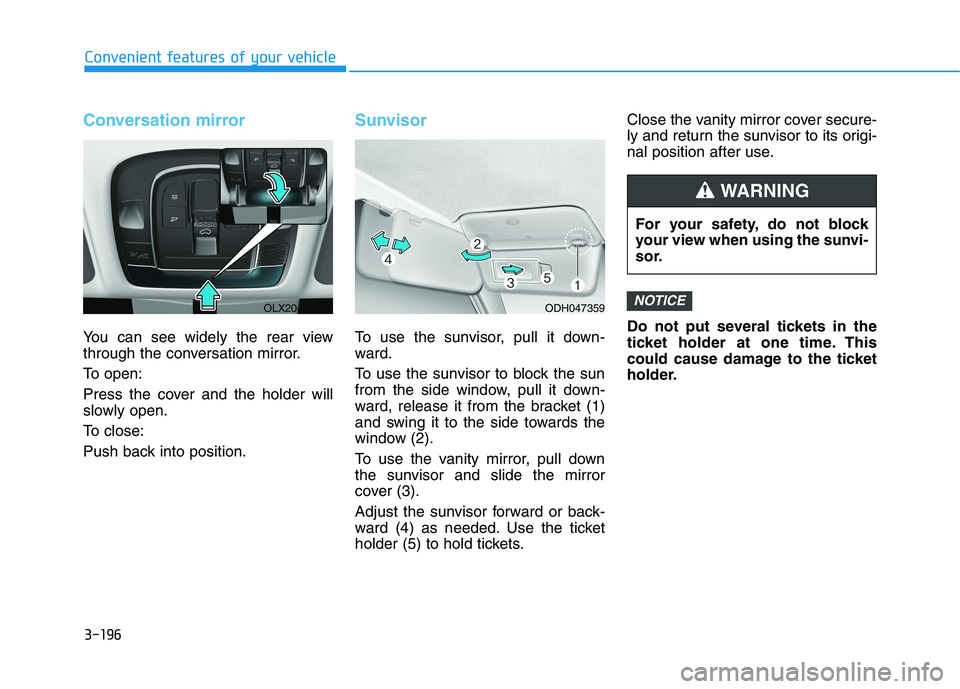
Conversation mirror
You can see widely the rear view
through the conversation mirror.
To open:
Press the cover and the holder will
slowly open.
To close:
Push back into position.
Sunvisor
To use the sunvisor, pull it down-
ward.
To use the sunvisor to block the sun
from the side window, pull it down-
ward, release it from the bracket (1)
and swing it to the side towards the
window (2).
To use the vanity mirror, pull down
the sunvisor and slide the mirror
cover (3).
Adjust the sunvisor forward or back-
ward (4) as needed. Use the ticket
holder (5) to hold tickets.Close the vanity mirror cover secure-
ly and return the sunvisor to its origi-
nal position after use.
Do not put several tickets in the
ticket holder at one time. This
could cause damage to the ticket
holder.
NOTICE
For your safety, do not block
your view when using the sunvi-
sor.
WARNING
ODH047359OLX2048074L
Page 314 of 612
5-5
Driving your vehicle
5
Before Entering the Vehicle
• Be sure all windows, outside mir-
ror(s), and outside lights are clean
and unobstructed.
Remove frost, snow, or ice.
Visually check the tires for uneven
wear and damage.
Check under the vehicle for any
sign of leaks.
Be sure there are no obstacles
behind you if you intend to back up.
Before Starting
Make sure the hood, the liftgate,
and the doors are securely closed
and locked.
Adjust the position of the seat and
steering wheel.
Adjust the inside and outside
rearview mirrors.
Verify all the lights work.
Fasten your seatbelt. Check that all
passengers have fastened their
seatbelts.
Check the gauges and indicators in
the instrument panel and the mes-
sages on the instrument display
when the ignition switch is in the
ON position.
Check that any items you are car-
rying are stored properly or fas-
tened down securely. CALIFORNIA PROPOSITION 65
WARNING
Engine exhaust and a wide vari-
ety of automobile components
including components found in
the interior furnishings in a
vehicle, contain or emit harmful
chemicals known to the State of
California to cause cancer and
birth defects and reproductive
harm. In addition, certain fluids
contained in vehicles and cer-
tain products of components
contain or emit chemicals
known to the State of California
to cause cancer and birth
defects or other reproductive
harm.
For more information go to
https://www.p65warnings.ca.go
v/passenger-vehicleWARNING
B BE
EF
FO
OR
RE
E
D
DR
RI
IV
VI
IN
NG
G
Page 392 of 612
5-83
Driving your vehicle
5
Blind-Spot Collision-Avoidance
Assist (BCA) system
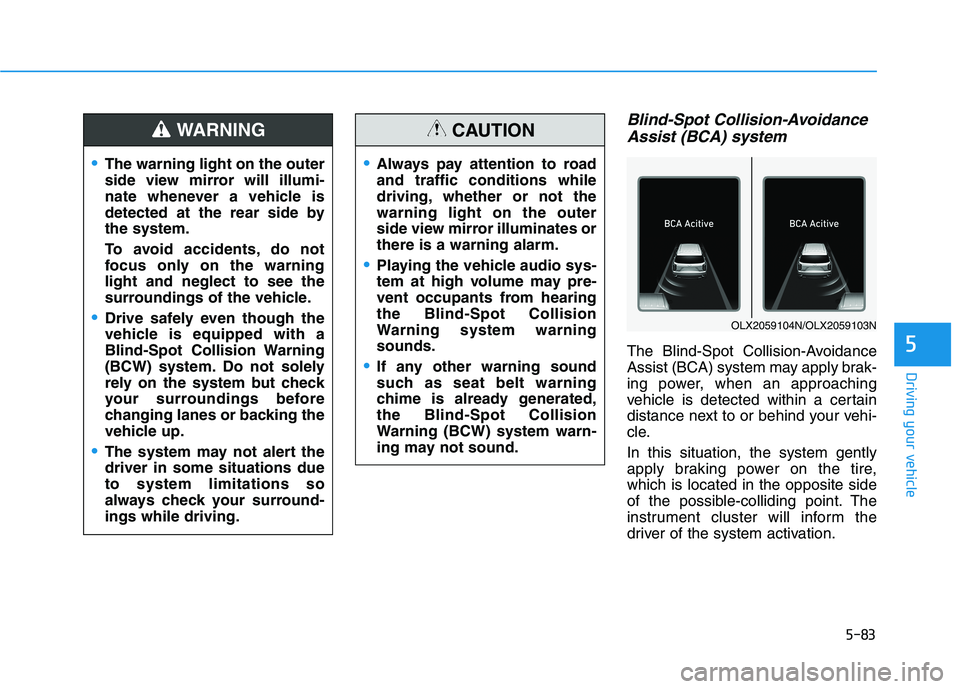
The Blind-Spot Collision-Avoidance
Assist (BCA) system may apply brak-
ing power, when an approaching
vehicle is detected within a certain
distance next to or behind your vehi-
cle.
In this situation, the system gently
apply braking power on the tire,
which is located in the opposite side
of the possible-colliding point. The
instrument cluster will inform the
driver of the system activation.
The warning light on the outer
side view mirror will illumi-
nate whenever a vehicle is
detected at the rear side by
the system.
To avoid accidents, do not
focus only on the warning
light and neglect to see the
surroundings of the vehicle.
Drive safely even though the
vehicle is equipped with a
Blind-Spot Collision Warning
(BCW) system. Do not solely
rely on the system but check
your surroundings before
changing lanes or backing the
vehicle up.
The system may not alert the
driver in some situations due
to system limitations so
always check your surround-
ings while driving.
WARNING
Always pay attention to road
and traffic conditions while
driving, whether or not the
warning light on the outer
side view mirror illuminates or
there is a warning alarm.
Playing the vehicle audio sys-
tem at high volume may pre-
vent occupants from hearing
the Blind-Spot Collision
Warning system warning
sounds.
If any other warning sound
such as seat belt warning
chime is already generated,
the Blind-Spot Collision
Warning (BCW) system warn-
ing may not sound.
CAUTION
OLX2059104N/OLX2059103N