Remote start HYUNDAI PALISADE 2022 User Guide
[x] Cancel search | Manufacturer: HYUNDAI, Model Year: 2022, Model line: PALISADE, Model: HYUNDAI PALISADE 2022Pages: 663, PDF Size: 15.74 MB
Page 130 of 663
3-34
Convenience Features
While resetting the driver's seatmemory system
1. It starts with the notification sound.
2. The driver's seat and seatback is
adjusted to the rearward position
with the notification sound.
3. The driver's seat and seatback is re-adjusted to the default position
(central position) with the notifica-
tion sound.
However, in the following cases, the
resetting procedure and the notifica-
tion sound may stop.
- The memory button is pressed.
- The control switch is operated.
- The driving speed exceeds 2 mph (3 km/h).
- The driver's door is closed. Reattempt to do the resetting
procedure again, when the
resetting procedure incomplete-
ly stops or the notification
sound do not stop.
Make sure that there is no obsta- cle around the driver's seat in
advance of resetting the driver's
seat memory system.
Easy Access Function
The system will move the driver's
seat automatically as follows:
With remote key
- It will move the driver's seat rear-ward and downward when the igni-
tion key is removed.
- It will move the driver's seat for- ward and upward when the ignition
key is inserted.
With smart key
- It will move the driver's seat rear- ward and downward when the
Engine Start/Stop button is
pressed to the OFF position.
- It will move the driver's seat forward and upward when the Engine
Start/Stop button is pressed to the
ACC or START position.
NOTICE
If the reset is failed, initialize
the system once again.
Initialize the system after
cleaning the obstacles sur-
rounding of seat.
After completing the initializa-
tion, adjust the driver position
memory system again.
CAUTION
Page 173 of 663
3-77
Convenience Features
3
3. Automatic opening
After the hazard warning lights blink
and the chime sounds 6 times, the
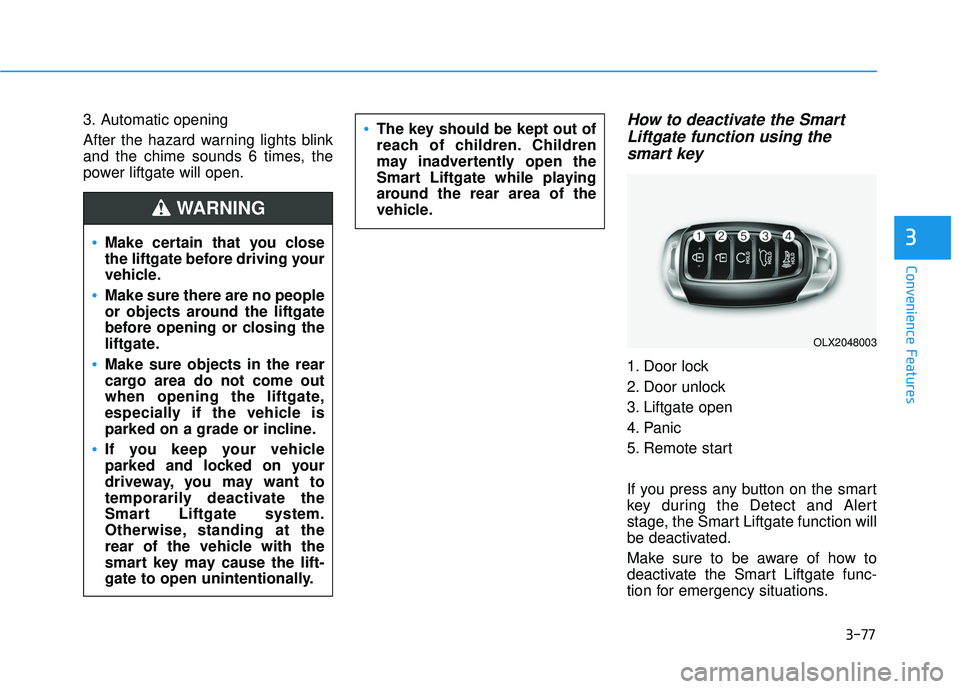
power liftgate will open.How to deactivate the SmartLiftgate function using thesmart key
1. Door lock
2. Door unlock
3. Liftgate open
4. Panic
5. Remote start
If you press any button on the smart
key during the Detect and Alert
stage, the Smart Liftgate function will
be deactivated.
Make sure to be aware of how to
deactivate the Smart Liftgate func-
tion for emergency situations.
Make certain that you close
the liftgate before driving your
vehicle.
Make sure there are no people
or objects around the liftgate
before opening or closing the
liftgate.
Make sure objects in the rear
cargo area do not come out
when opening the liftgate,
especially if the vehicle is
parked on a grade or incline.
If you keep your vehicle
parked and locked on your
driveway, you may want to
temporarily deactivate the
Smart Liftgate system.
Otherwise, standing at the
rear of the vehicle with the
smart key may cause the lift-
gate to open unintentionally.
WARNING
The key should be kept out of
reach of children. Children
may inadvertently open the
Smart Liftgate while playing
around the rear area of the
vehicle.
OLX2048003
Page 213 of 663
3-117
Convenience Features
3
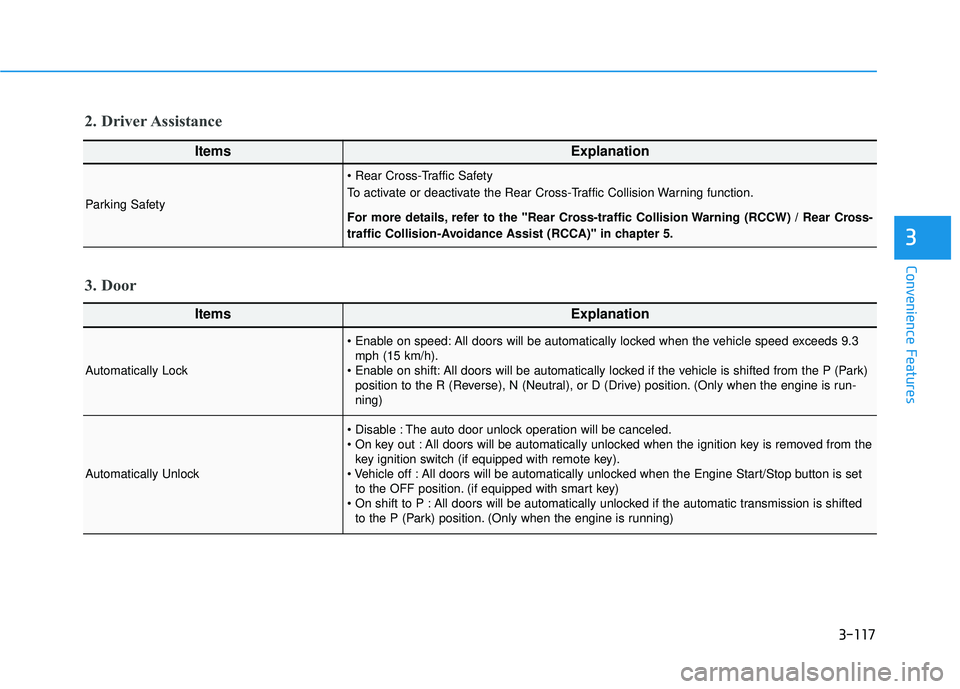
ItemsExplanation
Automatically Lock
All doors will be automatically locked when the vehicle speed exceeds 9.3mph (15 km/h).
All doors will be automatically locked if the vehicle is shifted from the P (Park) position to the R (Reverse), N (Neutral), or D (Drive) position. (Only when the engine is run-
ning)
Automatically Unlock
The auto door unlock operation will be canceled.
All doors will be automatically unlocked when the ignition key is removed from thekey ignition switch (if equipped with remote key).
All doors will be automatically unlocked when the Engine Start/Stop button is set to the OFF position. (if equipped with smart key)
All doors will be automatically unlocked if the automatic transmission is shifted to the P (Park) position. (Only when the engine is running)
3. Door
ItemsExplanation
Parking Safety
To activate or deactivate the Rear Cross-Traffic Collision Warning function.
For more details, refer to the "Rear Cross-traffic Collision Warning (RCCW) / Rear Cross-
traffic Collision-Avoidance Assist (RCCA)" in chapter 5.
2. Driver Assistance
Page 233 of 663
3-137
Convenience Features
3
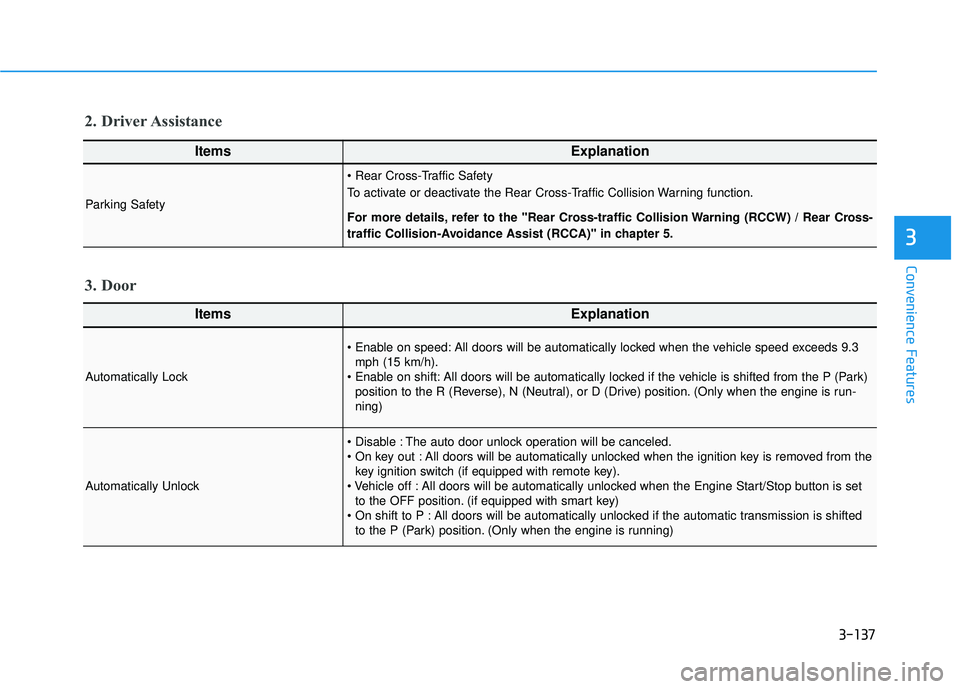
ItemsExplanation
Automatically Lock
All doors will be automatically locked when the vehicle speed exceeds 9.3mph (15 km/h).
All doors will be automatically locked if the vehicle is shifted from the P (Park) position to the R (Reverse), N (Neutral), or D (Drive) position. (Only when the engine is run-
ning)
Automatically Unlock
The auto door unlock operation will be canceled.
All doors will be automatically unlocked when the ignition key is removed from thekey ignition switch (if equipped with remote key).
All doors will be automatically unlocked when the Engine Start/Stop button is set to the OFF position. (if equipped with smart key)
All doors will be automatically unlocked if the automatic transmission is shifted to the P (Park) position. (Only when the engine is running)
3. Door
ItemsExplanation
Parking Safety
To activate or deactivate the Rear Cross-Traffic Collision Warning function.
For more details, refer to the "Rear Cross-traffic Collision Warning (RCCW) / Rear Cross-
traffic Collision-Avoidance Assist (RCCA)" in chapter 5.
2. Driver Assistance
Page 323 of 663
3-227
Convenience Features
3
If your cellular phone is not charging:
- Slightly change the position of thecellular phone on the charging
pad.
- Make sure the indicator light is orange.
The indicator light will blink orange for
10 seconds if there is a malfunction in
the wireless charging system.
In this case, temporarily stop the
charging process, and re-attempt to
charge your cellular phone again.
The system warns you with a mes-
sage on the LCD display if the cellular
phone is still on the wireless charging
unit after the engine is turned OFF
and the front door is opened.
Information
For some manufacturers' cellular
phones, the system may not warn you
even though the cellular phone is left
on the wireless charging unit. This is
due to the particular characteristic of
the cellular phone and not a malfunc-
tion of the wireless charging. The wireless cellular phone
charging system may not sup-
port certain cellular phones,
which are not verified for the Qi
specification ( ).
When placing your cellular phone on the charging mat,
position the phone in the middle
of the mat for optimal charging
performance. If your cell phone
is off to the side, the charging
rate may be less and in some
cases the cell phone may experi-
ence higher heat conduction.
In some cases, the wireless charging may stop temporarily
when the Remote Key or Smart
Key is used, either when starting
the vehicle or locking/unlocking
the doors, etc.
When charging certain cellular phones, the charging indicator
may not change to green when
the cell phone is fully charged.
The wireless charging process may temporarily stop, when tem-
perature abnormally increases
inside the wireless cellular phone
charging system. Stop the charg-
ing cellular phone and wait until
temperature falls to a certain level.
The wireless charging process may temporarily stop when there
is any metallic item, such as a
coin, between the wireless cellular
phone charging system and the
cellular phone.
When charging some cellular phones with a self-protection fea-
ture, the wireless charging speed
may decrease and the wireless
charging may stop.
If the cellular phone has a thick cover, the wireless charging may
not be possible.
If the cell phone is not completely contacting the charging pad, wire-
less charging may not operate
properly.
Some magnetic items like credit cards, phone cards or rail tickets
may be damaged if left with the
cellular phone during the charging
process.NOTICE
i
Page 490 of 663
5-156
Driving your vehicle
Warning Volume
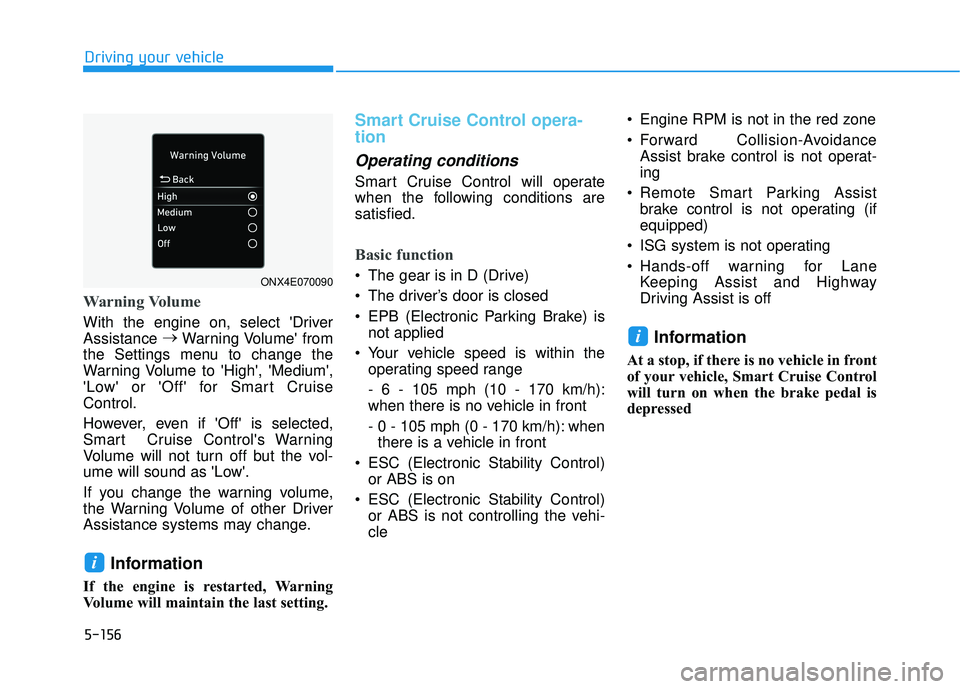
With the engine on, select 'Driver
Assistance →
Warning Volume' from
the Settings menu to change the
Warning Volume to 'High', 'Medium',
'Low' or 'Off' for Smart Cruise
Control.
However, even if 'Off' is selected,
Smart Cruise Control's Warning
Volume will not turn off but the vol-
ume will sound as 'Low'.
If you change the warning volume,
the Warning Volume of other Driver
Assistance systems may change.
Information
If the engine is restarted, Warning
Volume will maintain the last setting.
Smart Cruise Control opera-
tion
Operating conditions
Smart Cruise Control will operate
when the following conditions are
satisfied.
Basic function
The gear is in D (Drive)
The driver’s door is closed
EPB (Electronic Parking Brake) is not applied
Your vehicle speed is within the operating speed range
- 6 - 105 mph (10 - 170 km/h):
when there is no vehicle in front
- 0 - 105 mph (0 - 170 km/h): whenthere is a vehicle in front
ESC (Electronic Stability Control) or ABS is on
ESC (Electronic Stability Control) or ABS is not controlling the vehi-
cle Engine RPM is not in the red zone
Forward Collision-Avoidance
Assist brake control is not operat-
ing
Remote Smart Parking Assist brake control is not operating (if
equipped)
ISG system is not operating
Hands-off warning for Lane Keeping Assist and Highway
Driving Assist is off
Information
At a stop, if there is no vehicle in front
of your vehicle, Smart Cruise Control
will turn on when the brake pedal is
depressed
i
i
ONX4E070090
Page 546 of 663
6-12
What to do in an emergency
The TPMS Malfunction Indicator
may illuminate after blinking for
one minute if the vehicle is near
electric power supply cables or
radio transmitters such as police
stations, government and public
offices, broadcasting stations,
military installations, airports,
transmitting towers, etc.
Additionally, the TPMS Malfunction
Indicator may illuminate if snow
chains are used or electronic
devices such as computers, charg-
ers, remote starters, navigation,
etc. This may interfere with normal
operation of the TPMS.
Changing a Tire with TPMS
If you have a flat tire, the Low Tire
Pressure and LCD position indicator
will come on. Have the flat tire
repaired by an authorized HYUNDAI
dealer as soon as possible or
replace the flat tire with the spare
tire.
The spare tire does not come with a
tire pressure monitoring sensor.
When the low pressure tire or the flat
tire is replaced with the spare tire,
the Low Tire Pressure LCD position
indicator will remain on. Also, the
TPMS Malfunction Indicator will illu-
minate after blinking for one minute if
the vehicle is driven at speed above
15.5 mph (25 km/h) for approximate-
ly 20 minutes. Once the original tire equipped with
a tire pressure monitoring sensor is
reinflated to the recommended pres-
sure and reinstalled on the vehicle,
the Low Tire Pressure LCD position
indicator and TPMS Malfunction
Indicator will go off within a few min-
utes of driving.
If the indicators do not disappear
after a few minutes, please visit an
authorized HYUNDAI dealer.
Each wheel is equipped with a tire
pressure sensor mounted inside the
tire behind the valve stem (except for
the spare tire). You must use TPMS
specific wheels. It is recommended
that you always have your tires serv-
iced by an authorized HYUNDAI
dealer.
NOTICE
Never use a puncture-repairing
agent not approved by HYUNDAI
dealer to repair and/or inflate a
low pressure tire. Tire sealant
not approved by HYUNDAI deal-
er may damage the tire pressure
sensor.
CAUTION
Page 655 of 663
I-2
Accessing Your Vehicle ....................................................3-4Immobilizer System ..................................................3-14
Remote Key .................................................................3-4
Smart Key ....................................................................3-8
Air Bag - Advanced Supplemental Restraint System.....2-57 Additional Safety Precautions ....................................2-79
Air Bag Warning Label ..............................................2-79
How Does the Air Bag System Operate? ...................2-63
Occupant Classification System (OCS) .....................2-68
SRS Care ....................................................................2-78\
What to Expect After an Air Bag Inflates ..................2-67
Where Are the Air Bags? ...........................................2-59
Why Didn't My Air Bag Go Off in a Collision?........2-73
Air cleaner.......................................................................7\
-22 Filter Replacement .....................................................7-22
All Wheel Drive (AWD) ................................................5-43
Air Conditioning System ..................................................8-6 AWD Operation..........................................................5-44
Emergency Precautions ..............................................5-48
LCD display message .................................................5-47
Appearance care..............................................................7-69 Exterior Care ..............................................................7-69
Interior Care ...............................................................7-74 Automatic Climate Control System..............................3-196
Automatic Temperature Control Mode ....................3-197
Manual Temperature Control Mode .........................3-198
Rear climate control .................................................3-204
System Maintenance ................................................3-209
System Operation .....................................................3-207
Automatic transmission ..................................................5-15 Automatic transmission operation ............................5-15
Good driving practices ..............................................5-20
LCD display message .................................................5-19
Paddle Shifter (Manual Shift Mode) ..........................5-22
Parking........................................................................\
5-18
Battery ........................................................................\
.....7-29 Battery Recharging .....................................................7-31
For Best Battery Service ............................................7-30
Reset Features ............................................................7-32
Before driving ...................................................................5-5 Before Entering the Vehicle .........................................5-5
Before Starting .............................................................5-5
Key Ignition Switch .....................................................5-7
Blind-Spot Collision-Avoidance Assist (BCA) ..............5-96 Blind-Spot Collision Warning settings.......................5-86
Blind-Spot Collision-Avoidance Assist malfunction and limitations ...................................5-105
Blind-Spot Collision-Avoidance Assist operation ...5-101
Index
A
B