Hyundai Santa Fe 2004 Owner's Manual
Manufacturer: HYUNDAI, Model Year: 2004, Model line: Santa Fe, Model: Hyundai Santa Fe 2004Pages: 253, PDF Size: 22.41 MB
Page 131 of 253
1FEATURES OF YOUR HYUNDAI
118
When the eject button is pressed, the receiver
will eject the disc and REMOVE CD will be
displayed. You can now remove the disc. If the
disc is not removed, after 25 seconds, the disc
will be automatically pulled back into the re-
ceiver, If you try to push the disc back into the
receiver, before the 25 second time period is
complete, the receiver will sense an error and
will try to eject the disc several times before
stopping. You cannot repeatedly press the eject
button to eject the disc after you have tried to
push the CD in manually. The receivers 25-
second eject timer will reset at each press of
eject, which will cause the receiver to not eject
the disc until the 25-second time period has
elapsed.
Once the player stops and the disc is ejected,
remove the disc. After removing the disc, press
the VOLUME PWR knob off and then on again.
This will clear the disc-sensing feature and
enable discs to be loaded into the player again.
3. REVERSE Button
Press and hold this button reverse quickly
within a track. Release it to play the passage.
You will hear sound at a reduced volume. The
display will show elapsed time.
4. FORWARD Button
Press and hold this button to advance quickly
within a track. Release it to play the passage.
You will hear sound at a reduced volume. The
display will show elapsed time.
5. REPEAT Button
With repeat button, you can repeat one track or
an entire disc. To use repeat, do the following:
o To repeat the track you are listening to,
press and release the RPT button. RPT
track will appear on the display. Press RPT
again to turn it off.
o To repeat the disc you are listening to, press
and hold the RPT button for two seconds.
Press RPT again to turn it off.
6. RANDOM Button
With random, you can listen to the tracks in
random, rather than sequential order, on all of
the discs or on one disc.
To use random, do the following:o Press and release the RDM button to play
the tracks on all of the discs that are loaded,
in random order. RDM will appear in the
display. Press RDM to turn if off.
o To play the tracks on the disc you are
listening to in random order, press and hold
RDM for more than two seconds. You will
hear three beeps and RDM will appear on the
display. Press RDM again to turn if off.
7. AUTO EQUALIZER
Press AUTO EQ to select the desired preset
equalization setting while playing a compact
disc. The equalization will be automatically set
whenever you play a compact disc.
8. SEEK/SCAN BUTTON
SEEK
Press the down arrow while playing a CD to go
to the start of the current track if more than ten
seconds have played. Press the up arrow to go
to the next track. If you press the button more
than once, the player will continue moving back-
ward or forward through the disc.
Page 132 of 253
1FEATURES OF YOUR HYUNDAI
119
SCAN
Press and hold either SEEK SCAN arrow for
more than two seconds until SCAN appears on
the display and you hear a beep. Use SEEK
SCAN to listen to each track for a few seconds.
The sounds will mute while scanning. SCAN will
appear on the display. Press either SEEK SCAN
arrow again, to stop scanning.
DISC SCAN
Press and hold either SEEK SCAN arrow for
more than four seconds until DISC SCAN ap-
pears on the display and you hear a beep. Use
DISC SCAN to listen to the first track, for ten
seconds of each disc loaded. The sound will
mute while scanning to the next track. DISC
SCAN will appear on the display. Press either
SEEK SCAN arrow again, to stop scanning.
9. Playing CD
o Insert the CD to start CD playback, during
radio operation or cassette tape playing.
o When discs are in the CD deck, if you press
the play button the CD player will begin
playing even if the radio or cassette player
is being used.
10. Using Song List Mode
The integrated 6-disc CD changer has a feature
called song list. This feature is capable of saving
20 track selections.
To save tracks into SONG LIST perform the
following steps:
1. The disc player must be on with at least one
disc loaded. See "LOAD/EJECT" previously
for more information.
2. The disc changer must not be in song list
mode. S-LIST should not appear in the dis-
play. If S-LIST is present, press SONG LIST
to turn it off.
3. Select the desired disc by pressing the
numbered pushbutton and then use the
SEEK SCAN up arrow button to locate the
track that you want to save. The track will
begin to play.
4. Press and hold LIST for two or more sec-
onds to save the track into memory. When
LIST is pressed a beep will be heard imme-
diately. After two seconds of pressing LIST
continuously, two beeps will sound, to con-
firm that the track has been saved.
5. Repeat Steps 3 and 4 for saving other
selections.To play the song list, press LIST. One beep will
be heard and SLIST will appear on the display.
The recorded tracks will begin to play in the
order that they were saved.
You may seek through the song list by using the
SEEK SCAN arrows. Seeking past the last
saved track will return you to the first saved
track.
To delete tracks from SONG LIST perform the
following steps:
1. The disc player must be turned on.
2. Press SONG LIST to turn song list on.
S-LIST will appear on the display.
3. Press the SEEK SCAN arrows to select the
desired track to be deleted.
4. Press and hold the SONG LIST button for
two seconds. When pressing SONG LIST
one beep will be heard immediately. After two
seconds of pressing the SONG LIST button
continuously, two beeps will be heard, to
confirm that the track had been deleted.
5. To delete entire lists, press and hold LIST
button for > 4 seconds when pressing list,
one beep will be heard immediately. After two
seconds of pressing the LIST button con-
tinuously, two beeps will be heard. After 4
seconds, a beep would be heard to confirm
that all the tracks had been deleted and the
display will show SLIST_EMPTY.
Page 133 of 253
1FEATURES OF YOUR HYUNDAI
120
!CAUTION:o Do not insert warped or poor quality
discs into the CD player as damage to the
unit may occur.
o Do not insert anything like coins into the
player slot as damage to the unit may
occur.
o Do not place beverages close to the
audio system. The playback mechanism
may be damaged if you spill them.
o Do not impact on the audio system, or
the playback mechanism could be dam-
aged.
o Driving on the off-roads or other vibra-
tions may skip your compact disc.
Do not use the audio system on off-
roads as the discs could be scratched
and damaged.
o Do not grip or pull out the disc with your
hand while the disc is being pulled into
the unit by the self loading mechanism.
These can cause poor disc scratching to
occur or trouble in the compact disc
player.
o Avoid using CD-Recordable or CD-
Rewritable as the player could not be
operated in recording way of the CD
maker. When using the compact disc
player, genuine CDs are recommended.
Page 134 of 253
1FEATURES OF YOUR HYUNDAI
121CARE OF CASSETTE TAPESCARE OF DISCS
B850A02L B850A02F-AAT
Proper HandlingStorageWhen not in use, place your discs in their
individual case and store them in a cool place
away from the sun, heat, and dust.
Do not grip or pull out the disc with your hand
while the disc is being pulled into the unit by the
self loading mechanism.
Keep Your Discs Clean
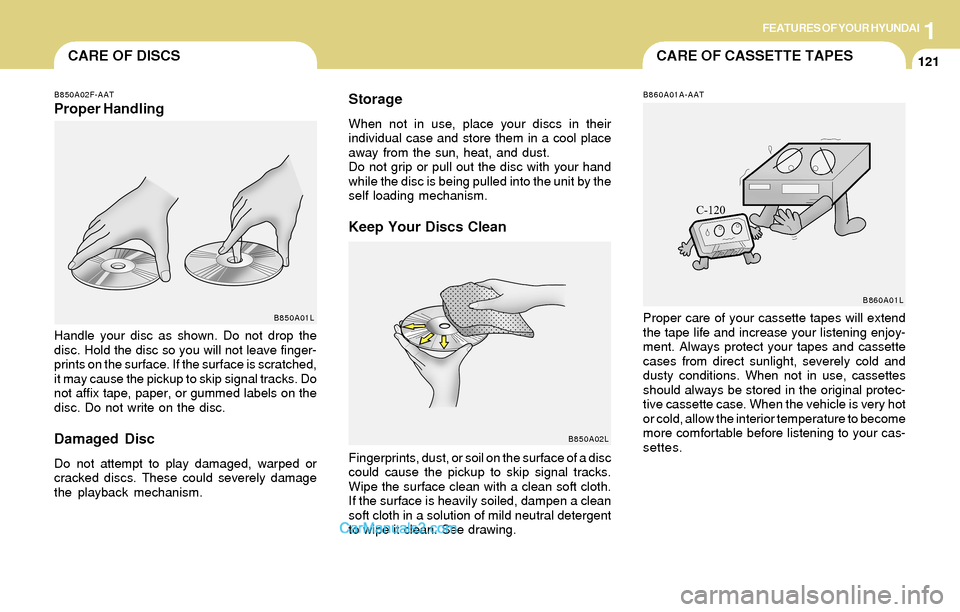
Handle your disc as shown. Do not drop the
disc. Hold the disc so you will not leave finger-
prints on the surface. If the surface is scratched,
it may cause the pickup to skip signal tracks. Do
not affix tape, paper, or gummed labels on the
disc. Do not write on the disc.
Damaged Disc
Do not attempt to play damaged, warped or
cracked discs. These could severely damage
the playback mechanism.Fingerprints, dust, or soil on the surface of a disc
could cause the pickup to skip signal tracks.
Wipe the surface clean with a clean soft cloth.
If the surface is heavily soiled, dampen a clean
soft cloth in a solution of mild neutral detergent
to wipe it clean. See drawing.
B860A01A-AAT
Proper care of your cassette tapes will extend
the tape life and increase your listening enjoy-
ment. Always protect your tapes and cassette
cases from direct sunlight, severely cold and
dusty conditions. When not in use, cassettes
should always be stored in the original protec-
tive cassette case. When the vehicle is very hot
or cold, allow the interior temperature to become
more comfortable before listening to your cas-
settes.B850A01L
B860A01L
Page 135 of 253
1FEATURES OF YOUR HYUNDAI
122
o Be sure that the cassette label is not loose
or peeling off or tape ejection may be difficult.
o Never touch or soil the actual audio tape
surfaces.
o Keep all magnetized objects, such as elec-
tric motors, speakers or transformers away
from your cassette tapes and tape player
unit.
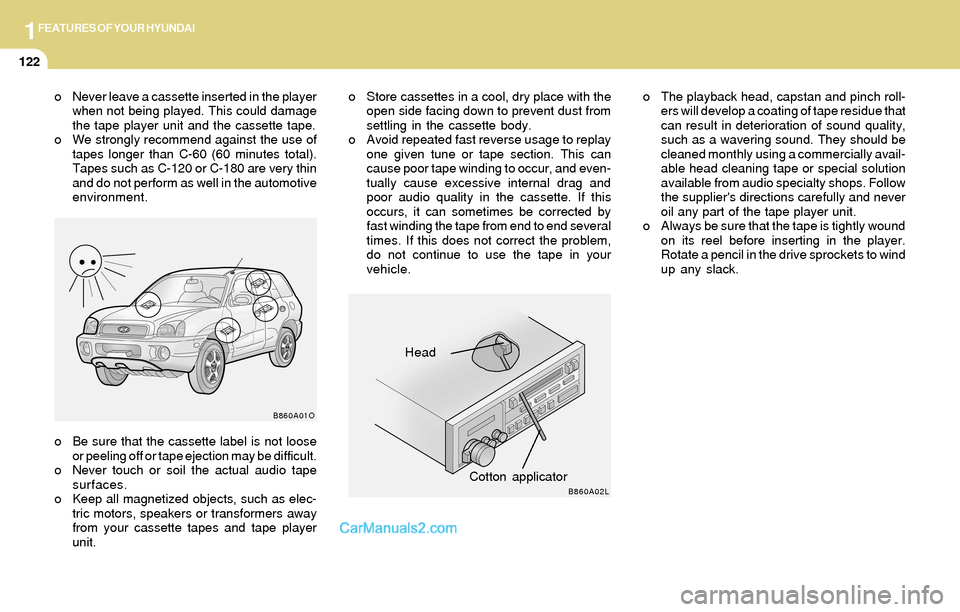
Head
Cotton applicator
B860A01O
B860A02L
o The playback head, capstan and pinch roll-
ers will develop a coating of tape residue that
can result in deterioration of sound quality,
such as a wavering sound. They should be
cleaned monthly using a commercially avail-
able head cleaning tape or special solution
available from audio specialty shops. Follow
the supplier's directions carefully and never
oil any part of the tape player unit.
o Always be sure that the tape is tightly wound
on its reel before inserting in the player.
Rotate a pencil in the drive sprockets to wind
up any slack. o Never leave a cassette inserted in the player
when not being played. This could damage
the tape player unit and the cassette tape.
o We strongly recommend against the use of
tapes longer than C-60 (60 minutes total).
Tapes such as C-120 or C-180 are very thin
and do not perform as well in the automotive
environment.o Store cassettes in a cool, dry place with the
open side facing down to prevent dust from
settling in the cassette body.
o Avoid repeated fast reverse usage to replay
one given tune or tape section. This can
cause poor tape winding to occur, and even-
tually cause excessive internal drag and
poor audio quality in the cassette. If this
occurs, it can sometimes be corrected by
fast winding the tape from end to end several
times. If this does not correct the problem,
do not continue to use the tape in your
vehicle.
Page 136 of 253
1FEATURES OF YOUR HYUNDAI
123ANTENNA
B870C01A-GAT
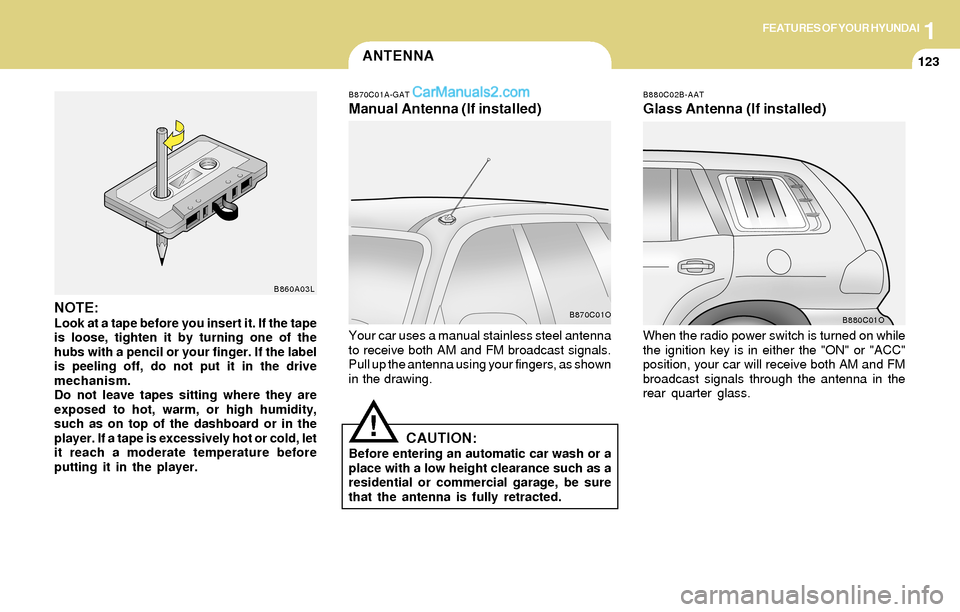
Manual Antenna (If installed)
B880C02B-AAT
Glass Antenna (If installed)
Your car uses a manual stainless steel antenna
to receive both AM and FM broadcast signals.
Pull up the antenna using your fingers, as shown
in the drawing.When the radio power switch is turned on while
the ignition key is in either the "ON" or "ACC"
position, your car will receive both AM and FM
broadcast signals through the antenna in the
rear quarter glass.
CAUTION:Before entering an automatic car wash or a
place with a low height clearance such as a
residential or commercial garage, be sure
that the antenna is fully retracted.
!
B870C01O
B880C01ONOTE:Look at a tape before you insert it. If the tape
is loose, tighten it by turning one of the
hubs with a pencil or your finger. If the label
is peeling off, do not put it in the drive
mechanism.
Do not leave tapes sitting where they are
exposed to hot, warm, or high humidity,
such as on top of the dashboard or in the
player. If a tape is excessively hot or cold, let
it reach a moderate temperature before
putting it in the player.
B860A03L
Page 137 of 253
1FEATURES OF YOUR HYUNDAI
124
CAUTION:o Do not clean the inner side of the rear
quarter glass with an abrasive type of
glass cleaner or use a scraper to remove
foreign deposits from the inner surface
of the glass as this may cause damage to
the antenna elements.
o Avoid adding metallic coating (some
aftermarket window tinting has metallic
contents). These can disturb receiving
AM and FM broadcast signals.
!
B885A01O-AAT
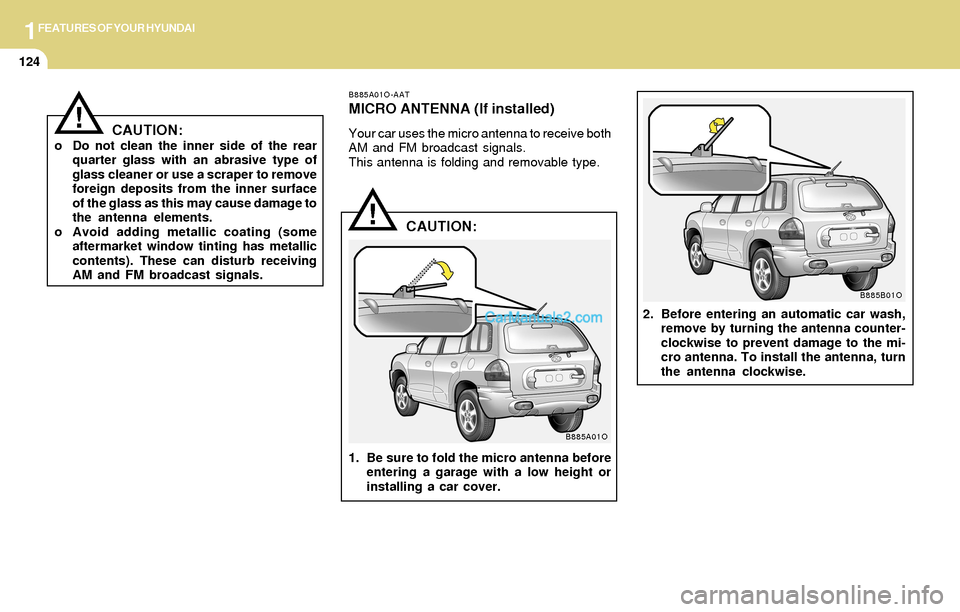
MICRO ANTENNA (If installed)
Your car uses the micro antenna to receive both
AM and FM broadcast signals.
This antenna is folding and removable type.
CAUTION:
1. Be sure to fold the micro antenna before
entering a garage with a low height or
installing a car cover.2. Before entering an automatic car wash,
remove by turning the antenna counter-
clockwise to prevent damage to the mi-
cro antenna. To install the antenna, turn
the antenna clockwise.
!
B885A01O
B885B01O
Page 138 of 253
DRIVING YOUR HYUNDAI
2
Engine Exhaust Can Be Dangerous! ............................ 2-2
Before Starting the Engine ............................................ 2-3
Key Positions ................................................................ 2-4
Starting..........................................................................2-5
Manual Transaxle ......................................................... 2-6
Automatic Transaxle ............................................ 2-8, 2-11
Anti-Lock Brake System (ABS) ..................................2-15
Brake Traction Control System (BTCS) .....................2-15
Full Traction Control System (FTCS) .........................2-17
Full-Time 4WD Operation...........................................2-18
Limited-Slip Differential................................................2-20
Good Braking Practices..............................................2-21
Driving for Economy...................................................2-22
Winter Driving.............................................................2-23
Trailer or Vehicle Towing ............................................2-26
2
Page 139 of 253
2DRIVING YOUR HYUNDAI
2
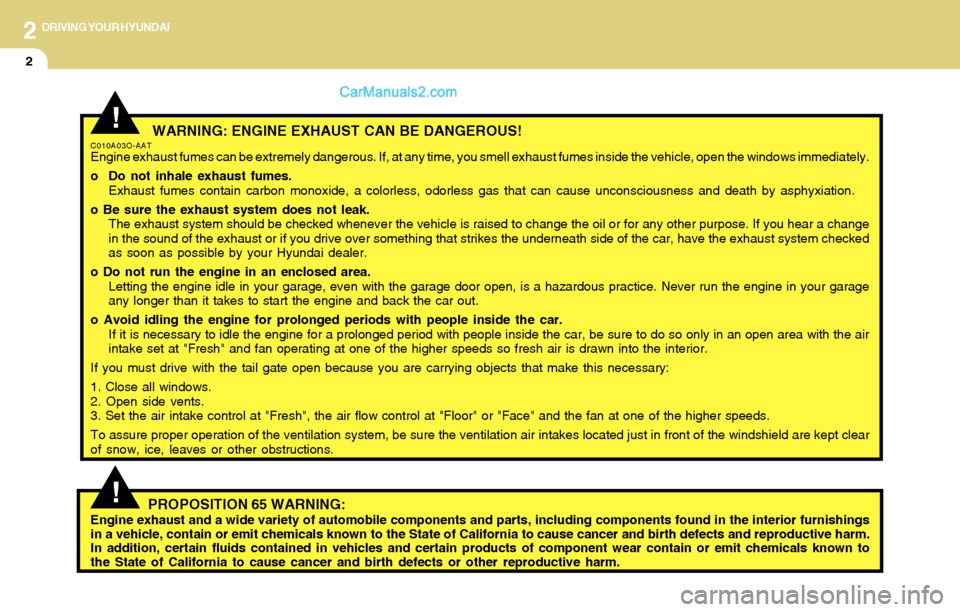
WARNING: ENGINE EXHAUST CAN BE DANGEROUS!C010A03O-AATEngine exhaust fumes can be extremely dangerous. If, at any time, you smell exhaust fumes inside the vehicle, open the windows immediately.
o Do not inhale exhaust fumes.
Exhaust fumes contain carbon monoxide, a colorless, odorless gas that can cause unconsciousness and death by asphyxiation.
o Be sure the exhaust system does not leak.
The exhaust system should be checked whenever the vehicle is raised to change the oil or for any other purpose. If you hear a change
in the sound of the exhaust or if you drive over something that strikes the underneath side of the car, have the exhaust system checked
as soon as possible by your Hyundai dealer.
o Do not run the engine in an enclosed area.
Letting the engine idle in your garage, even with the garage door open, is a hazardous practice. Never run the engine in your garage
any longer than it takes to start the engine and back the car out.
o Avoid idling the engine for prolonged periods with people inside the car.
If it is necessary to idle the engine for a prolonged period with people inside the car, be sure to do so only in an open area with the air
intake set at "Fresh" and fan operating at one of the higher speeds so fresh air is drawn into the interior.
If you must drive with the tail gate open because you are carrying objects that make this necessary:
1. Close all windows.
2. Open side vents.
3. Set the air intake control at "Fresh", the air flow control at "Floor" or "Face" and the fan at one of the higher speeds.
To assure proper operation of the ventilation system, be sure the ventilation air intakes located just in front of the windshield are kept clear
of snow, ice, leaves or other obstructions.
!
!PROPOSITION 65 WARNING:Engine exhaust and a wide variety of automobile components and parts, including components found in the interior furnishings
in a vehicle, contain or emit chemicals known to the State of California to cause cancer and birth defects and reproductive harm.
In addition, certain fluids contained in vehicles and certain products of component wear contain or emit chemicals known to
the State of California to cause cancer and birth defects or other reproductive harm.
Page 140 of 253
2DRIVING YOUR HYUNDAI
3BEFORE STARTING THE ENGINE
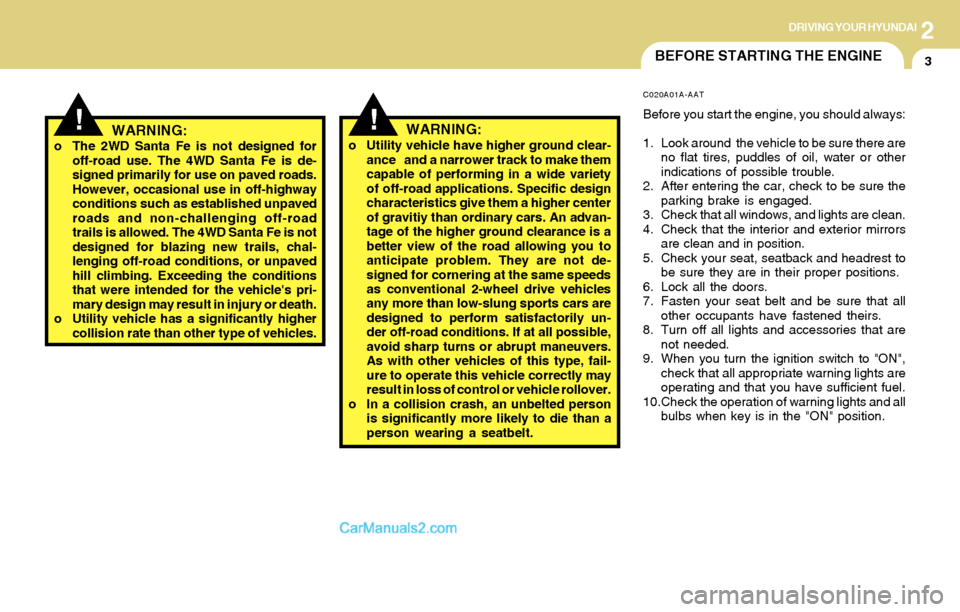
!!WARNING:o The 2WD Santa Fe is not designed for
off-road use. The 4WD Santa Fe is de-
signed primarily for use on paved roads.
However, occasional use in off-highway
conditions such as established unpaved
roads and non-challenging off-road
trails is allowed. The 4WD Santa Fe is not
designed for blazing new trails, chal-
lenging off-road conditions, or unpaved
hill climbing. Exceeding the conditions
that were intended for the vehicle's pri-
mary design may result in injury or death.
o Utility vehicle has a significantly higher
collision rate than other type of vehicles.
C020A01A-AAT
Before you start the engine, you should always:
1. Look around the vehicle to be sure there are
no flat tires, puddles of oil, water or other
indications of possible trouble.
2. After entering the car, check to be sure the
parking brake is engaged.
3. Check that all windows, and lights are clean.
4. Check that the interior and exterior mirrors
are clean and in position.
5. Check your seat, seatback and headrest to
be sure they are in their proper positions.
6. Lock all the doors.
7. Fasten your seat belt and be sure that all
other occupants have fastened theirs.
8. Turn off all lights and accessories that are
not needed.
9. When you turn the ignition switch to "ON",
check that all appropriate warning lights are
operating and that you have sufficient fuel.
10.Check the operation of warning lights and all
bulbs when key is in the "ON" position. o Utility vehicle have higher ground clear-
ance and a narrower track to make them
capable of performing in a wide variety
of off-road applications. Specific design
characteristics give them a higher center
of gravitiy than ordinary cars. An advan-
tage of the higher ground clearance is a
better view of the road allowing you to
anticipate problem. They are not de-
signed for cornering at the same speeds
as conventional 2-wheel drive vehicles
any more than low-slung sports cars are
designed to perform satisfactorily un-
der off-road conditions. If at all possible,
avoid sharp turns or abrupt maneuvers.
As with other vehicles of this type, fail-
ure to operate this vehicle correctly may
result in loss of control or vehicle rollover.
o In a collision crash, an unbelted person
is significantly more likely to die than a
person wearing a seatbelt.WARNING: