coolant level Hyundai Santa Fe 2004 User Guide
[x] Cancel search | Manufacturer: HYUNDAI, Model Year: 2004, Model line: Santa Fe, Model: Hyundai Santa Fe 2004Pages: 253, PDF Size: 22.41 MB
Page 199 of 253
6DO-IT-YOURSELF MAINTENANCE
5GENERAL CHECKS
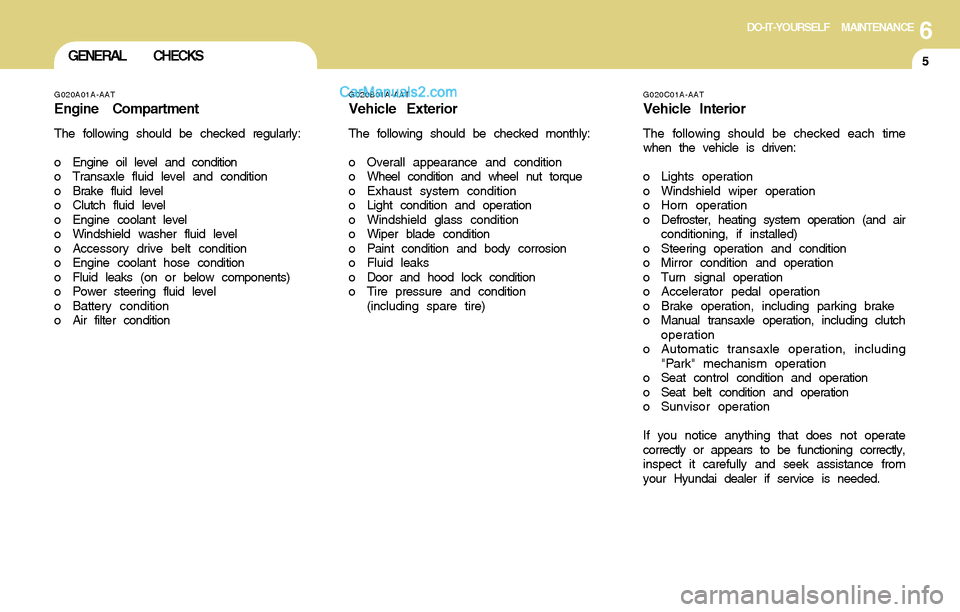
G020C01A-AAT
Vehicle Interior
The following should be checked each time
when the vehicle is driven:
o Lights operation
o Windshield wiper operation
o Horn operation
o Defroster, heating system operation (and air
conditioning, if installed)
o Steering operation and condition
o Mirror condition and operation
o Turn signal operation
o Accelerator pedal operation
o Brake operation, including parking brake
o Manual transaxle operation, including clutch
operation
o Automatic transaxle operation, including
"Park" mechanism operation
o Seat control condition and operation
o Seat belt condition and operation
o Sunvisor operation
If you notice anything that does not operate
correctly or appears to be functioning correctly,
inspect it carefully and seek assistance from
your Hyundai dealer if service is needed.
G020B01A-AAT
Vehicle Exterior
The following should be checked monthly:
o Overall appearance and condition
o Wheel condition and wheel nut torque
o Exhaust system condition
o Light condition and operation
o Windshield glass condition
o Wiper blade condition
o Paint condition and body corrosion
o Fluid leaks
o Door and hood lock condition
o Tire pressure and condition
(including spare tire)
G020A01A-AAT
Engine Compartment
The following should be checked regularly:
o Engine oil level and condition
o Transaxle fluid level and condition
o Brake fluid level
o Clutch fluid level
o Engine coolant level
o Windshield washer fluid level
o Accessory drive belt condition
o Engine coolant hose condition
o Fluid leaks (on or below components)
o Power steering fluid level
o Battery condition
o Air filter condition
Page 201 of 253
6DO-IT-YOURSELF MAINTENANCE
7CHANGING THE OIL AND FILTER
!
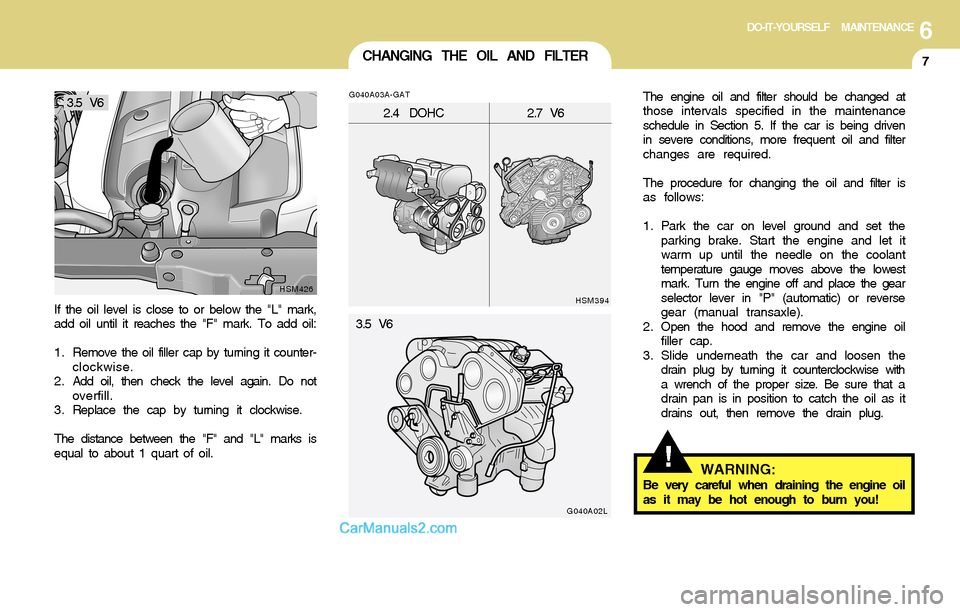
If the oil level is close to or below the "L" mark,
add oil until it reaches the "F" mark. To add oil:
1. Remove the oil filler cap by turning it counter-
clockwise.
2 . Add oil, then check the level again. Do not
overfill.
3 . Replace the cap by turning it clockwise.
The distance between the "F" and "L" marks is
equal to about 1 quart of oil.
HSM426G040A03A-GAT
The engine oil and filter should be changed at
those intervals specified in the maintenance
schedule in Section 5. If the car is being driven
in severe conditions, more frequent oil and filter
changes are required.
The procedure for changing the oil and filter is
as follows:
1. Park the car on level ground and set the
parking brake. Start the engine and let it
warm up until the needle on the coolant
temperature gauge moves above the lowest
mark. Turn the engine off and place the gear
selector lever in "P" (automatic) or reverse
gear (manual transaxle).
2 . Open the hood and remove the engine oil
filler cap.
3. Slide underneath the car and loosen the
drain plug by turning it counterclockwise with
a wrench of the proper size. Be sure that a
drain pan is in position to catch the oil as it
drains out, then remove the drain plug.
HSM394
2.4 DOHC2.7 V6
G040A02L
WARNING:Be very careful when draining the engine oil
as it may be hot enough to burn you! 3.5 V6
3.5 V6
Page 202 of 253
6DO-IT-YOURSELF MAINTENANCE
8CHECKING AND CHANGING THE
ENGINE COOLANT
!
!
G050A01A-AAT
WARNING:Do not remove the radiator cap when the
engine is hot. When the engine is hot, the
engine coolant is under pressure and may
erupt through the opening if the cap is
removed. You could be seriously burned if
you do not observe this precaution. Do not
remove the radiator cap until the radiator is
cool to the touch. 4 . When the oil has stopped draining, replace
the drain plug using a new washer and
retighten by turning it clockwise.
Oil pan drain plug tightening torque:
3.5 ~ 4.5 kgf.m
5. Remove the oil filter by turning it counter-
clockwise with a oil filter wrench of the proper
size. A certain amount of oil will come out
when you remove the filter. So be sure to
have your drain pan in place underneath it.
6 . Install a new oil filter in accordance with the
instructions on the carton or on the filter itself.
Do not over-tighten. (Tightening torque :
1.2 ~ 1.6 kgf.m) Be sure that the mounting
surface on the engine is clean and that the
old gasket is removed completely. Lubricate
the new gasket on the filter with clean engine
oil before installation.
7 . Refill the crankcase with the recommended
engine oil. Refer to the specification in chap-
ter 9 for engine oil capacity.
8 . Start the engine and check to be sure no oil
is leaking from the drain plug or oil filter.
9 . Shut off the engine and recheck the oil level.
NOTE:Always dispose of used engine oil in an
environmentally acceptable manner. It is
suggested that it be placed in a sealed
container and taken to a service station for
reclamation. Do not pour the oil on the
ground or put it in with the household
trash.
WARNING:Used motor oil may cause irritation or can-
cer of the skin if left in contact with the skin
for prolonged periods of time. Wash your
hands thoroughly with soap and warm
water as soon as possible after handling
used oil.
!PROPOSITION 65 WARNING:Used engine oil may cause irritation or
cancer of the skin if left in contact with the
skin for prolonged periods of time. Used
engine oil contains chemicals that have
caused cancer in laboratory animals. Al-
ways protect your skin by washing your
hands thoroughly with soap and warm
water as soon as possible after handling
used oil.
Page 203 of 253
6DO-IT-YOURSELF MAINTENANCE
9
G050B01A-AAT
Recommended Engine Coolant
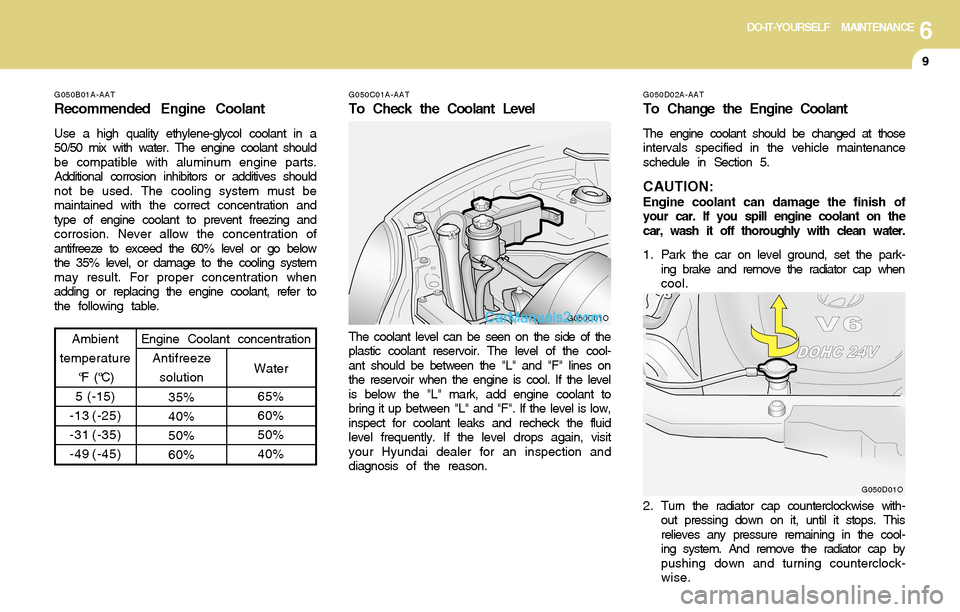
Use a high quality ethylene-glycol coolant in a
50/50 mix with water. The engine coolant should
be compatible with aluminum engine parts.
Additional corrosion inhibitors or additives should
not be used. The cooling system must be
maintained with the correct concentration and
type of engine coolant to prevent freezing and
corrosion. Never allow the concentration of
antifreeze to exceed the 60% level or go below
the 35% level, or damage to the cooling system
may result. For proper concentration when
adding or replacing the engine coolant, refer to
the following table.
Ambient
temperature
°F (°C)
5 (-15)
-13 (-25)
-31 (-35)
-49 (-45)
65%
60%
50%
40% 35%
40%
50%
60%Water Antifreeze
solution Engine Coolant concentration
G050C01A-AAT
To Check the Coolant Level
The coolant level can be seen on the side of the
plastic coolant reservoir. The level of the cool-
ant should be between the "L" and "F" lines on
the reservoir when the engine is cool. If the level
is below the "L" mark, add engine coolant to
bring it up between "L" and "F". If the level is low,
inspect for coolant leaks and recheck the fluid
level frequently. If the level drops again, visit
your Hyundai dealer for an inspection and
diagnosis of the reason.
G050C01OG050D02A-AAT
To Change the Engine Coolant
The engine coolant should be changed at those
intervals specified in the vehicle maintenance
schedule in Section 5.
CAUTION:Engine coolant can damage the finish of
your car. If you spill engine coolant on the
car, wash it off thoroughly with clean water.
1 . Park the car on level ground, set the park-
ing brake and remove the radiator cap when
cool.
G050D01O
2 . Turn the radiator cap counterclockwise with-
out pressing down on it, until it stops. This
relieves any pressure remaining in the cool-
ing system. And remove the radiator cap by
pushing down and turning counterclock-
wise.
Page 204 of 253
6DO-IT-YOURSELF MAINTENANCE
10SPARK PLUGS
!
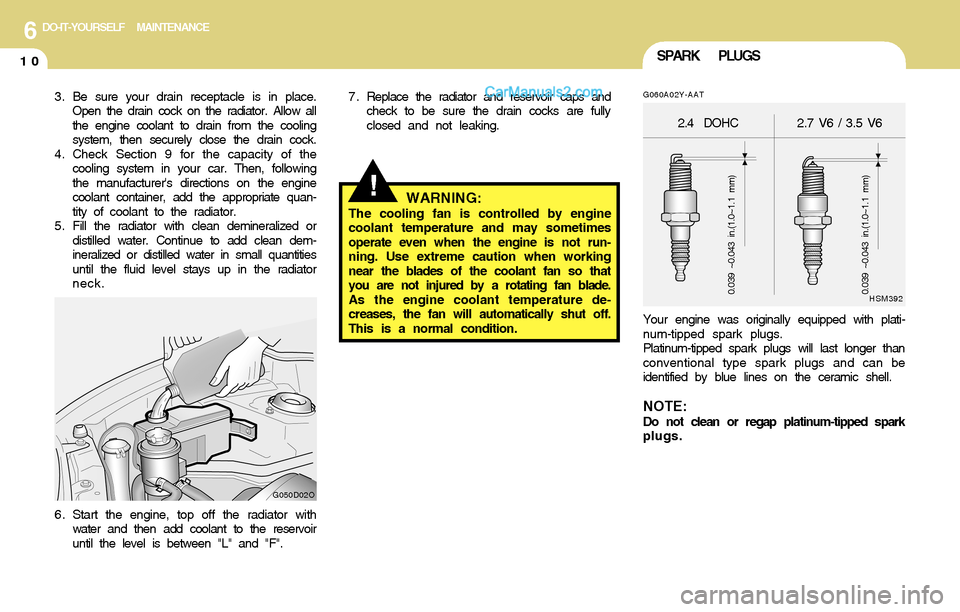
G060A02Y-AAT
Your engine was originally equipped with plati-
num-tipped spark plugs.
Platinum-tipped spark plugs will last longer than
conventional type spark plugs and can be
identified by blue lines on the ceramic shell.
NOTE:Do not clean or regap platinum-tipped spark
plugs.
HSM392
2.4 DOHC2.7 V6 / 3.5 V6
0.039 ~0.043 in.(1.0~1.1 mm)
0.039 ~0.043 in.(1.0~1.1 mm)
6 . Start the engine, top off the radiator with
water and then add coolant to the reservoir
until the level is between "L" and "F".
WARNING:The cooling fan is controlled by engine
coolant temperature and may sometimes
operate even when the engine is not run-
ning. Use extreme caution when working
near the blades of the coolant fan so that
you are not injured by a rotating fan blade.
As the engine coolant temperature de-
creases, the fan will automatically shut off.
This is a normal condition.
G050D02O
3. Be sure your drain receptacle is in place.
Open the drain cock on the radiator. Allow all
the engine coolant to drain from the cooling
system, then securely close the drain cock.
4. Check Section 9 for the capacity of the
cooling system in your car. Then, following
the manufacturer's directions on the engine
coolant container, add the appropriate quan-
tity of coolant to the radiator.
5 . Fill the radiator with clean demineralized or
distilled water. Continue to add clean dem-
ineralized or distilled water in small quantities
until the fluid level stays up in the radiator
neck.7 . Replace the radiator and reservoir caps and
check to be sure the drain cocks are fully
closed and not leaking.
Page 207 of 253
6DO-IT-YOURSELF MAINTENANCE
13CHECKING THE TRANSAXLE OIL
(MANUAL)FILLING THE WASHER RESERVOIR
G090A01O-AAT
The washer fluid reservoir supplies fluid to the
windshield washer system.
A good quality washer fluid should be used to fill
the washer reservoir. The fluid level should be
checked more frequently during inclement
weather or whenever the washer system is in
more frequent use.
The capacity of the washer reservoir is 3.59
U.S. quarts (3.4 Liters).
CAUTION:o Radiator anti-freeze (engine coolant)
should not be used in the washer system
because it will damage the car's finish.
o The washer should not be operated if the
washer reservoir is empty. This can dam-
age the washer fluid pump.
G090A01O
!
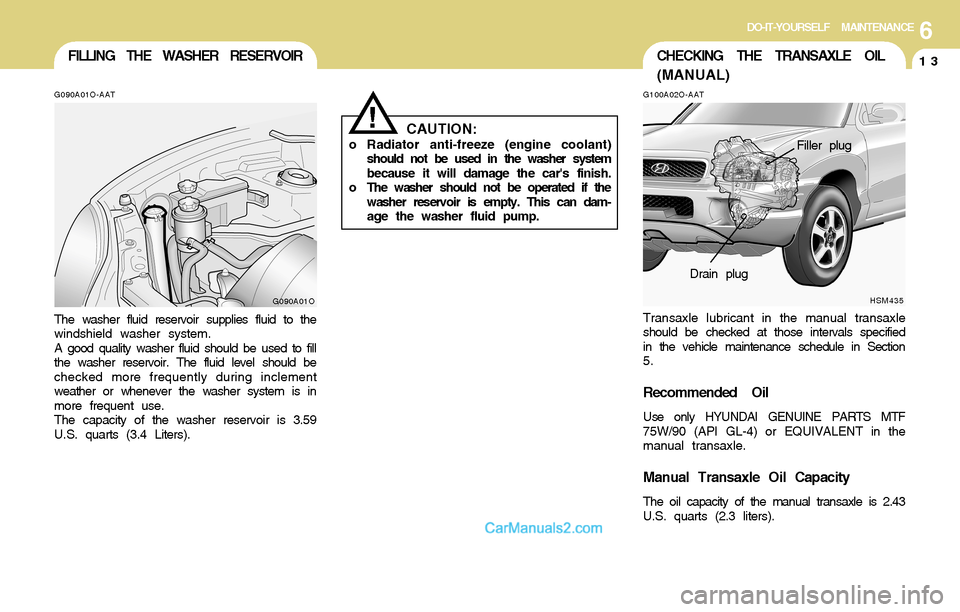
G100A02O-AAT
Transaxle lubricant in the manual transaxle
should be checked at those intervals specified
in the vehicle maintenance schedule in Section
5.
Recommended Oil
Use only HYUNDAI GENUINE PARTS MTF
75W/90 (API GL-4) or EQUIVALENT in the
manual transaxle.
Manual Transaxle Oil Capacity
The oil capacity of the manual transaxle is 2.43
U.S. quarts (2.3 liters).
HSM435
Filler plug
Drain plug
Page 210 of 253
6DO-IT-YOURSELF MAINTENANCE
16CHECKING THE BRAKES
G120D01A-AATTo Check the Fluid Level
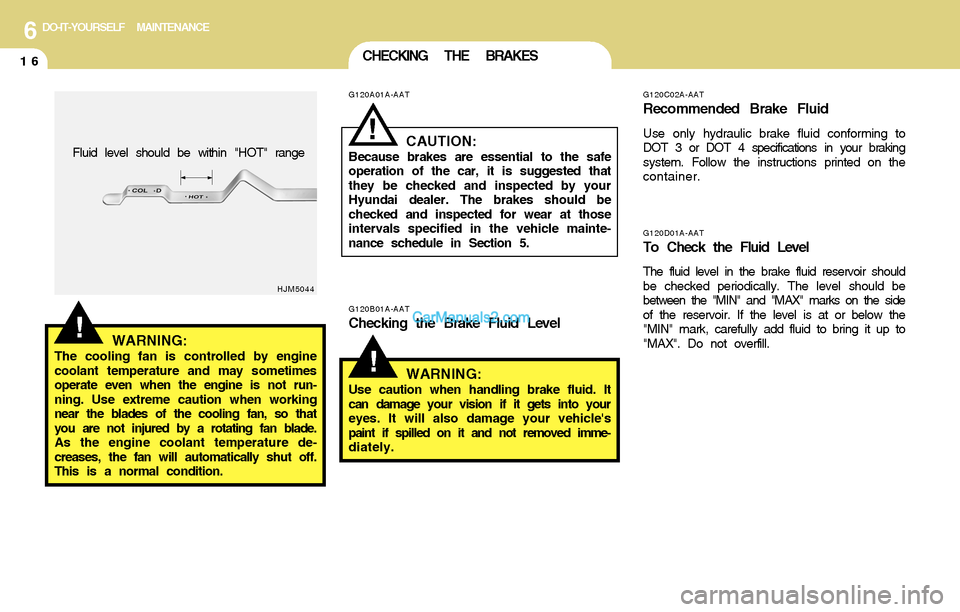
The fluid level in the brake fluid reservoir should
be checked periodically. The level should be
between the "MIN" and "MAX" marks on the side
of the reservoir. If the level is at or below the
"MIN" mark, carefully add fluid to bring it up to
"MAX". Do not overfill.
!
G120C02A-AAT
Recommended Brake Fluid
Use only hydraulic brake fluid conforming to
DOT 3 or DOT 4 specifications in your braking
system. Follow the instructions printed on the
container.
G120B01A-AATChecking the Brake Fluid Level
WARNING:
Use caution when handling brake fluid. It
can damage your vision if it gets into your
eyes. It will also damage your vehicle's
paint if spilled on it and not removed imme-
diately.
!WARNING:The cooling fan is controlled by engine
coolant temperature and may sometimes
operate even when the engine is not run-
ning. Use extreme caution when working
near the blades of the cooling fan, so that
you are not injured by a rotating fan blade.
As the engine coolant temperature de-
creases, the fan will automatically shut off.
This is a normal condition.
HJM5044
Fluid level should be within "HOT" range
G120A01A-AAT
CAUTION:Because brakes are essential to the safe
operation of the car, it is suggested that
they be checked and inspected by your
Hyundai dealer. The brakes should be
checked and inspected for wear at those
intervals specified in the vehicle mainte-
nance schedule in Section 5.
!
Page 218 of 253
6DO-IT-YOURSELF MAINTENANCE
24POWER STEERING FLUID LEVEL
G230A03A-AAT
G220C01A-AAT
Checking Condenser Cooling Fan
The condenser cooling fan should come on
automatically whenever the air conditioning is in
operation.
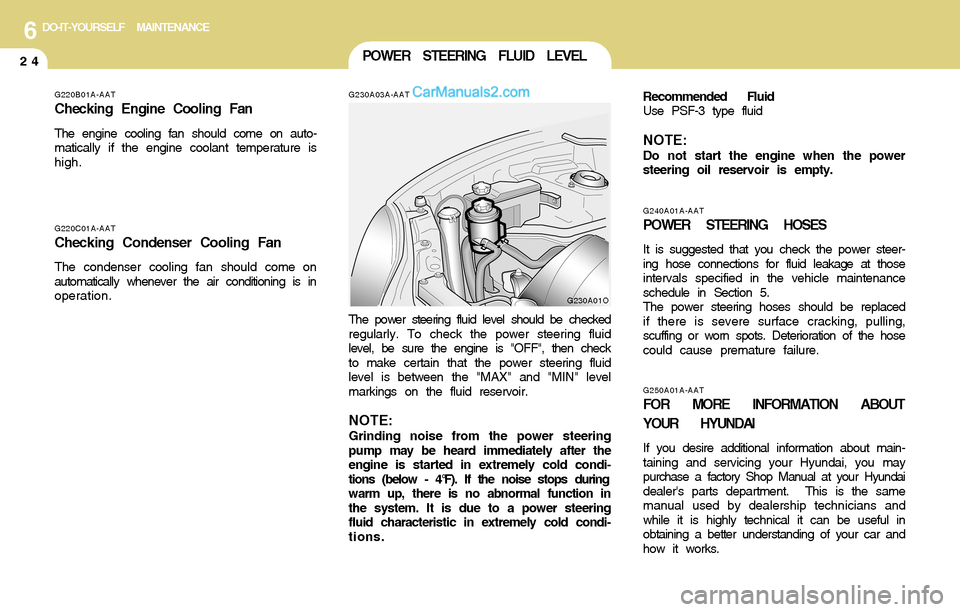
The power steering fluid level should be checked
regularly. To check the power steering fluid
level, be sure the engine is "OFF", then check
to make certain that the power steering fluid
level is between the "MAX" and "MIN" level
markings on the fluid reservoir.
NOTE:Grinding noise from the power steering
pump may be heard immediately after the
engine is started in extremely cold condi-
tions (below - 4°F). If the noise stops during
warm up, there is no abnormal function in
the system. It is due to a power steering
fluid characteristic in extremely cold condi-
tions.
G230A01O
G250A01A-AAT
FOR MORE INFORMATION ABOUT
YOUR HYUNDAI
If you desire additional information about main-
taining and servicing your Hyundai, you may
purchase a factory Shop Manual at your Hyundai
dealer's parts department. This is the same
manual used by dealership technicians and
while it is highly technical it can be useful in
obtaining a better understanding of your car and
how it works.
G240A01A-AAT
POWER STEERING HOSES
It is suggested that you check the power steer-
ing hose connections for fluid leakage at those
intervals specified in the vehicle maintenance
schedule in Section 5.
The power steering hoses should be replaced
if there is severe surface cracking, pulling,
scuffing or worn spots. Deterioration of the hose
could cause premature failure. Recommended Fluid
Use PSF-3 type fluid
NOTE:Do not start the engine when the power
steering oil reservoir is empty.
G220B01A-AAT
Checking Engine Cooling Fan
The engine cooling fan should come on auto-
matically if the engine coolant temperature is
high.
Page 219 of 253
6DO-IT-YOURSELF MAINTENANCE
25HEADLIGHT AIMING ADJUSTMENT
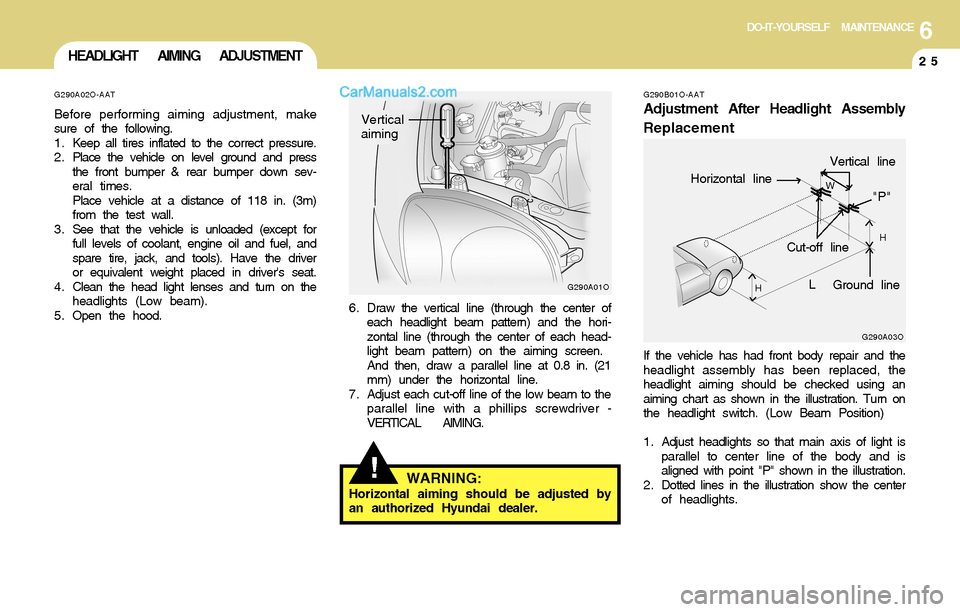
G290B01O-AAT
Adjustment After Headlight Assembly
Replacement
If the vehicle has had front body repair and the
headlight assembly has been replaced, the
headlight aiming should be checked using an
aiming chart as shown in the illustration. Turn on
the headlight switch. (Low Beam Position)
1 . Adjust headlights so that main axis of light is
parallel to center line of the body and is
aligned with point "P" shown in the illustration.
2 . Dotted lines in the illustration show the center
of headlights.
G290A03O
L
W
H
H
Cut-off line
Ground line
"P"
Horizontal line
Vertical line
!
6 . Draw the vertical line (through the center of
each headlight beam pattern) and the hori-
zontal line (through the center of each head-
light beam pattern) on the aiming screen.
And then, draw a parallel line at 0.8 in. (21
mm) under the horizontal line.
7. Adjust each cut-off line of the low beam to the
parallel line with a phillips screwdriver -
VERTICAL AIMING.
WARNING:Horizontal aiming should be adjusted by
an authorized Hyundai dealer.
G290A01O
Vertical
aiming
G290A02O-AAT
Before performing aiming adjustment, make
sure of the following.
1 . Keep all tires inflated to the correct pressure.
2 . Place the vehicle on level ground and press
the front bumper & rear bumper down sev-
eral times.
Place vehicle at a distance of 118 in. (3m)
from the test wall.
3 . See that the vehicle is unloaded (except for
full levels of coolant, engine oil and fuel, and
spare tire, jack, and tools). Have the driver
or equivalent weight placed in driver's seat.
4 . Clean the head light lenses and turn on the
headlights (Low beam).
5 . Open the hood.