service interval Hyundai Santa Fe 2005 Owner's Manual
[x] Cancel search | Manufacturer: HYUNDAI, Model Year: 2005, Model line: Santa Fe, Model: Hyundai Santa Fe 2005Pages: 277, PDF Size: 10.53 MB
Page 204 of 277
5
VEHICLE MAINTENANCE REQUIREMENTS2
F010C01A-AATSpecified Scheduled ProceduresThese are the procedures such as inspections,
adjustments and replacements that are listed in
the maintenance charts starting on page 5-4.
These procedures must be performed at the
intervals shown in the maintenance schedule to
assure that your warranty remains in effect.
Although it is strongly recommended that they
be performed by the trained technicians at your
Hyundai dealer, these procedures may be per-
formed at any qualified service facility.
It is suggested that genuine Hyundai service
parts be used for any required repairs or re-
placements. Other parts of equivalent quality
such as engine oil, engine coolant, manual or
auto transaxle oil, brake fluid and so on which
are not supplied by Hyundai Motor Company or
its distributor may be used without affecting
your warranty coverage but you should always
be sure these are equivalent to the quality of the
original Hyundai parts. Your Owner's Hand-
book provides further information about your
warranty coverage.
F010A01A-AATService RequirementsTo ensure that you receive the greatest number
of miles of satisfying operation from your Hyundai,
certain maintenance procedures must be per-
formed. Although careful design and engineer-
ing have reduced these to a minimum, those that
are required are of the utmost importance.
It is your responsibility to have these mainte-
nance procedures performed to comply with
the terms of the warranties covering your new
Hyundai. The Owner's Handbook supplied with
your new vehicle provides further information
about these warranties.
F010B01A-AATMaintenance RequirementsThe maintenance required for your Hyundai
can be divided into three main areas:
o Specified scheduled procedures
o General checks
o Do-it-yourself maintenance
MAINTENANCE INTERVALS
Page 205 of 277
5
VEHICLE MAINTENANCE REQUIREMENTS
3
F020A02Y-AATSCHEDULED MAINTENANCE
REQUIREMENTSo Inspection should be performed any time a
malfunction is experienced or suspected.
o Receipts for all emission control system
services should be retained to demonstrate
compliance with conditions of the emissions
system warranty.
o After 120 months or 150,000 miles (240,000
km), continue to follow the prescribed main-
tenance intervals.
o For severe usage maintenance require-
ments, see page 5-6 of this section.
F010D02A-AATGeneral ChecksThese are the regular checks you should per-
form when you drive your Hyundai or you fill the
fuel tank. A list of these items will be found on
page 6-5.F010E01A-AATDo-It-Yourself MaintenanceIf you are mechanically inclined, own a few tools
that are required and want to take the time to do
so, you can inspect and service a number of
items. For more information about doing it your-
self, see Section 6.
F010F01A-AATA Few Tipso Whenever you have your Hyundai serviced,
keep copies of the service records in your
glovebox. This will help ensure that you can
document that the required procedures have
been performed to keep your warranties in
effect. This is especially important when
service is not performed by an authorized
Hyundai dealer.
o If you choose to do your own maintenance
and repairs, you may find it helpful to have
an official Hyundai Shop Manual. A copy of
this publication may be purchased at your
Hyundai dealer's parts department.
Page 208 of 277
5
VEHICLE MAINTENANCE REQUIREMENTS6
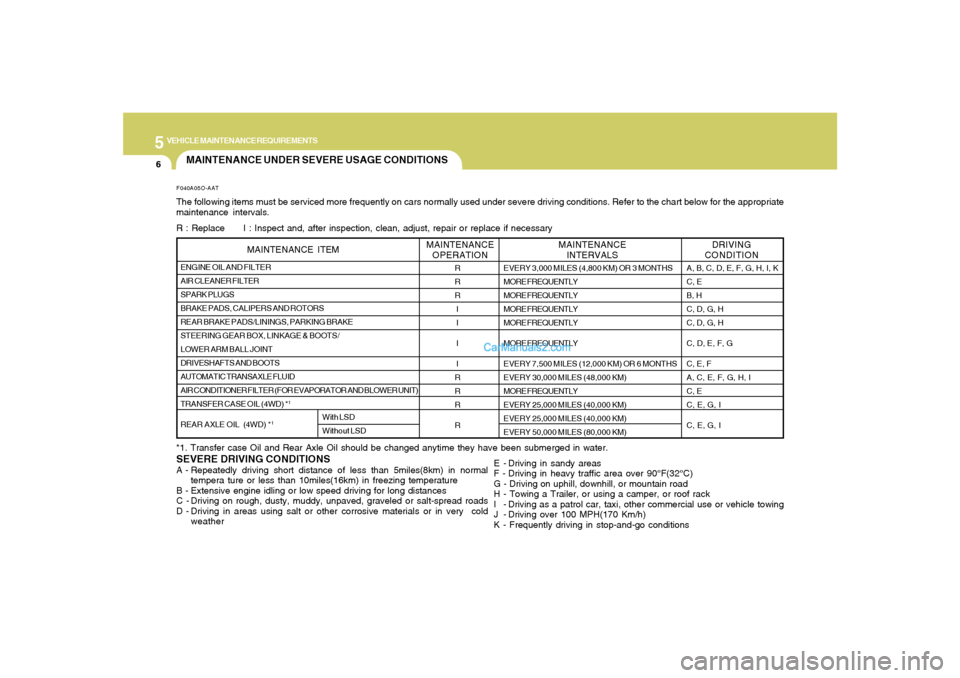
MAINTENANCE UNDER SEVERE USAGE CONDITIONS
SEVERE DRIVING CONDITIONSA - Repeatedly driving short distance of less than 5miles(8km) in normal
tempera ture or less than 10miles(16km) in freezing temperature
B - Extensive engine idling or low speed driving for long distances
C - Driving on rough, dusty, muddy, unpaved, graveled or salt-spread roads
D - Driving in areas using salt or other corrosive materials or in very cold
weatherF040A05O-AATThe following items must be serviced more frequently on cars normally used under severe driving conditions. Refer to the chart below for the appropriate
maintenance intervals.
R : Replace I : Inspect and, after inspection, clean, adjust, repair or replace if necessary
*1. Transfer case Oil and Rear Axle Oil should be changed anytime they have been submerged in water.
E - Driving in sandy areas
F - Driving in heavy traffic area over 90°F(32°C)
G - Driving on uphill, downhill, or mountain road
H - Towing a Trailer, or using a camper, or roof rack
I - Driving as a patrol car, taxi, other commercial use or vehicle towing
J - Driving over 100 MPH(170 Km/h)
K - Frequently driving in stop-and-go conditionsENGINE OIL AND FILTER
AIR CLEANER FILTER
SPARK PLUGS
BRAKE PADS, CALIPERS AND ROTORS
REAR BRAKE PADS/LININGS, PARKING BRAKE
STEERING GEAR BOX, LINKAGE & BOOTS/
LOWER ARM BALL JOINT
DRIVESHAFTS AND BOOTS
AUTOMATIC TRANSAXLE FLUID
AIR CONDITIONER FILTER (FOR EVAPORATOR AND BLOWER UNIT)
TRANSFER CASE OIL (4WD) *
1
REAR AXLE OIL (4WD) *
1
MAINTENANCE ITEM
R
R
R
I
I
I
I
R
R
R
R
EVERY 3,000 MILES (4,800 KM) OR 3 MONTHS
MORE FREQUENTLY
MORE FREQUENTLY
MORE FREQUENTLY
MORE FREQUENTLY
MORE FREQUENTLY
EVERY 7,500 MILES (12,000 KM) OR 6 MONTHS
EVERY 30,000 MILES (48,000 KM)
MORE FREQUENTLY
EVERY 25,000 MILES (40,000 KM)
EVERY 25,000 MILES (40,000 KM)
EVERY 50,000 MILES (80,000 KM)
With LSD
Without LSD
DRIVING
CONDITION MAINTENANCE
INTERVALS MAINTENANCE
OPERATION
A, B, C, D, E, F, G, H, I, K
C, E
B, H
C, D, G, H
C, D, G, H
C, D, E, F, G
C, E, F
A, C, E, F, G, H, I
C, E
C, E, G, I
C, E, G, I
Page 218 of 277
6
DO-IT-YOURSELF MAINTENANCE
7
!
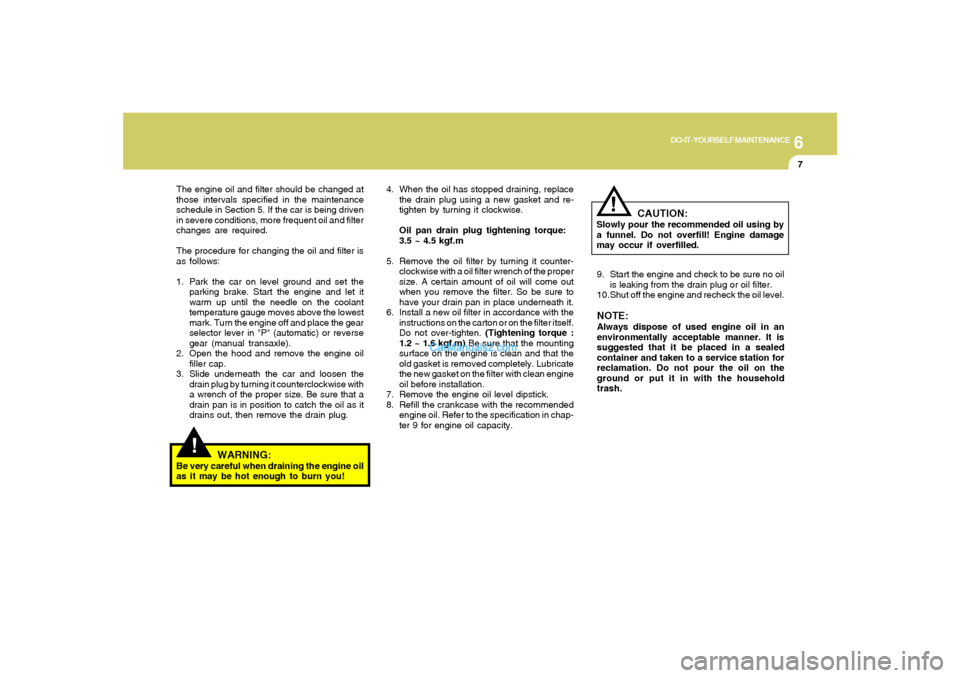
The engine oil and filter should be changed at
those intervals specified in the maintenance
schedule in Section 5. If the car is being driven
in severe conditions, more frequent oil and filter
changes are required.
The procedure for changing the oil and filter is
as follows:
1. Park the car on level ground and set the
parking brake. Start the engine and let it
warm up until the needle on the coolant
temperature gauge moves above the lowest
mark. Turn the engine off and place the gear
selector lever in "P" (automatic) or reverse
gear (manual transaxle).
2. Open the hood and remove the engine oil
filler cap.
3. Slide underneath the car and loosen the
drain plug by turning it counterclockwise with
a wrench of the proper size. Be sure that a
drain pan is in position to catch the oil as it
drains out, then remove the drain plug.
WARNING:
Be very careful when draining the engine oil
as it may be hot enough to burn you!4. When the oil has stopped draining, replace
the drain plug using a new gasket and re-
tighten by turning it clockwise.
Oil pan drain plug tightening torque:
3.5 ~ 4.5 kgf.m
5. Remove the oil filter by turning it counter-
clockwise with a oil filter wrench of the proper
size. A certain amount of oil will come out
when you remove the filter. So be sure to
have your drain pan in place underneath it.
6. Install a new oil filter in accordance with the
instructions on the carton or on the filter itself.
Do not over-tighten. (Tightening torque :
1.2 ~ 1.6 kgf.m) Be sure that the mounting
surface on the engine is clean and that the
old gasket is removed completely. Lubricate
the new gasket on the filter with clean engine
oil before installation.
7. Remove the engine oil level dipstick.
8. Refill the crankcase with the recommended
engine oil. Refer to the specification in chap-
ter 9 for engine oil capacity.
!
CAUTION:
Slowly pour the recommended oil using by
a funnel. Do not overfill! Engine damage
may occur if overfilled.
9. Start the engine and check to be sure no oil
is leaking from the drain plug or oil filter.
10.Shut off the engine and recheck the oil level.NOTE:Always dispose of used engine oil in an
environmentally acceptable manner. It is
suggested that it be placed in a sealed
container and taken to a service station for
reclamation. Do not pour the oil on the
ground or put it in with the household
trash.
Page 224 of 277
6
DO-IT-YOURSELF MAINTENANCE
13
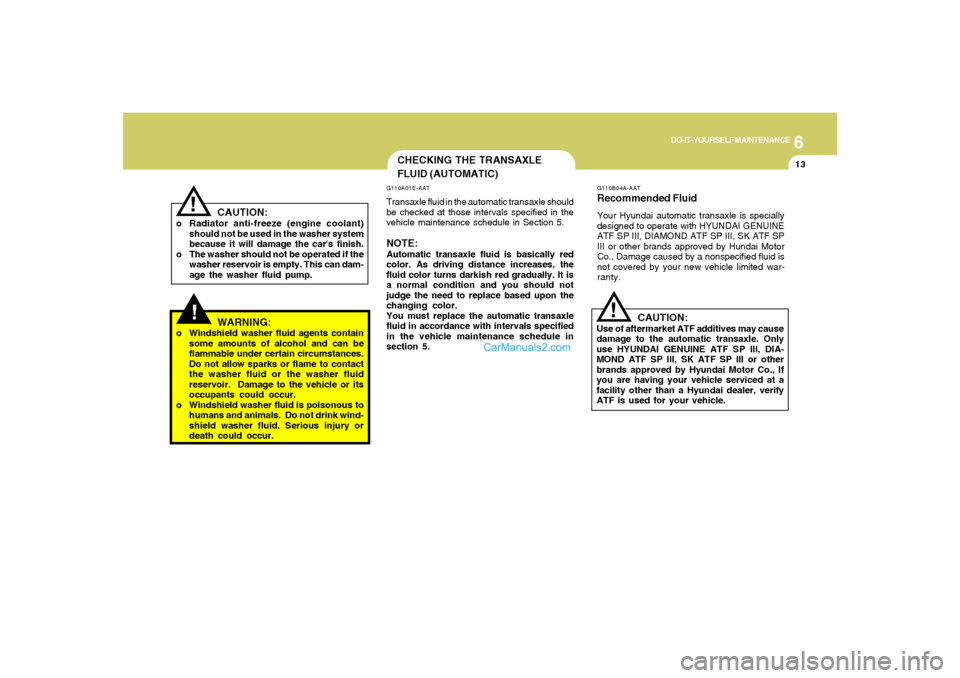
CAUTION:
o Radiator anti-freeze (engine coolant)
should not be used in the washer system
because it will damage the car's finish.
o The washer should not be operated if the
washer reservoir is empty. This can dam-
age the washer fluid pump.
!
CHECKING THE TRANSAXLE
FLUID (AUTOMATIC)G110A01E-AATTransaxle fluid in the automatic transaxle should
be checked at those intervals specified in the
vehicle maintenance schedule in Section 5.NOTE:Automatic transaxle fluid is basically red
color. As driving distance increases, the
fluid color turns darkish red gradually. It is
a normal condition and you should not
judge the need to replace based upon the
changing color.
You must replace the automatic transaxle
fluid in accordance with intervals specified
in the vehicle maintenance schedule in
section 5.
!
G110B04A-AATRecommended FluidYour Hyundai automatic transaxle is specially
designed to operate with HYUNDAI GENUINE
ATF SP III, DIAMOND ATF SP III, SK ATF SP
III or other brands approved by Hundai Motor
Co., Damage caused by a nonspecified fluid is
not covered by your new vehicle limited war-
ranty.
CAUTION:
Use of aftermarket ATF additives may cause
damage to the automatic transaxle. Only
use HYUNDAI GENUINE ATF SP III, DIA-
MOND ATF SP III, SK ATF SP III or other
brands approved by Hyundai Motor Co., If
you are having your vehicle serviced at a
facility other than a Hyundai dealer, verify
ATF is used for your vehicle.
!
WARNING:
o Windshield washer fluid agents contain
some amounts of alcohol and can be
flammable under certain circumstances.
Do not allow sparks or flame to contact
the washer fluid or the washer fluid
reservoir. Damage to the vehicle or its
occupants could occur.
o Windshield washer fluid is poisonous to
humans and animals. Do not drink wind-
shield washer fluid. Serious injury or
death could occur.
Page 273 of 277
10
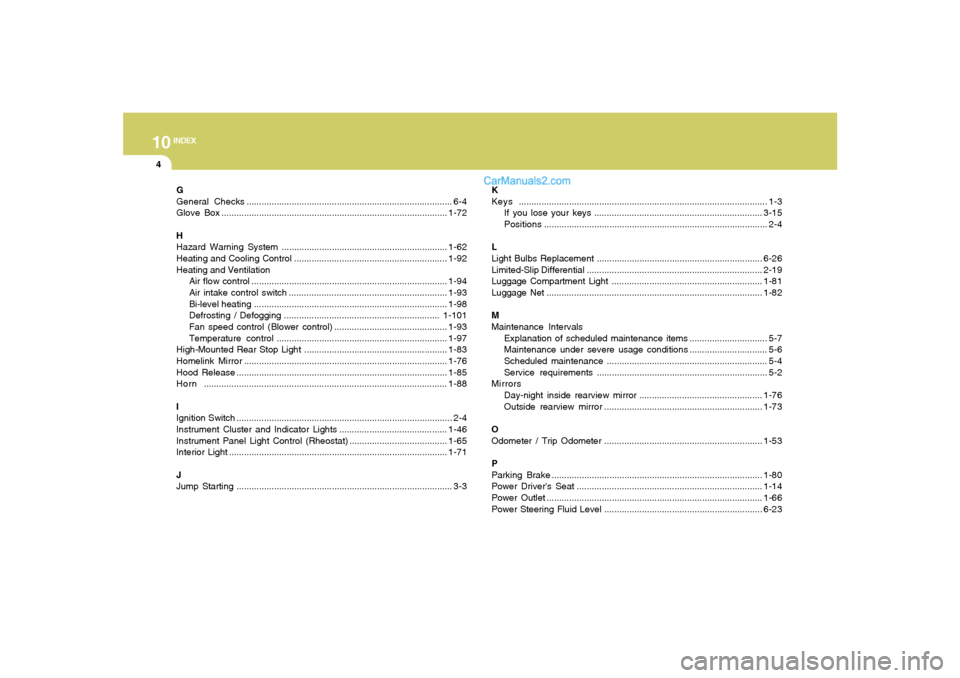
INDEX
4
G
General Checks.................................................................................. 6-4
Glove Box..........................................................................................1-72
H
Hazard Warning System ..................................................................1-62
Heating and Cooling Control .............................................................1-92
Heating and Ventilation
Air flow control..............................................................................1-94
Air intake control switch ...............................................................1-93
Bi-level heating.............................................................................1-98
Defrosting / Defogging ..............................................................1-101
Fan speed control (Blower control) .............................................1-93
Temperature control....................................................................1-97
High-Mounted Rear Stop Light .........................................................1-83
Homelink Mirror.................................................................................1-76
Hood Release....................................................................................1-85
Horn.................................................................................................1-88
I
Ignition Switch ...................................................................................... 2-4
Instrument Cluster and Indicator Lights...........................................1-46
Instrument Panel Light Control (Rheostat).......................................1-65
Interior Light.......................................................................................1-71
J
Jump Starting...................................................................................... 3-3K
Keys................................................................................................... 1-3
If you lose your keys ...................................................................3-15
Positions......................................................................................... 2-4
L
Light Bulbs Replacement..................................................................6-26
Limited-Slip Differential......................................................................2-19
Luggage Compartment Light ............................................................1-81
Luggage Net ......................................................................................1-82
M
Maintenance Intervals
Explanation of scheduled maintenance items ............................... 5-7
Maintenance under severe usage conditions............................... 5-6
Scheduled maintenance................................................................ 5-4
Service requirements.................................................................... 5-2
Mirrors
Day-night inside rearview mirror .................................................1-76
Outside rearview mirror ...............................................................1-73
O
Odometer / Trip Odometer ...............................................................1-53
P
Parking Brake....................................................................................1-80
Power Driver's Seat ..........................................................................1-14
Power Outlet......................................................................................1-66
Power Steering Fluid Level ...............................................................6-23