change time Hyundai Santa Fe 2009 Owner's Manual - RHD (UK, Australia)
[x] Cancel search | Manufacturer: HYUNDAI, Model Year: 2009, Model line: Santa Fe, Model: Hyundai Santa Fe 2009Pages: 269, PDF Size: 9.78 MB
Page 1 of 269
F1
All information in this Owner's Manual is current at the time of publication. However, in line with the Hyundai policy of continual product improve- ment, the right to amend or change specifications without prior notice or obligation to incorporate such amendments or changes into vehiclesalready produced, is reserved. This manual applies to all current Hyundai models and includes descrip- tions and explanations of optional as well as standard equipment. As a result, you may find material in this manual that does not apply to your specific vehicle.
A030A01O-DAT OWNER'S MANUAL Operation MaintenanceSpecifications
CM-aust-00.p655/19/2008, 6:25 PM
1
Page 71 of 269
1FEATURES OF YOUR HYUNDAI
60
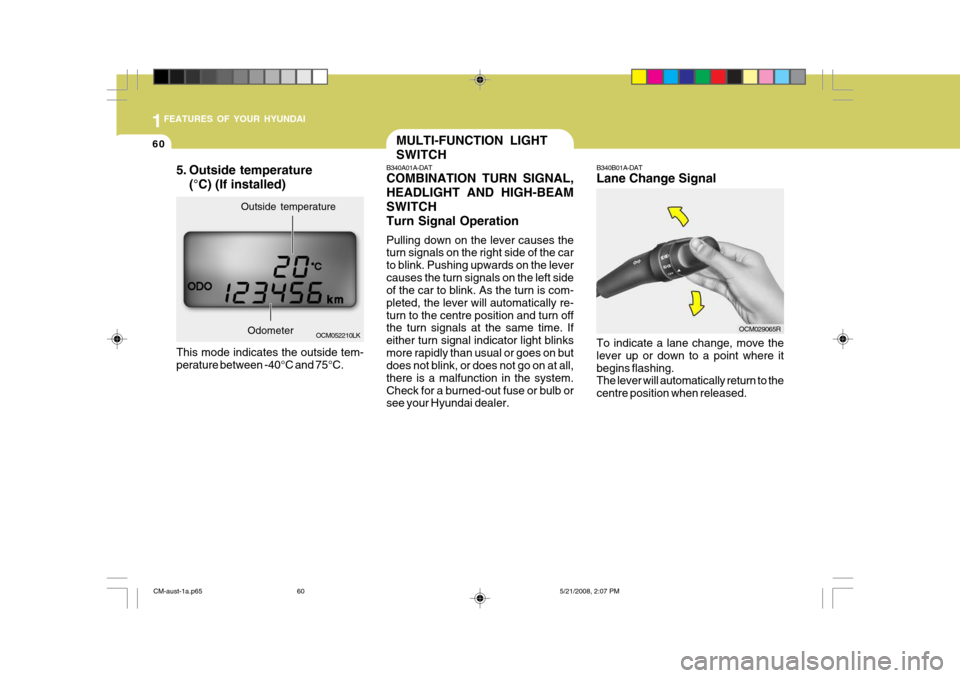
B340B01A-DAT Lane Change Signal To indicate a lane change, move the lever up or down to a point where itbegins flashing. The lever will automatically return to the centre position when released.
OCM029065R
MULTI-FUNCTION LIGHT SWITCH
B340A01A-DAT COMBINATION TURN SIGNAL, HEADLIGHT AND HIGH-BEAMSWITCHTurn Signal Operation Pulling down on the lever causes the turn signals on the right side of the car to blink. Pushing upwards on the levercauses the turn signals on the left side of the car to blink. As the turn is com- pleted, the lever will automatically re-turn to the centre position and turn off the turn signals at the same time. If either turn signal indicator light blinksmore rapidly than usual or goes on but does not blink, or does not go on at all, there is a malfunction in the system.Check for a burned-out fuse or bulb or see your Hyundai dealer.
OCM052210LK
Outside temperature
Odometer
5. Outside temperature
(°C) (If installed)
This mode indicates the outside tem- perature between -40°C and 75°C.
CM-aust-1a.p65 5/21/2008, 2:07 PM
60
Page 79 of 269
1FEATURES OF YOUR HYUNDAI
68
!
CAUTION:
Do not clean the inner side of the rear window glass with an abrasive typeof glass cleaner or use a scraper to remove the foreign deposits from the inner surface of the glass as thismay cause damage to the demister elements. NOTE: The engine must be running for the rear window demister to operate.
DIGITAL CLOCK
B400A01NF-AAT
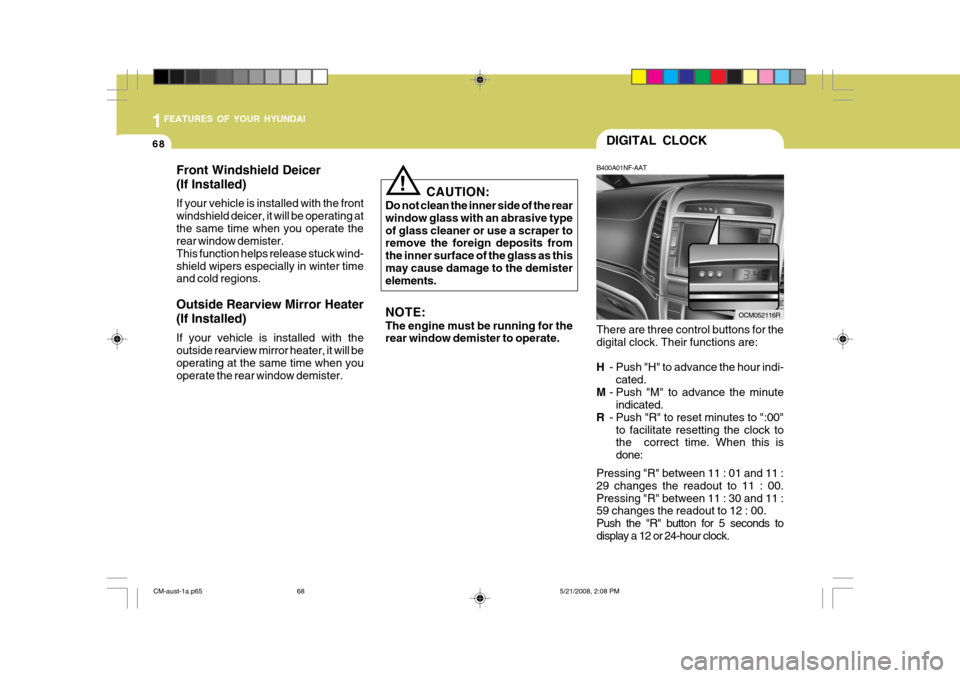
There are three control buttons for the digital clock. Their functions are: H - Push "H" to advance the hour indi-
cated.
M - Push "M" to advance the minute
indicated.
R - Push "R" to reset minutes to ":00"
to facilitate resetting the clock to the correct time. When this is done:
Pressing "R" between 11 : 01 and 11 :29 changes the readout to 11 : 00.Pressing "R" between 11 : 30 and 11 : 59 changes the readout to 12 : 00.
Push the "R" button for 5 seconds todisplay a 12 or 24-hour clock.
OCM052116R
Front Windshield Deicer (If Installed) If your vehicle is installed with the front windshield deicer, it will be operating atthe same time when you operate the rear window demister. This function helps release stuck wind-shield wipers especially in winter time and cold regions. Outside Rearview Mirror Heater (If Installed) If your vehicle is installed with the outside rearview mirror heater, it will be operating at the same time when youoperate the rear window demister.
CM-aust-1a.p65
5/21/2008, 2:08 PM
68
Page 134 of 269
1
FEATURES OF YOUR HYUNDAI
123
1
FEATURES OF YOUR HYUNDAI
123
1
FEATURES OF YOUR HYUNDAI
123
1
FEATURES OF YOUR HYUNDAI
123
1
FEATURES OF YOUR HYUNDAI
123
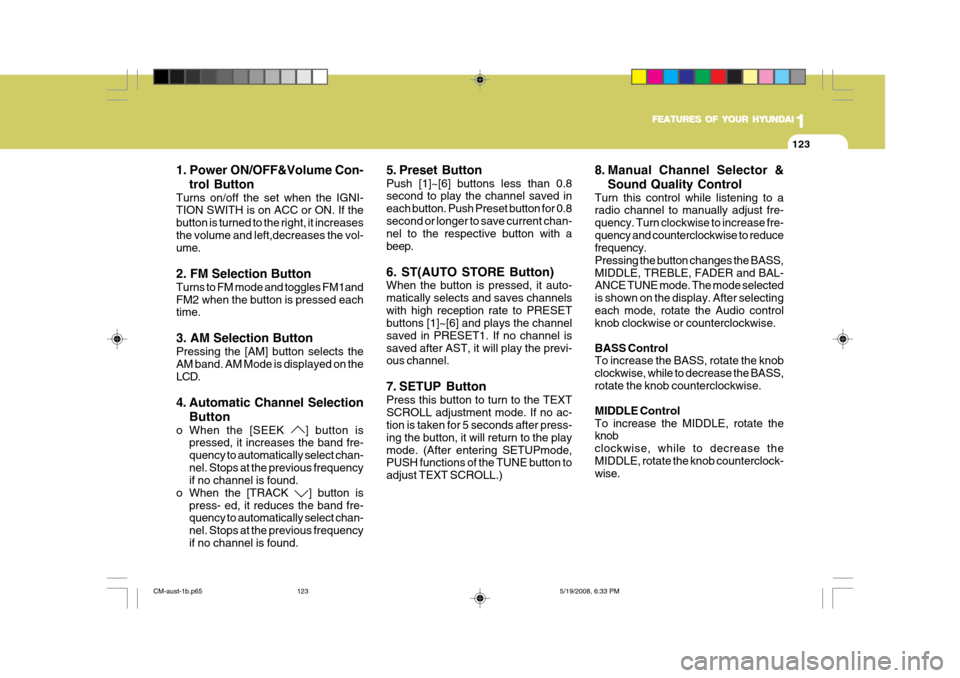
1. Power ON/OFF&Volume Con- trol Button
Turns on/off the set when the IGNI- TION SWITH is on ACC or ON. If the button is turned to the right, it increasesthe volume and left,decreases the vol- ume. 2. FM Selection Button Turns to FM mode and toggles FM1and FM2 when the button is pressed each time. 3. AM Selection Button Pressing the [AM] button selects the AM band. AM Mode is displayed on the LCD.
4. Automatic Channel Selection
Button
o When the [SEEK
] button is
pressed, it increases the band fre- quency to automatically select chan-nel. Stops at the previous frequency if no channel is found.
o When the [TRACK
] button is
press- ed, it reduces the band fre- quency to automatically select chan- nel. Stops at the previous frequencyif no channel is found. 5. Preset Button Push [1]~[6] buttons less than 0.8 second to play the channel saved in each button. Push Preset button for 0.8second or longer to save current chan- nel to the respective button with a beep. 6. ST(AUTO STORE Button) When the button is pressed, it auto- matically selects and saves channelswith high reception rate to PRESET buttons [1]~[6] and plays the channel saved in PRESET1. If no channel issaved after AST, it will play the previ- ous channel.
7. SETUP Button Press this button to turn to the TEXT SCROLL adjustment mode. If no ac- tion is taken for 5 seconds after press- ing the button, it will return to the playmode. (After entering SETUPmode, PUSH functions of the TUNE button to adjust TEXT SCROLL.)
8. Manual Channel Selector &
Sound Quality Control
Turn this control while listening to a radio channel to manually adjust fre- quency. Turn clockwise to increase fre-quency and counterclockwise to reduce frequency. Pressing the button changes the BASS,MIDDLE, TREBLE, FADER and BAL- ANCE TUNE mode. The mode selected is shown on the display. After selectingeach mode, rotate the Audio control knob clockwise or counterclockwise. BASS Control To increase the BASS, rotate the knob clockwise, while to decrease the BASS,rotate the knob counterclockwise. MIDDLE Control To increase the MIDDLE, rotate the knob clockwise, while to decrease theMIDDLE, rotate the knob counterclock- wise.
CM-aust-1b.p65 5/19/2008, 6:33 PM
123
Page 138 of 269
1
FEATURES OF YOUR HYUNDAI
127
1
FEATURES OF YOUR HYUNDAI
127
1
FEATURES OF YOUR HYUNDAI
127
1
FEATURES OF YOUR HYUNDAI
127
1
FEATURES OF YOUR HYUNDAI
127
7. CD or CD/AUX Selection But- ton
CD Selection Button If the CD is loaded, turns to CD mode. If no CD, it displays "NO Disc" for 3seconds and returns to th previous mode. CD/AUX Selection Button If the auxiliary device is connected, it switches to the AUX mode from theother mode to play the sound from the auxiliary player. If the CD is loaded, turns to CD mode, and if a device isconnected to AUX then it toggles. CD ➟AUX ➟CD... when the button is
pressed each time.(It will not turn to AUX if the auxiliary device is not con- nected) If no CD and auxiliary device is not connected, it displays "NO Media"for 3 seconds and returns to the previ- ous mode. 8. CD Indicator(CDP Only) When car ignition switch is ACC or ON and if the CD is loaded, this indicator is lighted. If the CD is ejected the light is turned off. 9. Folder Moving Button
o Moves [FOLDER
] button child
folder of the current folder and dis- plays the first song in the folder.Press TUNE/ ENTER knob to move to the folder displayed. It will play the first song in the folder.
o Moves [CAT
], [PTY ],
[FOLDER
] button parent folder
and displays the first song in the folder. Press TUNE/ENTER knob to move to the folder displayed.
10. Search/ENTER Button Turn this button clockwise to display the songs next to the currently played song. Turn the button counterclock-wise to display the songs before the currently played song. Press the button to skip and play the selected song. 11. SCAN Play Button Plays first 10 seconds of each song in the DISC. To cancel the mode, pressthe button once again. 12. AUX or DISC Selection But-
ton
AUX selection button If the auxiliary device is connected, it turns to AUX mode from the other modeto play the sound from the auxiliary player. If no auxiliary device is con- nected, it displays "NO Media" for 3seconds and returns to the previous mode. DISC selection button
o [DISC
] Change Button Changes
disc to the previous disc.
o [DISC
] Change Button Changes
disc to the next disc.
13. CD LOAD Button Push [LOAD] button to load CDs to available CDC deck (from 1~6). Push [LOAD] button for more than 2 seconds to load into all available decks.The last CD will play. 10 seconds idle status will disable loading process.
CM-aust-1b.p65 5/19/2008, 6:33 PM
127
Page 147 of 269
2DRIVING YOUR HYUNDAI
2
C010A01O-DAT
WARNING: ENGINE EXHAUST CAN BE DANGEROUS!
Engine exhaust fumes can be extremely dangerous. If, at any time, you smell exhaust fumes inside the vehicle, open the windows immediately. o Do not inhale exhaust fumes. Exhaust fumes contain carbon monoxide, a colorless, odorless gas that can cause unconsciousness and death by asphyxiation. o Be sure the exhaust system does not leak. The exhaust system should be checked whenever the vehicle is raised to change the oil or for any other purpose.If you hear a change in the sound of the exhaust or if you drive over something that strikes the underneath sideof the car, have the exhaust system checked as soon as possible by your Hyundai dealer. o Do not run the engine in an enclosed area. Letting the engine idle in your garage, even with the garage door open, is a hazardous practice. Never run theengine in your garage any longer than it takes to start the engine and back the car out. o Avoid idling the engine for prolonged periods with people inside the car. If it is necessary to idle the engine for a prolonged period with people inside the car, be sure to do so only in anopen area with the air intake set at "Fresh" and the fan operating at one of the higher speeds so fresh air is drawn into the interior. If you must drive with the tail gate open because you are carrying objects that make this necessary:
1. Close all windows.
2. Open side vents.
3. Set the air intake control at "Fresh", the air flow control at "Floor" or "Face" and the fan at one of the higher speeds.
To assure proper operation of the ventilation system, be sure the ventilation air intakes located just in front of the windshield are kept clear of snow, ice, leaves or other obstructions.
!
CM-aust-2.p65 5/19/2008, 6:34 PM
2
Page 164 of 269
2
DRIVING YOUR HYUNDAI
19
!
4WD LOCK SYSTEM
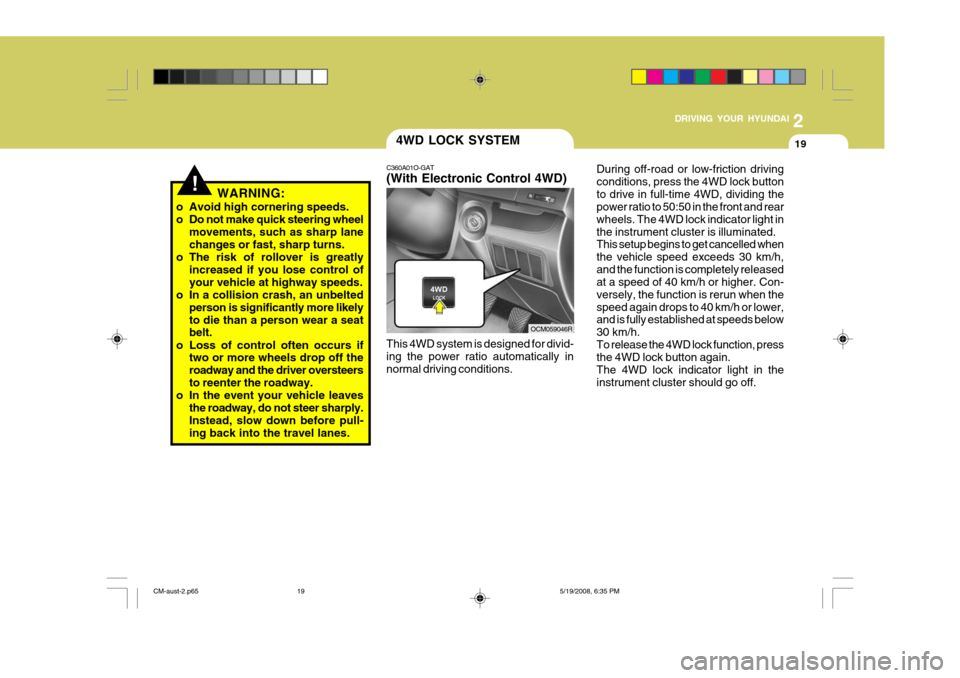
C360A01O-GAT (With Electronic Control 4WD) This 4WD system is designed for divid- ing the power ratio automatically innormal driving conditions. During off-road or low-friction drivingconditions, press the 4WD lock buttonto drive in full-time 4WD, dividing the power ratio to 50:50 in the front and rear wheels. The 4WD lock indicator light inthe instrument cluster is illuminated. This setup begins to get cancelled when the vehicle speed exceeds 30 km/h,and the function is completely released at a speed of 40 km/h or higher. Con- versely, the function is rerun when thespeed again drops to 40 km/h or lower, and is fully established at speeds below 30 km/h.To release the 4WD lock function, press the 4WD lock button again. The 4WD lock indicator light in theinstrument cluster should go off.
OCM059046R
WARNING:
o Avoid high cornering speeds.
o Do not make quick steering wheel movements, such as sharp lane changes or fast, sharp turns.
o The risk of rollover is greatly increased if you lose control ofyour vehicle at highway speeds.
o In a collision crash, an unbelted person is significantly more likelyto die than a person wear a seat belt.
o Loss of control often occurs if two or more wheels drop off the roadway and the driver oversteersto reenter the roadway.
o In the event your vehicle leaves the roadway, do not steer sharply. Instead, slow down before pull- ing back into the travel lanes.
CM-aust-2.p65 5/19/2008, 6:35 PM
19
Page 174 of 269
2
DRIVING YOUR HYUNDAI
29
!
C190F01A-DAT Trailer and Vehicle Towing Tips
1. Before towing, check towbar and
safety chain connections as well as proper operation of the trailer running lights, brake lights and turn signals.
2. Always drive your vehicle at a mod- erate speed (Less than 100 km/h).
3. Trailer towing requires more fuel than
normal conditions.
4. To maintain engine braking efficiency and electrical charging performance, do not use fifth gear (manualtransaxle) or overdrive (automatic transaxle).
5. Always secure items in the trailer to prevent load shift while driving.
6. Check the condition and air pressure
of all tyres on the trailer and your car. Low tyre pressure can seriously af- fect the handling. Also check the spare tyre.
7. The vehicle/trailer combination is more affected by crosswind and buf-feting. When being passed by alarge vehicle, keep a constant speed and steer straight ahead. If there is too much wind buffeting, slow downto get out of the other vehicle's air turbulence. 8. When parking your car and trailer,
especially on a hill, be sure to follow all the normal precautions. Turn your front wheel into the curb, set the parking brake firmly, and put thetransaxle in 1st or Reverse (manual) or Park (automatic). In addition, place wheel chocks at each of the trailer'styres.
9. If the trailer has electric brakes, drive
your vehicle with the trailer attached,and then apply the trailer brakes by hand. This test confirms the opera- tion of the trailer brakes and alsochecks your electrical connection at the same time.
10. During your trip, check occasionally to be sure that the load is secure,and that the lights and any trailer brakes are still working.
11. Avoid jerky starts, sudden accel- eration or sudden stops.
12. Avoid sharp turns and rapid lane changes.
13. Avoid holding the brake pedal down
too long or too frequently. This couldcause the brakes to overheat, re- sulting in reduced braking efficiency.
CAUTION:
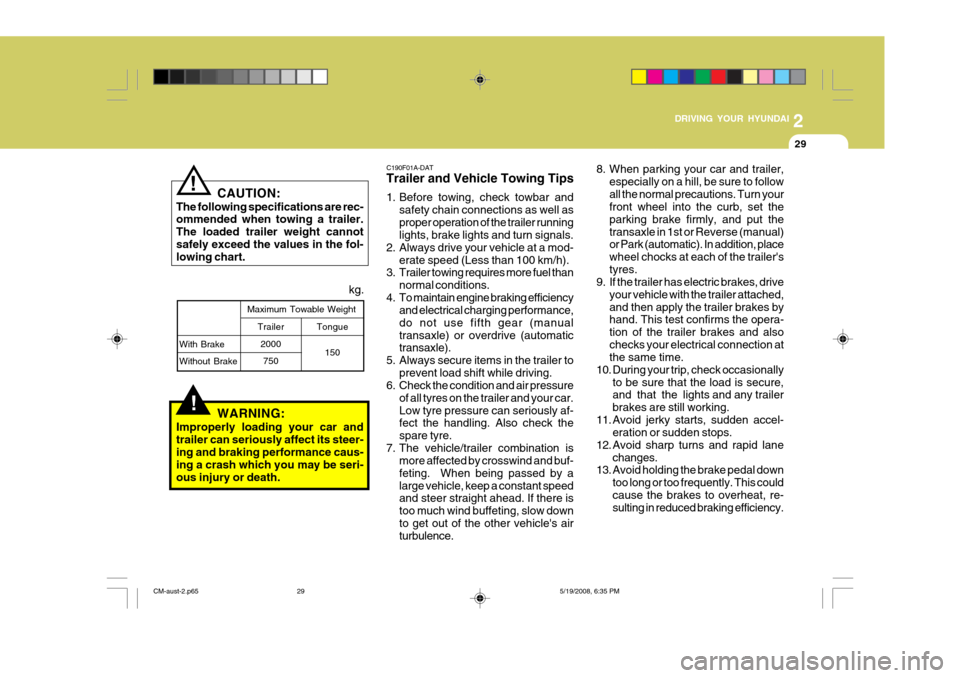
The following specifications are rec-ommended when towing a trailer. The loaded trailer weight cannotsafely exceed the values in the fol- lowing chart.
!
Maximum Towable Weight kg.
With Brake Without Brake
WARNING:
Improperly loading your car and trailer can seriously affect its steer-ing and braking performance caus- ing a crash which you may be seri- ous injury or death.
Tongue
150
Trailer
2000750
CM-aust-2.p65 5/19/2008, 6:35 PM
29
Page 203 of 269
5
VEHICLE MAINTENANCE REQUIREMENTS
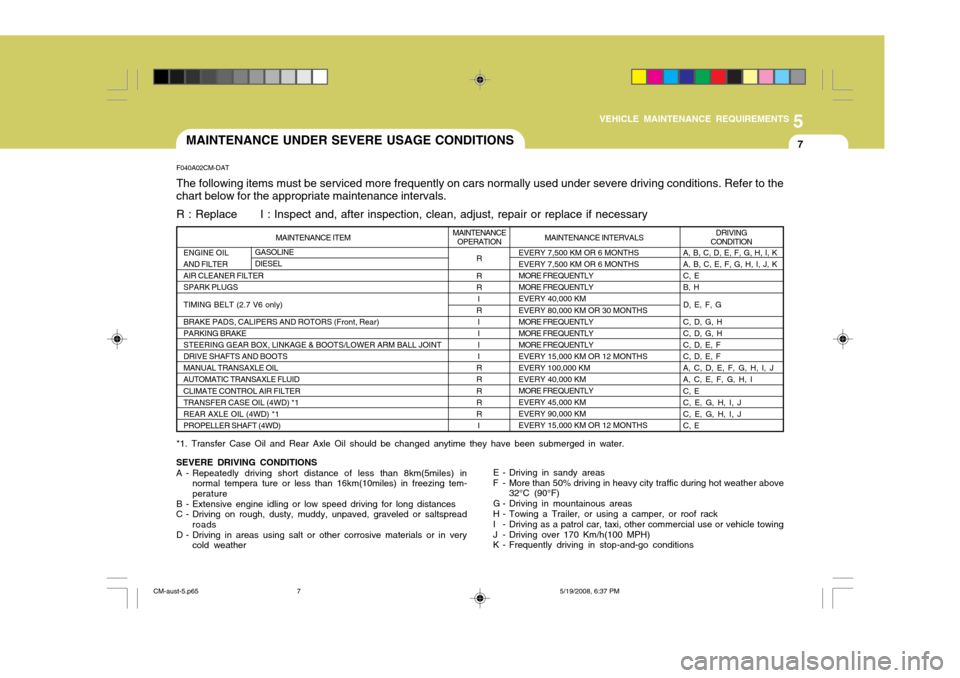
7MAINTENANCE UNDER SEVERE USAGE CONDITIONS
F040A02CM-DAT The following items must be serviced more frequently on cars normally used under severe driving conditions. Refer to the chart below for the appropriate maintenance intervals. R : Replace I : Inspect and, after inspection, clean, adjust, repair or replace if necessary
SEVERE DRIVING CONDITIONS
A - Repeatedly driving short distance of less than 8km(5miles) in normal tempera ture or less than 16km(10miles) in freezing tem- perature
B - Extensive engine idling or low speed driving for long distances
C - Driving on rough, dusty, muddy, unpaved, graveled or saltspread roads
D - Driving in areas using salt or other corrosive materials or in very cold weather E - Driving in sandy areas
F - More than 50% driving in heavy city traffic during hot weather above 32°C (90°F)
G - Driving in mountainous areas
H - Towing a Trailer, or using a camper, or roof rack
I - Driving as a patrol car, taxi, other commercial use or vehicle towing
J - Driving over 170 Km/h(100 MPH)
K - Frequently driving in stop-and-go conditions
*1. Transfer Case Oil and Rear Axle Oil should be changed anytime they have been submerged in water. MAINTENANCE INTERVALS
ENGINE OIL AND FILTERAIR CLEANER FILTERSPARK PLUGS TIMING BELT (2.7 V6 only)BRAKE PADS, CALIPERS AND ROTORS (Front, Rear) PARKING BRAKESTEERING GEAR BOX, LINKAGE & BOOTS/LOWER ARM BALL JOINTDRIVE SHAFTS AND BOOTSMANUAL TRANSAXLE OILAUTOMATIC TRANSAXLE FLUID CLIMATE CONTROL AIR FILTER TRANSFER CASE OIL (4WD) *1REAR AXLE OIL (4WD) *1PROPELLER SHAFT (4WD)
A, B, C, D, E, F, G, H, I, K A, B, C, E, F, G, H, I, J, KC, EB, H D, E, F, GC, D, G, H C, D, G, HC, D, E, FC, D, E, FA, C, D, E, F, G, H, I, JA, C, E, F, G, H, I C, E C, E, G, H, I, JC, E, G, H, I, JC, E
MAINTENANCE ITEM DRIVING
CONDITION
EVERY 7,500 KM OR 6 MONTHS EVERY 7,500 KM OR 6 MONTHSMORE FREQUENTLYMORE FREQUENTLYEVERY 40,000 KM EVERY 80,000 KM OR 30 MONTHS MORE FREQUENTLYMORE FREQUENTLYMORE FREQUENTLYEVERY 15,000 KM OR 12 MONTHSEVERY 100,000 KM EVERY 40,000 KM MORE FREQUENTLYEVERY 45,000 KMEVERY 90,000 KMEVERY 15,000 KM OR 12 MONTHS
R R R
I
R
IIII
RR R RR
I
MAINTENANCE
OPERATIONGASOLINE DIESEL
CM-aust-5.p65 5/19/2008, 6:37 PM
7
Page 216 of 269
6
DO-IT-YOURSELF MAINTENANCE
9
!!
!
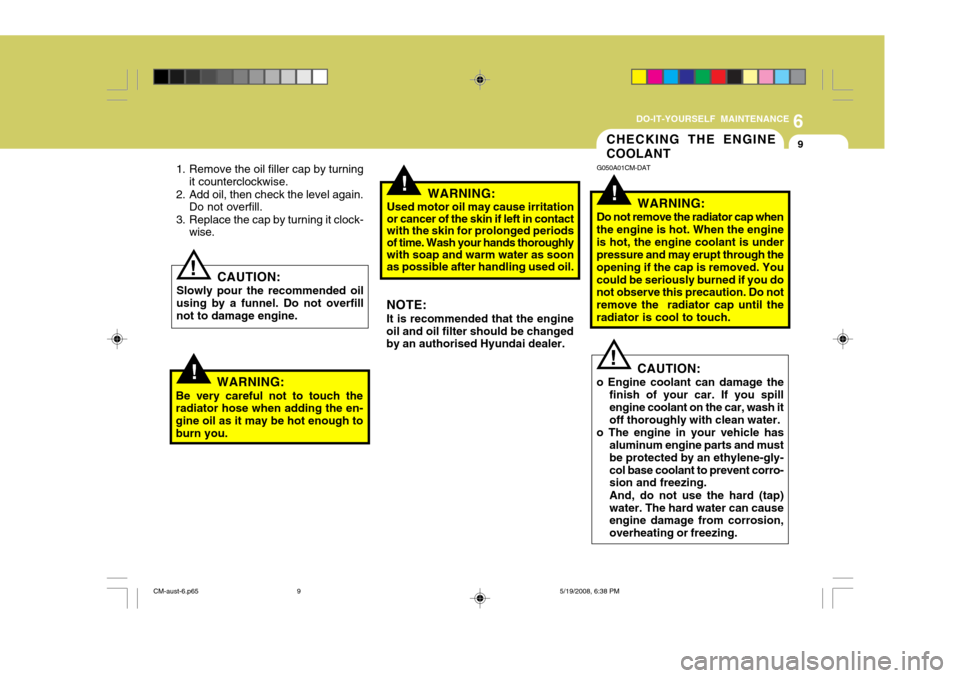
CHECKING THE ENGINE COOLANT
G050A01CM-DAT
WARNING:
Do not remove the radiator cap when the engine is hot. When the engineis hot, the engine coolant is under pressure and may erupt through the opening if the cap is removed. Youcould be seriously burned if you do not observe this precaution. Do not remove the radiator cap until theradiator is cool to touch.
WARNING:
Used motor oil may cause irritation or cancer of the skin if left in contact with the skin for prolonged periods of time. Wash your hands thoroughly with soap and warm water as soon as possible after handling used oil.
CAUTION:
Slowly pour the recommended oil
using by a funnel. Do not overfill not to damage engine.
!
WARNING:
Be very careful not to touch the radiator hose when adding the en- gine oil as it may be hot enough toburn you.
! CAUTION:
o Engine coolant can damage the finish of your car. If you spill engine coolant on the car, wash it off thoroughly with clean water.
o The engine in your vehicle has aluminum engine parts and must be protected by an ethylene-gly-col base coolant to prevent corro- sion and freezing. And, do not use the hard (tap) water. The hard water can cause engine damage from corrosion, overheating or freezing.
1. Remove the oil filler cap by turning
it counterclockwise.
2. Add oil, then check the level again. Do not overfill.
3. Replace the cap by turning it clock- wise.
NOTE: It is recommended that the engine
oil and oil filter should be changed by an authorised Hyundai dealer.
CM-aust-6.p65 5/19/2008, 6:38 PM
9