seat adjustment Hyundai Santa Fe 2009 Owner's Manual - RHD (UK, Australia)
[x] Cancel search | Manufacturer: HYUNDAI, Model Year: 2009, Model line: Santa Fe, Model: Hyundai Santa Fe 2009Pages: 269, PDF Size: 9.78 MB
Page 29 of 269
1FEATURES OF YOUR HYUNDAI
18
!
!
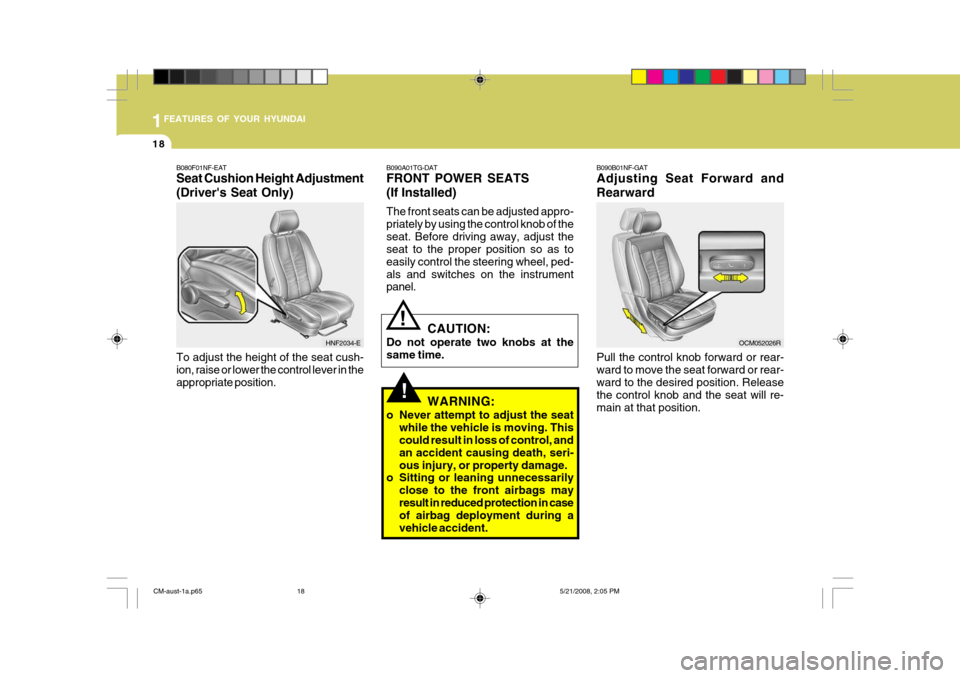
B090A01TG-DAT FRONT POWER SEATS (If Installed) The front seats can be adjusted appro- priately by using the control knob of theseat. Before driving away, adjust the seat to the proper position so as to easily control the steering wheel, ped-als and switches on the instrument panel.
CAUTION:
Do not operate two knobs at the same time.
WARNING:
o Never attempt to adjust the seat while the vehicle is moving. This could result in loss of control, and an accident causing death, seri-ous injury, or property damage.
o Sitting or leaning unnecessarily
close to the front airbags mayresult in reduced protection in case of airbag deployment during a vehicle accident.
B080F01NF-EAT Seat Cushion Height Adjustment (Driver's Seat Only) To adjust the height of the seat cush- ion, raise or lower the control lever in theappropriate position.
HNF2034-E
B090B01NF-GAT Adjusting Seat Forward and Rearward Pull the control knob forward or rear- ward to move the seat forward or rear-ward to the desired position. Release the control knob and the seat will re- main at that position.OCM052026R
CM-aust-1a.p65
5/21/2008, 2:05 PM
18
Page 30 of 269
1
FEATURES OF YOUR HYUNDAI
19
!
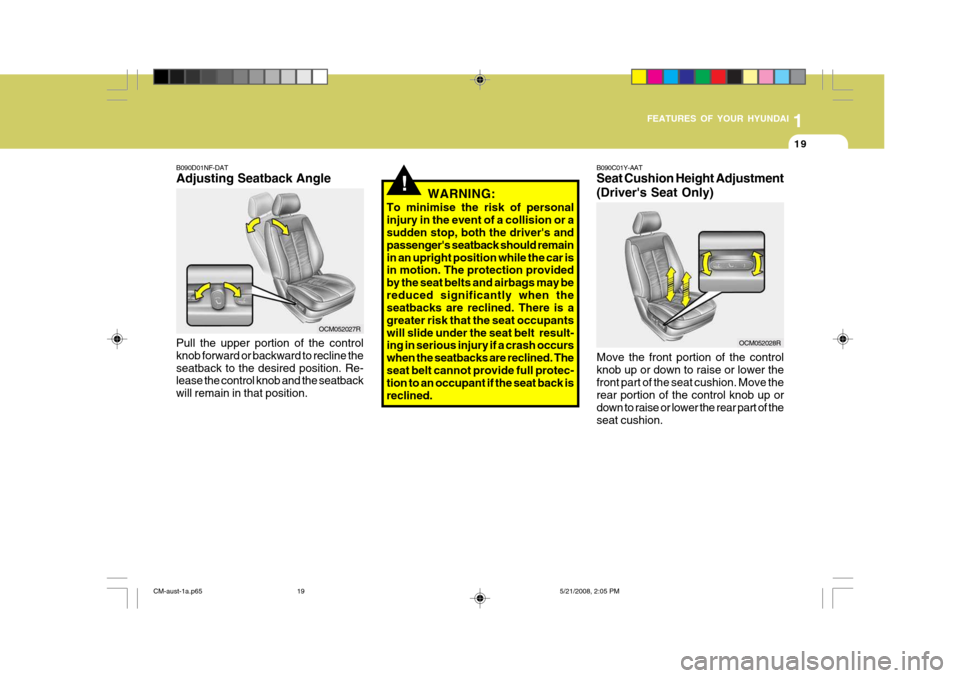
B090D01NF-DAT Adjusting Seatback Angle Pull the upper portion of the control knob forward or backward to recline theseatback to the desired position. Re- lease the control knob and the seatback will remain in that position. WARNING:
To minimise the risk of personalinjury in the event of a collision or a sudden stop, both the driver's and passenger's seatback should remainin an upright position while the car is in motion. The protection provided by the seat belts and airbags may bereduced significantly when the seatbacks are reclined. There is a greater risk that the seat occupantswill slide under the seat belt result- ing in serious injury if a crash occurs when the seatbacks are reclined. Theseat belt cannot provide full protec- tion to an occupant if the seat back is reclined.
OCM052027R B090C01Y-AAT Seat Cushion Height Adjustment (Driver's Seat Only) Move the front portion of the control knob up or down to raise or lower thefront part of the seat cushion. Move the rear portion of the control knob up or down to raise or lower the rear part of theseat cushion.
OCM052028R
CM-aust-1a.p65
5/21/2008, 2:05 PM
19
Page 37 of 269
1FEATURES OF YOUR HYUNDAI
26
!
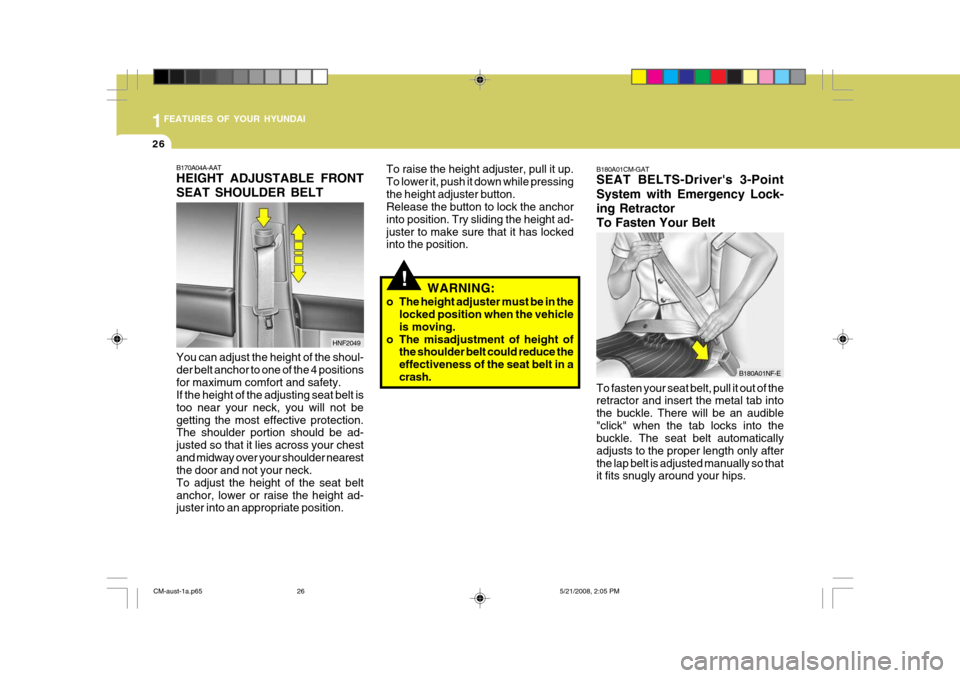
To raise the height adjuster, pull it up. To lower it, push it down while pressingthe height adjuster button. Release the button to lock the anchor into position. Try sliding the height ad-juster to make sure that it has locked into the position.
WARNING:
o The height adjuster must be in the locked position when the vehicle is moving.
o The misadjustment of height of the shoulder belt could reduce theeffectiveness of the seat belt in acrash. B180A01CM-GAT SEAT BELTS-Driver's 3-Point System with Emergency Lock- ing RetractorTo Fasten Your Belt To fasten your seat belt, pull it out of the retractor and insert the metal tab into the buckle. There will be an audible"click" when the tab locks into the buckle. The seat belt automatically adjusts to the proper length only afterthe lap belt is adjusted manually so that it fits snugly around your hips.
B170A04A-AAT HEIGHT ADJUSTABLE FRONT SEAT SHOULDER BELT You can adjust the height of the shoul- der belt anchor to one of the 4 positionsfor maximum comfort and safety. If the height of the adjusting seat belt is too near your neck, you will not begetting the most effective protection. The shoulder portion should be ad- justed so that it lies across your chestand midway over your shoulder nearest the door and not your neck. To adjust the height of the seat beltanchor, lower or raise the height ad- juster into an appropriate position.
HNF2049
B180A01NF-E
CM-aust-1a.p65
5/21/2008, 2:05 PM
26
Page 93 of 269
1FEATURES OF YOUR HYUNDAI
82
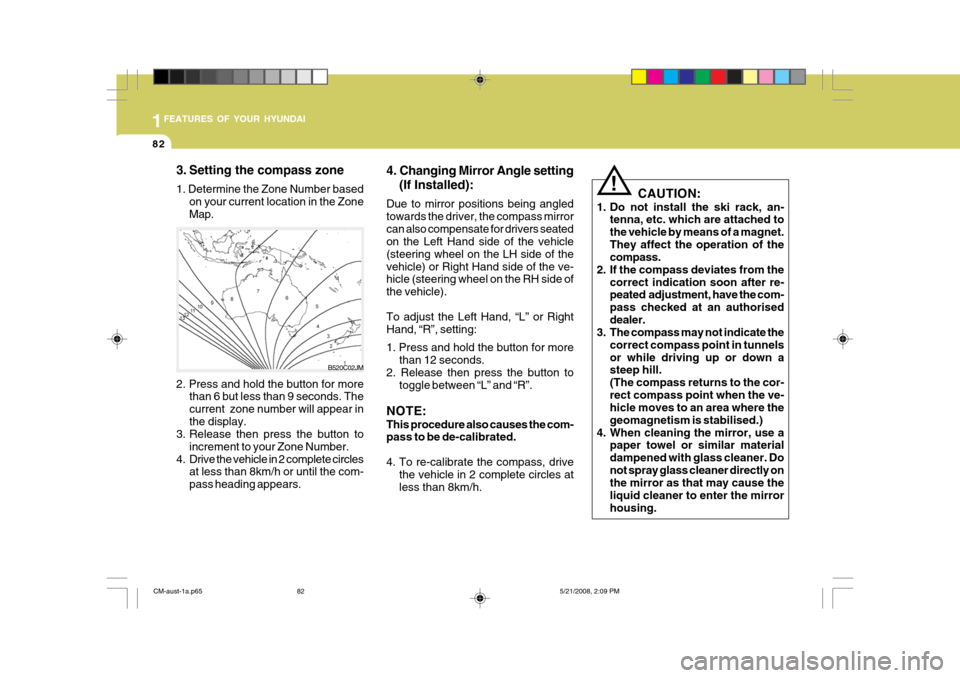
3. Setting the compass zone 1. Determine the Zone Number based
on your current location in the Zone Map.
2. Press and hold the button for more than 6 but less than 9 seconds. Thecurrent zone number will appear inthe display.
3. Release then press the button to
increment to your Zone Number.
4. Drive the vehicle in 2 complete circles at less than 8km/h or until the com-pass heading appears. B520C02JM
!
CAUTION:
1. Do not install the ski rack, an- tenna, etc. which are attached to the vehicle by means of a magnet.They affect the operation of the compass.
2. If the compass deviates from the
correct indication soon after re-peated adjustment, have the com- pass checked at an authoriseddealer.
3. The compass may not indicate the
correct compass point in tunnelsor while driving up or down a steep hill. (The compass returns to the cor-rect compass point when the ve- hicle moves to an area where the geomagnetism is stabilised.)
4. When cleaning the mirror, use a paper towel or similar materialdampened with glass cleaner. Donot spray glass cleaner directly on the mirror as that may cause the liquid cleaner to enter the mirrorhousing.
4. Changing Mirror Angle setting
(If Installed):
Due to mirror positions being angledtowards the driver, the compass mirrorcan also compensate for drivers seated on the Left Hand side of the vehicle (steering wheel on the LH side of thevehicle) or Right Hand side of the ve- hicle (steering wheel on the RH side of the vehicle). To adjust the Left Hand, “L” or Right Hand, “R”, setting: 1. Press and hold the button for more than 12 seconds.
2. Release then press the button to
toggle between “L” and “R”.
NOTE: This procedure also causes the com- pass to be de-calibrated.
4. To re-calibrate the compass, drive the vehicle in 2 complete circles at less than 8km/h.
CM-aust-1a.p65 5/21/2008, 2:09 PM
82
Page 235 of 269
6DO-IT-YOURSELF MAINTENANCE
28
OCM055007L
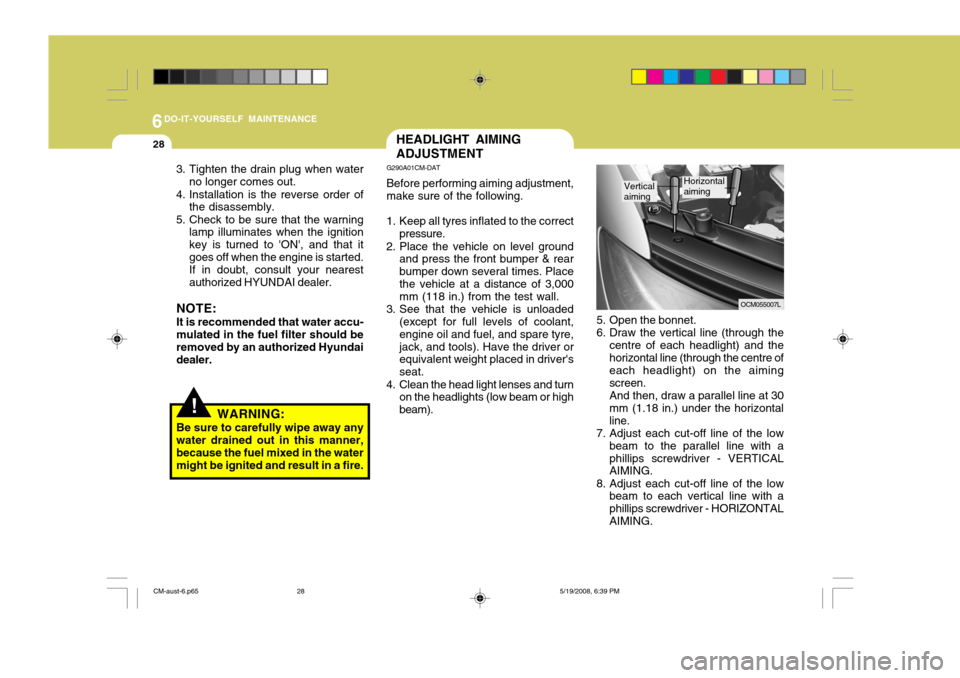
5. Open the bonnet.
6. Draw the vertical line (through the centre of each headlight) and thehorizontal line (through the centre of each headlight) on the aiming screen.And then, draw a parallel line at 30mm (1.18 in.) under the horizontalline.
7. Adjust each cut-off line of the low
beam to the parallel line with aphillips screwdriver - VERTICAL AIMING.
8. Adjust each cut-off line of the low beam to each vertical line with a phillips screwdriver - HORIZONTALAIMING.
Vertical aimingHorizontal aiming
HEADLIGHT AIMING ADJUSTMENT
G290A01CM-DAT Before performing aiming adjustment, make sure of the following.
1. Keep all tyres inflated to the correct pressure.
2. Place the vehicle on level ground and press the front bumper & rear bumper down several times. Placethe vehicle at a distance of 3,000 mm (118 in.) from the test wall.
3. See that the vehicle is unloaded (except for full levels of coolant, engine oil and fuel, and spare tyre,jack, and tools). Have the driver or equivalent weight placed in driver's seat.
4. Clean the head light lenses and turn on the headlights (low beam or highbeam).
!WARNING:
Be sure to carefully wipe away any water drained out in this manner, because the fuel mixed in the watermight be ignited and result in a fire.
3. Tighten the drain plug when water
no longer comes out.
4. Installation is the reverse order of the disassembly.
5. Check to be sure that the warning lamp illuminates when the ignitionkey is turned to 'ON', and that itgoes off when the engine is started.If in doubt, consult your nearestauthorized HYUNDAI dealer.
NOTE: It is recommended that water accu- mulated in the fuel filter should be removed by an authorized Hyundai dealer.
CM-aust-6.p65 5/19/2008, 6:39 PM
28