driver seat adjustment Hyundai Santa Fe 2011 Owner's Manual - RHD (UK, Australia)
[x] Cancel search | Manufacturer: HYUNDAI, Model Year: 2011, Model line: Santa Fe, Model: Hyundai Santa Fe 2011Pages: 312, PDF Size: 23.92 MB
Page 21 of 312
Safety system of your vehicle
4
3
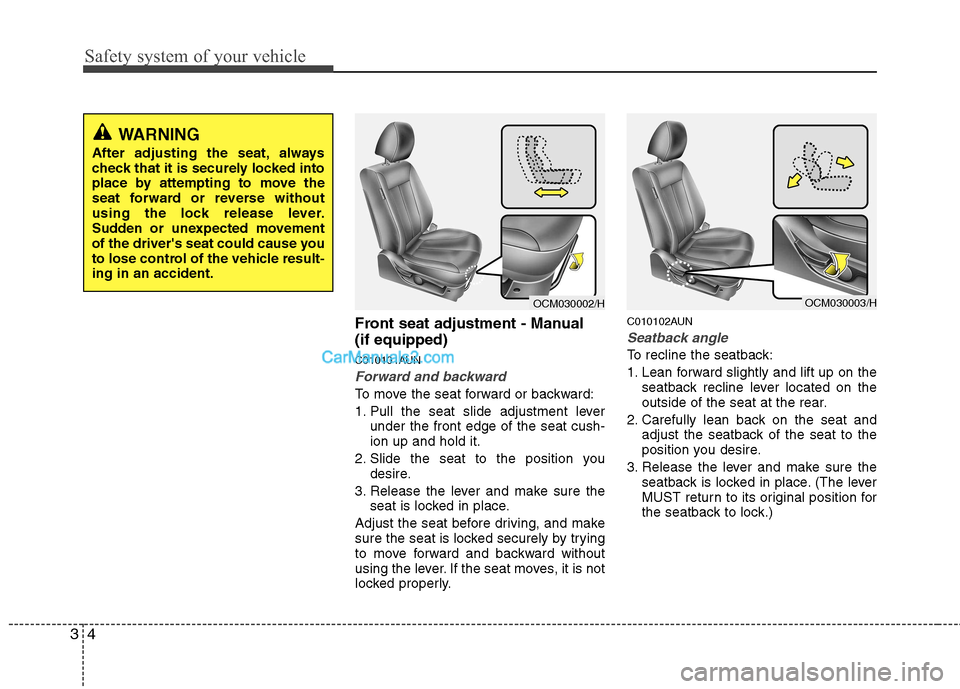
Front seat adjustment - Manual (if equipped)
C010101AUN
Forward and backward
To move the seat forward or backward:
1. Pull the seat slide adjustment lever
under the front edge of the seat cush- ion up and hold it.
2. Slide the seat to the position you desire.
3. Release the lever and make sure the seat is locked in place.
Adjust the seat before driving, and make
sure the seat is locked securely by trying
to move forward and backward without
using the lever. If the seat moves, it is not
locked properly. C010102AUN
Seatback angle
To recline the seatback:
1. Lean forward slightly and lift up on the
seatback recline lever located on the
outside of the seat at the rear.
2. Carefully lean back on the seat and adjust the seatback of the seat to the
position you desire.
3. Release the lever and make sure the seatback is locked in place. (The lever
MUST return to its original position for
the seatback to lock.)
OCM030003/HOCM030002/H
WARNING
After adjusting the seat, always
check that it is securely locked into
place by attempting to move the
seat forward or reverse without
using the lock release lever.
Sudden or unexpected movement
of the driver's seat could cause you
to lose control of the vehicle result-ing in an accident.
Page 22 of 312
35
Safety system of your vehicle
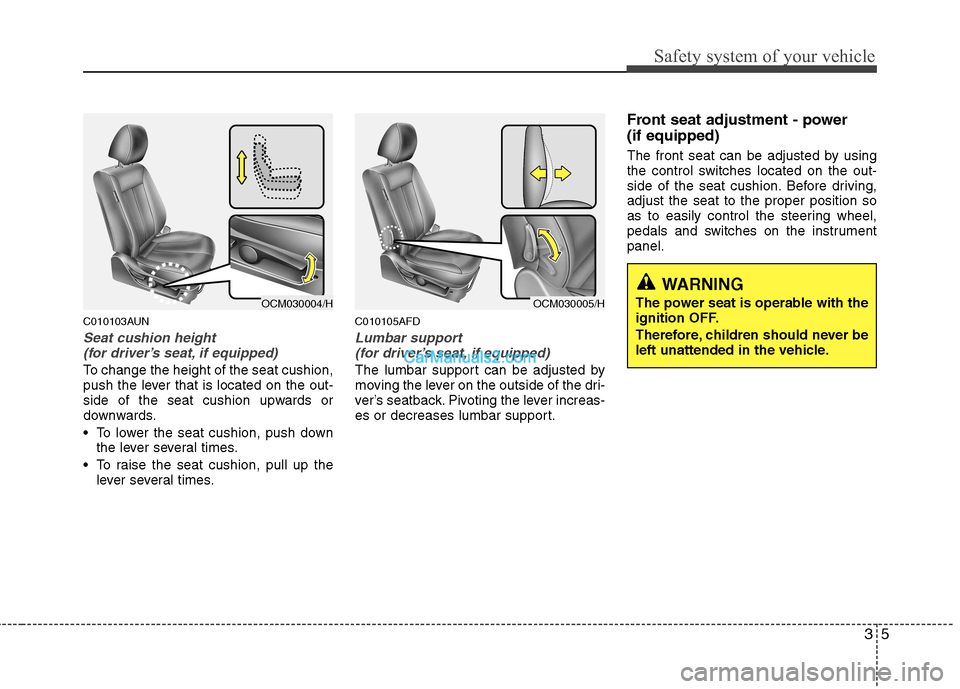
C010103AUN
Seat cushion height (for driver’s seat, if equipped)
To change the height of the seat cushion,
push the lever that is located on the out-
side of the seat cushion upwards or
downwards.
To lower the seat cushion, push down the lever several times.
To raise the seat cushion, pull up the lever several times. C010105AFD
Lumbar support
(for driver’s seat, if equipped)
The lumbar support can be adjusted by
moving the lever on the outside of the dri-
ver’s seatback. Pivoting the lever increas-
es or decreases lumbar support. Front seat adjustment - power (if equipped)
The front seat can be adjusted by using
the control switches located on the out-
side of the seat cushion. Before driving,adjust the seat to the proper position so
as to easily control the steering wheel,
pedals and switches on the instrumentpanel.
OCM030004/HOCM030005/H
WARNING
The power seat is operable with the
ignition OFF.
Therefore, children should never be
left unattended in the vehicle.
Page 25 of 312
Safety system of your vehicle
8
3
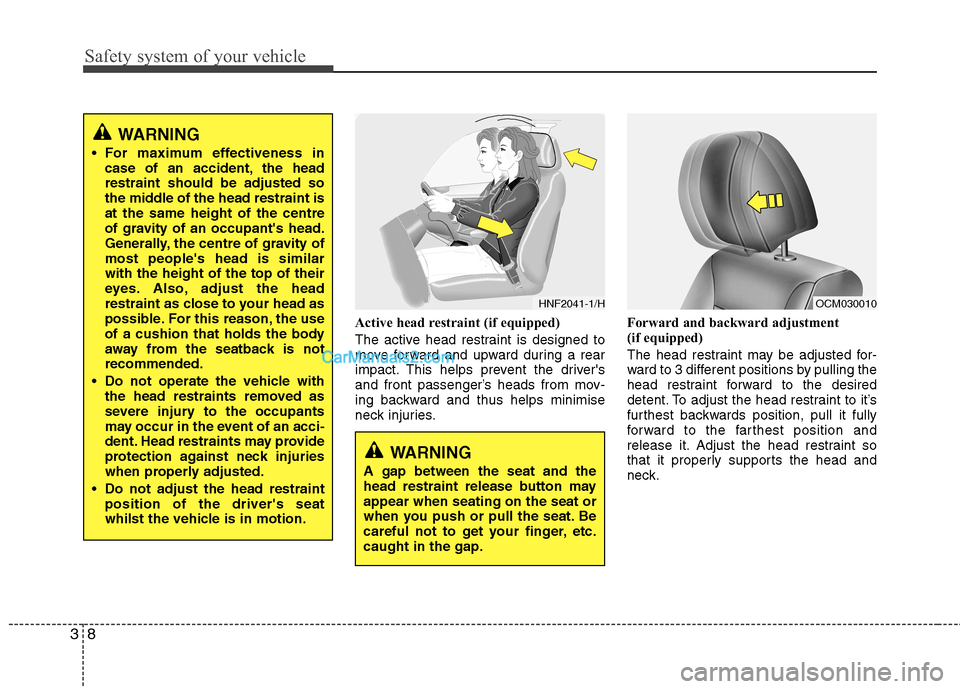
Active head restraint (if equipped)
The active head restraint is designed to
move forward and upward during a rear
impact. This helps prevent the driver's
and front passenger’s heads from mov-
ing backward and thus helps minimise
neck injuries. Forward and backward adjustment
(if equipped)
The head restraint may be adjusted for-
ward to 3 different positions by pulling the
head restraint forward to the desired
detent. To adjust the head restraint to it’s
furthest backwards position, pull it fully
forward to the farthest position and
release it. Adjust the head restraint so
that it properly supports the head and
neck.
OCM030010HNF2041-1/H
WARNING
For maximum effectiveness in case of an accident, the head restraint should be adjusted so
the middle of the head restraint isat the same height of the centre
of gravity of an occupant's head.
Generally, the centre of gravity ofmost people's head is similarwith the height of the top of their
eyes. Also, adjust the head
restraint as close to your head as
possible. For this reason, the use
of a cushion that holds the body
away from the seatback is notrecommended.
Do not operate the vehicle with the head restraints removed as
severe injury to the occupants
may occur in the event of an acci-
dent. Head restraints may provide
protection against neck injuries
when properly adjusted.
Do not adjust the head restraint position of the driver's seat
whilst the vehicle is in motion.
WARNING
A gap between the seat and the
head restraint release button mayappear when seating on the seat or
when you push or pull the seat. Be
careful not to get your finger, etc.caught in the gap.
Page 109 of 312
Features of your vehicle
34
4
D140100AUN
Inside rearview mirror
Adjust the rearview mirror to centre on
the view through the rear window. Make
this adjustment before you start driving.
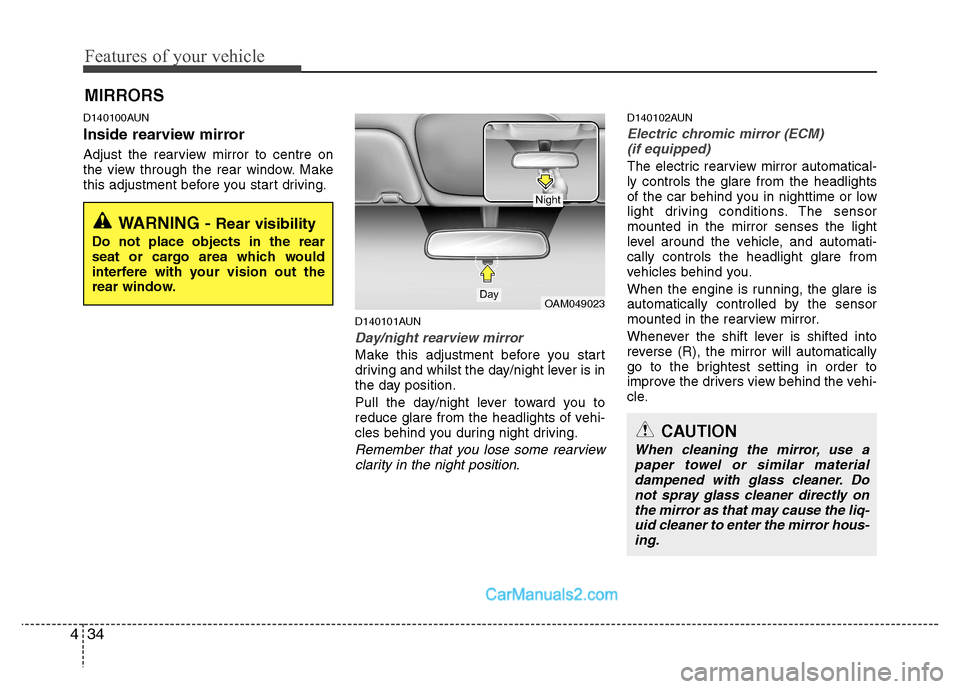
D140101AUN
Day/night rearview mirror
Make this adjustment before you start
driving and whilst the day/night lever is in
the day position.
Pull the day/night lever toward you to
reduce glare from the headlights of vehi-
cles behind you during night driving.
Remember that you lose some rearviewclarity in the night position.
D140102AUN
Electric chromic mirror (ECM)(if equipped)
The electric rearview mirror automatical- ly controls the glare from the headlights
of the car behind you in nighttime or low
light driving conditions. The sensormounted in the mirror senses the light
level around the vehicle, and automati-cally controls the headlight glare from
vehicles behind you.
When the engine is running, the glare is
automatically controlled by the sensor
mounted in the rearview mirror.
Whenever the shift lever is shifted into
reverse (R), the mirror will automatically
go to the brightest setting in order to
improve the drivers view behind the vehi-
cle.
MIRRORS
WARNING -
Rear visibility
Do not place objects in the rear
seat or cargo area which would
interfere with your vision out the
rear window.
OAM049023
CAUTION
When cleaning the mirror, use a paper towel or similar materialdampened with glass cleaner. Do not spray glass cleaner directly on
the mirror as that may cause the liq- uid cleaner to enter the mirror hous-ing.
Day
Night