instrument panel Hyundai Santa Fe 2016 User Guide
[x] Cancel search | Manufacturer: HYUNDAI, Model Year: 2016, Model line: Santa Fe, Model: Hyundai Santa Fe 2016Pages: 759, PDF Size: 29.36 MB
Page 77 of 759
357
Safety features of your vehicle
Main components of occupant
classification system
A detection device located withinthe front passenger seat cushion.
Electronic system to determine whether the front passenger air
bag system should be activated or
deactivated.
An indicator light located on the instrument panel which illuminates
the words PASSENGER AIR BAG
"OFF" indicating the front passen-
ger air bag system is deactivated.
The instrument panel air bag indi- cator light is interconnected with
the occupant classification system.
If the front passenger seat is occu-
pied by a person that the system
determines to be of adult size, and
he/she sits properly (sitting upright
with the seatback in an upright posi-
tion, centered on the seat cushion
with their seat belt on, legs comfort-
ably extended and their feet on the
floor), the PASSENGER AIR BAG
"OFF" indicator will be turned off and
the front passenger's air bag will be
able to inflate, if necessary, in frontal
crashes. You will find the PASSENGER AIR
BAG "OFF" indicator on the center
facia panel. This system detects the
conditions 1~4 in the following table
and activates or deactivates the front
passenger air bag based on these
conditions.
Always be sure that you and all vehi-
cle occupants are seated and
restrained properly (sitting upright
with the seat in an upright position,
centered on the seat cushion, with
the person's legs comfortably
extended, feet on the floor, and wear-
ing the safety belt properly) for the
most effective protection by the air
bag and the safety belt.
The OCS may not function proper-
ly if the passenger takes actions
which can affect the classification
system. These include:
(1) Failing to sit in an upright posi- tion.
(2) Leaning against the door or center console.
(3) Sitting towards the sides or the front of the seat.
(4) Putting legs on the dashboard or resting them on other loca-
tions which reduce the passen-
ger weight on the front seat.
(5) Improperly wearing the safety belt.
(6) Reclining the seat back.
(7) Wearing a thick cloth like ski wear or hip protection wear.
(8) Put on the seat an additional thick cushion.
Page 82 of 759
Safety features of your vehicle
62
3
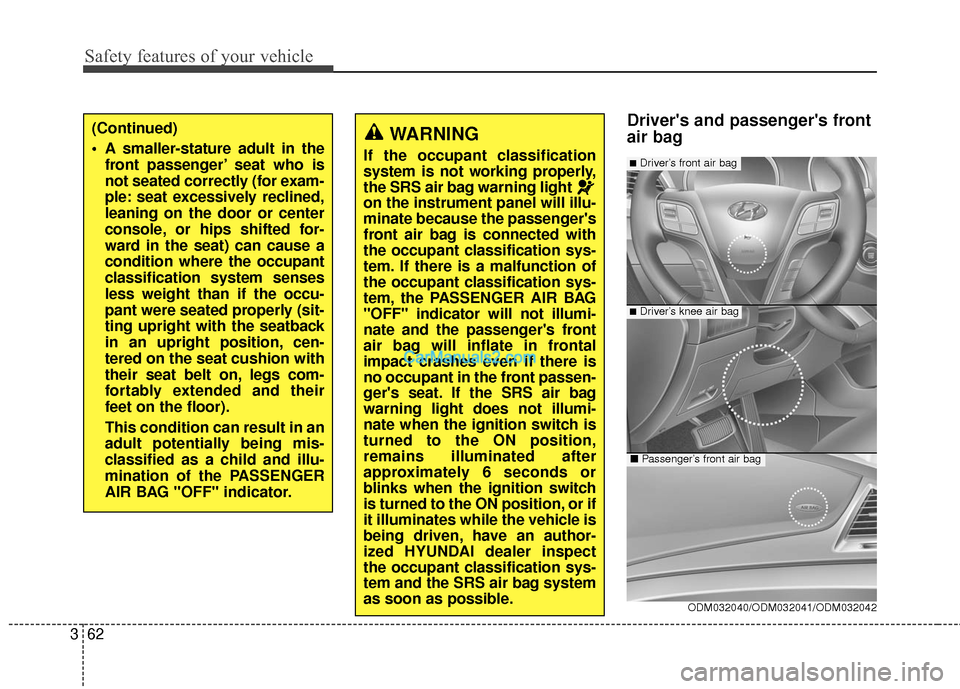
Driver's and passenger's front
air bagWARNING
If the occupant classification
system is not working properly,
the SRS air bag warning light
on the instrument panel will illu-
minate because the passenger's
front air bag is connected with
the occupant classification sys-
tem. If there is a malfunction of
the occupant classification sys-
tem, the PASSENGER AIR BAG
"OFF" indicator will not illumi-
nate and the passenger's front
air bag will inflate in frontal
impact crashes even if there is
no occupant in the front passen-
ger's seat. If the SRS air bag
warning light does not illumi-
nate when the ignition switch is
turned to the ON position,
remains illuminated after
approximately 6 seconds or
blinks when the ignition switch
is turned to the ON position, or if
it illuminates while the vehicle is
being driven, have an author-
ized HYUNDAI dealer inspect
the occupant classification sys-
tem and the SRS air bag system
as soon as possible.
(Continued)
A smaller-stature adult in the
front passenger’ seat who is
not seated correctly (for exam-
ple: seat excessively reclined,
leaning on the door or center
console, or hips shifted for-
ward in the seat) can cause a
condition where the occupant
classification system senses
less weight than if the occu-
pant were seated properly (sit-
ting upright with the seatback
in an upright position, cen-
tered on the seat cushion with
their seat belt on, legs com-
fortably extended and their
feet on the floor).
This condition can result in an
adult potentially being mis-
classified as a child and illu-
mination of the PASSENGER
AIR BAG "OFF" indicator.
ODM032040/ODM032041/ODM032042
■Driver’s knee air bag
■Driver’s front air bag
■ Passenger’s front air bag
Page 85 of 759
365
Safety features of your vehicle
(Continued)
If the SRS air bag warninglight remains illuminated while
the vehicle is being driven,
have an authorized HYUNDAI
dealer inspect the air bag sys-
tem as soon as possible.
Air bags can only be used once – have an authorized HYUNDAI
dealer replace the air bag
immediately after deployment.
The SRS is designed to deploy the front air bags only when
frontal impact is sufficiently
severe and when the impact
angle is toward from the for-
ward longitudinal axis of the
vehicle. Additionally, the air
bags will only deploy once.
Seat belts must be worn at all
times.
Front air bags are not intended to deploy in side-impact, rear-
impact or rollover crashes. In
addition, front air bags will not
deploy in frontal crashes below
the deployment threshold.
(Continued)(Continued)
No objects should be placedover or near the air bag mod-
ules on the steering wheel,
instrument panel, and the
front passenger's panel above
the glove box, because any
such object could cause harm
if the vehicle is in a crash
severe enough to cause the
air bags to deploy.
Never place covers, blankets or seat warmers on the pas-
senger seat as these may
interfere with the occupant
classification system.
Do not tamper with or discon- nect SRS wiring or other com-
ponents of the SRS system.
Doing so could result in injury,
due to accidental deployment
of the air bags or by rendering
the SRS inoperative.
(Continued)(Continued)
Front and side air bags caninjure occupants improperly
positioned in the front seats.
Move your seat as far back as practical from the front air
bags, while still maintaining
control of the vehicle.
You and your passengers should never sit or lean unnec-
essarily close to the air bags.
Improperly positioned driver
and passengers can be severe-
ly injured by inflating air bags.
Never lean against the door or center console – always sit in
an upright position.
Do not allow a passenger to ride in the front seat when the
PASSENGER AIR BAG "OFF"
indicator is illuminated,
because the air bag will not
deploy in the event of a mod-
erate or severe frontal crash.
(Continued)
Page 95 of 759
375
Safety features of your vehicle
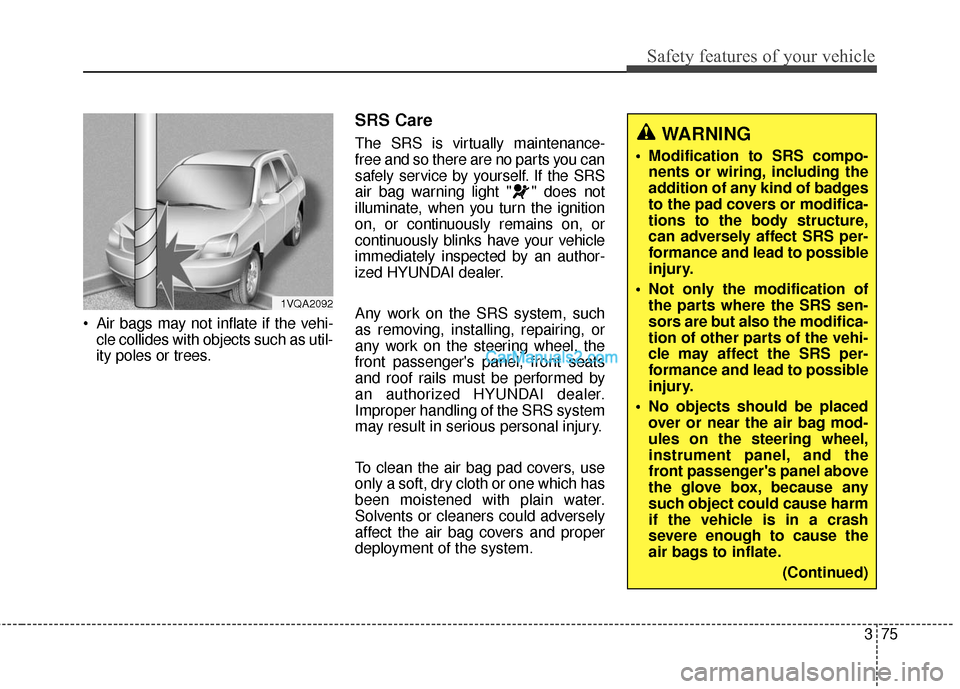
Air bags may not inflate if the vehi-cle collides with objects such as util-
ity poles or trees.
SRS Care
The SRS is virtually maintenance-
free and so there are no parts you can
safely service by yourself. If the SRS
air bag warning light " " does not
illuminate, when you turn the ignition
on, or continuously remains on, or
continuously blinks have your vehicle
immediately inspected by an author-
ized HYUNDAI dealer.
Any work on the SRS system, such
as removing, installing, repairing, or
any work on the steering wheel, the
front passenger's panel, front seats
and roof rails must be performed by
an authorized HYUNDAI dealer.
Improper handling of the SRS system
may result in serious personal injury.
To clean the air bag pad covers, use
only a soft, dry cloth or one which has
been moistened with plain water.
Solvents or cleaners could adversely
affect the air bag covers and proper
deployment of the system.WARNING
Modification to SRS compo-nents or wiring, including the
addition of any kind of badges
to the pad covers or modifica-
tions to the body structure,
can adversely affect SRS per-
formance and lead to possible
injury.
Not only the modification of the parts where the SRS sen-
sors are but also the modifica-
tion of other parts of the vehi-
cle may affect the SRS per-
formance and lead to possible
injury.
No objects should be placed over or near the air bag mod-
ules on the steering wheel,
instrument panel, and the
front passenger's panel above
the glove box, because any
such object could cause harm
if the vehicle is in a crash
severe enough to cause the
air bags to inflate.
(Continued)
1VQA2092
Page 151 of 759
Features of your vehicle
54
4
(Continued)
• Some noises may be heard when
operating the steering in low tem-
peratures. When the temperature
rises, the noise will disappear. This
is a normal condition.
• The steering effort may become heavy when the charging system
warning light comes on.Tilt & telescopic steering
A tilt steering wheel allows you to
adjust the steering wheel before you
drive. You can also raise it to give
your legs more room when you exit
and enter the vehicle (if equipped).
The steering wheel should be posi-
tioned so that it is comfortable for
you to drive, while permitting you to
see the instrument panel warning
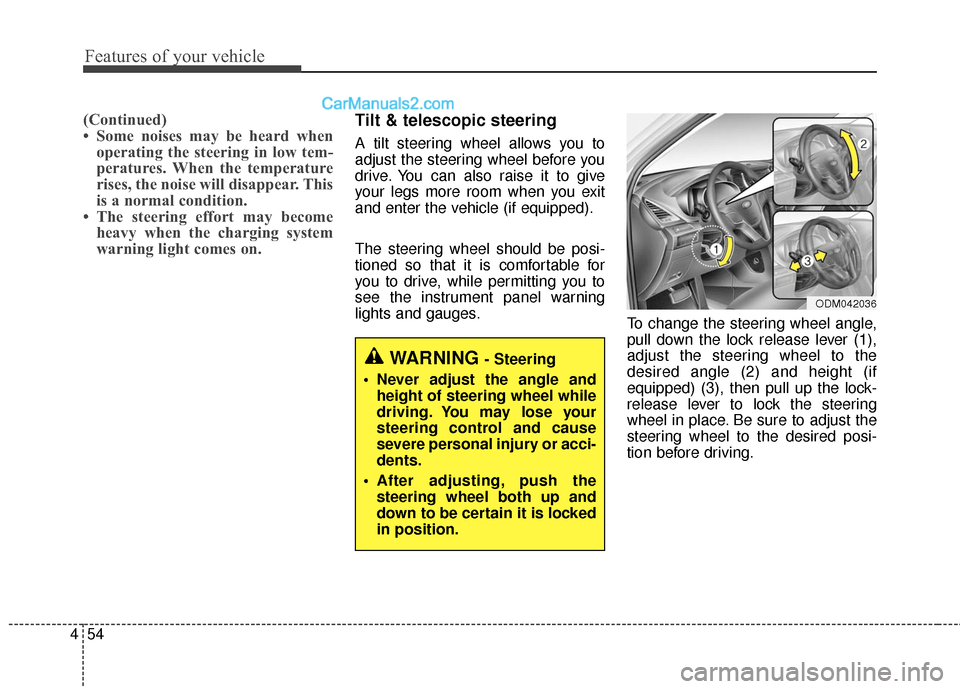
lights and gauges. To change the steering wheel angle,
pull down the lock release lever (1),
adjust the steering wheel to the
desired angle (2) and height (if
equipped) (3), then pull up the lock-
release lever to lock the steering
wheel in place. Be sure to adjust the
steering wheel to the desired posi-
tion before driving.
WARNING - Steering
Never adjust the angle and height of steering wheel while
driving. You may lose your
steering control and cause
severe personal injury or acci-
dents.
After adjusting, push the steering wheel both up and
down to be certain it is locked
in position.
ODM042036
Page 169 of 759
Features of your vehicle
72
4
Instrument Cluster Control
Adjusting Instrument Cluster
Illumination
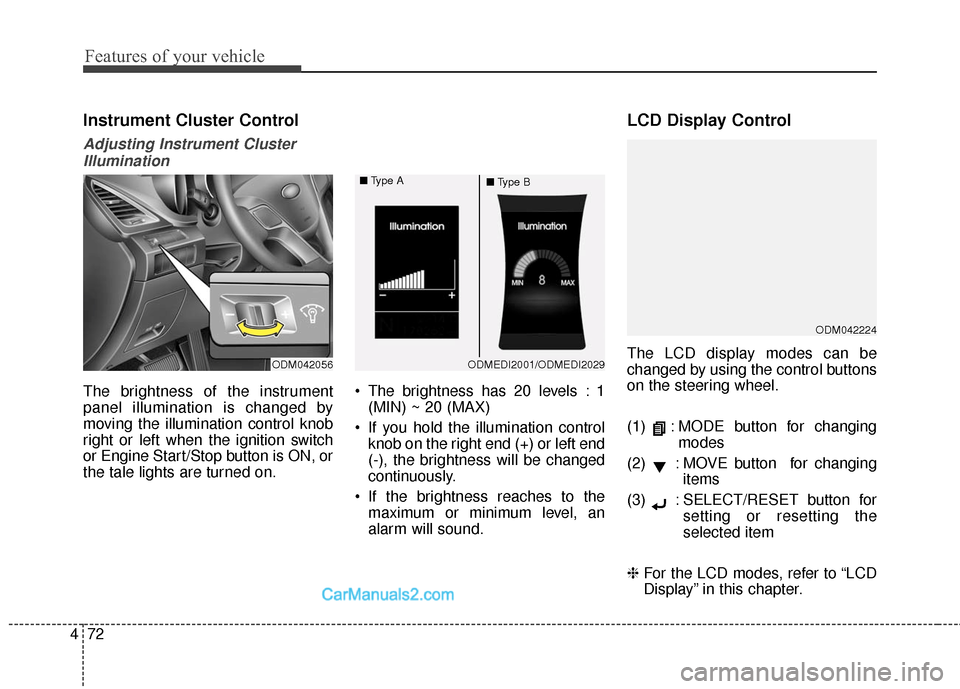
The brightness of the instrument
panel illumination is changed by
moving the illumination control knob
right or left when the ignition switch
or Engine Start/Stop button is ON, or
the tale lights are turned on. The brightness has 20 levels : 1
(MIN) ~ 20 (MAX)
If you hold the illumination control knob on the right end (+) or left end
(-), the brightness will be changed
continuously.
If the brightness reaches to the maximum or minimum level, an
alarm will sound.
LCD Display Control
The LCD display modes can be
changed by using the control buttons
on the steering wheel.
(1) : MODE button for changing modes
(2) : MOVE button for changing items
(3) : SELECT/RESET button for setting or resetting the
selected item
❈ For the LCD modes, refer to “LCD
Display” in this chapter.
ODM042224
ODM042056ODMEDI2001/ODMEDI2029
■
Type A
■Type B
Page 210 of 759
4113
Features of your vehicle
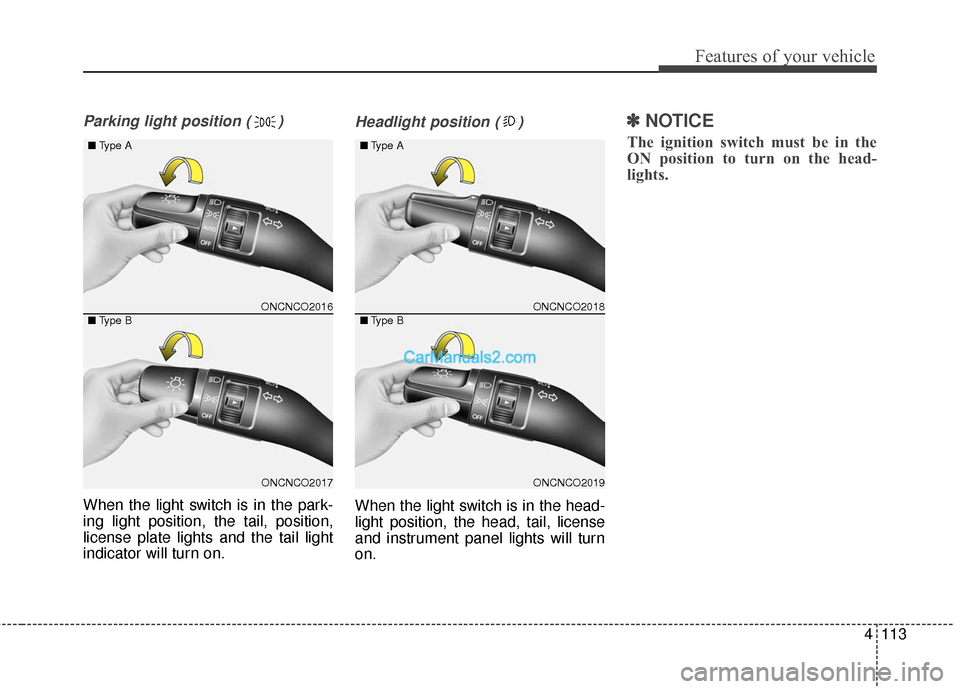
Parking light position ( )
When the light switch is in the park-
ing light position, the tail, position,
license plate lights and the tail light
indicator will turn on.
Headlight position ( )
When the light switch is in the head-
light position, the head, tail, license
and instrument panel lights will turn
on.
✽ ✽NOTICE
The ignition switch must be in the
ON position to turn on the head-
lights.
ONCNCO2016
ONCNCO2017
■
Type A
■ Type B
ONCNCO2018
ONCNCO2019
■
Type A
■ Type B
Page 211 of 759
Features of your vehicle
114
4
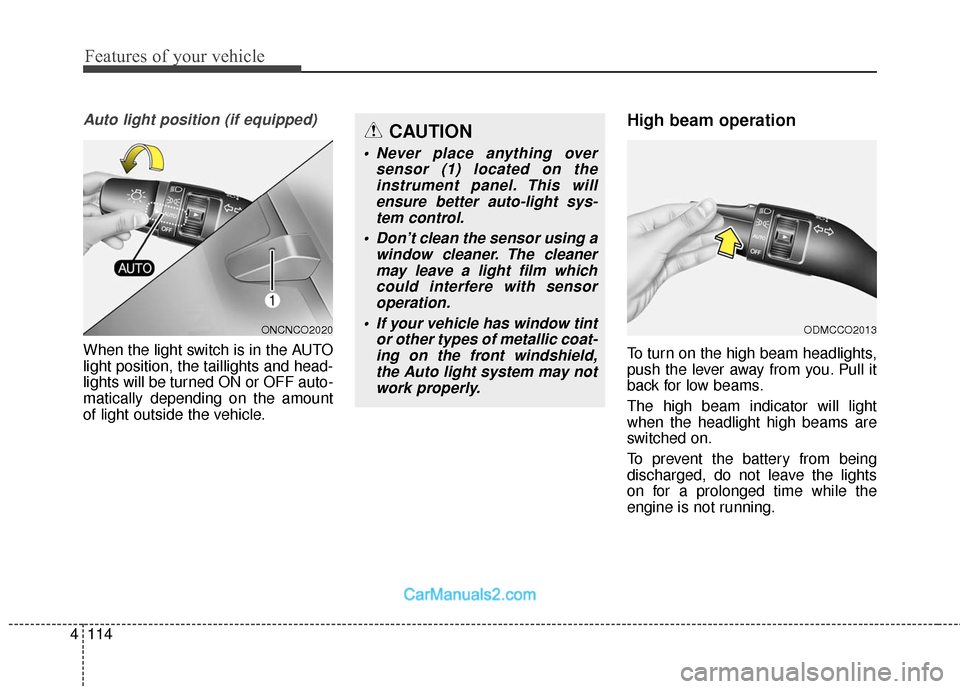
Auto light position (if equipped)
When the light switch is in the AUTO
light position, the taillights and head-
lights will be turned ON or OFF auto-
matically depending on the amount
of light outside the vehicle.
High beam operation
To turn on the high beam headlights,
push the lever away from you. Pull it
back for low beams.
The high beam indicator will light
when the headlight high beams are
switched on.
To prevent the battery from being
discharged, do not leave the lights
on for a prolonged time while the
engine is not running.
ONCNCO2020
CAUTION
• Never place anything over
sensor (1) located on theinstrument panel. This willensure better auto-light sys-tem control.
Don’t clean the sensor using a window cleaner. The cleanermay leave a light film whichcould interfere with sensoroperation.
If your vehicle has window tint or other types of metallic coat-ing on the front windshield,the Auto light system may notwork properly.
ODMCCO2013
Page 212 of 759
4115
Features of your vehicle
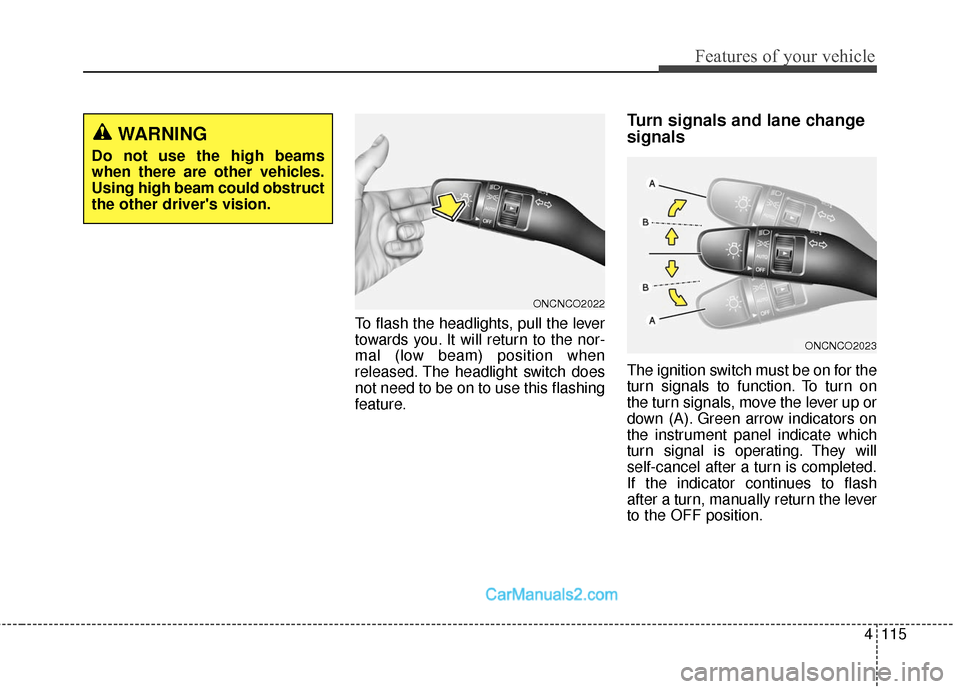
To flash the headlights, pull the lever
towards you. It will return to the nor-
mal (low beam) position when
released. The headlight switch does
not need to be on to use this flashing
feature.
Turn signals and lane change
signals
The ignition switch must be on for the
turn signals to function. To turn on
the turn signals, move the lever up or
down (A). Green arrow indicators on
the instrument panel indicate which
turn signal is operating. They will
self-cancel after a turn is completed.
If the indicator continues to flash
after a turn, manually return the lever
to the OFF position.
WARNING
Do not use the high beams
when there are other vehicles.
Using high beam could obstruct
the other driver's vision.
ONCNCO2022
ONCNCO2023
Page 221 of 759
Features of your vehicle
124
4
✽
✽
NOTICE
If you want to defrost and defog the
front windshield, refer to
“Windshield defrosting and defog-
ging” in this section.
Rear window defroster
The defroster heats the window to
remove frost, fog and thin ice from
the rear window, while the engine is
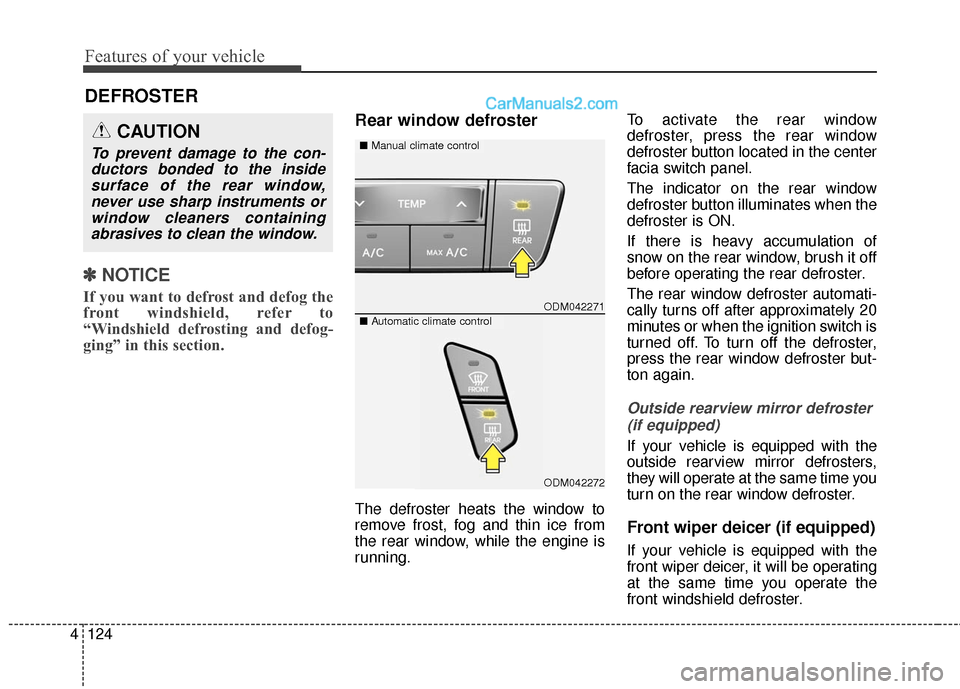
running. To activate the rear window
defroster, press the rear window
defroster button located in the center
facia switch panel.
The indicator on the rear window
defroster button illuminates when the
defroster is ON.
If there is heavy accumulation of
snow on the rear window, brush it off
before operating the rear defroster.
The rear window defroster automati-
cally turns off after approximately 20
minutes or when the ignition switch is
turned off. To turn off the defroster,
press the rear window defroster but-
ton again.
Outside rearview mirror defroster
(if equipped)
If your vehicle is equipped with the
outside rearview mirror defrosters,
they will operate at the same time you
turn on the rear window defroster.
Front wiper deicer (if equipped)
If your vehicle is equipped with the
front wiper deicer, it will be operating
at the same time you operate the
front windshield defroster.
DEFROSTER
ODM042271
■ Manual climate controlCAUTION
To prevent damage to the con-
ductors bonded to the insidesurface of the rear window,never use sharp instruments orwindow cleaners containingabrasives to clean the window.
■ Automatic climate control
ODM042272