Repair Hyundai Santa Fe 2020 Owner's Guide
[x] Cancel search | Manufacturer: HYUNDAI, Model Year: 2020, Model line: Santa Fe, Model: Hyundai Santa Fe 2020Pages: 557, PDF Size: 19.29 MB
Page 484 of 557
Compact spare tire replacement
A compact spare tire has a shorter
tread life than a regular size tire.
Replace it when you can see the
tread wear indicator bars on the tire.
The replacement compact spare tire
should be the same size and design
tire as the one provided with your
new vehicle and should be mounted
on the same compact spare tire
wheel. The compact spare tire is not
designed to be mounted on a regular
size wheel, and the compact spare
tire wheel is not designed for mount-
ing a regular size tire.
Wheel Replacement
When replacing the metal wheels for
any reason, make sure the new
wheels are equivalent to the original
factory units in diameter, rim width
and offset.
Tire Traction
Tire traction can be reduced if you
drive on worn tires, tires that are
improperly inflated or on slippery
road surfaces. Tires should be
replaced when the tread depth is at
least 2/32 inch (1.6 mm). To reduce
the possibility of losing control, slow
down whenever there is rain, snow or
ice on the road.
The original tire should be
repaired or replaced as soon as
possible to avoid failure of the
spare and loss of vehicle con-
trol resulting in an accident. The
compact spare tire is for emer-
gency use only. Do not operate
your vehicle over 50 mph (80
km/h) when using the compact
spare tire.
WARNING
Tires degrade over time, even
when they are not being used.
Regardless of the remaining
tread, HYUNDAI recommends
that tires be replaced after six
(6) years of normal service.
When replacing tires (or
wheels), it is recommended to
replace the two front or two
rear tires (or wheels) as a pair.
Replacing just one tire can
seriously affect your vehicle's
handling. If only replacing one
pair of tires, it is recommend-
ed to install the pair of new
tires on the rear axle.
Heat caused by hot climates
or frequent high loading con-
ditions can accelerate the
aging process. Failure to fol-
low this warning may cause
sudden tire failure, which
could lead to a loss of vehicle
control resulting in an acci-
dent.
Maintenance
7-42
Page 492 of 557
All Season Tires
HYUNDAI specifies all season tires
on some models to provide good
performance for use all year round,
including snowy and icy road condi-
tions. All season tires are identified
by ALL SEASON and/or M+S (Mud
and Snow) on the tire sidewall. Snow
tires have better snow traction than
all season tires and may be more
appropriate in some areas.
Snow Tires
If you equip your car with snow tires,
they should be the same size and
have the same load capacity as the
original tires. Snow tires should be
installed on all four wheels; other-
wise, poor handling may result. Snow
tires should carry 4 psi (28 kPa)
more air pressure than the pressure
recommended for the standard tires
on the tire label on the driver’s side of
the center pillar, or up to the maxi-
mum pressure shown on the tire
sidewall, whichever is less. Do not
drive faster than 75 mph (120 km/h)
when your vehicle is equipped with
snow tires.
Radial-Ply Tires
Radial-ply tires provide improved
tread life, road hazard resistance and
smoother high speed ride. The radi-
al-ply tires used on this vehicle are of
belted construction, and are selected
to complement the ride and handling
characteristics of your vehicle.
Radial-ply tires have the same load
carrying capacity, as bias-ply or bias
belted tires of the same size, and use
the same recommended inflation
pressure. Mixing of radial-ply tires
with bias-ply or bias belted tires is
not recommended. Any combina-
tions of radial-ply and bias-ply or bias
belted tires when used on the same
vehicle will seriously deteriorate
vehicle handling. The best rule to fol-
low is: Identical pairs of radial-ply
tires should always be used as a set
for the front tires and a set for the
rear tires.Longer wearing tires can be more
susceptible to irregular tread wear. It
is very important to follow the tire
rotation interval in this chapter to
achieve the tread life potential of
these tires. Cuts and punctures in
radial-ply tires are repairable only in
the tread area, because of sidewall
flexing. Consult your tire dealer for
radial-ply tire repairs.
Do not mix bias ply and radial
ply tires under any circum-
stances. This may cause unusu-
al handling characteristics that
may cause loss of vehicle con-
trol resulting in an accident.
WARNING
Maintenance
7-50
Page 494 of 557
F
FU
U S
SE
E S
S
A vehicle's electrical system is pro-
tected from electrical overload dam-
age by fuses.
This vehicle has 2 (or 3) fuse panels,
one located in the driver's side panel
bolster, the other in the engine com-
partment near the battery.
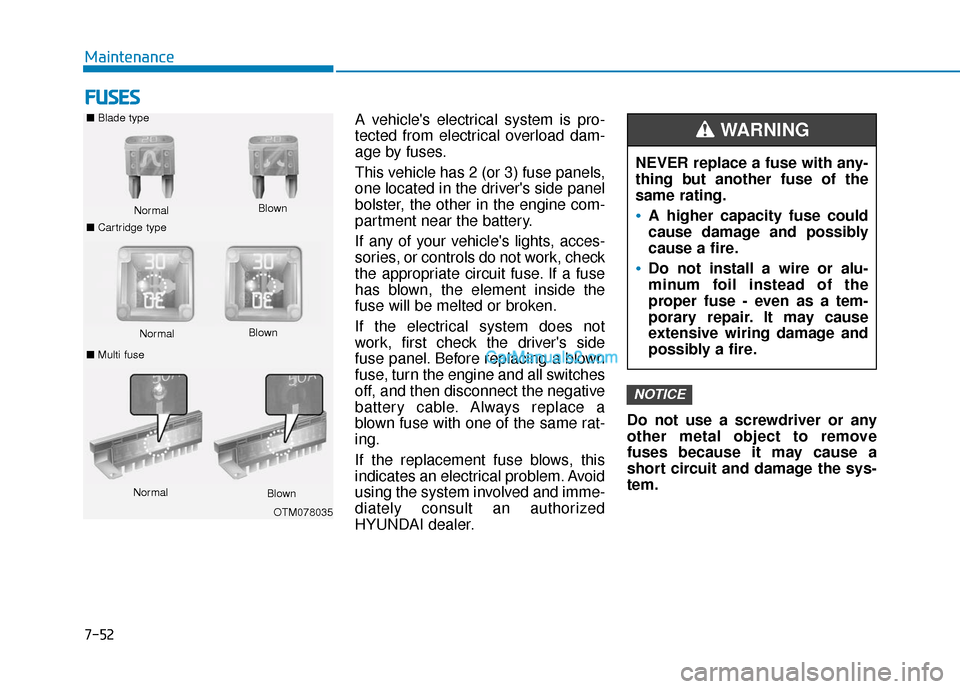
If any of your vehicle's lights, acces-
sories, or controls do not work, check
the appropriate circuit fuse. If a fuse
has blown, the element inside the
fuse will be melted or broken.
If the electrical system does not
work, first check the driver's side
fuse panel. Before replacing a blown
fuse, turn the engine and all switches
off, and then disconnect the negative
battery cable. Always replace a
blown fuse with one of the same rat-
ing.
If the replacement fuse blows, this
indicates an electrical problem. Avoid
using the system involved and imme-
diately consult an authorized
HYUNDAI dealer. Do not use a screwdriver or any
other metal object to remove
fuses because it may cause a
short circuit and damage the sys-
tem.
NOTICE
NEVER replace a fuse with any-
thing but another fuse of the
same rating.
A higher capacity fuse could
cause damage and possibly
cause a fire.
Do not install a wire or alu-
minum foil instead of the
proper fuse - even as a tem-
porary repair. It may cause
extensive wiring damage and
possibly a fire.
WARNING ■
Blade type
Normal
■ Cartridge type Blown
Normal
Blown
■ Multi fuse
Normal Blown
OTM078035
Maintenance
7-52
Page 508 of 557
Daytime running light (DRL),
parking lamp and side marker
lamp
If the LED lamp does not operate,
have the system checked by an
authorized HYUNDAI dealer.
The LED lamps cannot be replaced
as a single unit because it is an inte-
grated unit. The LED lamps has to be
replaced with the unit.
A skilled technician should check or
repair the LED lamp, for it may dam-
age related parts of the vehicle.
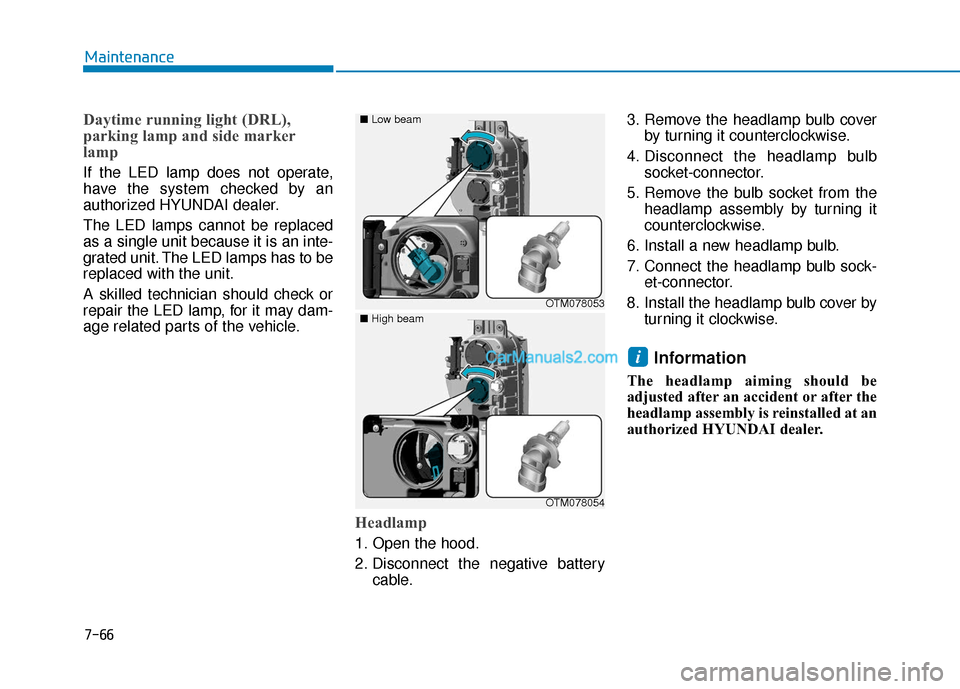
Headlamp
1. Open the hood.
2. Disconnect the negative batterycable. 3. Remove the headlamp bulb cover
by turning it counterclockwise.
4. Disconnect the headlamp bulb socket-connector.
5. Remove the bulb socket from the headlamp assembly by turning it
counterclockwise.
6. Install a new headlamp bulb.
7. Connect the headlamp bulb sock- et-connector.
8. Install the headlamp bulb cover by turning it clockwise.
Information
The headlamp aiming should be
adjusted after an accident or after the
headlamp assembly is reinstalled at an
authorized HYUNDAI dealer.
i
OTM078053
■
Low beam
OTM078054
■
High beam
Maintenance
7-66
Page 510 of 557
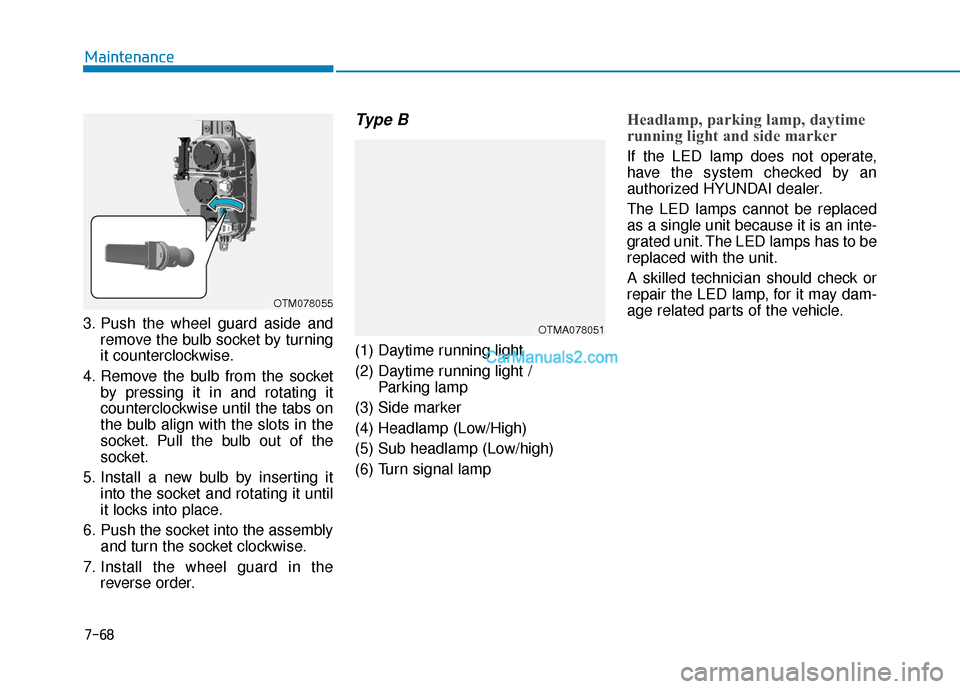
3. Push the wheel guard aside andremove the bulb socket by turning
it counterclockwise.
4. Remove the bulb from the socket by pressing it in and rotating it
counterclockwise until the tabs on
the bulb align with the slots in the
socket. Pull the bulb out of the
socket.
5. Install a new bulb by inserting it into the socket and rotating it until
it locks into place.
6. Push the socket into the assembly and turn the socket clockwise.
7. Install the wheel guard in the reverse order.
Type B
(1) Daytime running light
(2) Daytime running light / Parking lamp
(3) Side marker
(4) Headlamp (Low/High)
(5) Sub headlamp (Low/high)
(6) Turn signal lamp
Headlamp, parking lamp, daytime
running light and side marker
If the LED lamp does not operate,
have the system checked by an
authorized HYUNDAI dealer.
The LED lamps cannot be replaced
as a single unit because it is an inte-
grated unit. The LED lamps has to be
replaced with the unit.
A skilled technician should check or
repair the LED lamp, for it may dam-
age related parts of the vehicle.
7-68
Maintenance
OTM078055
OTMA078051
Page 511 of 557
7-69
7
Maintenance
Front Fog Lamp Replacement
(if equipped)
Type A
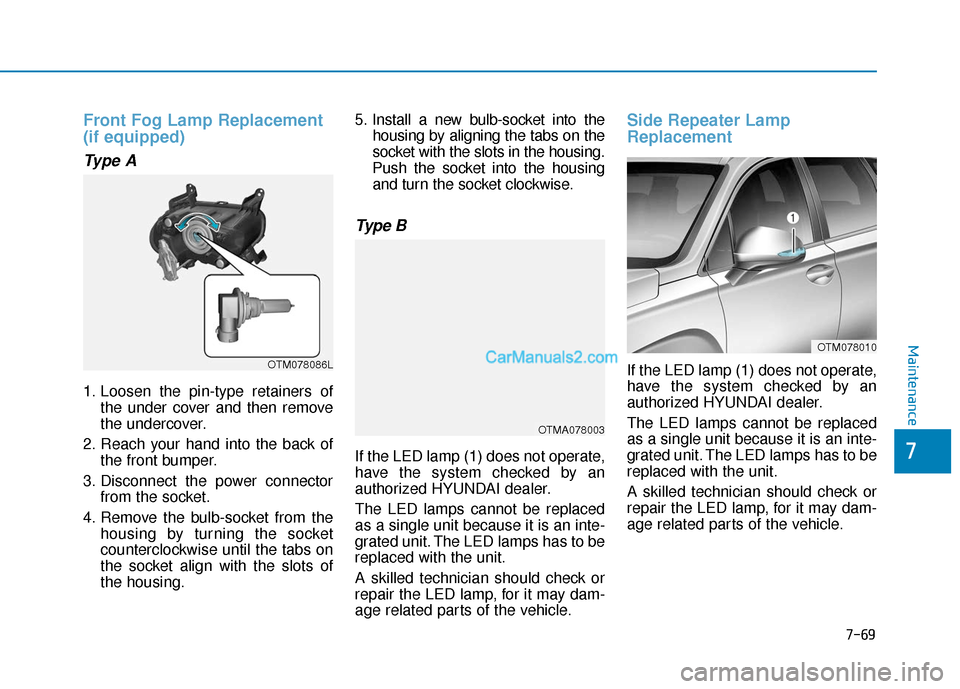
1. Loosen the pin-type retainers ofthe under cover and then remove
the undercover.
2. Reach your hand into the back of the front bumper.
3. Disconnect the power connector from the socket.
4. Remove the bulb-socket from the housing by turning the socket
counterclockwise until the tabs on
the socket align with the slots of
the housing. 5. Install a new bulb-socket into the
housing by aligning the tabs on the
socket with the slots in the housing.
Push the socket into the housing and turn the socket clockwise.
Type B
If the LED lamp (1) does not operate,
have the system checked by an
authorized HYUNDAI dealer.
The LED lamps cannot be replaced
as a single unit because it is an inte-
grated unit. The LED lamps has to be
replaced with the unit.
A skilled technician should check or
repair the LED lamp, for it may dam-
age related parts of the vehicle.
Side Repeater Lamp
Replacement
If the LED lamp (1) does not operate,
have the system checked by an
authorized HYUNDAI dealer.
The LED lamps cannot be replaced
as a single unit because it is an inte-
grated unit. The LED lamps has to be
replaced with the unit.
A skilled technician should check or
repair the LED lamp, for it may dam-
age related parts of the vehicle.
OTM078010
OTMA078003
OTM078086L
7
Maintenance
Page 515 of 557
Tail lamp, stop lamp and side
marker lamp
If the LED lamp does not operate,
have the system checked by an
authorized HYUNDAI dealer.
The LED lamps cannot replaced as a
single unit because it is an integrated
unit. The LED lamps has to be
replaced with the unit.
A skilled technician should check or
repair the LED lamp, for it may dam-
age related parts of the vehicle.
Turn signal lamp and back up lamp
If the light bulb does not operate,
have the vehicle checked by an
authorized HYUNDI dealer.
High Mounted Stop Lamp Bulb
Replacement
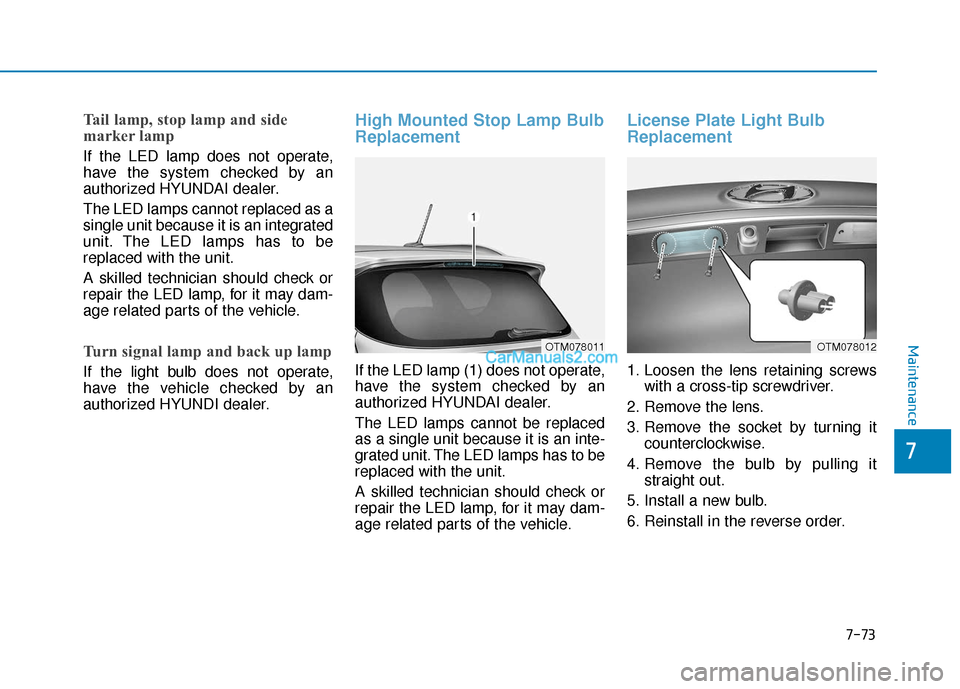
If the LED lamp (1) does not operate,
have the system checked by an
authorized HYUNDAI dealer.
The LED lamps cannot be replaced
as a single unit because it is an inte-
grated unit. The LED lamps has to be
replaced with the unit.
A skilled technician should check or
repair the LED lamp, for it may dam-
age related parts of the vehicle.
License Plate Light Bulb
Replacement
1. Loosen the lens retaining screwswith a cross-tip screwdriver.
2. Remove the lens.
3. Remove the socket by turning it counterclockwise.
4. Remove the bulb by pulling it straight out.
5. Install a new bulb.
6. Reinstall in the reverse order.
OTM078011OTM078012Maintenance
7-73
7
Page 517 of 557
■Room lamp
OTM078014OTM078013
■Map lamp
Map lamp and room lamp (LED type)
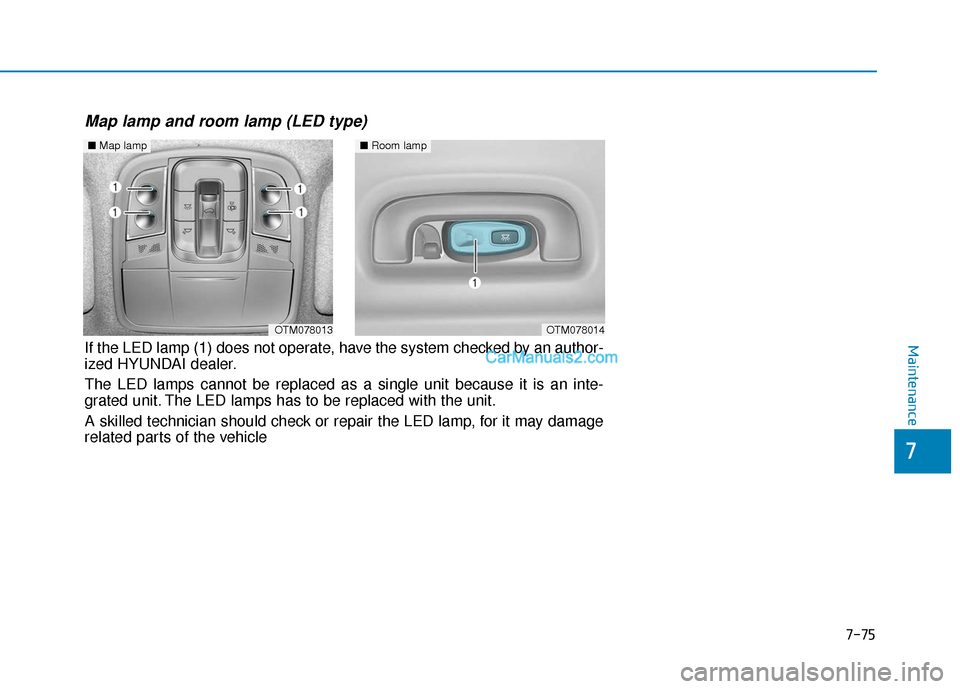
If the LED lamp (1) does not operate, have the system checked by an author-
ized HYUNDAI dealer.
The LED lamps cannot be replaced as a single unit because it is an inte-\
grated unit. The LED lamps has to be replaced with the unit.
A skilled technician should check or repair the LED lamp, for it may damage
related parts of the vehicleMaintenance
7-75
7
Page 520 of 557
Waxing
A good coat of wax provides a barri-
er between your paint and environ-
mental contamination.
Keeping a good coat of wax on your
vehicle will help protect it.
Wax the vehicle when water will no
longer bead on the paint.
Always wash and dry the vehicle
before waxing. Use a good quality
liquid or paste wax, and follow the
manufacturer’s instructions. Wax all
metal trim to protect it and to main-
tain its luster.
Removing oil, tar, and similar materi-
als with a spot remover will usually
strip the wax from the finish. Be sure
to re-wax these areas even if the rest
of the vehicle does not yet need wax-
ing. Wiping dust or dirt off the body
with a dry cloth will scratch the
finish.
Do not use steel wool, abrasive cleaners, or strong detergents
containing highly alkaline or
caustic agents on chrome-plat-
ed or anodized aluminum parts.
This may result in damage to the
protective coating and cause
discoloration or paint deteriora-
tion.
Matte paint finish vehicle
(if equipped)
Do not use any polish protector
such as a detergent, an abrasive
and a polish. In case wax is
applied, remove the wax immedi-
ately using a silicon remover and
if any tar or tar contaminant is on
the surface use a tar remover to
clean. However, be careful not to
apply too much pressure on the
painted area.
Repairing your vehicle's finish
Deep scratches or stone chips in the
painted surface must be repaired
promptly. Exposed metal will quickly
rust and may develop into a major
repair expense.
If your vehicle is damaged and
requires any metal repair or
replacement, be sure the body
shop applies anti-corrosion mate-
rials to the parts repaired or
replaced.
Matte paint finish vehicle
(if equipped)
In case of matte paint finish vehi-
cles, it is impossible to modify
only the damaged area and repair
of the whole part is necessary. If
the vehicle is damaged and paint-
ing is required, we recommend
that you have your vehicle main-
tained and repaired by an author-
ized HYUNDAI dealer. Take
extreme care, as it is difficult to
restore the quality after the repair.
NOTICE
NOTICE
NOTICE
NOTICE
Maintenance
7-78
Page 527 of 557
Canister
Fuel vapors generated inside the fuel
tank are absorbed and stored in the
onboard canister. When the engine is
running, the fuel vapors absorbed in
the canister are drawn into the surge
tank through the purge control sole-
noid valve.
Purge Control Solenoid Valve(PCSV)
The purge control solenoid valve is
controlled by the Engine Control
Module (ECM); when the engine
coolant temperature is low during
idling, the PCSV closes so that evap-
orated fuel is not taken into the
engine. After the engine warms-up
during ordinary driving, the PCSV
opens to introduce evaporated fuel to
the engine.
3. Exhaust Emission Control System
The Exhaust Emission Control
System is a highly effective system
which controls exhaust emissions
while maintaining good vehicle per-
formance.
When the engine starts or fails to
start, excessive attempts to restart
the engine may cause damage to the
emission system.
Engine exhaust (carbon monox-
ide) precautions
Carbon monoxide can be present
with other exhaust fumes. If you
smell exhaust fumes of any kind in
your vehicle, drive with all the win-
dows fully open. Have your vehicle
checked and repaired immediate-
ly.
Engine exhaust gases contain
carbon monoxide (CO). Though
colorless and odorless, it is
dangerous and could be lethal if
inhaled. Follow the instructions
on this page to avoid CO poi-
soning.
WARNING
Maintenance
7-85
7