Set up menu Hyundai Santa Fe 2020 Owner's Manual
[x] Cancel search | Manufacturer: HYUNDAI, Model Year: 2020, Model line: Santa Fe, Model: Hyundai Santa Fe 2020Pages: 557, PDF Size: 19.29 MB
Page 40 of 557
2-22
Safety system of your vehicle
Each time you push the switch, the temperature setting of the seat is
changed as follows :
When pressing the switch for more than 1.5 seconds with the
seat warmer operating, the seat
warmer will turn OFF.
The seat warmer defaults to the OFF position each time the ignition
switches is turned to the ON posi-
tion.
Auto Comfort Control (for driver's seat) (if equipped)
- The seat warmer automaticallycontrols the seat temperature
depending on the ambient tem-
perature and the set climate con-
trol temperature when the engine
is running. If the seat warmer
switch is pushed, the seat warmer
will have to be controlled manual-
ly.
To use this function, it must be activated from the Settings menu
in the AV/AVN system screen. - The seat warmer defaults to the
OFF position whenever the igni-
tion switch is ON. However, if the
Auto Comfort Control function is
ON, the driver's seat warmer will
turn on and off depending on the
ambient temperature and the set
climate control temperature.
For more details, refer to the sep-
arately supplied Multimedia manu-
al with your vehicle.
Information
With the seat warmer switch in the
ON position, the heating system in the
seat turns off or on automatically
depending on the seat temperature.
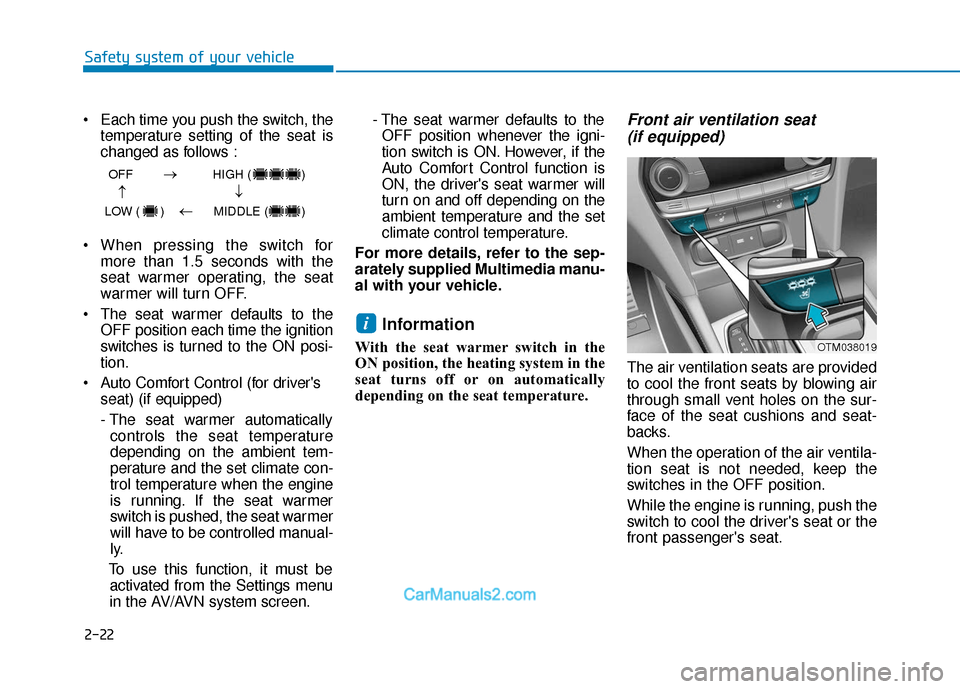
Front air ventilation seat (if equipped)
The air ventilation seats are provided
to cool the front seats by blowing air
through small vent holes on the sur-
face of the seat cushions and seat-
backs.
When the operation of the air ventila-
tion seat is not needed, keep the
switches in the OFF position.
While the engine is running, push the
switch to cool the driver's seat or the
front passenger's seat.
i
OFF HIGH ( )
LOW ( ) MIDDLE ( )
→→
→
→
OTM038019
Page 41 of 557
2-23
Safety system of your vehicle
2
Each time you push the switch,the airflow changes as follows:
When pressing the switch for more than 1.5 seconds with the air
ventilation seat operating, the
operation will turn OFF.
The air v entilation seats def aults
to the OFF position each time the
ignition switch is turned to the ON
position.
Auto Comfort Control (for driver's seat) (if equipped)
- The air ventilation seats auto-matically controls the seat tem-
perature depending on the ambi-
ent temperature and the set cli-
mate control temperature when
the engine is running. If the air
ventilation seats switch is
pushed, the air ventilation seats
will have to be controlled manu-
ally.
To use this function, it must be activated from the Settings menu
in the AV/AVN system screen. - The air ventilation seats defaults
to the OFF position whenever
the ignition switch is ON.
However, if the Auto Comfort
Control function is ON, the air
ventilation seats will turn on and
off depending on the ambient
temperature and the set climate
control temperature.
For more details, refer to the sep-
arately supplied Multimedia manu-
al with your vehicle.
To prevent damage to the air ven-
tilation seat:
Use the air ventilation seat ONLY when the climate control system
is on. Using the air ventilation
seat for prolonged periods of
time with the climate control
system off could cause the air
ventilation seat to malfunction.
Never use a solvent such as paint thinner, benzene, alcohol
or gasoline to clean the seats. Avoid spilling liquids on the sur-
face of the front seats and seat-
backs; this may cause the air
vent holes to become blocked
and not work properly.
Do not place materials such as plastic bags or newspapers
under the seats. They may block
the air intake causing the air
vents to not work properly.
Do not change the seat covers. It may damage the air ventilation
seat.
If the air vents do not operate, restart the vehicle. If there is no
change, have the vehicle
inspected by an authorized
HYUNDAI dealer.
NOTICE
OFF HIGH ( )
LOW ( ) MIDDLE ( )
→→
→
→
Page 93 of 557
3-4
Convenient features of your vehicle
Remote Key (if equipped)
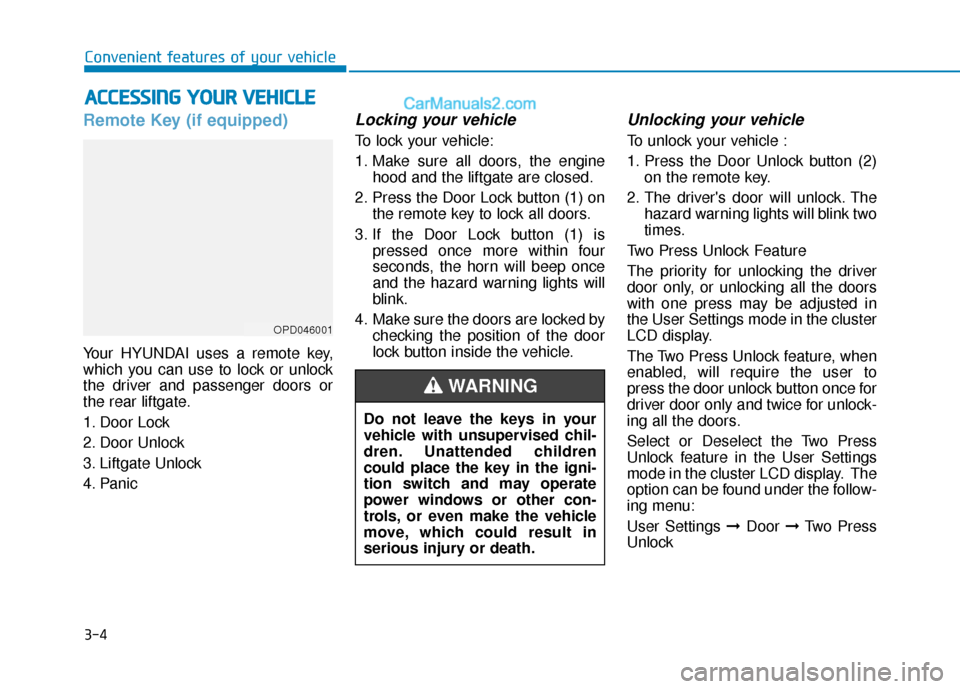
Your HYUNDAI uses a remote key,
which you can use to lock or unlock
the driver and passenger doors or
the rear liftgate.
1. Door Lock
2. Door Unlock
3. Liftgate Unlock
4. Panic
Locking your vehicle
To lock your vehicle:
1. Make sure all doors, the enginehood and the liftgate are closed.
2. Press the Door Lock button (1) on the remote key to lock all doors.
3. If the Door Lock button (1) is pressed once more within four
seconds, the horn will beep once
and the hazard warning lights will
blink.
4. Make sure the doors are locked by checking the position of the door
lock button inside the vehicle.
Unlocking your vehicle
To unlock your vehicle :
1. Press the Door Unlock button (2)on the remote key.
2. The driver's door will unlock. The hazard warning lights will blink two
times.
Two Press Unlock Feature
The priority for unlocking the driver
door only, or unlocking all the doors
with one press may be adjusted in
the User Settings mode in the cluster
LCD display.
The Two Press Unlock feature, when
enabled, will require the user to
press the door unlock button once for
driver door only and twice for unlock-
ing all the doors.
Select or Deselect the Two Press
Unlock feature in the User Settings
mode in the cluster LCD display. The
option can be found under the follow-
ing menu:
User Settings ➞ Door ➞Two Press
Unlock
A A C
CC
CE
E S
SS
SI
IN
N G
G
Y
Y O
O U
UR
R
V
V E
EH
H I
IC
C L
LE
E
OPD046001
Do not leave the keys in your
vehicle with unsupervised chil-
dren. Unattended children
could place the key in the igni-
tion switch and may operate
power windows or other con-
trols, or even make the vehicle
move, which could result in
serious injury or death.
WARNING
Page 98 of 557
3-9
Convenient features of your vehicle
3
Two Press Unlock Feature
The priority for unlocking the driver
door only, or unlocking all the doors
with one press may be adjusted in
the User Settings mode in the cluster
LCD display.
The Two Press Unlock feature, when
enabled, will require the user to
press the door unlock button once for
driver door only and twice for unlock-
ing all the doors.
Select or Deselect the Two Press
Unlock feature in the User Settings
mode in the cluster LCD display. The
option can be found under the follow-
ing menu:
User Settings ➞Door ➞Two Press
Unlock The Two Press Unlock feature can
also be enabled or disabled by
pressing the door lock and unlock
buttons simultaneously on the Key
FOB:
Press and hold both the Door Lock
button and the Door Unlock button
simultaneously until the hazard
warning lights blink.
This will enable or disable the Two
Press Unlock feature. Repeat this
procedure to enable/disable the
mode again.
Information
• The door handle buttons will only
operate when the smart key is with-
in 28-40 inches (0.7~1m) from the
outside door handle.
• Either the driver or front passenger door can be opened with the door
handle button when the smart key
is within this range.
• If you press the front passenger outside door handle with the smart
key in your possession, all the doors
will unlock.
Opening the liftgate
Non-power liftgate
To unlock and open the liftgate:
1. Make sure you have the smart keyin your possession.
2. Press either the liftgate handle release switch on the vehicle or
press and hold the Liftgate Unlock
button on the smart key for more
than one second. The hazard
warning lights will blink two times
and the liftgate latch will unlock.
3. Once the liftgate is opened and then closed, the liftgate will auto-
matically re-lock after 30 seconds.
Information
• The liftgate handle switch will onlyoperate when the smart key is with-
in 28 inches (0.7 m) from the lift-
gate handle.
• The Liftgate Unlock button (3) will only unlock the liftgate. It will not
release the latch and open the lift-
gate automatically. If the Liftgate
Unlock button is used, someone
must still press the liftgate handle
switch to open the liftgate.
i
i
Page 111 of 557
3-22
Convenient features of your vehicle
Make sure that all the win-
dows are closed. If the win-
dow is open, the alert may
activate by the sensor detect-
ing an unintended movement
(e.g. wind or bugs).
CAUTION
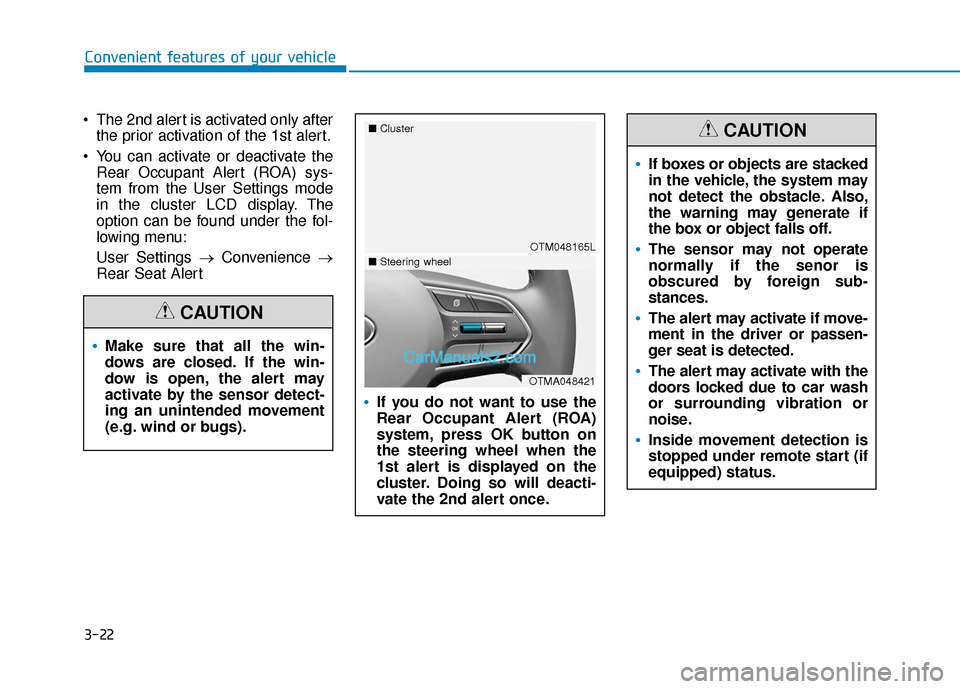
The 2nd alert is activated only afterthe prior activation of the 1st alert.
You can activate or deactivate the Rear Occupant Alert (ROA) sys-
tem from the User Settings mode
in the cluster LCD display. The
option can be found under the fol-
lowing menu:
User Settings → Convenience →
Rear Seat Alert
If you do not want to use the
Rear Occupant Alert (ROA)
system, press OK button on
the steering wheel when the
1st alert is displayed on the
cluster. Doing so will deacti-
vate the 2nd alert once.
OTM048165L
■
Cluster
OTMA048421
■Steering wheel
If boxes or objects are stacked
in the vehicle, the system may
not detect the obstacle. Also,
the warning may generate if
the box or object falls off.
The sensor may not operate
normally if the senor is
obscured by foreign sub-
stances.
The alert may activate if move-
ment in the driver or passen-
ger seat is detected.
The alert may activate with the
doors locked due to car wash
or surrounding vibration or
noise.
Inside movement detection is
stopped under remote start (if
equipped) status.
CAUTION
Page 118 of 557
3-29
Convenient features of your vehicle
3
Heated Steering Wheel
(if equipped)
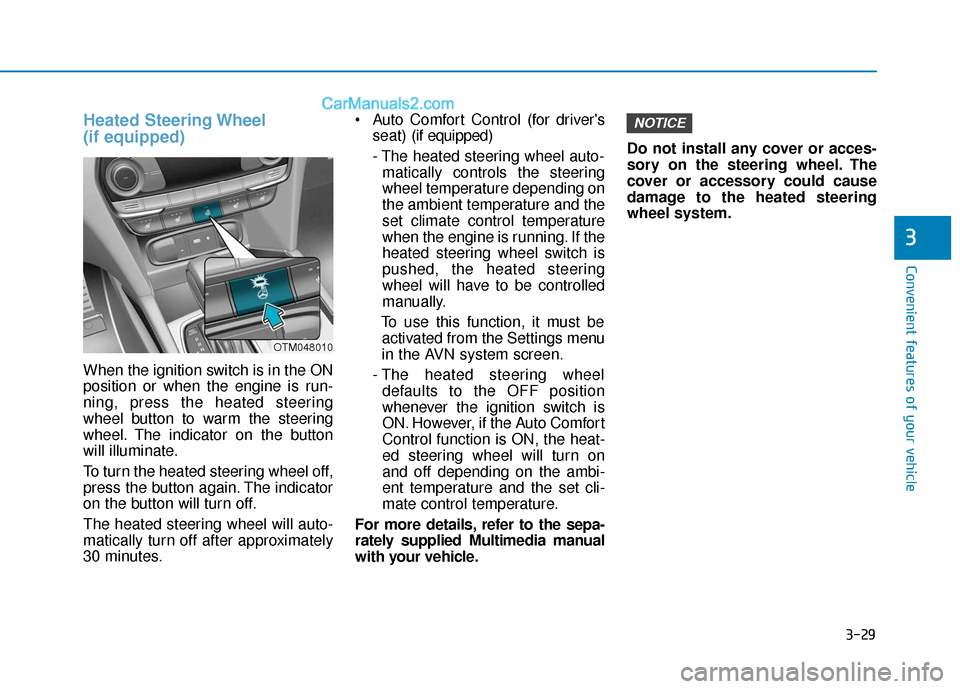
When the ignition switch is in the ON
position or when the engine is run-
ning, press the heated steering
wheel button to warm the steering
wheel. The indicator on the button
will illuminate.
To turn the heated steering wheel off,
press the button again. The indicator
on the button will turn off.
The heated steering wheel will auto-
matically turn off after approximately
30 minutes. Auto Comfort Control (for driver's
seat) (if equipped)
- The heated steering wheel auto- matically controls the steering
wheel temperature depending on
the ambient temperature and the
set climate control temperature
when the engine is running. If the
heated steering wheel switch is
pushed, the heated steering
wheel will have to be controlled
manually.
To use this function, it must be activated from the Settings menu
in the AVN system screen.
- The heated steering wheel defaults to the OFF position
whenever the ignition switch is
ON. However, if the Auto Comfort
Control function is ON, the heat-
ed steering wheel will turn on
and off depending on the ambi-
ent temperature and the set cli-
mate control temperature.
For more details, refer to the sepa-
rately supplied Multimedia manual
with your vehicle. Do not install any cover or acces-
sory on the steering wheel. The
cover or accessory could cause
damage to the heated steering
wheel system.
NOTICE
OTM048010
Page 194 of 557
3-105
Convenient features of your vehicle
3
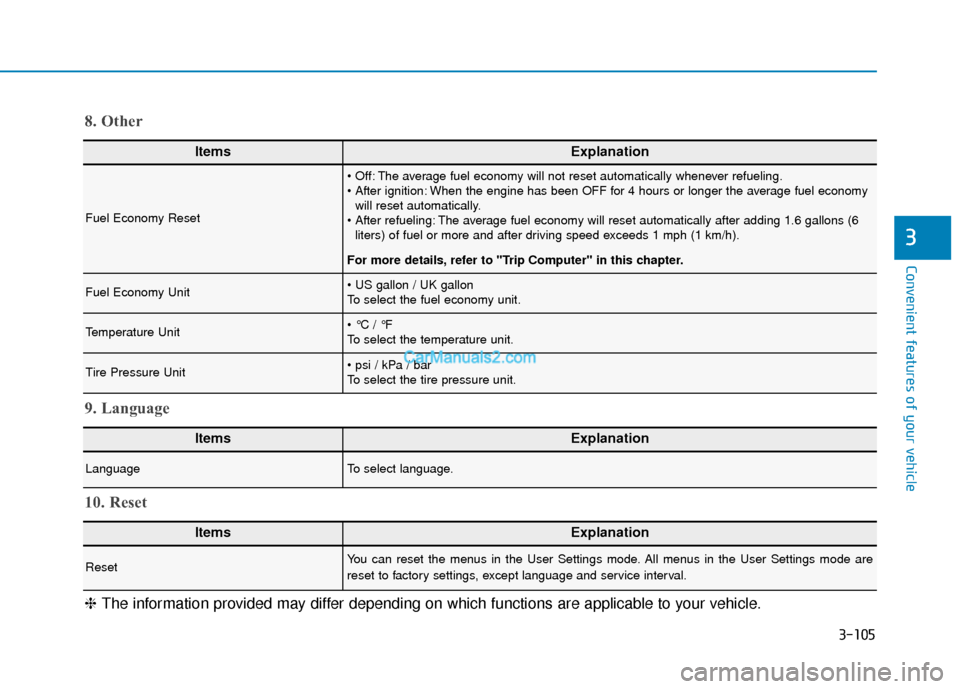
ItemsExplanation
Fuel Economy Reset
The average fuel economy will not reset automatically whenever refueling.
When the engine has been OFF for 4 hours or longer the average fuel economywill reset automatically.
The average fuel economy will reset automatically after adding 1.6 gallons (6 liters) of fuel or more and after driving speed exceeds 1 mph (1 km/h).
For more details, refer to "Trip Computer" in this chapter.
Fuel Economy Unit
To select the fuel economy unit.
Temperature Unit
To select the temperature unit.
Tire Pressure Unit
To select the tire pressure unit.
8. Other
ItemsExplanation
LanguageTo select language.
9. Language
ItemsExplanation
ResetYou can reset the menus in the User Settings mode. All menus in the User Settings mode are
reset to factory settings, except language and service interval.
10. Reset
❈ The information provided may differ depending on which functions are applicable to your vehicle.
Page 253 of 557
3-164
Convenient features of your vehicle
Sunroof Inside Air
Recirculation (if equipped)
When the sunroof is opened, out-
side (fresh) air will be automatically
selected. At this time, if you press the
air intake control button, recirculated
air position will be selected but will
change back to outside (fresh) air
after 3 minutes. When the sunroof is
closed, the air intake position will
return to the original position that
was selected.
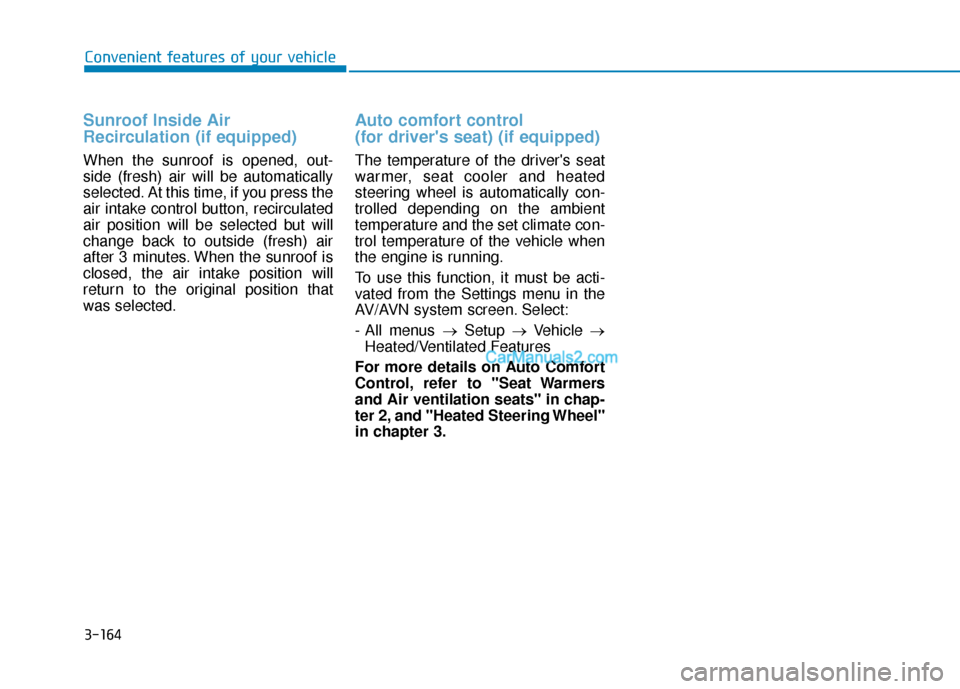
Auto comfort control
(for driver's seat) (if equipped)
The temperature of the driver's seat
warmer, seat cooler and heated
steering wheel is automatically con-
trolled depending on the ambient
temperature and the set climate con-
trol temperature of the vehicle when
the engine is running.
To use this function, it must be acti-
vated from the Settings menu in the
AV/AVN system screen. Select:
- All menus →Setup →Vehicle →
Heated/Ventilated Features
For more details on Auto Comfort
Control, refer to "Seat Warmers
and Air ventilation seats" in chap-
ter 2, and "Heated Steering Wheel"
in chapter 3.
Page 264 of 557
3-175
Convenient features of your vehicle
3
The wireless charging processmay temporarily stop, when tem-
perature abnormally increases
inside the wireless cellular phone
charging system. Stop the charg-
ing cellular phone and wait until
temperature falls to a certain level.
The wireless charging process may temporarily stop when there
is any metallic item, such as a
coin, between the wireless cellular
phone charging system and the
cellular phone.
When charging some cellular phones with a self-protection fea-
ture, the wireless charging speed
may decrease and the wireless
charging may stop.
If the cellular phone has a thick cover, the wireless charging may
not be possible.
If the cellular phone is not com- pletely contacting the charging
pad, wireless charging may not
operate properly.
Some magnetic items like credit cards, phone cards or rail tickets
may be damaged if left with the
cellular phone during the charging
process. When any cellular phone without a
wireless charging function or a
metallic object is placed on the
charging pad, a small noise may
sound. This small sound is due to
the vehicle discerning compatibil-
ity of the object placed on the
charging pad. It does not affect
your vehicle or the cellular phone
in any way.
Information
If the ignition switch is in the OFF
position, the charging also stops.
Information
This device complies with part 15 of
the FCC Rules.
Operation is subject to the following
two conditions:
1. This device may not cause harmful interference, and
2. This device must accept any inter- ference received, including inter-
ference that may cause undesired
operation.
Clock
Vehicles with Audio system
Select the [SETUP] button on the
audio system ➟ Select [Date/Time].
Set time: Set the time displayed on the audio screen.
Time format: Choose between 12- hour and 24-hour time formats.
Vehicles with Navigation system
Select the Settings menu on the
Navigation system ➟Select
[Date/Time].
GPS time: Displays time accord- ing to the received GNSS time.
24-hour: Switches to 12 hour or 24 hour.
i
i
Do not attempt to adjust the
clock while driving. Doing so
may result in distracted driving
which may lead to an accident
involving personal injury or
death.
WARNING