manual transmission HYUNDAI SANTA FE CALLIGRAPHY 2021 Owners Manual
[x] Cancel search | Manufacturer: HYUNDAI, Model Year: 2021, Model line: SANTA FE CALLIGRAPHY, Model: HYUNDAI SANTA FE CALLIGRAPHY 2021Pages: 636, PDF Size: 81.2 MB
Page 8 of 636
Introduction
1-2
FOREWORD
Congratulations, and thank you for choosing HYUNDAI. We are pleased to welcome
you to the growing number of discerning people who drive HYUNDAI. We are very
proud of the advanced engineering and high-quality construction of each HYUNDAI
we build.
Your Owner’s Manual will introduce you to the features and operation of your new
HYUNDAI. To become familiar with your new HYUNDAI, so that you can fully enjoy it,
read this Owner’s Manual carefully before driving your new vehicle.
This manual contains important safety information and instructions intended to
familiarize you with your vehicle’s controls and safety features so you can safely
operate your vehicle.
This manual also contains information on maintenance designed to enhance safe
operation of the vehicle. It is recommended that all service and maintenance on your
car be performed by an authorized HYUNDAI dealer. An authorized HYUNDAI dealer
are prepared to provide high-quality service, maintenance and any other assistance
that may be required.
This Owner’s Manual should be considered a permanent part of your vehicle, and
should be kept in the vehicle so you can refer to it at any time. The manual should stay
with the vehicle if you sell it to provide the next owner with important operating, safety
and maintenance information.
HYUNDAI MOTOR AMERICA
CAUTION
Severe engine and transmission damage may result from the use of poor quality
fuels and lubricants that do not meet HYUNDAI specifications. You must always use
high quality fuels and lubricants that meet the specifications listed on Page 2-14 in
the Vehicle Specifications section of the Owner’s Manual.
Copyright 2020 HYUNDAI Motor America. All rights reserved. No part of this
publication may be reproduced, stored in any retrieval system or transmitted in
any form or by any means without the prior written permission of HYUNDAI Motor
America.
Page 131 of 636
04
4-33
OTM080005L
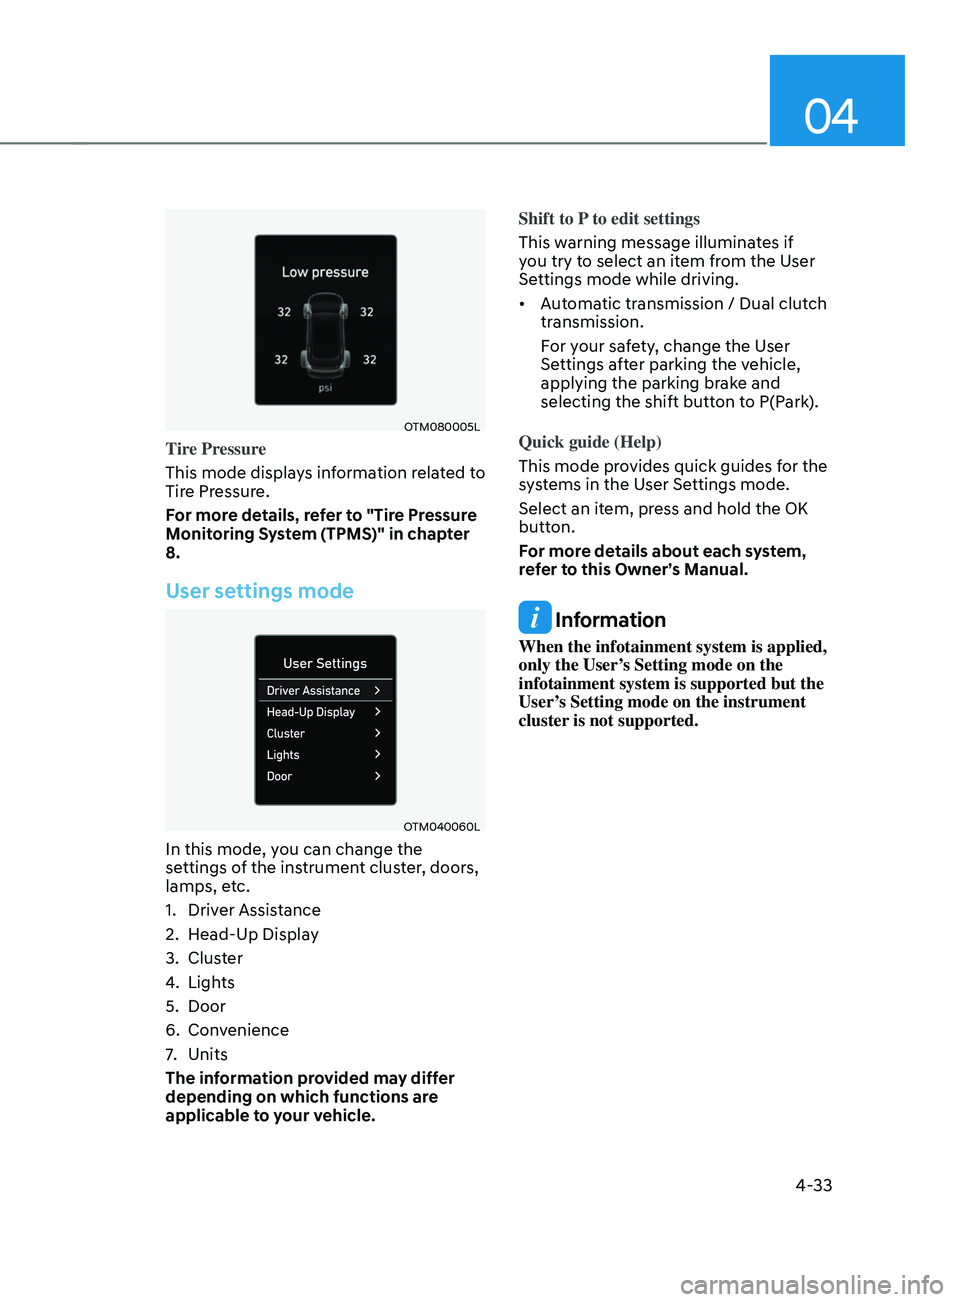
Tire Pressure
This mode displays information related to
Tire Pressure.
For more details, refer to "Tire Pressure
Monitoring System (TPMS)" in chapter
8.
User settings mode
OTM040060L
In this mode, you can change the
settings of the instrument cluster, doors,
lamps, etc.
1.
Driver Assis
tance
2.
Head-Up Displa
y
3.
Clust
er
4.
Lights
5.
Door
6.
Conv
enience
7.
Units
The inf
ormation provided may differ
depending on which functions are
applicable to your vehicle. Shift to P to edit settings
This warning message illuminates if
you try to select an item from the User
Settings mode while driving.
•
Automatic transmission / Dual clutch
transmission.
For your safety, change the User
Settings after parking the vehicle,
applying the parking brake and
selecting the shift button to P(Park).
Quick guide (Help)
This mode provides quick guides for the
systems in the User Settings mode.
Select an item, press and hold the OK
button.
For more details about each system,
refer to this Owner’s Manual.
Information
When the infotainment system is applied,
only the User’s Setting mode on the
infotainment system is supported but the
User’s Setting mode on the instrument
cluster is not supported.
Page 194 of 636
Convenient features
5-50
2. On your garage door opener in your
garage, locate the “Learn” button
(usually near where the hanging
antenna wire is attached to the garage
door opener). If there is difficulty
locating this button, reference the
device’s owner’s manual.
3.
Press and r
elease the “Learn” button.
4.
A light on y
our garage door opener
may flash, and your Two-Way
Communication indicators (4), (6) in
your vehicle may flash, confirming
completion of the process.
5.
Re
turn to the vehicle and firmly
press and release the programmed
HomeLink button to activate
your garage door. The Two-Way
Communication indicators (4), (6)
flash in orange when the door is
moving. Do not make any additional
button presses until AFTER the garage
door has come to a complete stop.
6.
Your T
wo-Way Communication
programming is now complete.
Information
If your garage door opener has Two-
Way Communication functionality,
it is possible for HomeLink to stop
functioning the garage door shortly
after initial programming, IF the Two-
Way Communication Programming
wasn’t properly completed. This
usually happens after the first 10 times
a programmed HomeLink button is
pressed. If you experience this, completing
the “Programming a New HomeLink
Button” and “Two-Way Communication
Programming” will restore door
operation.
4) Canadian Pr ogramming
Canadian radio-frequency laws require
transmitter remote signals to “time-
out” (or quit) after a couple seconds of
transmission, which may not be long
enough for HomeLink to pick up the signal
during programming.
If you live in Canada or you are having
difficulties programming a gate operator
or garage door opener by using the
programming procedures, replace
“Programming a New HomeLink Button”
step 3 with the following:
While the HomeLink indicator light (7) is
flashing orange, press and release (“cycle”)
your device’s handheld remote every two
seconds until the HomeLink indicator light
(7) changes from orange to green. You may
now release the hand-held remote button.
Then proceed with “Programming a New
HomeLink Button” step 4.
Page 289 of 636
Before driving ........................................................................\
............................6-4Before entering the vehicle ........................................................................\
................6-4
Bef ore starting ........................................................................\
..................................... 6-4
Ignition switch ........................................................................\
...........................6-5Key ignition switch ........................................................................\
............................... 6-5
Ke y ignition switch positions ........................................................................\
.............. 6-6
S
tarting the engine
........................................................................\
............................... 6
-7
Engine Start/Stop button ........................................................................\
.........6-9Engine Stop/Start button positions ........................................................................\
..6-10
S tarting the engine ........................................................................\
.............................. 6-
11
Turning off the engine
........................................................................\
........................ 6-
12
Remote start
........................................................................\
....................................... 6-
13
Automatic transmission ........................................................................\
..........6-14Automatic transmission operation ........................................................................\
....6-14
L CD display message (button type) ........................................................................\
.. 6-19
P
addle shifter (Manual shift mode)
........................................................................\
.. 6-20
Good driving pr
actices
........................................................................\
....................... 6-
21
Dual clutch transmission ........................................................................\
........6-23Dual clutch transmission operation ........................................................................\
..6-23
P arking ........................................................................\
............................................... 6-
30
LCD display message (button type)
........................................................................\
. 6-30
P
addle shifter (Manual shifter mode)
....................................................................... 6-32
Good driving pr
actices
........................................................................\
...................... 6-
33
Braking system ........................................................................\
........................6-34Power-assist brakes ........................................................................\
...........................6-34
Disc br akes wear indicator ........................................................................\
................ 6-34
Electronic Parking Brake (EPB)
........................................................................\
......... 6-35
A
uto Hold (if equipped)
........................................................................\
..................... 6-
39
Anti-lock Brake System (ABS)
........................................................................\
........... 6-43
Electronic S
tability Control (ESC)
........................................................................\
.... 6-44
V
ehicle Stability Management (VSM)
...................................................................... 6-4
7
Hill-Start Assist Control (HAC)
........................................................................\
......... 6-48
Do
wnhill Brake Control (DBC)
........................................................................\
......... 6-48
Good br
aking practices
........................................................................\
...................... 6-51
Four wheel drive (4WD) ........................................................................\
..........6-52Four Wheel Drive (4WD) operation ........................................................................\
...6-53
Emer gency precautions ........................................................................\
.................... 6-58
R
educing the risk of a rollover
........................................................................\
.......... 6-59
6. Driving your vehicle
Driving your vehicle
6
Page 293 of 636
06
6-5
WARNING
To reduce the risk of SERIOUS INJURY or
DEATH, take the following precautions:
• NEVER allow children or any person
who is unfamiliar with the vehicle to
touch the ignition switch or related
parts. Unexpected and sudden
vehicle movement can occur.
• NEVER reach through the steering
wheel for the ignition switch, or any
other control, while the vehicle is in
motion. The presence of your hand
or arm in this area may cause a loss
of vehicle control resulting in an
accident.
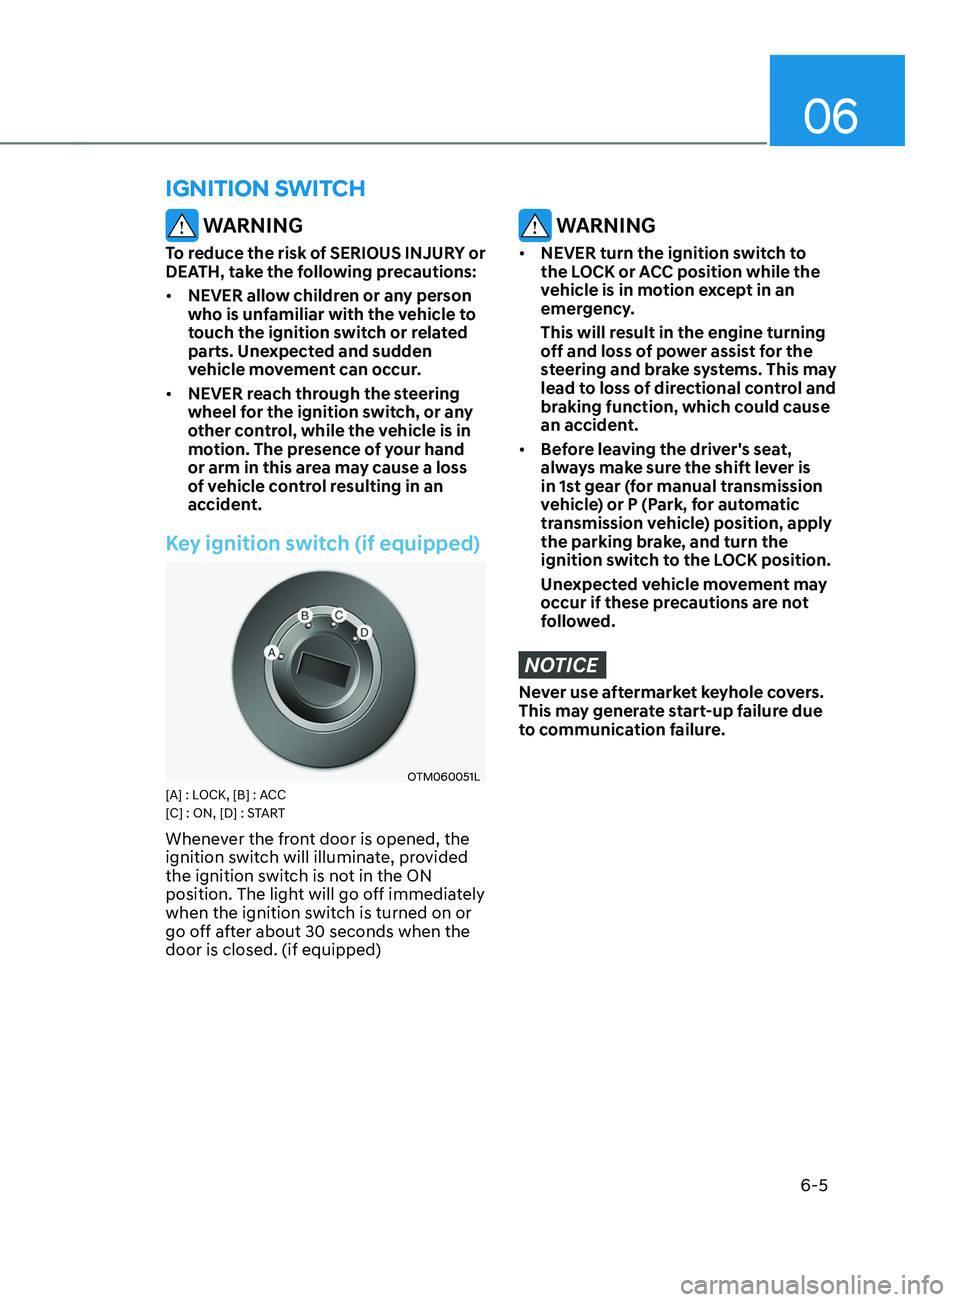
Key ignition switch (if equipped)
OTM060051L[A] : LOCK, [B] : ACC
[C] : ON, [D] : START
Whenever the front door is opened, the
ignition switch will illuminate, provided
the ignition switch is not in the ON
position. The light will go off immediately
when the ignition switch is turned on or
go off after about 30 seconds when the
door is closed. (if equipped)
WARNING
• NEVER turn the ignition switch to
the LOCK or ACC position while the
vehicle is in motion except in an
emergency.
This will result in the engine turning
off and loss of power assist for the
steering and brake systems. This may
lead to loss of directional control and
braking function, which could cause
an accident.
• Before leaving the driver's seat,
always make sure the shift lever is
in 1st gear (for manual transmission
vehicle) or P (Park, for automatic
transmission vehicle) position, apply
the parking brake, and turn the
ignition switch to the LOCK position.
Unexpected vehicle movement may
occur if these precautions are not
followed.
NOTICE
Never use aftermarket keyhole covers.
This may generate start-up failure due
to communication failure.
IGNITION SWITCH
Page 303 of 636
06
6-15
The indicator in the instrument cluster
displays the shift lever/button position
when the ignition switch is in the ON
position.
WARNING
To reduce the risk of serious injury or
death:
• ALWAYS check the surrounding
areas near your vehicle for people,
especially children, before shifting a
vehicle into D (Drive) or R (Reverse).
• Before leaving the driver’s seat,
always make sure the shift lever
is in the P (Park) position, then set
the parking brake, and place the
ignition switch in the LOCK/OFF
position. Unexpected and sudden
vehicle movement can occur if these
precautions are not followed.
• When using the paddle shifter
(manual shift mode), do not use
engine braking (shifting from a
high gear to lower gear) rapidly on
slippery roads. The vehicle may slip
causing an accident.
P (Park)
Always come to a complete stop before
shifting into P (Park).
To shift from P (Park), you must depress
firmly on the brake pedal and make sure
your foot is off the accelerator pedal.
If you have done all of the above and
still cannot shift the lever out of P
(Park), see "Shift-Lock Release" in this
chapter. (shift lever type)
The shift lever/button must be in P (Park)
before turning the engine off.
WARNING
• Shifting into P (Park) while the
vehicle is in motion may cause you to
lose control of the vehicle.
• After the vehicle has stopped, always
make sure the shift lever is in P
(Park), apply the parking brake, and
turn the engine off.
• When parking on an incline, shift
the gear to P (Park) and apply the
parking brake to prevent the vehicle
from rolling downhill.
• Do not use the P (Park) position in
place of the parking brake.
R (Reverse)
Use this position to drive the vehicle
backward.
NOTICE
Always come to a complete stop before
shifting into or out of R (Reverse); you
may damage the transmission if you
shift into R (Reverse) while the vehicle is
in motion.
When the vehicle is stopped in R
(Reverse) or D (Drive) position, if you
open the driver’s door with the seat
belt unfastened, the gear is shifted to P
(Park) position automatically.
However when the vehicle moves in R
(Reverse) or D (Drive) position, if you
open the driver’s door with the seat belt
unfastened, the gear may be not shifted
to P (Park) position automatically for
protecting the automatic transmission.
Page 308 of 636
Driving your vehicle
6-20
Shift button held down
The warning message appears on the
LCD display, when the shift button is
pressed continuously or the shift button
does not properly operate. Clean the
surroundings of gear shift button.
If this message appears again, we
recommend you to have the vehicle
inspected by an authorized HYUNDAI
dealer.
Shifter system malfunction! Service
immediately
The warning message appears on the
LCD display, when the transmission
or the shift button does not properly
operate in the P (Park) position.
In this case, we recommend you to
immediately have the vehicle inspected
by an authorized HYUNDAI dealer.
Check shift controls
The warning message appears on the
LCD display, when there is a malfunction
with transmission shift button.
In this case, we recommend you to
immediately have the vehicle inspected
by an authorized HYUNDAI dealer.
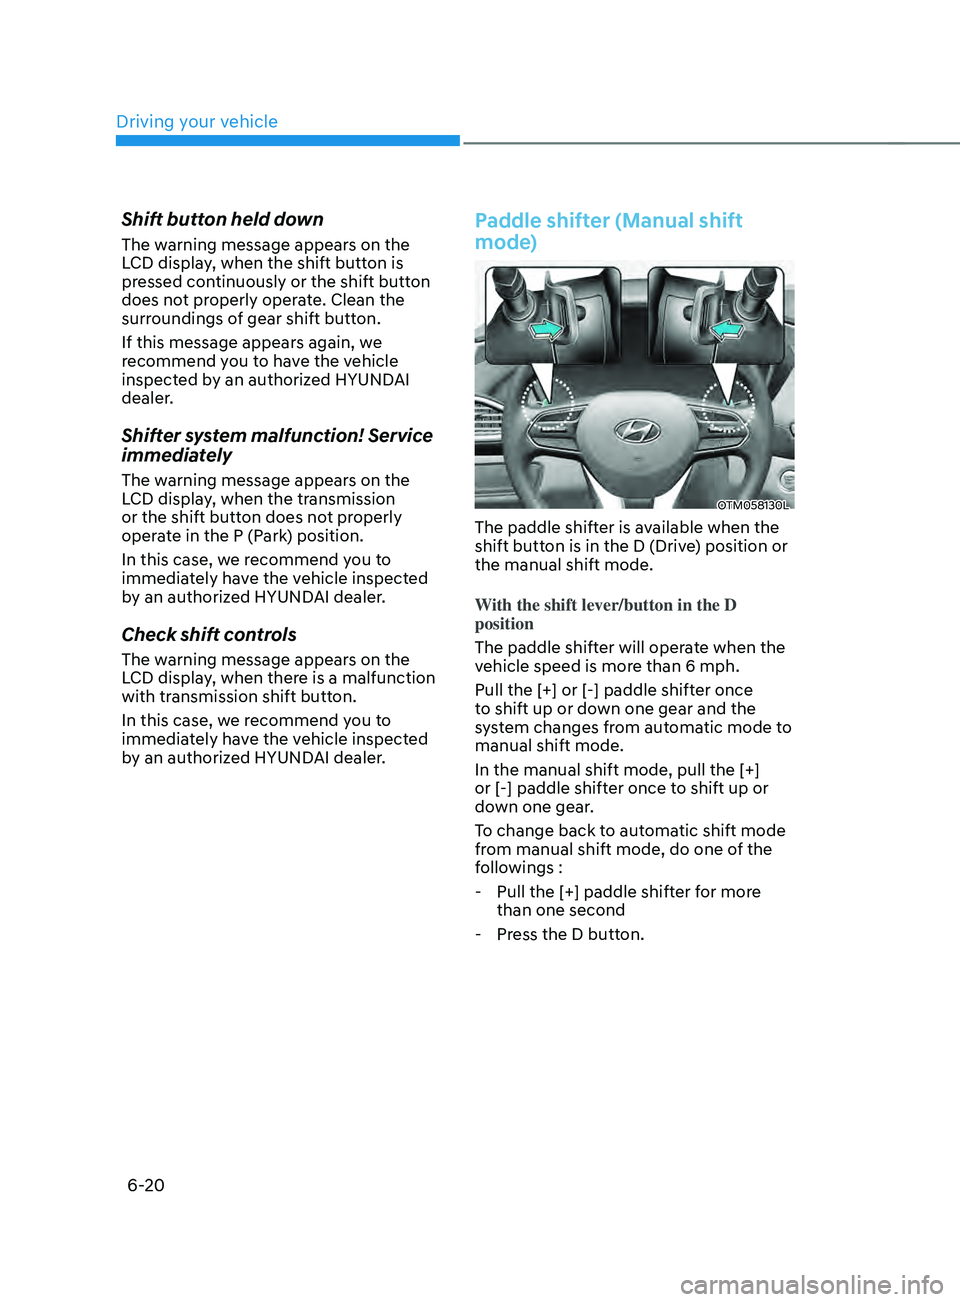
Paddle shifter (Manual shift
mode)
OTM058130L
The paddle shifter is available when the
shift button is in the D (Drive) position or
the manual shift mode.
With the shift lever/button in the D
position
The paddle shifter will operate when the
vehicle speed is more than 6 mph.
Pull the [+] or [-] paddle shifter once
to shift up or down one gear and the
system changes from automatic mode to
manual shift mode.
In the manual shift mode, pull the [+]
or [-] paddle shifter once to shift up or
down one gear.
To change back to automatic shift mode
from manual shift mode, do one of the
followings :
- Pull the [+] paddle shifter f
or more
than one second
- Press the D butt
on.
Page 309 of 636
06
6-21
The manual shift mode also changes
back to automatic shift mode in one of
following situations
- When the accelera
tor pedal is gently
depressed for more than 6 seconds
while driving
- When the vehicle s
tops
Information
If the [+] and [-] paddle shifters are pulled
at the same time, gear shift may not occur.
Good driving practices
• Never move the shift button from
P (Park) or N (Neutral) to any other
position with the accelerator pedal
depressed.
• Never move the shift lever/button into
P (Park) when the vehicle is in motion.
Be sure the vehicle is completely
stopped before you attempt to shift
into R (Reverse) or D (Drive).
• Do not move the shift button to N
(Neutral) when driving. Doing so
may result in an accident because
of a loss of engine braking and the
transmission could be damaged.
• Driving uphill or downhill, Shift
to D (Drive) to drive forward or R
(Reverse) to drive backwards, and
check the gear position indicated
on the cluster before driving. If you
drive in the opposite direction of the
selected gear, the engine will turn
off and a serious accident might be
occurred due to the degraded brake
performance.
• Do not drive with your foot resting
on the brake pedal. Even light, but
consistent pedal pressure can result
in the brakes overheating, brake wear
and possibly even brake failure.
• When driving with shifter paddles,
slow down before shifting to a lower
gear. Otherwise, the lower gear may
not be engaged if the engine rpms are
outside of the allowable range.
• Always apply the parking brake when
leaving the vehicle. Do not depend on
placing the transmission in P (Park) to
keep the vehicle from moving.
Page 312 of 636
Driving your vehicle
6-24
• The dual clutch transmission can be
thought of as an automatically shifting
manual transmission. It gives the
driving feel of a manual transmission,
yet provides the ease of a fully
automatic transmission.
• When D (Drive) is selected, the
transmission will automatically
shift through the gears similar to a
conventional automatic transmission.
Unlike a traditional automatic
transmission, the gear shifting can
sometimes be felt and heard as the
actuators engage the clutches and the
gears are selected.
• The dual clutch transmission
incorporates a wet-type dual clutch
mechanism, which allows for better
acceleration performance and
increased fuel efficiency while driving.
But it differs from a conventional
automatic transmission because
it does not incorporate a torque
converter. Instead, the transition from
one gear to the next is managed by
clutch slip, especially at lower speeds.
As a result, shifts are sometimes more
noticeable, and a light vibration can
be felt as the transmission shaft speed
is matched with the engine shaft
speed. This is a normal condition of
the dual clutch transmission.
• The wet-type clutch transfers torque
more directly and provides a direct-
drive feeling which may feel different
from a conventional automatic
transmission. This may be more
noticeable when launching the vehicle
from a stop or when traveling at low,
stop-and-go vehicle speeds. •
When rapidly accelerating from a
lower vehicle speed, the engine
rpm may increase dramatically as a
result of clutch slip as the dual clutch
transmission selects the correct gear.
This is a normal condition.
• When accelerating from a stop on
an incline, press the accelerator
smoothly and gradually to avoid any
shudder feeling or jerkiness.
• When traveling at a lower vehicle
speed, if you release the accelerator
pedal quickly, you may feel engine
braking before the transmission
changes gears. This engine braking
feeling is similar to operating a
manual transmission at low speed.
• When driving downhill, you may wish
to move the gear shift lever/button to
Manual Shift mode and downshift to
a lower gear in order to control your
speed without using the brake pedal
excessively.
• When you turn the engine on and off,
you may hear clicking sounds as the
system goes through a self-test. This
is a normal sound for the dual clutch
transmission.
• During the first 1000 miles (1,500km),
you may feel that the vehicle may not
be smooth when accelerating at low
speed. During this break-in period, the
shift quality and performance of your
new vehicle is continuously optimized.
Page 344 of 636
Driving your vehicle
6-56
For safe 4WD operation
Before driving
• Make sure all passengers are wearing
seat belts.
• Sit upright and closer to the steering
wheel than usual. Adjust the steering
wheel to a position comfortable for
you to drive.
Driving on snow-covered or icy roads
• Start off slowly by applying the
accelerator pedal gently.
• Use snow tires or tire chains.
• Keep sufficient distance between your
vehicle and the vehicle in front of you.
• Apply engine braking during
deceleration by using the paddle
shifter (manual shift mode) and
manually selecting a lower gear.
• Avoid speeding, rapid acceleration,
sudden brake applications, and sharp
turns to prevent skids.
Information
When using Snow Tires, mount them on
all four wheels.
If a full set of chains is not available for
an 4WD vehicle when using tire chains,
chains may be installed on the front wheels
only.
For more details on Snow Tires and Tire
Chains, refer to "Winter Driving" section
later in this chapter.
CAUTION
Mud or snow
If one of the front or rear wheels
begins to spin in mud, snow, etc. the
vehicle can sometimes be driven out by
engaging the accelerator pedal further;
however avoid running the engine
continuously at high rpm because doing
so could damage the AWD system.
Driving in sand or mud
• Maintain slow and constant speed.
Operate the accelerator pedal slowly
to ensure safe driving (wheel-slip
prevention).
• Keep sufficient distance between your
vehicle and the vehicle in front of you.
• Reduce vehicle speed and always
check the road condition.
• Avoid speeding, rapid acceleration,
sudden brake applications, and sharp
turns to prevent getting stuck.
• When the vehicle is stuck in snow,
sand or mud, the tires may not
operate.
• This is to protect the transmission and
not a malfunction.
NOTICE
Moving the vehicle forcibly to get out
of mud or sand can cause damage/
overheat of the engine or damage/
breakdown of the transmission,
differential or 4WD system as well as
damage to tires. If excessive wheel slip
occurs after entering a sandy/muddy
road, the vehicle may fall into the sand/
mud. When it happens, put a stone or
a tree branch under the tire, and then
try to pull out the vehicle, or try to get it
unstuck by repeatedly moving forwards
and backwards.