ECU Hyundai Sonata 2004 User Guide
[x] Cancel search | Manufacturer: HYUNDAI, Model Year: 2004, Model line: Sonata, Model: Hyundai Sonata 2004Pages: 208, PDF Size: 16.93 MB
Page 118 of 208
DRIVING YOUR HYUNDAI 2- 3
C020A01A-AATBEFORE STARTING THE ENGINE
Before you start the engine, you should always:
1. Look around the vehicle to be sure there are
no flat tires, puddles of oil, water or other
indications of possible trouble.
2. After entering the car, check to be sure the
parking brake is engaged.
3. Check that all windows, and lights are clean.
4. Check that the interior and exterior mirrors
are clean and in position.
5. Check your seat, seatback and headrest to
be sure they are in their proper positions.
6. Lock all the doors.
7. Fasten your seat belt and be sure that all
other occupants have fastened theirs.
8. Turn off all lights and accessories that are
not needed.
9. When you turn the ignition switch to "ON",
check that all appropriate warning lights are
operating and that you have sufficient fuel.
10.Check the operation of warning lights and all
bulbs when key is in the "ON" position.
C030A01A-AATCOMBINATION IGNITION SWITCH
To Start the Engine
Before starting the engine:
o If your Hyundai is equipped with a manual
transaxle, place the shift lever in neutral and
depress the clutch.
o If your Hyundai has an automatic transaxle,
place the shift lever in "P" (park).
o To start the engine, insert the ignition key and
turn it to the "START" position. Release it as
soon as the engine starts. Do not hold the
key in the "START" position for more than 15
seconds.
NOTE:o For safety, the engine will not start if the
shift lever is not in "P" or "N" Position.
o The ignition key cannot be turned from
"ACC" position to "LOCK" position un-
less the shift lever is in the "P" (Park)
position or the negative battery terminal
is disconnected from the battery. To
remove the key, always confirm that the
shift lever is securely positioned in "P"
(Park).
o For additional information about start-
ing, see page 2-3.
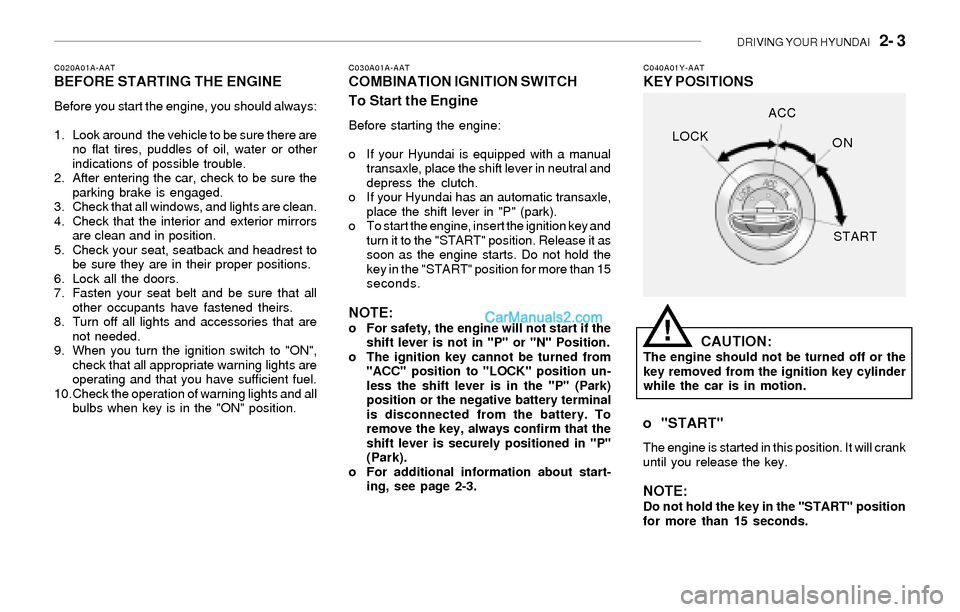
C040A01Y-AATKEY POSITIONS
CAUTION:
The engine should not be turned off or the
key removed from the ignition key cylinder
while the car is in motion.
!
o "START"
The engine is started in this position. It will crank
until you release the key.
NOTE:Do not hold the key in the "START" position
for more than 15 seconds.LOCKACC
ON
START
Page 124 of 208
DRIVING YOUR HYUNDAI 2- 9
CAUTION:o In sports mode, the driver must execute
upward shifts in accordance with pre-
vailing road conditions, taking care to
keep the engine speed below the red
zone.
o For engine protection, upward shifts are
made automatically when the engine
rpm reaches the red zone.
o By rapidly moving the selector lever back-
wards (-) twice it is possible to skip one
gear, i.e., 3rd to 1st, 4th to 2nd. Since
sudden engine braking and/or rapid ac-
celeration can cause a loss of traction,
however, downshifts must be made care-
fully in accordance with the vehicle's
speed.
!
C090H01L-GATNOTE:o For smooth and safe operation, depress
the brake pedal when shifting from "Neu-
tral" position or "Park" position to a
forward or reverse gear.
o The ignition key must be in the "ON"
position and the brake pedal fully de-
pressed in order to move the shift lever
from the "P" (Park) position to any of the
other positions.
o It is always possible to shift from "R",
"N", "D" position to "P" position. The
vehicle must be fully stopped to avoid
transaxle damage.
C090I02L-GAT
CAUTION:
o Shift into "R" and "P" position only when
the vehicle has completely stopped.
o Do not accelerate the engine in reverse
or any of the forward positions with the
brakes applied.
o Always apply the footbrake when shift-
ing from "P" or "N", to "R", "D"position.
o Do not use the "P" (Park) position in
place of the parking brake. Always set
the parking brake, shift the transaxle
into "P" (Park) position and turn off the
ignition when you leave the vehicle, even
momentarily. Never leave the vehicle
unattended while the engine is running.
o Check the automatic transaxle fluid level
regularly, and add fluid as necessary.
o See the maintenance schedule for the
proper fluid recommendation.
!
NOTE:o In sports mode, only the four forward
gears can be selected. To reverse or park
the vehicle, move the selector lever to
the "R" or "P" position as required.
o In sports mode, downward shifts are
made automatically when the vehicle
slows down. When the vehicle stops, 1st
gear is automatically selected.
o To maintain the required levels of ve-
hicle performance and safety, the sys-
tem may not execute certain gearshifts
when the selector lever is operated.o Before driving away from a stop on a
slippery road, push the selector lever
forward into the +(UP) position. This
causes the transaxle to shift into 2nd
gear which is better for smooth driving
away on a slippery road. Push the selec-
tor lever to the -(DOWN) side to shift
back to 1st gear.
Page 131 of 208
2- 16 DRIVING YOUR HYUNDAI
C190D01S-AAT
Safety Chains
Should the hitch connection between your car
and the trailer or vehicle you are towing fail, the
trailer or vehicle could wander dangerously
across other lanes of traffic and ultimately leave
the roadway. To eliminate this potentially dan-
gerous situation, safety chains, attached be-
tween your car and the trailer or towed vehicle,
are required in most states.
CAUTION:o Never connect a trailer brake system
directly to the vehicle brake system.
o When towing a trailer on steep grades (in
excess of 12%) pay close attention to the
engine coolant temperature gauge to
ensure the engine does not overheat. If
the needle of the coolant temperature
gauge moves across the dial towards
"H" (HOT), pull over and stop as soon as
it is safe to do so, and allow the engine
to idle until it cools down. You may
proceed once the engine has cooled
sufficiently.
!
C180A01A-AATUSE OF LIGHTS
Check your lights regularly for correct opera-
tion and always keep them clean. When driving
during the day in conditions of poor visibility, it
is helpful to drive with headlights on low beam.
This enables you to be seen as well as to see.
C190A01S-AAT
TRAILER OR VEHICLE TOWING
If you are considering towing with your car, you
should first check with your State's Department
of Motor Vehicles to determine their legal re-
quirements.
Since laws vary from State to State the require-
ments for towing trailers, cars, or other types of
vehicles or apparatus may differ. Ask your
Hyundai dealer for further details before towing.
C190B01S-AATTrailer Hitches
Select the proper hitch and ball combination,
making sure that its location is compatible with
that of the trailer or vehicle being towed.
Use a quality non-equalizing hitch which distrib-
utes the tongue load uniformly throughout the
chassis.
The hitch should be bolted securely to the car
and installed by a qualified technician. DO NOT
USE A HITCH DESIGNED FOR TEMPORARY
INSTALLATION AND NEVER USE ONE THAT
ATTACHES ONLY TO THE BUMPER.
CAUTION:Do not do any towing with your car during
its first 1,200 miles (2,000 km) in order to
allow the engine to properly break in. Fail-
ure to heed this caution may result in seri-
ous engine or transaxle damage.
!
C190C01Y-AATTrailer Brakes
If your trailer is equipped with a braking system,
make sure it conforms to federal and/or local
regulations and that it is properly installed and
operating correctly.
NOTE:If you tow a trailer or vehicle, your car will
require more frequent maintenance due to
the additional load. See Maintenance Under
Severe Usage Conditions" on page 5-6.
Page 133 of 208
2- 18 DRIVING YOUR HYUNDAI
CAUTION:If overheating should occur when towing,
(the temperature gauge reads near red zone),
taking the following action may reduce or
eliminate the problem.
1. Turn off the air conditioner.
2. Reduce highway speed.
3. Select a lower gear when going uphill.
4. While in stop and go traffic, place the
gear selector in park or neutral and idle
the engine at a higher speed.
!
C190F01S-AATTrailer or Vehicle Towing Tips
1. Before towing, check hitch and safety chain
connections as well as proper operation of
the trailer running lights, brake lights, and
turn signals.
2. Always drive your vehicle at a moderate
speed (Less than 60 mph)
3. Trailer towing requires more fuel than normal
conditions.
4. To maintain engine braking efficiency and
electrical charging performance, do not use
fifth gear (manual transaxle) or overdrive
(automatic transaxle).
5. Always secure items in the trailer to prevent
load shift while driving.
6. Check the condition and air pressure of all
tires on the trailer and your car. Low tire
pressure can seriously affect the handling.
Also check the spare tire.
7. The vehicle/trailer combination is more af-
fected by crosswind and buffeting.
When being passed by a large vehicle, keep
a constant speed and steer straight ahead.
If there is too much wind buffeting slow down
to get out of the other vehicle's air turbulence.
8. When parking your car and trailer, especially
on a hill, be sure to follow all the normal
precautions. Turn your front wheel into the
curb, set the parking brake firmly, and put the
transaxle in 1st or Reverse (manual) or Park
(automatic). In addition, place wheel chocks
at each of the trailer's tires.9. If the trailer has electric brakes, start your
vehicle and trailer moving, and then apply the
trailer brake controller by hand to be sure the
brakes are working. This lets you check
your electrical connection at the same time.
10.During your trip, check occasionally to be
sure that the load is secure, and that the
lights and any trailer brakes are still working.
11.Avoid jerky starts, sudden acceleration or
sudden stops.
12.Avoid sharp turns and rapid lane changes.
13.Avoid holding the brake pedal down too long
or too frequently. This could cause the brakes
to overheat, resulting in reduced braking
efficiency.
14.When going down a hill, shift into a lower gear
and use the engine braking effect.
When ascending a long grade, downshift the
transaxle to a lower gear and reduce speed
to reduce chances of engine overloading
and/or overheating.
15.If you have to stop while going uphill, do not
hold the vehicle in place by pressing on the
accelerator. This can cause the automatic
transaxle to overheat. Use the parking brake
or footbrake.
NOTE:When towing check transaxle fluid more
frequently.
Page 135 of 208
3- 2 WHAT TO DO IN AN EMERGENCY
!
!
D010A01A-AATIF THE ENGINE WILL NOT START
D010B01A-AATIf Engine Doesn't Turn Over or Turns
Over Slowly
D010C01Y-AATIf Engine Turns Over Normally but Does
Not Start
1. Check fuel level.
2. Check all connectors at ignition, coil and
spark plugs. Re-connect any that may be
disconnected or loose.
3. Check the fuel line in the engine room.
4. If engine still refuses to start, call a Hyundai
dealer or seek other qualified assistance.
D010D01A-AATIf Engine Stalls While Driving
1. Reduce your speed gradually, keeping a
straight line. Move cautiously off the road to
a safe place.
2. Turn on your emergency flashers.
3. Try to start the engine again. If your vehicle
will not start, contact a Hyundai dealer or
seek other qualified assistance.
WARNING:If the engine will not start, do not push or
pull the car to start it. This could result in a
collision or cause other damage. In addi-
tion, push or pull starting may cause the
catalytic converter to be overloaded and
create a fire hazard.
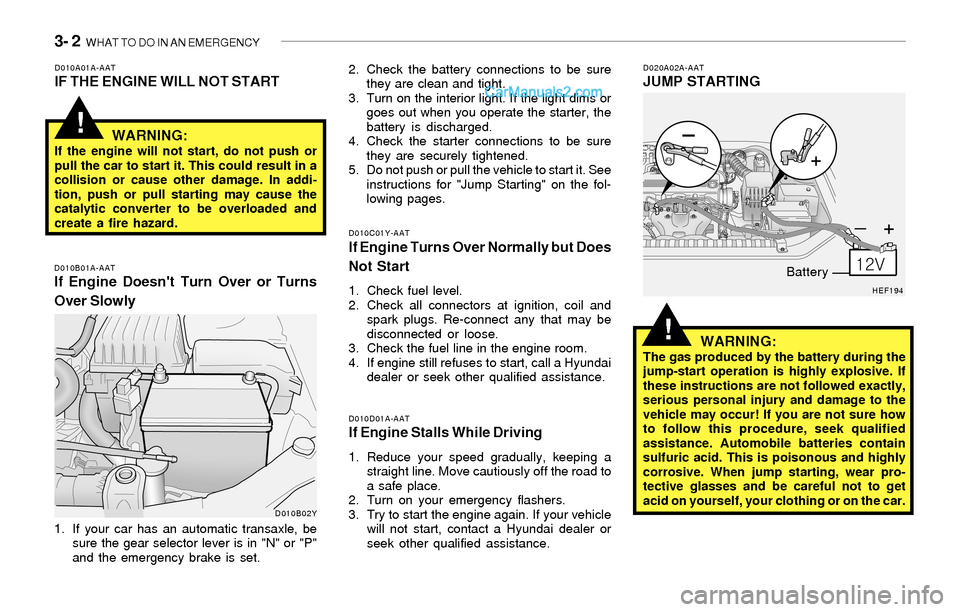
1. If your car has an automatic transaxle, be
sure the gear selector lever is in "N" or "P"
and the emergency brake is set.2. Check the battery connections to be sure
they are clean and tight.
3. Turn on the interior light. If the light dims or
goes out when you operate the starter, the
battery is discharged.
4. Check the starter connections to be sure
they are securely tightened.
5. Do not push or pull the vehicle to start it. See
instructions for "Jump Starting" on the fol-
lowing pages.
D020A02A-AATJUMP STARTING
WARNING:
The gas produced by the battery during the
jump-start operation is highly explosive. If
these instructions are not followed exactly,
serious personal injury and damage to the
vehicle may occur! If you are not sure how
to follow this procedure, seek qualified
assistance. Automobile batteries contain
sulfuric acid. This is poisonous and highly
corrosive. When jump starting, wear pro-
tective glasses and be careful not to get
acid on yourself, your clothing or on the car.
D010B02YHEF194
Battery
Page 142 of 208
WHAT TO DO IN AN EMERGENCY 3- 9
D080A01A-AATIF YOUR CAR MUST BE TOWEDD060I01Y-AAT8. Lower Vehicle and Tighten NutsD060J01A-AATAfter Changing Wheels
Lower the car to the ground by turning the jack
handle counterclockwise. Then position the
wrench as shown in the drawing and tighten the
wheel nuts. Be sure the socket is seated com-
pletely over the nut. Do not stand on the wrench
handle or use an extension pipe over the wrench
handle.
Go around the wheel tightening every other nut
until they are all tight. Then double-check each
nut for tightness and reinstall the wheel cover.
After changing wheels, have a technician tighten
the wheel nuts to their proper torque as soon as
possible.
Wheel nut tightening torque:Steel wheel & aluminium alloy wheel:
65-80 lb.ft (900-1,100 kg.cm)If you have a tire gauge, remove the valve cap
and check the air pressure. If the pressure is
lower than recommended, drive slowly to the
nearest service station and inflate to the correct
pressure. If it is too high, adjust it until it is correct.
Always reinstall the valve cap after checking or
adjusting tire pressure. If the cap is not re-
placed, air may leak from the tire. If you lose a
valve cap, buy another and install it as soon as
possible.
After you have changed wheels, always secure
the flat tire in its place in the trunk and return the
jack, jack handle, and tools to their proper
storage locations.
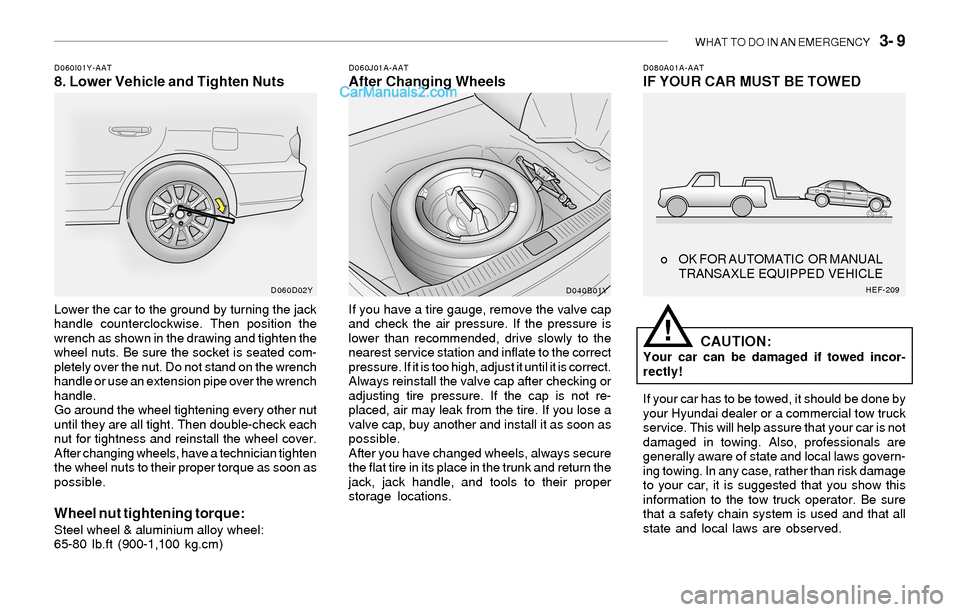
CAUTION:Your car can be damaged if towed incor-
rectly!
If your car has to be towed, it should be done by
your Hyundai dealer or a commercial tow truck
service. This will help assure that your car is not
damaged in towing. Also, professionals are
generally aware of state and local laws govern-
ing towing. In any case, rather than risk damage
to your car, it is suggested that you show this
information to the tow truck operator. Be sure
that a safety chain system is used and that all
state and local laws are observed.
!
o OK FOR AUTOMATIC OR MANUAL
TRANSAXLE EQUIPPED VEHICLE
D060D02Y
D040B01YHEF-209
Page 156 of 208
VEHICLE MAINTENANCE REQUIREMENTS 5- 7
F060G01A-AATo Vapor Hose and Fuel Filler Cap
The vapor hose and fuel filler cap should be
inspected at those intervals specified in the
maintenance schedule. Make sure that a new
vapor hose or fuel filler cap is correctly re-
placed.
F060D01A-AATo Fuel Lines, Fuel Hoses and Connec-
tions
Check the fuel lines, fuel hoses and connec-
tions for leakage and damage. Have a trained
technician replace any damaged or leaking
parts immediately.
F060A01A-AATEXPLANATION OF SCHEDULED MAIN-
TENANCE ITEMS
F060B02A-AATo Drive Belts
Inspect all drive belts for evidence of cuts,
cracks, excessive wear or oil saturation and
replace if necessary. Drive belts should be
checked periodically for proper tension and
adjusted as necessary.
F060M01A-AATo Engine Oil and Filter
The engine oil and filter should be changed at the
intervals specified in the maintenance sched-
ule. If the car is being driven in severe condi-
tions, more frequent oil and filter changes are
required.
F060C01A-AATo Fuel Filter
A clogged filter can limit the speed at which the
vehicle may be driven, damage the emission
system and cause hard starting. If an exces-
sive amount of foreign matter accumulates in
the fuel tank, the filter may require replacement
more frequently.
After installing a new filter, run the engine for
several minutes, and check for leaks at the
connections. Fuel filters should be installed by
trained technicians.
F060F01A-AATo Vacuum, Crankcase
Ventilation Hoses
Inspect the surface of hoses for evidence of
heat and/or mechanical damage. Hard and
brittle rubber, cracking, tears, cuts, abrasions,
and excessive swelling indicate deterioration.
Particular attention should be paid to examine
those hose surfaces nearest to high heat
sources, such as the exhaust manifold.
Inspect the hose routing to assure that the
hoses do not come in contact with any heat
source, sharp edges or moving component
which might cause heat damage or mechanical
wear. Inspect all hose connections, such as
clamps and couplings, to make sure they are
secure, and that no leaks are present. Hoses
should be replaced immediately if there is any
evidence of deterioration or damage.
F070C01A-AATo Coolant
The coolant should be changed at the intervals
specified in the maintenance schedule.
F060E01A-AATo Timing belt
Inspect all parts related to the timing belt for
damage and deformation. Replace any dam-
aged parts immediately.
F060J01A-AAT
o Spark plugs
Make sure to install new spark plugs of the
correct heat range.
F060H01A-AATo Air cleaner filter
A Genuine Hyundai air cleaner filter is recom-
mended when filter is replaced.
Page 166 of 208
6- 8 DO-IT-YOURSELF MAINTENANCE
G050D02A-AATTo Change the Engine CoolantThe engine coolant should be changed at those
intervals specified in the vehicle maintenance
schedule in Section 5.
G050C01A-AAT
To Check the Coolant LevelThe coolant level can be seen on the side of the
plastic coolant reservoir. The level of the cool-
ant should be between the "L" and "F" lines on
the reservoir when the engine is cool. If the level
is below the "L" mark, add engine coolant to
bring it up between "L" and "F". If the level is low,
inspect for coolant leaks and recheck the fluid
level frequently. If the level drops again, visit
your Hyundai dealer for an inspection and
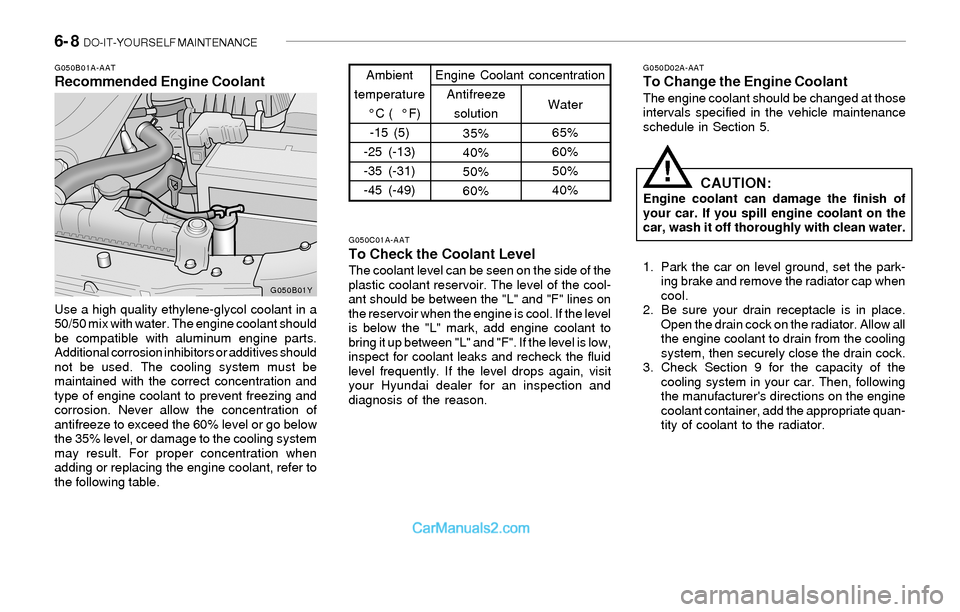
diagnosis of the reason.Ambient
temperature
°C ( °F)
-15 (5)
-25 (-13)
-35 (-31)
-45 (-49)
65%
60%
50%
40% 35%
40%
50%
60%Water Antifreeze
solution Engine Coolant concentration
G050B01A-AATRecommended Engine Coolant
Use a high quality ethylene-glycol coolant in a
50/50 mix with water. The engine coolant should
be compatible with aluminum engine parts.
Additional corrosion inhibitors or additives should
not be used. The cooling system must be
maintained with the correct concentration and
type of engine coolant to prevent freezing and
corrosion. Never allow the concentration of
antifreeze to exceed the 60% level or go below
the 35% level, or damage to the cooling system
may result. For proper concentration when
adding or replacing the engine coolant, refer to
the following table.
G050B01Y
CAUTION:Engine coolant can damage the finish of
your car. If you spill engine coolant on the
car, wash it off thoroughly with clean water.
1. Park the car on level ground, set the park-
ing brake and remove the radiator cap when
cool.
2. Be sure your drain receptacle is in place.
Open the drain cock on the radiator. Allow all
the engine coolant to drain from the cooling
system, then securely close the drain cock.
3. Check Section 9 for the capacity of the
cooling system in your car. Then, following
the manufacturer's directions on the engine
coolant container, add the appropriate quan-
tity of coolant to the radiator.
!
Page 170 of 208
6- 12 DO-IT-YOURSELF MAINTENANCE
!
G110B03A-AAT
Recommended Fluid
Your Hyundai automatic transaxle is specially
designed to operate with HYUNDAI GENUINE
ATF or DIAMOND ATF SP-III or SK ATF SP-III.
Damage caused by a nonspecified fluid is not
covered by your new vehicle limited warranty.
G110A01A-AAT
CHECKING THE TRANSAXLE FLUID
(AUTOMATIC)
Transaxle fluid in the automatic transaxle should
be checked at those intervals specified in the
vehicle maintenance schedule in Section 5.
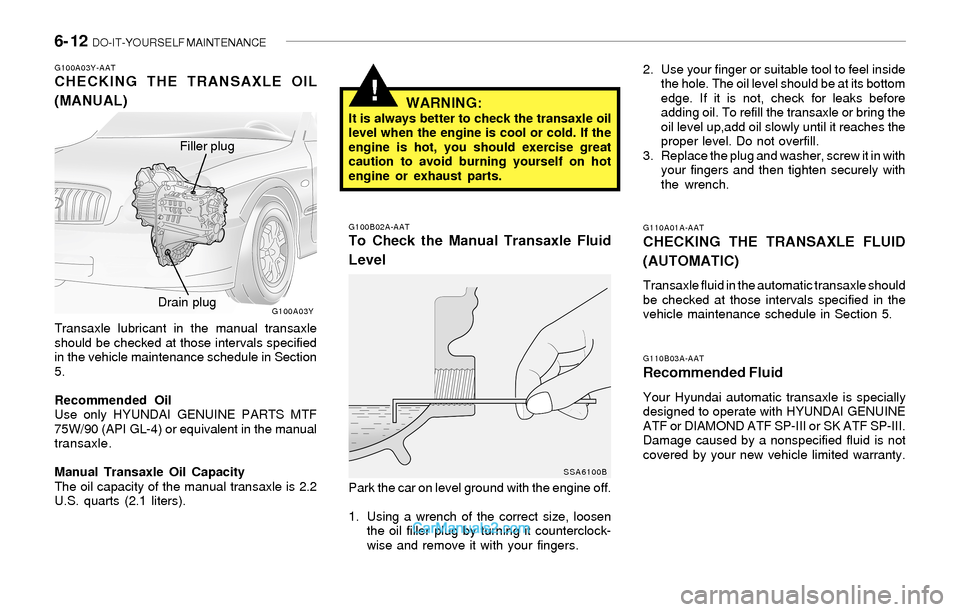
G100B02A-AATTo Check the Manual Transaxle Fluid
Level
G100A03Y-AATCHECKING THE TRANSAXLE OIL
(MANUAL)
Transaxle lubricant in the manual transaxle
should be checked at those intervals specified
in the vehicle maintenance schedule in Section
5.
Recommended Oil
Use only HYUNDAI GENUINE PARTS MTF
75W/90 (API GL-4) or equivalent in the manual
transaxle.
Manual Transaxle Oil Capacity
The oil capacity of the manual transaxle is 2.2
U.S. quarts (2.1 liters).Park the car on level ground with the engine off.
1. Using a wrench of the correct size, loosen
the oil filler plug by turning it counterclock-
wise and remove it with your fingers.2. Use your finger or suitable tool to feel inside
the hole. The oil level should be at its bottom
edge. If it is not, check for leaks before
adding oil. To refill the transaxle or bring the
oil level up,add oil slowly until it reaches the
proper level. Do not overfill.
3. Replace the plug and washer, screw it in with
your fingers and then tighten securely with
the wrench.
WARNING:It is always better to check the transaxle oil
level when the engine is cool or cold. If the
engine is hot, you should exercise great
caution to avoid burning yourself on hot
engine or exhaust parts.
G100A03Y
SSA6100B
Filler plug
Drain plug
Page 187 of 208
DO-IT-YOURSELF MAINTENANCE 6- 29
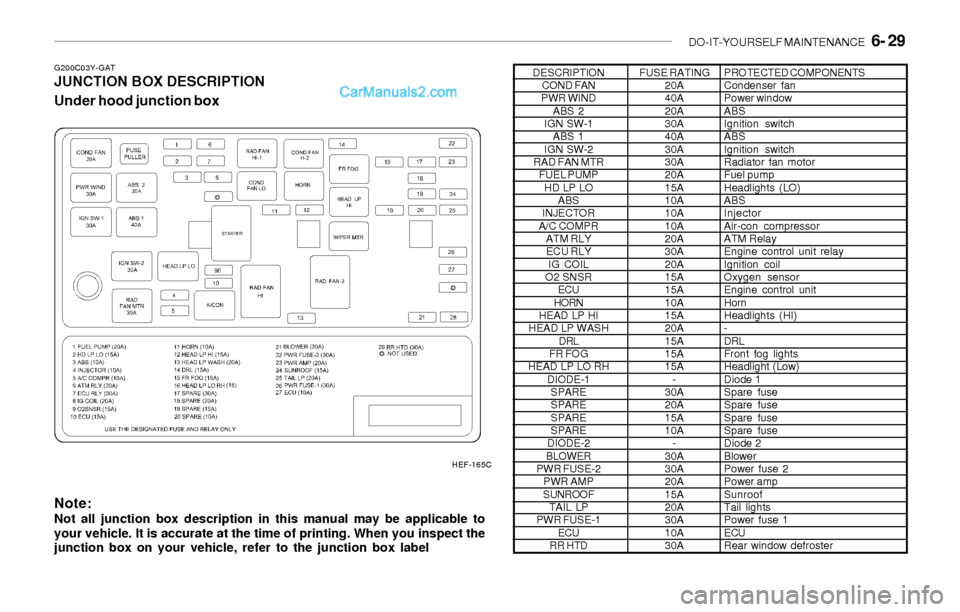
G200C03Y-GATJUNCTION BOX DESCRIPTION
Under hood junction box
Note:
Not all junction box description in this manual may be applicable to
your vehicle. It is accurate at the time of printing. When you inspect the
junction box on your vehicle, refer to the junction box label
DESCRIPTION
COND FAN
PWR WIND
ABS 2
IGN SW-1
ABS 1
IGN SW-2
RAD FAN MTR
FUEL PUMP
HD LP LO
ABS
INJECTOR
A/C COMPR
ATM RLY
ECU RLY
IG COIL
O2 SNSR
ECU
HORN
HEAD LP HI
HEAD LP WASH
DRL
FR FOG
HEAD LP LO RH
DIODE-1
SPARE
SPARE
SPARE
SPARE
DIODE-2
BLOWER
PWR FUSE-2
PWR AMP
SUNROOF
TAIL LP
PWR FUSE-1
ECU
RR HTDFUSE RATING
20A
40A
20A
30A
40A
30A
30A
20A
15A
10A
10A
10A
20A
30A
20A
15A
15A
10A
15A
20A
15A
15A
15A
-
30A
20A
15A
10A
-
30A
30A
20A
15A
20A
30A
10A
30APROTECTED COMPONENTS
Condenser fan
Power window
ABS
Ignition switch
ABS
Ignition switch
Radiator fan motor
Fuel pump
Headlights (LO)
ABS
Injector
Air-con compressor
ATM Relay
Engine control unit relay
Ignition coil
Oxygen sensor
Engine control unit
Horn
Headlights (HI)
-
DRL
Front fog lights
Headlight (Low)
Diode 1
Spare fuse
Spare fuse
Spare fuse
Spare fuse
Diode 2
Blower
Power fuse 2
Power amp
Sunroof
Tail lights
Power fuse 1
ECU
Rear window defroster
HEF-165C