clock Hyundai Sonata 2004 User Guide
[x] Cancel search | Manufacturer: HYUNDAI, Model Year: 2004, Model line: Sonata, Model: Hyundai Sonata 2004Pages: 208, PDF Size: 16.93 MB
Page 119 of 208
2- 4 DRIVING YOUR HYUNDAI
!
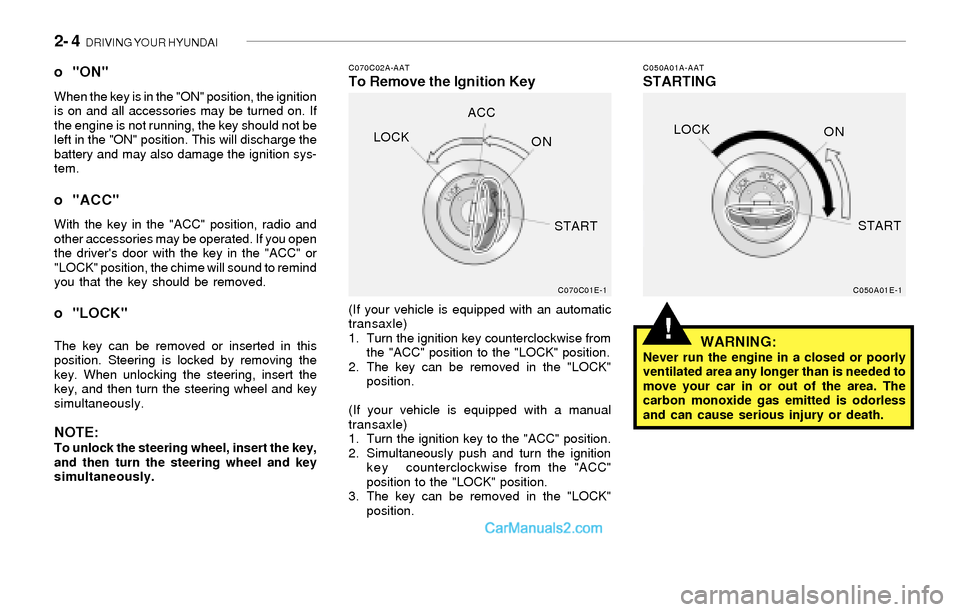
C070C02A-AATTo Remove the Ignition KeyC050A01A-AATSTARTING o "ON"When the key is in the "ON" position, the ignition
is on and all accessories may be turned on. If
the engine is not running, the key should not be
left in the "ON" position. This will discharge the
battery and may also damage the ignition sys-
tem.
o "ACC"
With the key in the "ACC" position, radio and
other accessories may be operated. If you open
the driver's door with the key in the "ACC" or
"LOCK" position, the chime will sound to remind
you that the key should be removed.
o "LOCK"
The key can be removed or inserted in this
position. Steering is locked by removing the
key. When unlocking the steering, insert the
key, and then turn the steering wheel and key
simultaneously.
NOTE:To unlock the steering wheel, insert the key,
and then turn the steering wheel and key
simultaneously.(If your vehicle is equipped with an automatic
transaxle)
1. Turn the ignition key counterclockwise from
the "ACC" position to the "LOCK" position.
2. The key can be removed in the "LOCK"
position.
(If your vehicle is equipped with a manual
transaxle)
1. Turn the ignition key to the "ACC" position.
2. Simultaneously push and turn the ignition
key counterclockwise from the "ACC"
position to the "LOCK" position.
3. The key can be removed in the "LOCK"
position.
WARNING:Never run the engine in a closed or poorly
ventilated area any longer than is needed to
move your car in or out of the area. The
carbon monoxide gas emitted is odorless
and can cause serious injury or death.
C070C01E-1
C050A01E-1
LOCKACC
ON
STARTLOCK
ON
START
Page 140 of 208
WHAT TO DO IN AN EMERGENCY 3- 7
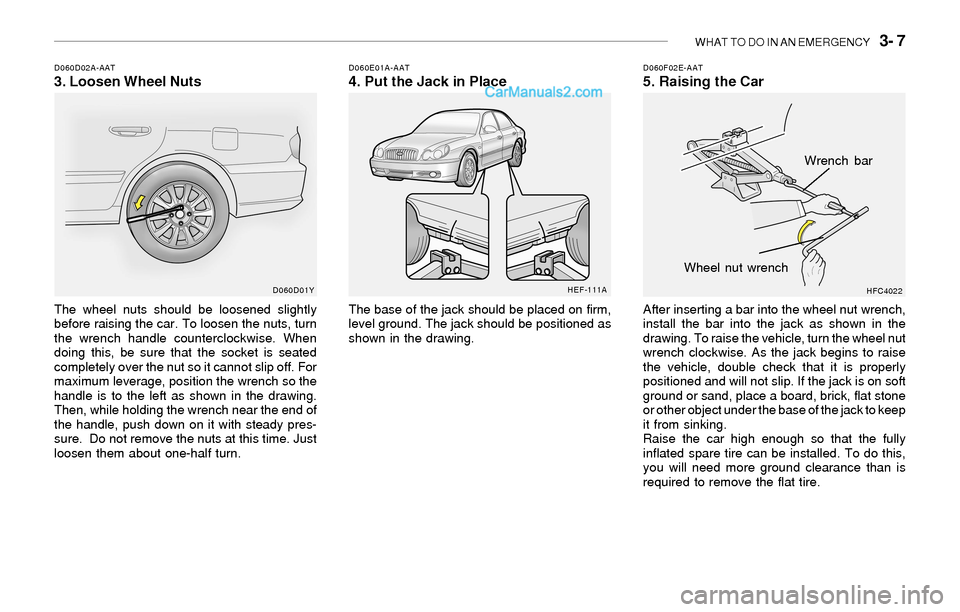
D060D02A-AAT3. Loosen Wheel NutsD060E01A-AAT4. Put the Jack in Place
The wheel nuts should be loosened slightly
before raising the car. To loosen the nuts, turn
the wrench handle counterclockwise. When
doing this, be sure that the socket is seated
completely over the nut so it cannot slip off. For
maximum leverage, position the wrench so the
handle is to the left as shown in the drawing.
Then, while holding the wrench near the end of
the handle, push down on it with steady pres-
sure. Do not remove the nuts at this time. Just
loosen them about one-half turn.The base of the jack should be placed on firm,
level ground. The jack should be positioned as
shown in the drawing.
D060F02E-AAT5. Raising the Car
After inserting a bar into the wheel nut wrench,
install the bar into the jack as shown in the
drawing. To raise the vehicle, turn the wheel nut
wrench clockwise. As the jack begins to raise
the vehicle, double check that it is properly
positioned and will not slip. If the jack is on soft
ground or sand, place a board, brick, flat stone
or other object under the base of the jack to keep
it from sinking.
Raise the car high enough so that the fully
inflated spare tire can be installed. To do this,
you will need more ground clearance than is
required to remove the flat tire.
D060D01Y
HFC4022
Wrench bar
Wheel nut wrench
HEF-111A
Page 142 of 208
WHAT TO DO IN AN EMERGENCY 3- 9
D080A01A-AATIF YOUR CAR MUST BE TOWEDD060I01Y-AAT8. Lower Vehicle and Tighten NutsD060J01A-AATAfter Changing Wheels
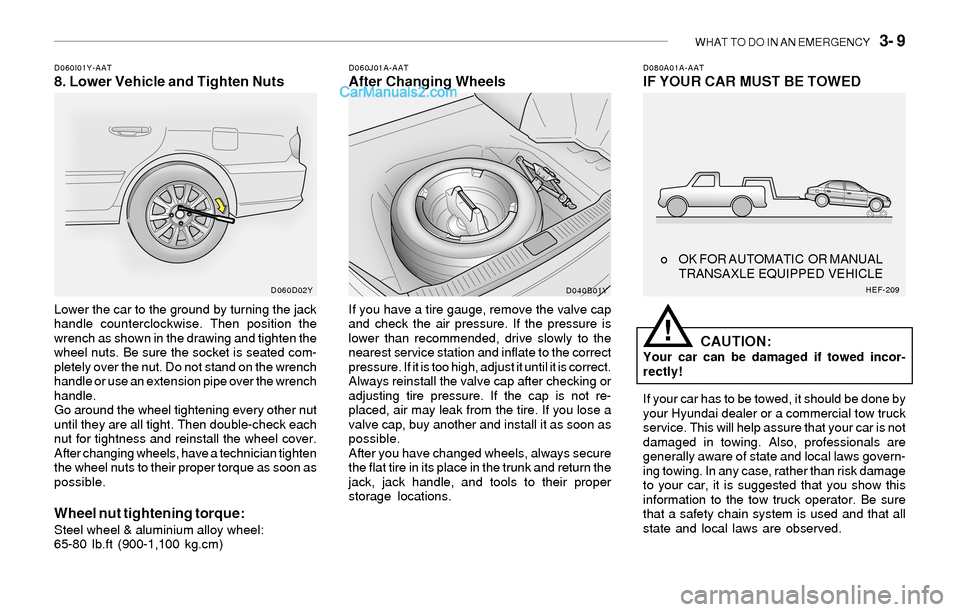
Lower the car to the ground by turning the jack
handle counterclockwise. Then position the
wrench as shown in the drawing and tighten the
wheel nuts. Be sure the socket is seated com-
pletely over the nut. Do not stand on the wrench
handle or use an extension pipe over the wrench
handle.
Go around the wheel tightening every other nut
until they are all tight. Then double-check each
nut for tightness and reinstall the wheel cover.
After changing wheels, have a technician tighten
the wheel nuts to their proper torque as soon as
possible.
Wheel nut tightening torque:Steel wheel & aluminium alloy wheel:
65-80 lb.ft (900-1,100 kg.cm)If you have a tire gauge, remove the valve cap
and check the air pressure. If the pressure is
lower than recommended, drive slowly to the
nearest service station and inflate to the correct
pressure. If it is too high, adjust it until it is correct.
Always reinstall the valve cap after checking or
adjusting tire pressure. If the cap is not re-
placed, air may leak from the tire. If you lose a
valve cap, buy another and install it as soon as
possible.
After you have changed wheels, always secure
the flat tire in its place in the trunk and return the
jack, jack handle, and tools to their proper
storage locations.
CAUTION:Your car can be damaged if towed incor-
rectly!
If your car has to be towed, it should be done by
your Hyundai dealer or a commercial tow truck
service. This will help assure that your car is not
damaged in towing. Also, professionals are
generally aware of state and local laws govern-
ing towing. In any case, rather than risk damage
to your car, it is suggested that you show this
information to the tow truck operator. Be sure
that a safety chain system is used and that all
state and local laws are observed.
!
o OK FOR AUTOMATIC OR MANUAL
TRANSAXLE EQUIPPED VEHICLE
D060D02Y
D040B01YHEF-209
Page 164 of 208
6- 6 DO-IT-YOURSELF MAINTENANCE
!
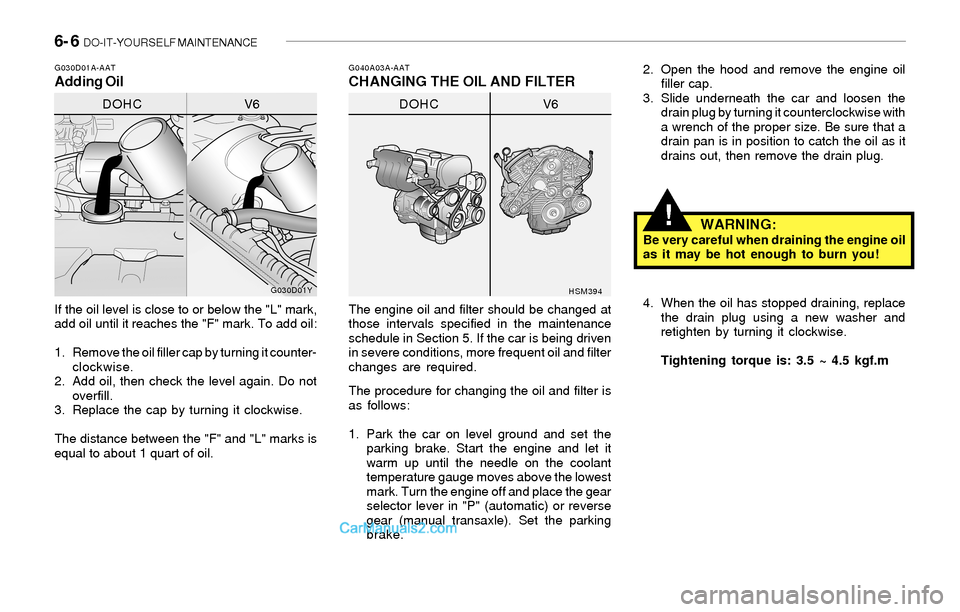
G040A03A-AATCHANGING THE OIL AND FILTERG030D01A-AATAdding Oil
If the oil level is close to or below the "L" mark,
add oil until it reaches the "F" mark. To add oil:
1. Remove the oil filler cap by turning it counter-
clockwise.
2. Add oil, then check the level again. Do not
overfill.
3. Replace the cap by turning it clockwise.
The distance between the "F" and "L" marks is
equal to about 1 quart of oil.The engine oil and filter should be changed at
those intervals specified in the maintenance
schedule in Section 5. If the car is being driven
in severe conditions, more frequent oil and filter
changes are required.
The procedure for changing the oil and filter is
as follows:
1. Park the car on level ground and set the
parking brake. Start the engine and let it
warm up until the needle on the coolant
temperature gauge moves above the lowest
mark. Turn the engine off and place the gear
selector lever in "P" (automatic) or reverse
gear (manual transaxle). Set the parking
brake.
G030D01Y
HSM394
DOHC V6DOHC V62. Open the hood and remove the engine oil
filler cap.
3. Slide underneath the car and loosen the
drain plug by turning it counterclockwise with
a wrench of the proper size. Be sure that a
drain pan is in position to catch the oil as it
drains out, then remove the drain plug.
WARNING:Be very careful when draining the engine oil
as it may be hot enough to burn you!
4. When the oil has stopped draining, replace
the drain plug using a new washer and
retighten by turning it clockwise.
Tightening torque is: 3.5 ~ 4.5 kgf.m
Page 165 of 208
DO-IT-YOURSELF MAINTENANCE 6- 7
!
!
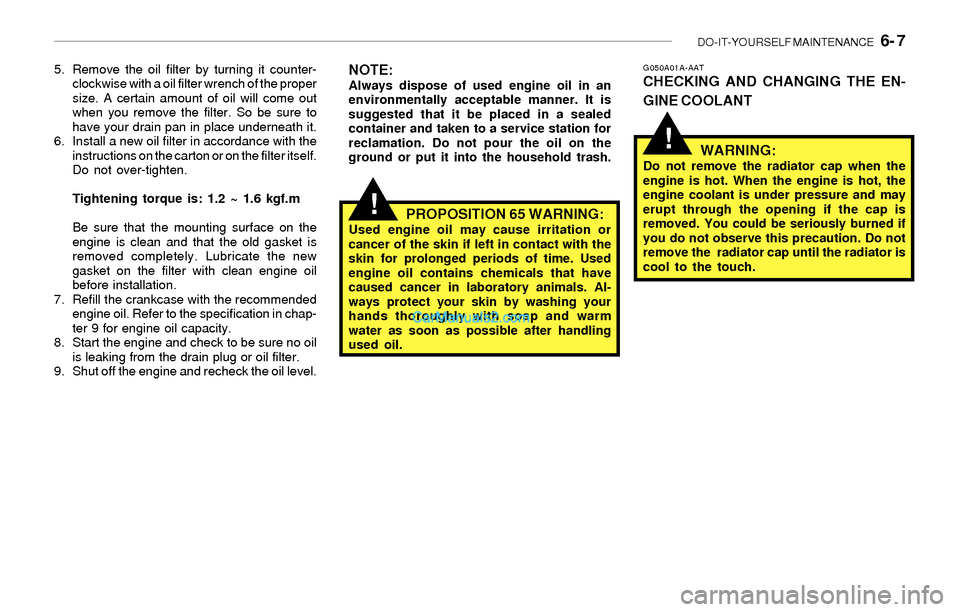
5. Remove the oil filter by turning it counter-
clockwise with a oil filter wrench of the proper
size. A certain amount of oil will come out
when you remove the filter. So be sure to
have your drain pan in place underneath it.
6. Install a new oil filter in accordance with the
instructions on the carton or on the filter itself.
Do not over-tighten.
Tightening torque is: 1.2 ~ 1.6 kgf.m
Be sure that the mounting surface on the
engine is clean and that the old gasket is
removed completely. Lubricate the new
gasket on the filter with clean engine oil
before installation.
7. Refill the crankcase with the recommended
engine oil. Refer to the specification in chap-
ter 9 for engine oil capacity.
8. Start the engine and check to be sure no oil
is leaking from the drain plug or oil filter.
9. Shut off the engine and recheck the oil level.G050A01A-AATCHECKING AND CHANGING THE EN-
GINE COOLANT
WARNING:
Do not remove the radiator cap when the
engine is hot. When the engine is hot, the
engine coolant is under pressure and may
erupt through the opening if the cap is
removed. You could be seriously burned if
you do not observe this precaution. Do not
remove the radiator cap until the radiator is
cool to the touch.
NOTE:Always dispose of used engine oil in an
environmentally acceptable manner. It is
suggested that it be placed in a sealed
container and taken to a service station for
reclamation. Do not pour the oil on the
ground or put it into the household trash.
PROPOSITION 65 WARNING:Used engine oil may cause irritation or
cancer of the skin if left in contact with the
skin for prolonged periods of time. Used
engine oil contains chemicals that have
caused cancer in laboratory animals. Al-
ways protect your skin by washing your
hands thoroughly with soap and warm
water as soon as possible after handling
used oil.
Page 167 of 208
DO-IT-YOURSELF MAINTENANCE 6- 9
!
4. Turn the radiator cap counterclockwise with-
out pressing down on it, until it stops. This
relieves any pressure remaining in the cool-
ing system. And remove the radiator cap by
pushing down and turning counterclock-
wise.
Now fill the radiator with clean demineralized
or distilled water. Continue to add clean
demineralized or distilled water in small quan-
tities until the fluid level stays up in the
radiator neck.
5. Start the engine, top off the radiator with
water and then add coolant to the reservoir
until the level is between "L" and "F".
6. Replace the radiator and reservoir caps and
check to be sure the drain cocks are fully
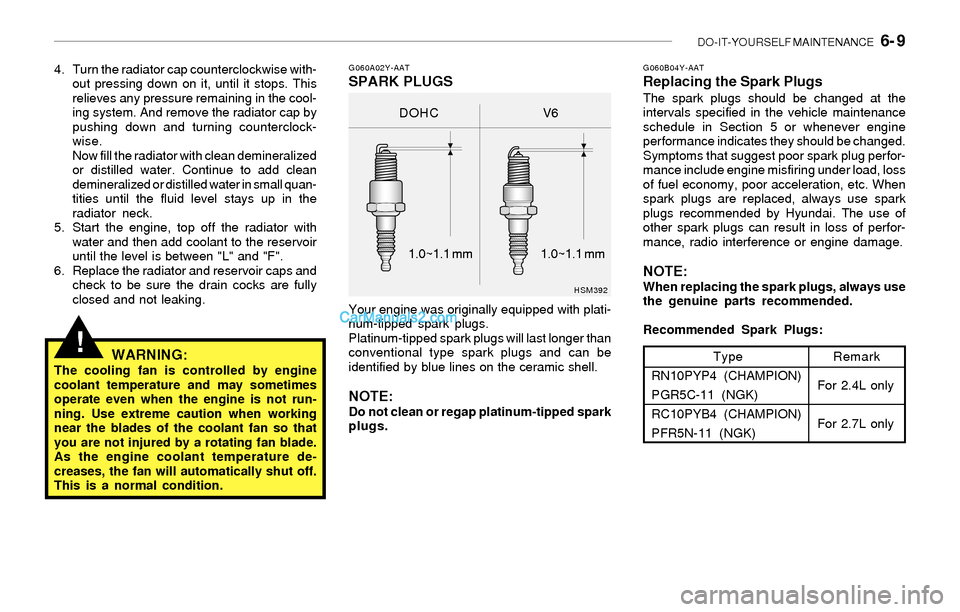
closed and not leaking.G060A02Y-AATSPARK PLUGS
Your engine was originally equipped with plati-
num-tipped spark plugs.
Platinum-tipped spark plugs will last longer than
conventional type spark plugs and can be
identified by blue lines on the ceramic shell.
NOTE:Do not clean or regap platinum-tipped spark
plugs.
WARNING:The cooling fan is controlled by engine
coolant temperature and may sometimes
operate even when the engine is not run-
ning. Use extreme caution when working
near the blades of the coolant fan so that
you are not injured by a rotating fan blade.
As the engine coolant temperature de-
creases, the fan will automatically shut off.
This is a normal condition.
HSM392G060B04Y-AAT
Replacing the Spark PlugsThe spark plugs should be changed at the
intervals specified in the vehicle maintenance
schedule in Section 5 or whenever engine
performance indicates they should be changed.
Symptoms that suggest poor spark plug perfor-
mance include engine misfiring under load, loss
of fuel economy, poor acceleration, etc. When
spark plugs are replaced, always use spark
plugs recommended by Hyundai. The use of
other spark plugs can result in loss of perfor-
mance, radio interference or engine damage.
NOTE:When replacing the spark plugs, always use
the genuine parts recommended.
Recommended Spark Plugs:
Type
RN10PYP4 (CHAMPION)
PGR5C-11 (NGK)
RC10PYB4 (CHAMPION)
PFR5N-11 (NGK)Remark
For 2.4L only
For 2.7L only
DOHC V6
1.0~1.1 mm 1.0~1.1 mm
Page 168 of 208
6- 10 DO-IT-YOURSELF MAINTENANCE
!
G060C04Y-AATChanging the Spark Plugs
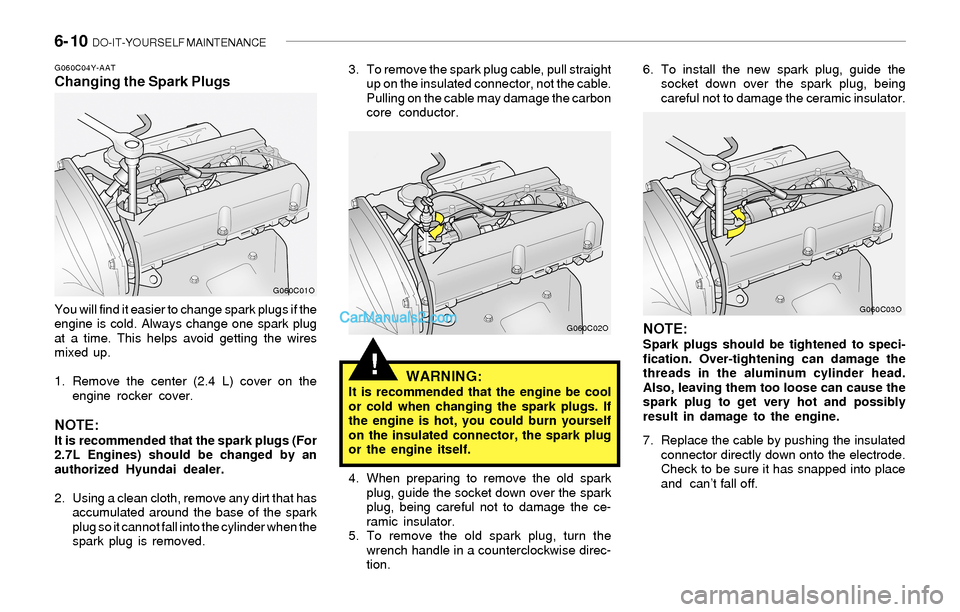
You will find it easier to change spark plugs if the
engine is cold. Always change one spark plug
at a time. This helps avoid getting the wires
mixed up.
1. Remove the center (2.4 L) cover on the
engine rocker cover.
NOTE:It is recommended that the spark plugs (For
2.7L Engines) should be changed by an
authorized Hyundai dealer.
2. Using a clean cloth, remove any dirt that has
accumulated around the base of the spark
plug so it cannot fall into the cylinder when the
spark plug is removed.3. To remove the spark plug cable, pull straight
up on the insulated connector, not the cable.
Pulling on the cable may damage the carbon
core conductor.
WARNING:It is recommended that the engine be cool
or cold when changing the spark plugs. If
the engine is hot, you could burn yourself
on the insulated connector, the spark plug
or the engine itself.
4. When preparing to remove the old spark
plug, guide the socket down over the spark
plug, being careful not to damage the ce-
ramic insulator.
5. To remove the old spark plug, turn the
wrench handle in a counterclockwise direc-
tion.6. To install the new spark plug, guide the
socket down over the spark plug, being
careful not to damage the ceramic insulator.
NOTE:Spark plugs should be tightened to speci-
fication. Over-tightening can damage the
threads in the aluminum cylinder head.
Also, leaving them too loose can cause the
spark plug to get very hot and possibly
result in damage to the engine.
7. Replace the cable by pushing the insulated
connector directly down onto the electrode.
Check to be sure it has snapped into place
and can’t fall off.
G060C01O
G060C02OG060C03O
Page 170 of 208
6- 12 DO-IT-YOURSELF MAINTENANCE
!
G110B03A-AAT
Recommended Fluid
Your Hyundai automatic transaxle is specially
designed to operate with HYUNDAI GENUINE
ATF or DIAMOND ATF SP-III or SK ATF SP-III.
Damage caused by a nonspecified fluid is not
covered by your new vehicle limited warranty.
G110A01A-AAT
CHECKING THE TRANSAXLE FLUID
(AUTOMATIC)
Transaxle fluid in the automatic transaxle should
be checked at those intervals specified in the
vehicle maintenance schedule in Section 5.
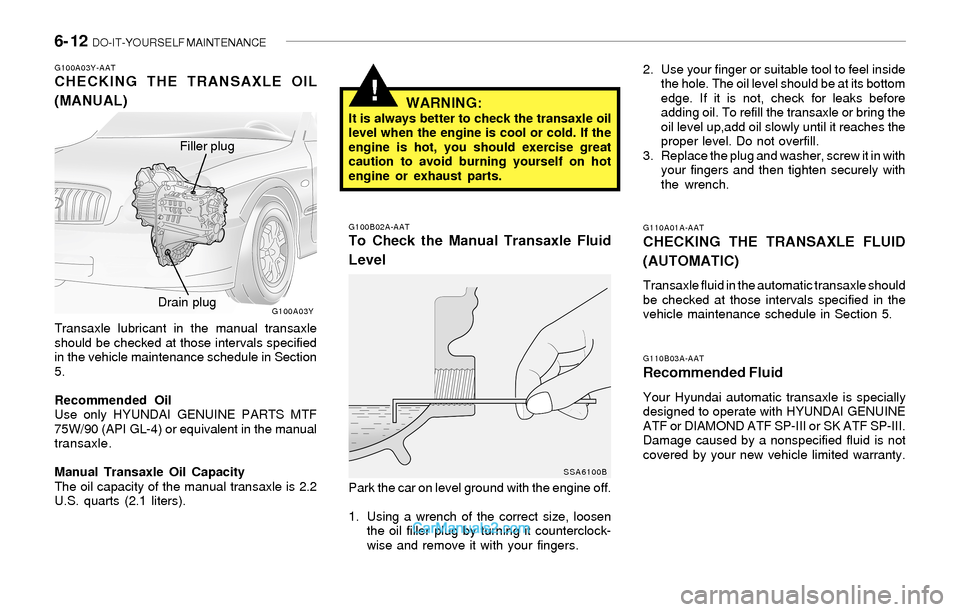
G100B02A-AATTo Check the Manual Transaxle Fluid
Level
G100A03Y-AATCHECKING THE TRANSAXLE OIL
(MANUAL)
Transaxle lubricant in the manual transaxle
should be checked at those intervals specified
in the vehicle maintenance schedule in Section
5.
Recommended Oil
Use only HYUNDAI GENUINE PARTS MTF
75W/90 (API GL-4) or equivalent in the manual
transaxle.
Manual Transaxle Oil Capacity
The oil capacity of the manual transaxle is 2.2
U.S. quarts (2.1 liters).Park the car on level ground with the engine off.
1. Using a wrench of the correct size, loosen
the oil filler plug by turning it counterclock-
wise and remove it with your fingers.2. Use your finger or suitable tool to feel inside
the hole. The oil level should be at its bottom
edge. If it is not, check for leaks before
adding oil. To refill the transaxle or bring the
oil level up,add oil slowly until it reaches the
proper level. Do not overfill.
3. Replace the plug and washer, screw it in with
your fingers and then tighten securely with
the wrench.
WARNING:It is always better to check the transaxle oil
level when the engine is cool or cold. If the
engine is hot, you should exercise great
caution to avoid burning yourself on hot
engine or exhaust parts.
G100A03Y
SSA6100B
Filler plug
Drain plug
Page 179 of 208
DO-IT-YOURSELF MAINTENANCE 6- 21
G250A01A-AATFOR MORE INFORMATION ABOUT
YOUR HYUNDAI
If you desire additional information about main-
taining and servicing your Hyundai, you may
purchase a factory Shop Manual at your Hyundai
dealer's parts department. This is the same
manual used by dealership technicians and
while it is highly technical it can be useful in
obtaining a better understanding of your car and
how it works.
G240A01A-AATPOWER STEERING HOSES
It is suggested that you check the power steer-
ing hose connections for fluid leakage at regular
intervals. The power steering hoses should be
replaced if there is severe surface cracking,
scuffing or worn spots. Deterioration of the hose
could cause premature failure. Recommended Fluid
Use PSF-3 type fluid
NOTE:Do not start the engine when the power
steering oil reservoir is empty.
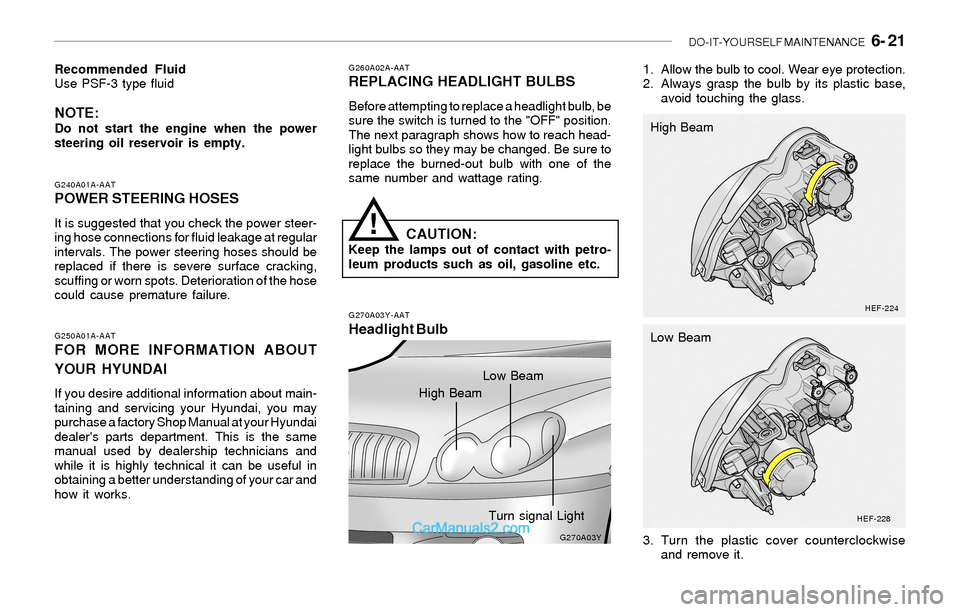
G260A02A-AATREPLACING HEADLIGHT BULBS
Before attempting to replace a headlight bulb, be
sure the switch is turned to the "OFF" position.
The next paragraph shows how to reach head-
light bulbs so they may be changed. Be sure to
replace the burned-out bulb with one of the
same number and wattage rating.
!CAUTION:Keep the lamps out of contact with petro-
leum products such as oil, gasoline etc.
G270A03Y-AAT
Headlight Bulb
1. Allow the bulb to cool. Wear eye protection.
2. Always grasp the bulb by its plastic base,
avoid touching the glass.
G270A03Y
HEF-224
HEF-228
3. Turn the plastic cover counterclockwise
and remove it. High Beam
Low Beam
High BeamLow Beam
Turn signal Light
Page 188 of 208
6- 30 DO-IT-YOURSELF MAINTENANCE
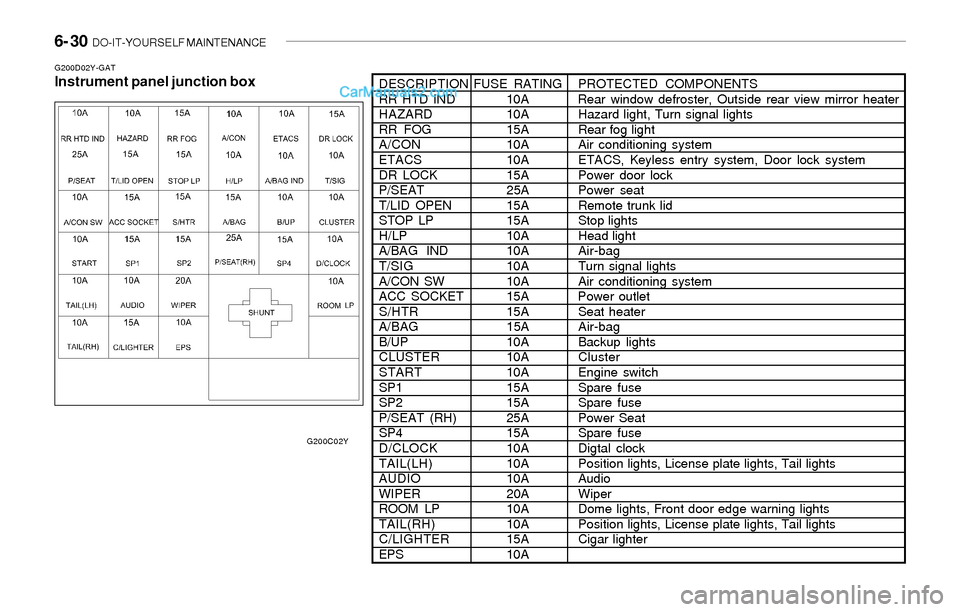
G200D02Y-GATInstrument panel junction boxDESCRIPTIONFUSE RATINGPROTECTED COMPONENTS
RR HTD IND 10A Rear window defroster, Outside rear view mirror heater
HAZARD 10AHazard light, Turn signal lights
RR FOG 15A Rear fog light
A/CON 10AAir conditioning system
ETACS 10AETACS, Keyless entry system, Door lock system
DR LOCK 15A Power door lock
P/SEAT 25A Power seat
T/LID OPEN 15A Remote trunk lid
STOP LP 15A Stop lights
H/LP 10AHead light
A/BAG IND 10A Air-bag
T/SIG 10A Turn signal lights
A/CON SW 10A Air conditioning system
ACC SOCKET 15A Power outlet
S/HTR 15A Seat heater
A/BAG 15A Air-bag
B/UP 10A Backup lights
CLUSTER 10A Cluster
START 10AEngine switch
SP1 15A Spare fuse
SP2 15A Spare fuse
P/SEAT (RH) 25A Power Seat
SP4 15A Spare fuse
D/CLOCK 10ADigtal clock
TAIL(LH) 10APosition lights, License plate lights, Tail lights
AUDIO 10AAudio
WIPER 20A Wiper
ROOM LP 10A Dome lights, Front door edge warning lights
TAIL(RH) 10APosition lights, License plate lights, Tail lights
C/LIGHTER 15ACigar lighter
EPS 10A
G200C02Y