oil level Hyundai Sonata 2004 User Guide
[x] Cancel search | Manufacturer: HYUNDAI, Model Year: 2004, Model line: Sonata, Model: Hyundai Sonata 2004Pages: 208, PDF Size: 16.93 MB
Page 164 of 208
6- 6 DO-IT-YOURSELF MAINTENANCE
!
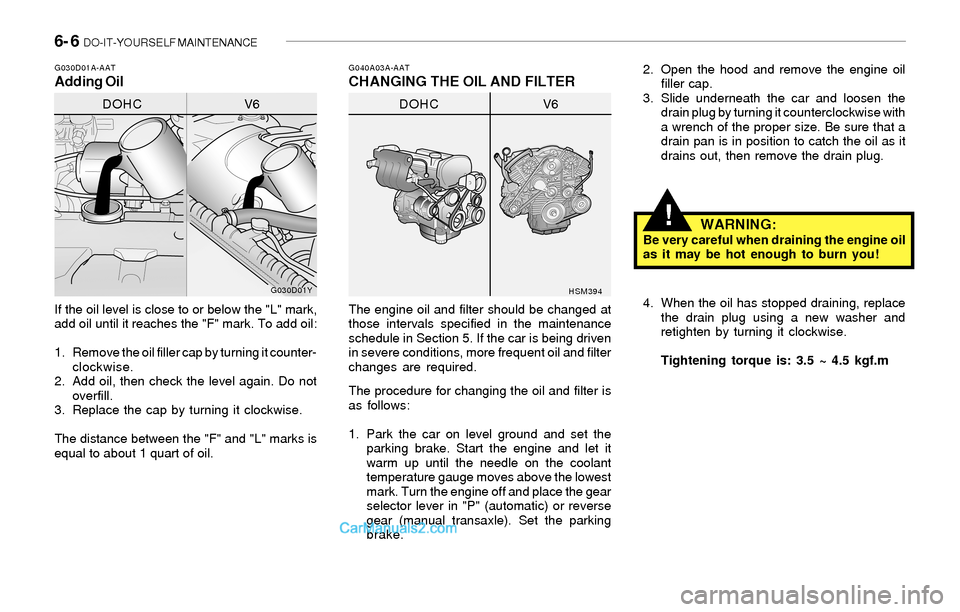
G040A03A-AATCHANGING THE OIL AND FILTERG030D01A-AATAdding Oil
If the oil level is close to or below the "L" mark,
add oil until it reaches the "F" mark. To add oil:
1. Remove the oil filler cap by turning it counter-
clockwise.
2. Add oil, then check the level again. Do not
overfill.
3. Replace the cap by turning it clockwise.
The distance between the "F" and "L" marks is
equal to about 1 quart of oil.The engine oil and filter should be changed at
those intervals specified in the maintenance
schedule in Section 5. If the car is being driven
in severe conditions, more frequent oil and filter
changes are required.
The procedure for changing the oil and filter is
as follows:
1. Park the car on level ground and set the
parking brake. Start the engine and let it
warm up until the needle on the coolant
temperature gauge moves above the lowest
mark. Turn the engine off and place the gear
selector lever in "P" (automatic) or reverse
gear (manual transaxle). Set the parking
brake.
G030D01Y
HSM394
DOHC V6DOHC V62. Open the hood and remove the engine oil
filler cap.
3. Slide underneath the car and loosen the
drain plug by turning it counterclockwise with
a wrench of the proper size. Be sure that a
drain pan is in position to catch the oil as it
drains out, then remove the drain plug.
WARNING:Be very careful when draining the engine oil
as it may be hot enough to burn you!
4. When the oil has stopped draining, replace
the drain plug using a new washer and
retighten by turning it clockwise.
Tightening torque is: 3.5 ~ 4.5 kgf.m
Page 165 of 208
DO-IT-YOURSELF MAINTENANCE 6- 7
!
!
5. Remove the oil filter by turning it counter-
clockwise with a oil filter wrench of the proper
size. A certain amount of oil will come out
when you remove the filter. So be sure to
have your drain pan in place underneath it.
6. Install a new oil filter in accordance with the
instructions on the carton or on the filter itself.
Do not over-tighten.
Tightening torque is: 1.2 ~ 1.6 kgf.m
Be sure that the mounting surface on the
engine is clean and that the old gasket is
removed completely. Lubricate the new
gasket on the filter with clean engine oil
before installation.
7. Refill the crankcase with the recommended
engine oil. Refer to the specification in chap-
ter 9 for engine oil capacity.
8. Start the engine and check to be sure no oil
is leaking from the drain plug or oil filter.
9. Shut off the engine and recheck the oil level.G050A01A-AATCHECKING AND CHANGING THE EN-
GINE COOLANT
WARNING:
Do not remove the radiator cap when the
engine is hot. When the engine is hot, the
engine coolant is under pressure and may
erupt through the opening if the cap is
removed. You could be seriously burned if
you do not observe this precaution. Do not
remove the radiator cap until the radiator is
cool to the touch.
NOTE:Always dispose of used engine oil in an
environmentally acceptable manner. It is
suggested that it be placed in a sealed
container and taken to a service station for
reclamation. Do not pour the oil on the
ground or put it into the household trash.
PROPOSITION 65 WARNING:Used engine oil may cause irritation or
cancer of the skin if left in contact with the
skin for prolonged periods of time. Used
engine oil contains chemicals that have
caused cancer in laboratory animals. Al-
ways protect your skin by washing your
hands thoroughly with soap and warm
water as soon as possible after handling
used oil.
Page 169 of 208
DO-IT-YOURSELF MAINTENANCE 6- 11
G070A03Y-AATCHANGING THE AIR CLEANER FILTER
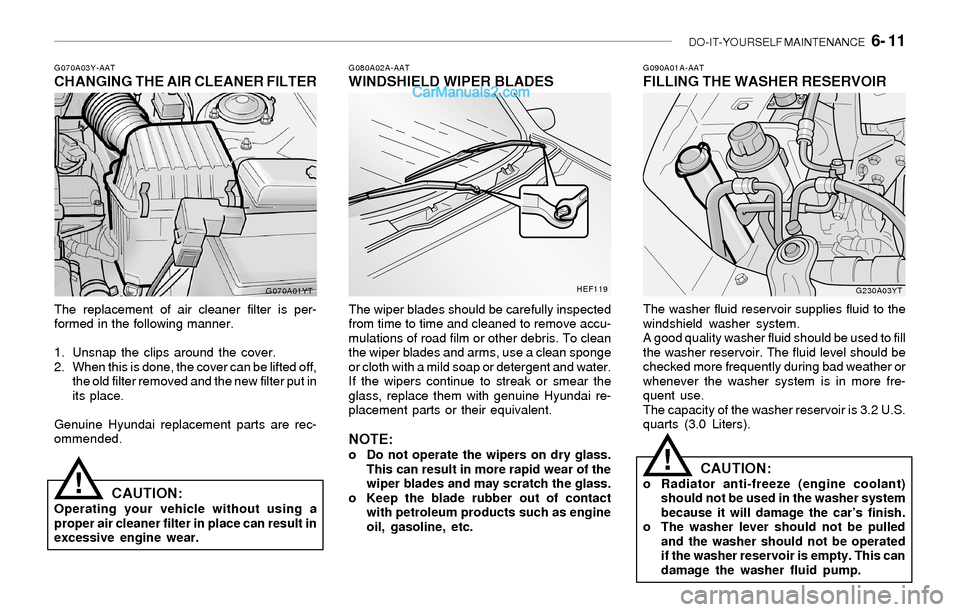
The replacement of air cleaner filter is per-
formed in the following manner.
1. Unsnap the clips around the cover.
2. When this is done, the cover can be lifted off,
the old filter removed and the new filter put in
its place.
Genuine Hyundai replacement parts are rec-
ommended.
G080A02A-AATWINDSHIELD WIPER BLADES
The wiper blades should be carefully inspected
from time to time and cleaned to remove accu-
mulations of road film or other debris. To clean
the wiper blades and arms, use a clean sponge
or cloth with a mild soap or detergent and water.
If the wipers continue to streak or smear the
glass, replace them with genuine Hyundai re-
placement parts or their equivalent.
NOTE:o Do not operate the wipers on dry glass.
This can result in more rapid wear of the
wiper blades and may scratch the glass.
o Keep the blade rubber out of contact
with petroleum products such as engine
oil, gasoline, etc.
G090A01A-AATFILLING THE WASHER RESERVOIR
The washer fluid reservoir supplies fluid to the
windshield washer system.
A good quality washer fluid should be used to fill
the washer reservoir. The fluid level should be
checked more frequently during bad weather or
whenever the washer system is in more fre-
quent use.
The capacity of the washer reservoir is 3.2 U.S.
quarts (3.0 Liters).
CAUTION:Operating your vehicle without using a
proper air cleaner filter in place can result in
excessive engine wear.
CAUTION:o Radiator anti-freeze (engine coolant)
should not be used in the washer system
because it will damage the car’s finish.
o The washer lever should not be pulled
and the washer should not be operated
if the washer reservoir is empty. This can
damage the washer fluid pump.
G070A01YTHEF119
G230A03YT
!
!
Page 170 of 208
6- 12 DO-IT-YOURSELF MAINTENANCE
!
G110B03A-AAT
Recommended Fluid
Your Hyundai automatic transaxle is specially
designed to operate with HYUNDAI GENUINE
ATF or DIAMOND ATF SP-III or SK ATF SP-III.
Damage caused by a nonspecified fluid is not
covered by your new vehicle limited warranty.
G110A01A-AAT
CHECKING THE TRANSAXLE FLUID
(AUTOMATIC)
Transaxle fluid in the automatic transaxle should
be checked at those intervals specified in the
vehicle maintenance schedule in Section 5.
G100B02A-AATTo Check the Manual Transaxle Fluid
Level
G100A03Y-AATCHECKING THE TRANSAXLE OIL
(MANUAL)
Transaxle lubricant in the manual transaxle
should be checked at those intervals specified
in the vehicle maintenance schedule in Section
5.
Recommended Oil
Use only HYUNDAI GENUINE PARTS MTF
75W/90 (API GL-4) or equivalent in the manual
transaxle.
Manual Transaxle Oil Capacity
The oil capacity of the manual transaxle is 2.2
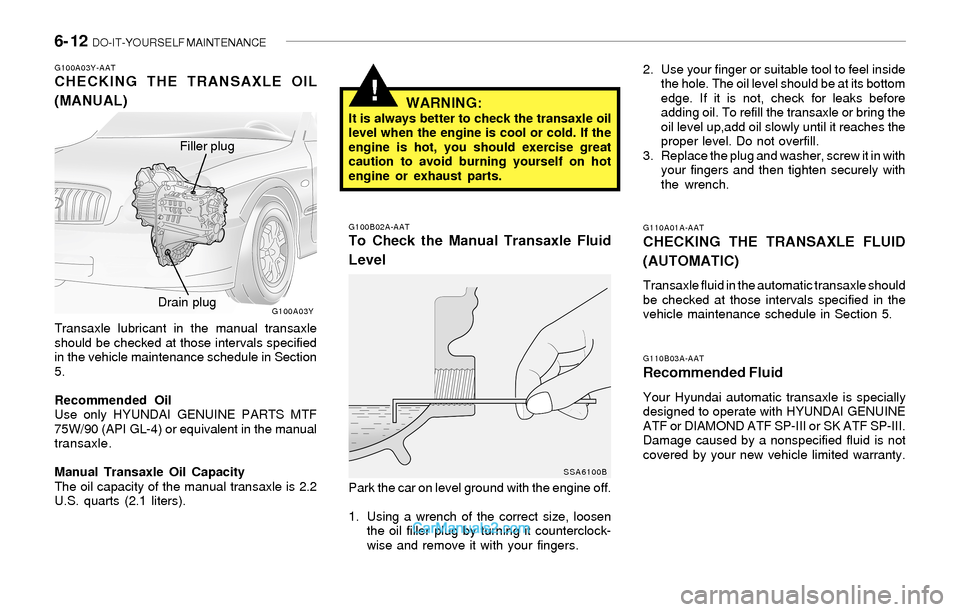
U.S. quarts (2.1 liters).Park the car on level ground with the engine off.
1. Using a wrench of the correct size, loosen
the oil filler plug by turning it counterclock-
wise and remove it with your fingers.2. Use your finger or suitable tool to feel inside
the hole. The oil level should be at its bottom
edge. If it is not, check for leaks before
adding oil. To refill the transaxle or bring the
oil level up,add oil slowly until it reaches the
proper level. Do not overfill.
3. Replace the plug and washer, screw it in with
your fingers and then tighten securely with
the wrench.
WARNING:It is always better to check the transaxle oil
level when the engine is cool or cold. If the
engine is hot, you should exercise great
caution to avoid burning yourself on hot
engine or exhaust parts.
G100A03Y
SSA6100B
Filler plug
Drain plug
Page 184 of 208
6- 26 DO-IT-YOURSELF MAINTENANCE
!
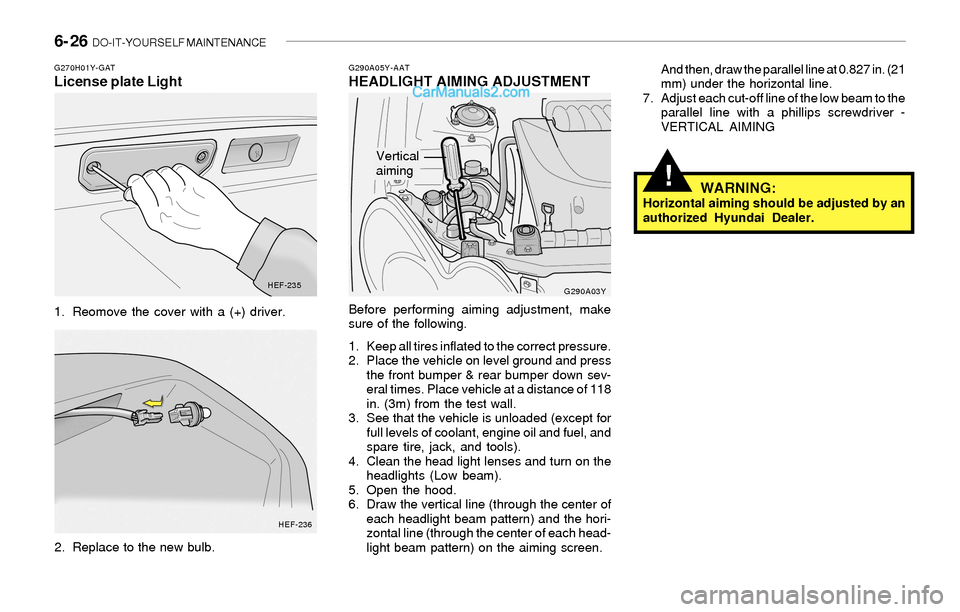
G290A05Y-AATHEADLIGHT AIMING ADJUSTMENT
Before performing aiming adjustment, make
sure of the following.
1. Keep all tires inflated to the correct pressure.
2. Place the vehicle on level ground and press
the front bumper & rear bumper down sev-
eral times. Place vehicle at a distance of 118
in. (3m) from the test wall.
3. See that the vehicle is unloaded (except for
full levels of coolant, engine oil and fuel, and
spare tire, jack, and tools).
4. Clean the head light lenses and turn on the
headlights (Low beam).
5. Open the hood.
6. Draw the vertical line (through the center of
each headlight beam pattern) and the hori-
zontal line (through the center of each head-
light beam pattern) on the aiming screen.And then, draw the parallel line at 0.827 in. (21
mm) under the horizontal line.
7. Adjust each cut-off line of the low beam to the
parallel line with a phillips screwdriver -
VERTICAL AIMING
WARNING:Horizontal aiming should be adjusted by an
authorized Hyundai Dealer.
G290A03Y
G270H01Y-GATLicense plate Light
1. Reomove the cover with a (+) driver.
2. Replace to the new bulb.
HEF-235
HEF-236
Vertical
aiming
Page 208 of 208
Seoul KoreaPrinting: FEB. 20, 2004
Publication No.: A38O-EU42P
Printed in Korea
SERVICE STATION INFORMATION
FUEL:
UNLEADED gasoline only
Pump Octane Rating of 87 (Research Octane Number 91) or higher.
FUEL TANK CAPACITY
US.gal (Imp.gal., liter) 17.2 (14.3, 65)
TIRE PRESSURE:
See the label on the driver's side of the center pillar outer panel.
OTHER TIRE INFORMATION:
See pages 8-2 through 8-6
HOOD RELEASE:
Pull handle under left side of dash.
ENGINE OIL:
API grade SH, SG or SG/CD multigrade and fuel efficient oil. Use SAE
10W-30, 10W-40 or 10W-50 if normal temperatures are above -10°F
(-23°C). For other viscosity recommendations, see page 6-5 or 9-4.
MANUAL TRANSAXLE:
HYUNDAI GENUINE PARTS MTF 75W/90 (API GL-4) Oil level
should be up to filler-bolt hole in housing beside differential.
AUTOMATIC TRANSAXLE:
Apply the parking brake, with the engine running, shift the selector
lever through all ranges and return to “N” (Neutral) position. Then
check the level of fluid on the dipstick. Use only HYUNDAI GENU-
INE ATF available at your dealer or DIAMOND ATF SP-III or SK
ATF SP-III.
QUICK INDEX
o Car will not start ....................................................................... 3-2
o Flat tire ..................................................................................... 3-5
o Warning light/chime comes on .............................................. 1-35
o Engine overheats ...................................................................... 3-3
o Towing of your vehicle ............................................................. 3-9
o Starting the engine ................................................................... 2-3
o Driving tips for first 1,200 miles (2,000 km) .......................... 1-3
o Scheduled maintenance ............................................................ 5-4
o Reporting safety defects ........................................................... 8-7