rear view mirror Hyundai Sonata 2020 Owner's Manual
[x] Cancel search | Manufacturer: HYUNDAI, Model Year: 2020, Model line: Sonata, Model: Hyundai Sonata 2020Pages: 537, PDF Size: 14.54 MB
Page 131 of 537
5. Convenient Features
Accessing Your Vehicle ........................................................................\
.......... 5-4Remote Key ........................................................................\
...................................... 5-4
Smart Key ........................................................................\
..........................................5-7
Immobilizer System ........................................................................\
........................ 5-14
Hyundai Digital Key ........................................................................\
......................... 5-15
Door Locks ........................................................................\
............................. 5-31Operating Door Locks from Outside the Vehicle .................................................. 5-31
Operating Door Locks from Inside the Vehicle .................................................... 5-32
Automatic Door Lock and Unlock Features .......................................................... 5-34
Child-Protector Rear Door Locks ........................................................................\
.. 5-35
Rear Occupant Alert (ROA) System ....................................................................... 5-36
Theft-Alarm System ........................................................................\
............. 5-38
Driver Position Memory System ................................................................. 5-39
Storing Positions into Memory ........................................................................\
..... 5-39
Recalling Positions from Memory ........................................................................\
.5-40
Resetting the Driver’s Seat Memory System ........................................................5-40
Easy Access Function ........................................................................\
......................5-41
Steering Wheel ........................................................................\
..................... 5-42Electric Power Steering (EPS) ........................................................................\
........ 5-42
Tilt Steering / Telescope Steering ........................................................................\
. 5-43
Heated Steering Wheel ........................................................................\
.................. 5-44
Horn........................................................................\
................................................. 5-45
Mirrors ......................................................................\
....................................5-46Inside Rearview Mirror ........................................................................\
................... 5-46
Side View Mirrors ........................................................................\
........................... 5-53
Reverse Parking Aid Function ........................................................................\
........ 5-55
Windows ......................................................................\
................................. 5-56Power Windows ........................................................................\
.............................. 5-57
Panoramic Sunroof ........................................................................\
..............5-60Sunshade ...............................................................\
..................................................5-61
Sliding the Sunroof ........................................................................\
..........................5-61
Tilting the Sunroof ........................................................................\
..........................5-61
Closing the Sunroof ........................................................................\
....................... 5-62
Resetting the Sunroof ........................................................................\
.................... 5-63
Sunroof Open Warning ........................................................................\
.................. 5-63
Exterior Features ........................................................................\
..................5-64Hood ....................................................................\
.................................................... 5-64
Trunk ...................................................................\
..................................................... 5 -65
Emergency Trunk Safety Release ........................................................................\
.. 5-66
Fuel Filler Door ........................................................................\
............................... 5-70
5
Page 170 of 537
Convenient Features5-40
Recalling Positions from Memory
1. Shift to P (Park) while the ignition switch is in the ON position.
2. Press the desired memory button (1 or 2). The system will beep once,
and then the driver’s seat position,
side view mirror position, instrument
panel illumination intensity and
head-up display height/brightness
will automatically adjust to the stored
positions.
3. “Settings 1 (or 2) applied” will appear on the cluster LCD display.
If your vehicle is equipped with
additional navigation, please refer to the
infotainment system manual separately
supplied.
Information
• While recalling the “1” memory
position, pressing the SET or 1 button
temporarily stops the adjustment of
the recalled memory position. Pressing
the 2 button recalls the “2” memory
position.
• While recalling the “2” memory
position, pressing the SET or 2 button
temporarily stops the adjustment of
the recalled memory position. Pressing
the 1 button recalls the “1” memory
position.
• While recalling the stored positions,
pressing one of the control buttons
for the driver’s seat, side view mirror,
instrument panel illumination or head-
up display will cause the movement of
that component to stop and move in
the direction that the control button is
pressed.
Resetting the Driver’s Seat
Memory System
Take the following procedures to reset
the driver’s seat memory system, when it
does not operate properly.
To reset the driver’s seat memory
system
1. Place the ignition switch to the ON
position, shift to P (Park), and open
the driver’s door.
2. Operate the control switch to set the driver’s seat and seatback to the
foremost position.
3. Simultaneously press the SET button and push forward the seat movement
switch over 2 seconds.
While resetting the driver’s seat
memory system
1. It starts with the notification sound.
2. The driver’s seat and seatback is adjusted to the rearward position with
the notification sound.
3. The driver’s seat and seatback is re-adjusted to the default position
(central position) with the notification
sound.
However, in the following cases, the
resetting procedure and the notification
sound may stop.
- The memory button is pressed.
- The control switch is operated.
- The gear is shifted out of P (Park) .
- The driving speed exceeds 2 mph (3 km/h).
- The driver’s door is closed.
Page 176 of 537
Convenient Features5-46
MIRRORS
Inside Rearview Mirror
Before driving your vehicle, check to
see that your inside rearview mirror is
properly positioned. Adjust the rearview
mirror so that the view through the rear
window is properly centered.
WARNING
Make sure your line of sight is not
obstructed. Do not place objects in the
rear seat, cargo area, or behind the rear
head restraints which could interfere
with your vision through the rear
window.
WARNING
To prevent serious injury during an
accident or deployment of the air bag,
do not modify the rearview mirror and
do not install a wide mirror.
WARNING
NEVER adjust the mirror while driving.
This may cause loss of vehicle control
resulting in an accident.
NOTICE
When cleaning the mirror, use a paper
towel or similar material dampened
with glass cleaner. Do not spray glass
cleaner directly on the mirror as this
may cause the liquid cleaner to enter
the mirror housing.
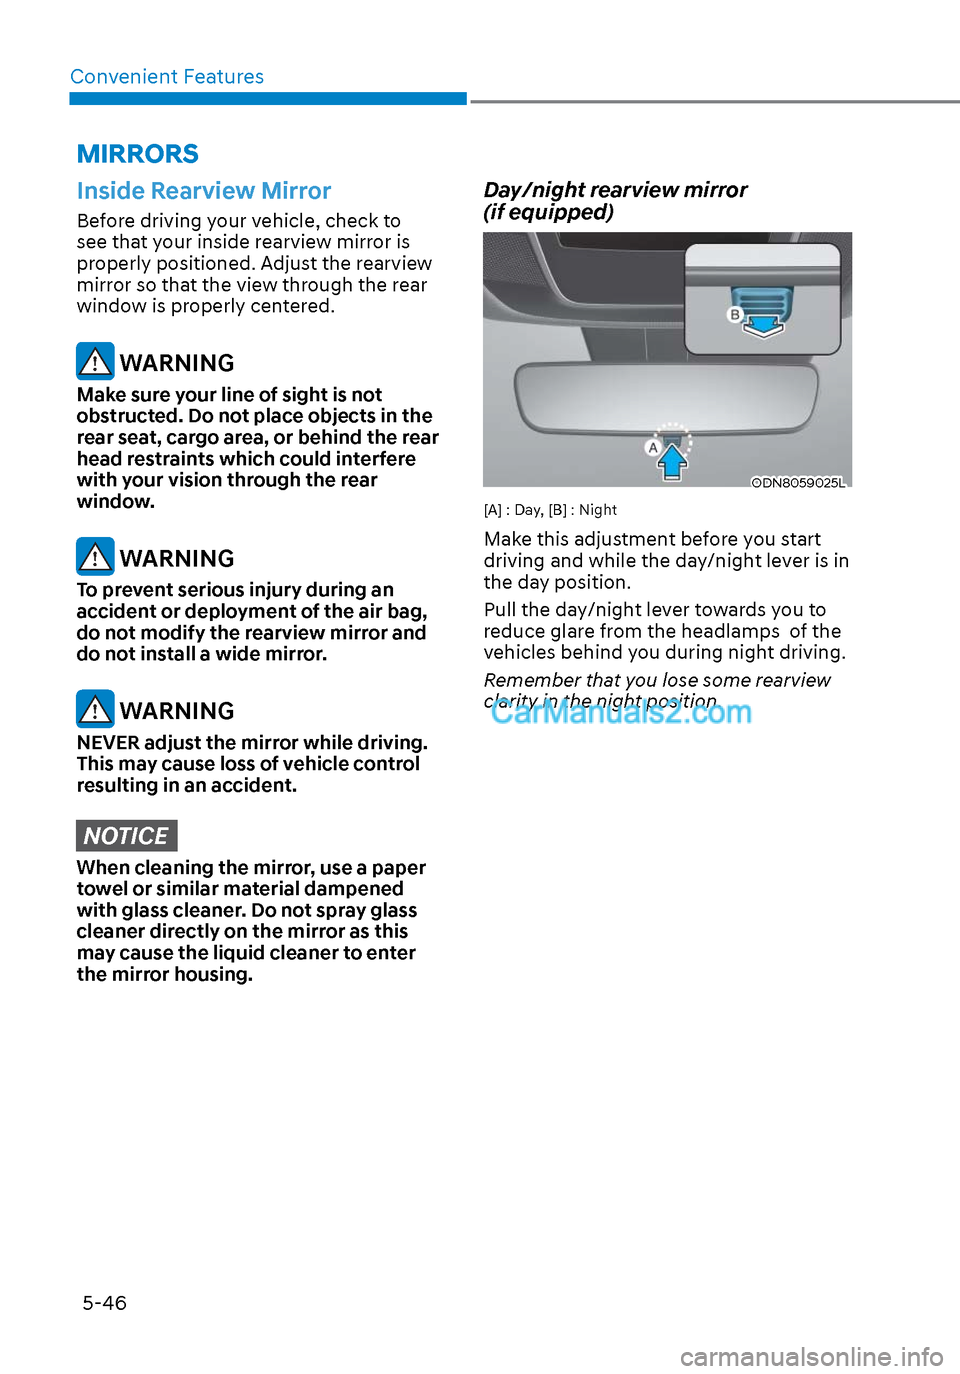
Day/night rearview mirror
(if equipped)
ODN8059025LODN8059025L
[A] : Day, [B] : Night
Make this adjustment before you start
driving and while the day/night lever is in
the day position.
Pull the day/night lever towards you to
reduce glare from the headlamps of the
vehicles behind you during night driving.
Remember that you lose some rearview
clarity in the night position.
Page 177 of 537
05
5-47
Electrochromic Mirror (ECM)
(if equipped)
ODN8059023LODN8059023L
The electric rearview mirror automatically
controls the glare from the headlamp of
the vehicle behind you in nighttime or low
light driving conditions.
When the engine is running, the glare is
automatically controlled by the sensor
mounted in the rearview mirror. The
sensor detects the light level around the
vehicle, and automatically adjusts to
control the headlamp glare from vehicles
behind you.
Whenever the shift button is placed in R
(Reverse), the mirror will automatically
go to the brightest setting in order to
improve the driver’s view behind the
vehicle.
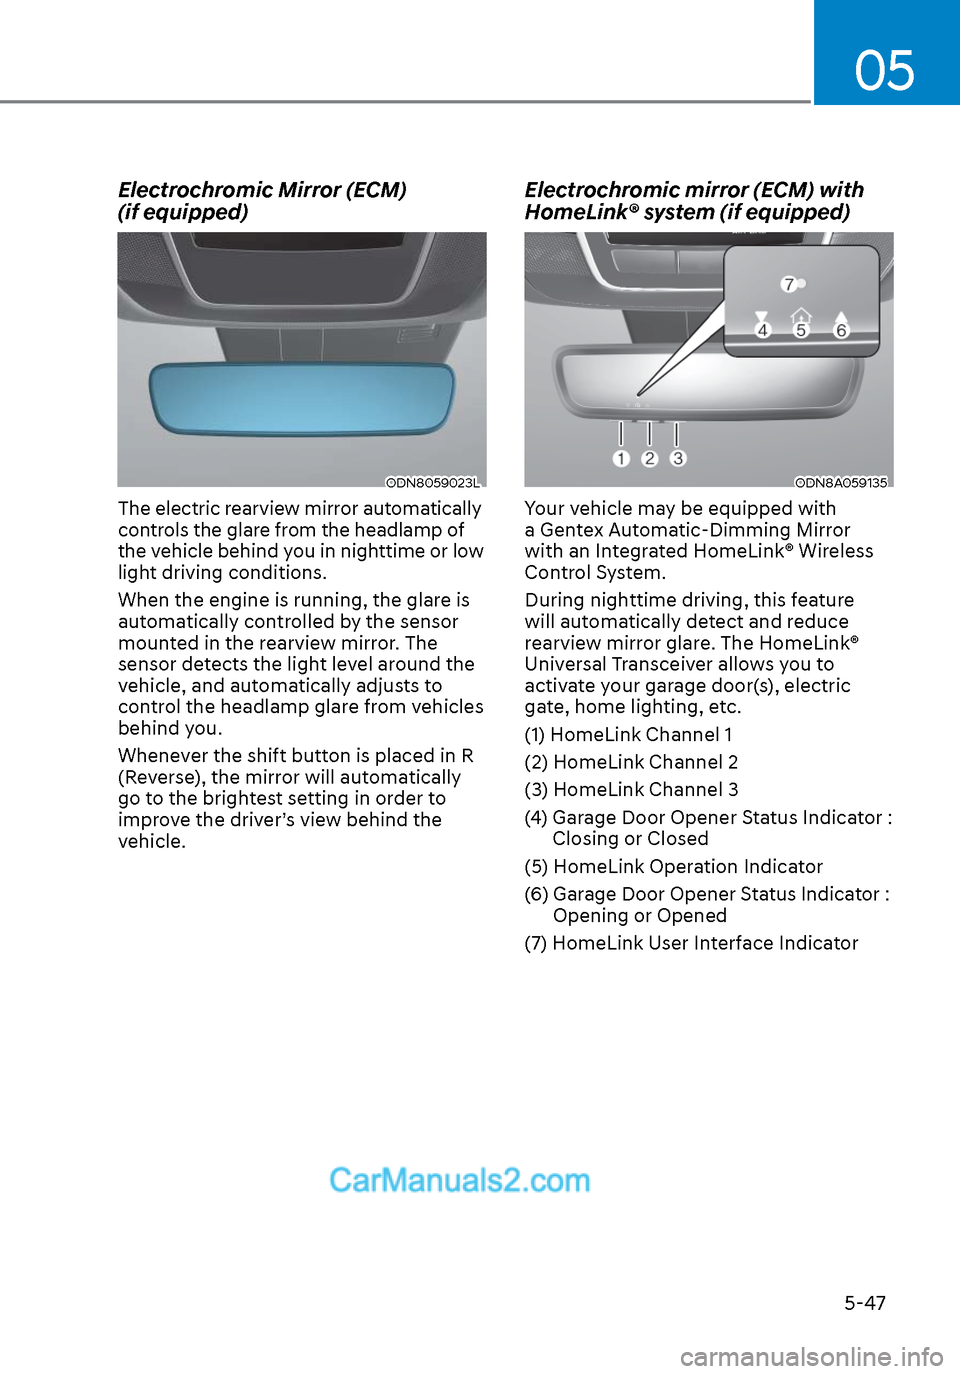
Electrochromic mirror (ECM) with
HomeLink® system (if equipped)
ODN8A059135ODN8A059135
Your vehicle may be equipped with
a Gentex Automatic-Dimming Mirror
with an Integrated HomeLink® Wireless
Control System.
During nighttime driving, this feature
will automatically detect and reduce
rearview mirror glare. The HomeLink®
Universal Transceiver allows you to
activate your garage door(s), electric
gate, home lighting, etc.
(1) HomeLink Channel 1
(2) HomeLink Channel 2
(3) HomeLink Channel 3
(4) Garage Door Opener Status Indicator : Closing or Closed
(5) HomeLink Operation Indicator
(6) Garage Door Opener Status Indicator : Opening or Opened
(7) HomeLink User Interface Indicator
Page 183 of 537
05
5-53
Information
Two way communication range distance
between “vehicle” and “garage door
opener” is 100m.
The range may be reduced or increased
a little due to obstacle conditions around
the garage door opener, such as houses or
trees.
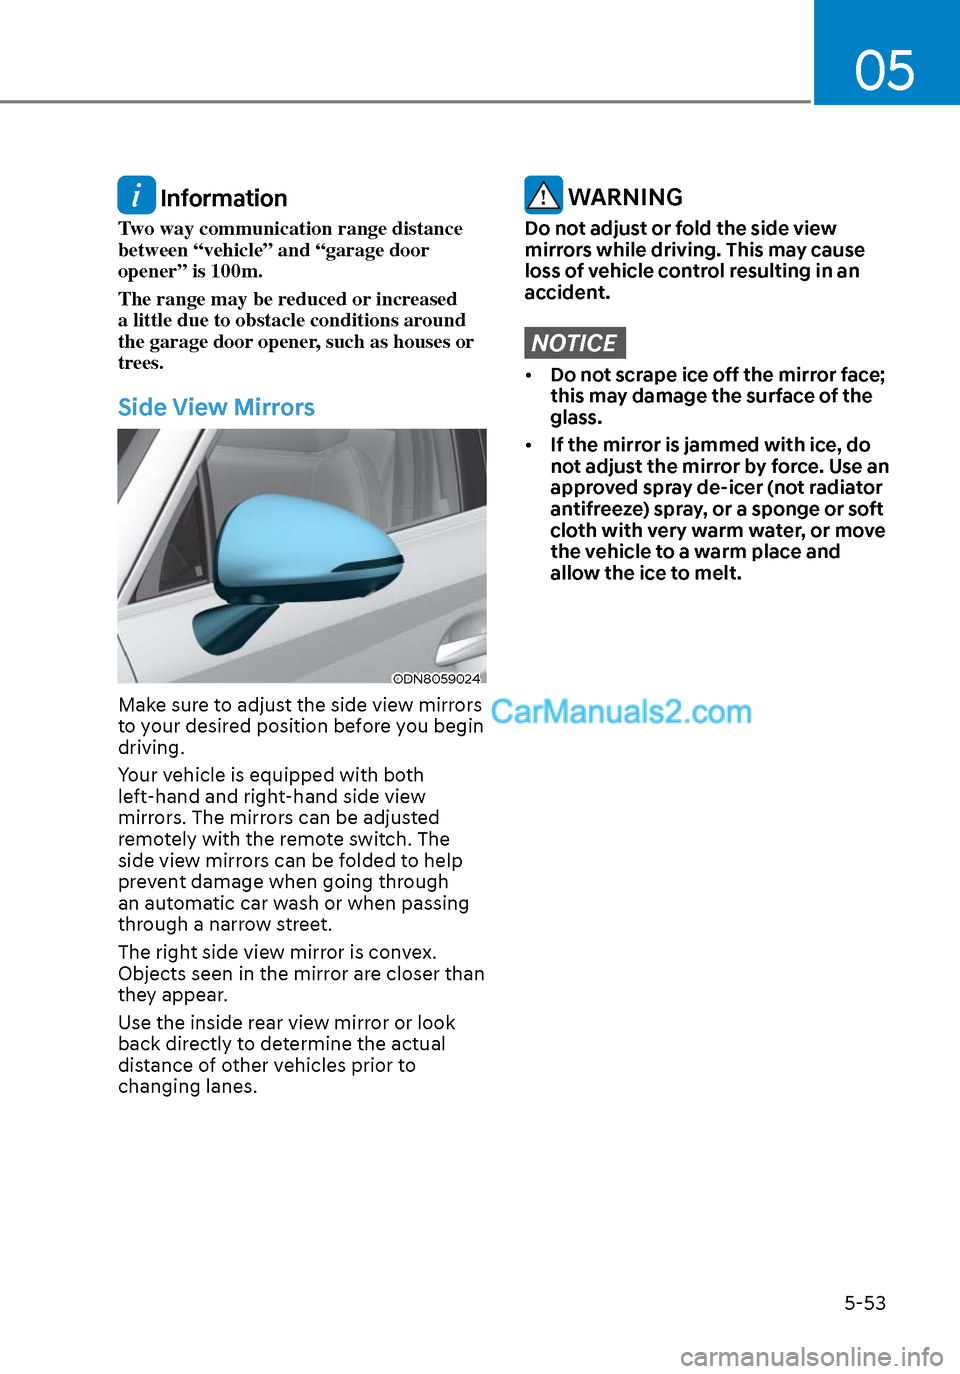
Side View Mirrors
ODN8059024ODN8059024
Make sure to adjust the side view mirrors
to your desired position before you begin
driving.
Your vehicle is equipped with both
left-hand and right-hand side view
mirrors. The mirrors can be adjusted
remotely with the remote switch. The
side view mirrors can be folded to help
prevent damage when going through
an automatic car wash or when passing
through a narrow street.
The right side view mirror is convex.
Objects seen in the mirror are closer than
they appear.
Use the inside rear view mirror or look
back directly to determine the actual
distance of other vehicles prior to
changing lanes.
WARNING
Do not adjust or fold the side view
mirrors while driving. This may cause
loss of vehicle control resulting in an
accident.
NOTICE
• Do not scrape ice off the mirror face;
this may damage the surface of the
glass.
• If the mirror is jammed with ice, do
not adjust the mirror by force. Use an
approved spray de-icer (not radiator
antifreeze) spray, or a sponge or soft
cloth with very warm water, or move
the vehicle to a warm place and
allow the ice to melt.
Page 218 of 537
Convenient Features5-88
SURROUND VIEW MONITOR (SVM) (IF EQUIPPED)
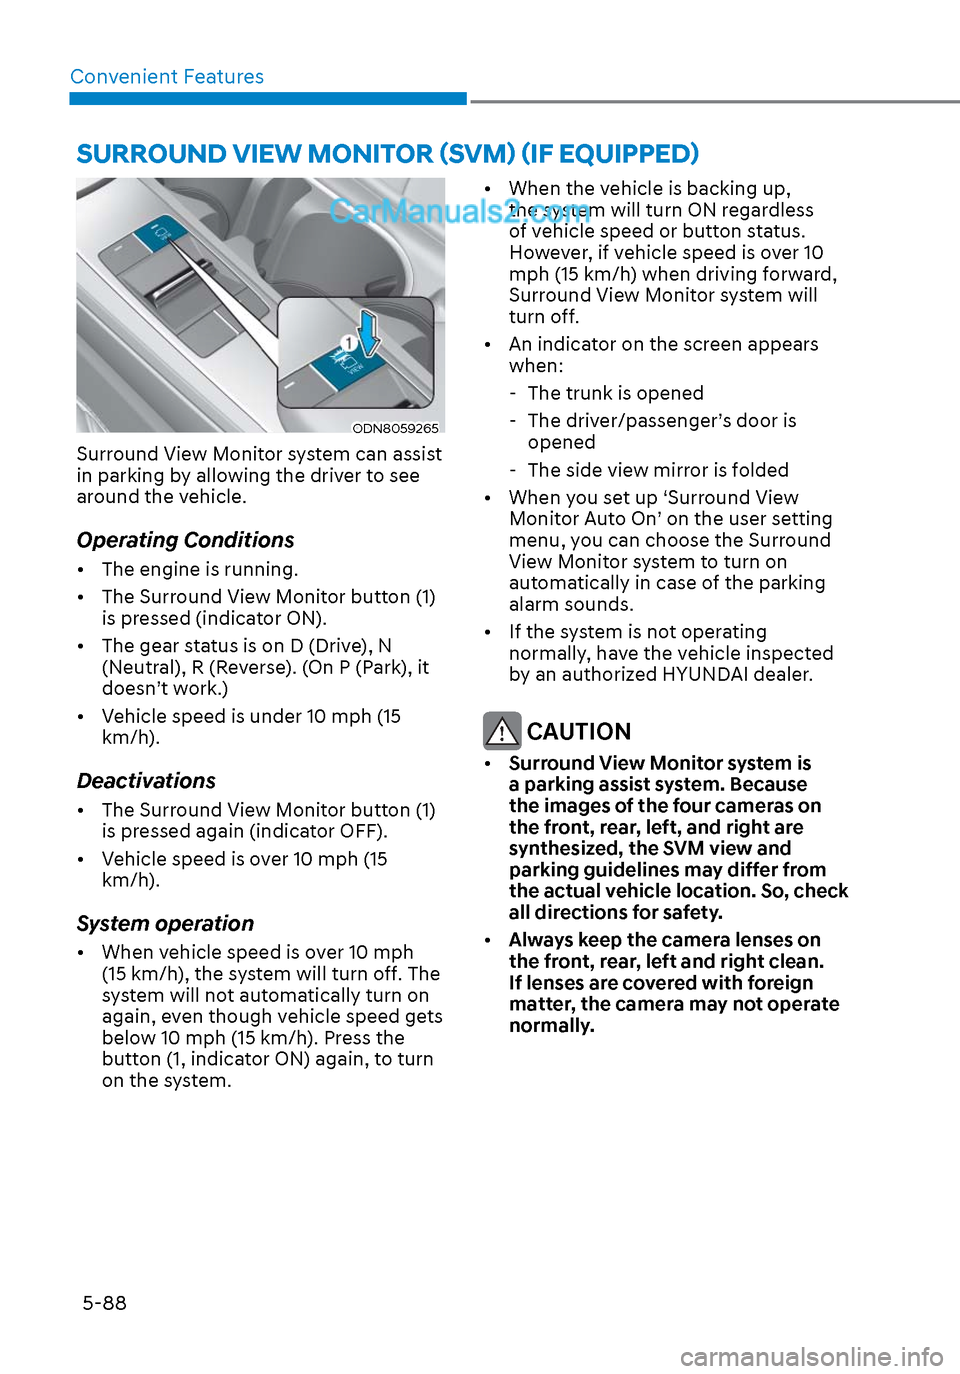
ODN8059265ODN8059265
Surround View Monitor system can assist
in parking by allowing the driver to see
around the vehicle.
Operating Conditions
• The engine is running.
• The Surround View Monitor button (1) is pressed (indicator ON).
• The gear status is on D (Drive), N (Neutral), R (Reverse). (On P (Park), it
doesn’t work.)
• Vehicle speed is under 10 mph (15 km/h).
Deactivations
• The Surround View Monitor button (1) is pressed again (indicator OFF).
• Vehicle speed is over 10 mph (15 km/h).
System operation
• When vehicle speed is over 10 mph (15 km/h), the system will turn off. The
system will not automatically turn on
again, even though vehicle speed gets
below 10 mph (15 km/h). Press the
button (1, indicator ON) again, to turn
on the system. • When the vehicle is backing up,
the system will turn ON regardless
of vehicle speed or button status.
However, if vehicle speed is over 10
mph (15 km/h) when driving forward,
Surround View Monitor system will
turn off.
• An indicator on the screen appears when:
- The trunk is opened
- The driver/passenger’s door is opened
- The side view mirror is folded
• When you set up ‘Surround View Monitor Auto On’ on the user setting
menu, you can choose the Surround
View Monitor system to turn on
automatically in case of the parking
alarm sounds.
• If the system is not operating normally, have the vehicle inspected
by an authorized HYUNDAI dealer.
CAUTION
• Surround View Monitor system is
a parking assist system. Because
the images of the four cameras on
the front, rear, left, and right are
synthesized, the SVM view and
parking guidelines may differ from
the actual vehicle location. So, check
all directions for safety.
• Always keep the camera lenses on
the front, rear, left and right clean.
If lenses are covered with foreign
matter, the camera may not operate
normally.
Page 268 of 537
Convenient Features5-138
WINDSHIELD DEFROSTING AND DEFOGGING
WARNING
Windshield heating
Do not use the
or position
during cooling operation in extremely
humid weather. The difference between
the temperature of the outside air and
that of the windshield could cause the
outer surface of the windshield to fog
up, causing loss of visibility could cause
an accident resulting in serious injury
or death. In this case, set the mode
selection knob or button to the
position and fan speed control knob or
button to a lower speed.
• For maximum defrost performance, set the temperature control knob
to the highest temperature setting
(rotated all the way to the right) and
the fan speed control to the highest
setting.
• If warm air to the floor is desired while defrosting or defogging, set the mode
to the floor-defrost position.
• Before driving, clear all snow and ice from the windshield, rear window,
side view mirrors, and all side
windows.
• Clear all snow and ice from the hood and air inlet in the cowl grill
to improve heater and defroster
efficiency and to reduce the
probability of fogging up the inside of
the windshield.
NOTICE
If you start the vehicle when the
weather is cold, more adequate way to
heat the cabin is described below.
1. Turn off or lower the blower, right after engine starting, because
engine temperature is still low and
the air flow is cold.
2. After few minutes of engine warm up, turn the blower to low to medium
speed and set the temperature
control to Hot.
Manual Climate Control System
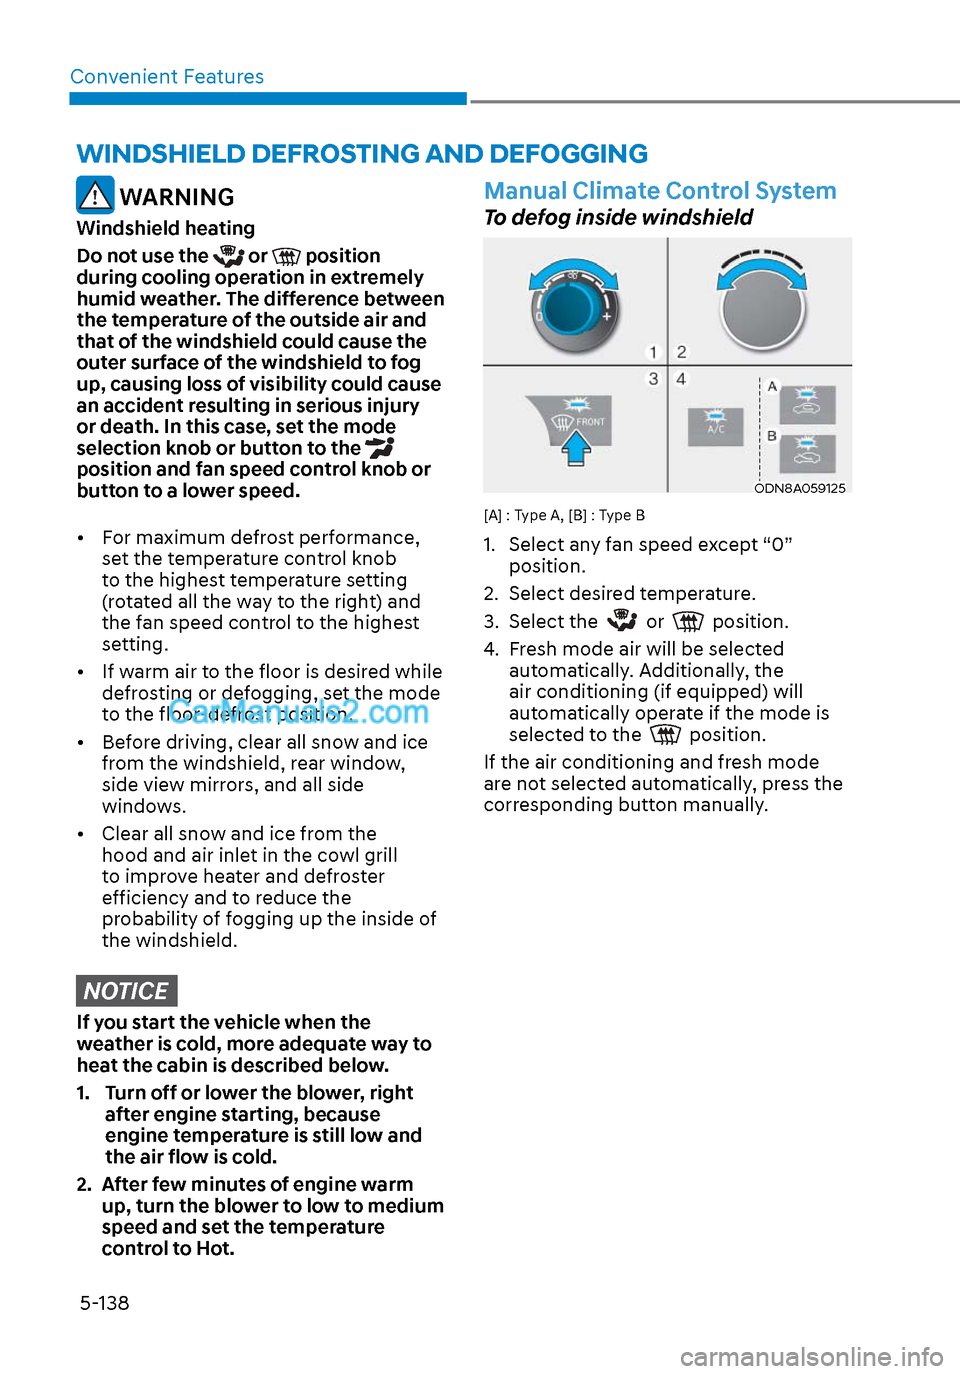
To defog inside windshield
ODN8A059125ODN8A059125
[A] : Type A, [B] : Type B
1. Select any fan speed except “0” position.
2. Select desired temperature.
3. Select the
or position.
4. Fresh mode air will be selected automatically. Additionally, the
air conditioning (if equipped) will
automatically operate if the mode is
selected to the
position.
If the air conditioning and fresh mode
are not selected automatically, press the
corresponding button manually.
Page 350 of 537
While Driving6-66
When external condition is intervened
• The brightness outside changes suddenly such as when entering or
exiting a tunnel, or when passing
under a bridge.
• The brightness outside is too low such as when the headlamps are not on at
night or the vehicle is going through
a tunnel.
• There is a boundary structure in the roadway such as a concrete barrier,
guardrail and reflector post that is
inadvertently being detected by the
camera.
• When light coming from a street light or an oncoming vehicle is reflected on
a wet road surface such as a puddle in
the road.
• The field of view in front is obstructed by sun glare.
• There is not enough distance between you and the vehicle in front to be
able to detect the lane marker or the
vehicle ahead is driving on the lane
marke.
• Driving on a steep grade, over a hill, or when driving on a curved road.
• The adverse road conditions cause excessive vehicle vibrations while
driving.
• The surrounding of the inside rear view mirror temperature is high due to
direct sunlight, etc.
• Road surface is not even. When front visibility is poor
• The windshield or the camera lens is
blocked with dirt or debris.
• The windshield glass is fogged up; a clear view of the road is obstructed.
• Placing objects on the dashboard, etc.
• The sensor cannot detect the lane marker because of fog, heavy rain or
snow.
Page 355 of 537
06
6-71
WARNING
• The warning light on the side view
mirror will illuminate whenever a
vehicle is detected at the rear side by
the system.
To avoid accidents, do not focus only
on the warning light and neglect to
see the surrounding of the vehicle.
• Drive safely even though the
vehicle is equipped with Blind-Spot
Collision-Avoidance Assist system.
Do not solely rely on the system
but check your surrounding before
changing lanes or backing the
vehicle up.
• The system may not alert the driver
in some conditions so always check
your surroundings while driving.
CAUTION
• The driver should always use
extreme caution while operating
the vehicle, whether or not the
warning light on the side view mirror
illuminates or there is a warning
alarm.
• Playing the vehicle audio system at
high volume may offset the Blind-
Spot Collision Warning system
warning sounds.
• The warning of Blind-Spot Collision-
Avoidance Assist system may not
sound while other system’s warning
sounds.
Blind-Spot Collision-Avoidance
Assist
Blind-Spot Collision-Avoidance Assist
system may apply braking power, when
an approaching vehicle is detected
within a certain distance next to or
behind your vehicle.
It gently applies braking power on the
tire, which is located in the opposite
side of the possibly-colliding point. The
instrument cluster will inform the driver
of the system activation.
Blind-Spot Collision-Avoidance Assist
system is automatically deactivated
when:
- The vehicle drives a certain distance away
- The vehicle direction is changed against the possible-colliding point
- The steering wheel is abruptly moved
- The brake pedal is depressed
- After a certain period of time
The driver should drive the vehicle in the
middle of the vehicle lanes to keep the
system in the ready status.
When the vehicle drives too close to one
side of the vehicle lanes, the system may
not properly operate.
In addition, the system may not properly
control your vehicle in accordance with
driving situations. Thus, always pay close
attention to road situations.
Page 357 of 537
06
6-73
Rear corner radar
The rear corner radars are the sensors
inside the rear bumper for detecting the
side and rear areas. Always keep the rear
bumper clean for proper operation of the
system.
CAUTION
• The system may not work properly
when the bumper has been
damaged, or if the rear bumper has
been replaced or repaired.
• The sensing range differs somewhat
according to the width of the road.
When the road is narrow, the system
may detect other vehicles in the next
lane. On the other hand, when the
road is wide, the system may not
detect vehicles on both lanes and
may not warn.
• The system may turn off due to
strong electromagnetic waves.
• Always keep the sensors clean.
• NEVER arbitrarily disassemble the
sensor component nor apply any
impact on the sensor component.
• Be careful not to apply unnecessary
force on the radar sensor or sensor
cover. If the sensor is forcibly moved
out of proper alignment, the system
may not operate correctly. In this
case, a warning message may not
be displayed. Have the vehicle
inspected by an authorized HYUNDAI
dealer. •
Do not apply foreign objects such as
a bumper sticker or a bumper guard
near the radar sensor or apply paint
to the sensor area. Doing so may
adversely affect the performance of
the sensor.
• NEVER install any accessories or
stickers on the front windshield, nor
tint the front windshield.
• Pay extreme caution to keep the
front view camera out of water.
• NEVER locate any reflective objects
(i.e. white paper, mirror) over the
crash pad. Any light reflection may
cause a malfunction of the system.