battery HYUNDAI SONATA 2022 Owner's Manual
[x] Cancel search | Manufacturer: HYUNDAI, Model Year: 2022, Model line: SONATA, Model: HYUNDAI SONATA 2022Pages: 546, PDF Size: 51.21 MB
Page 193 of 546
05
5-63
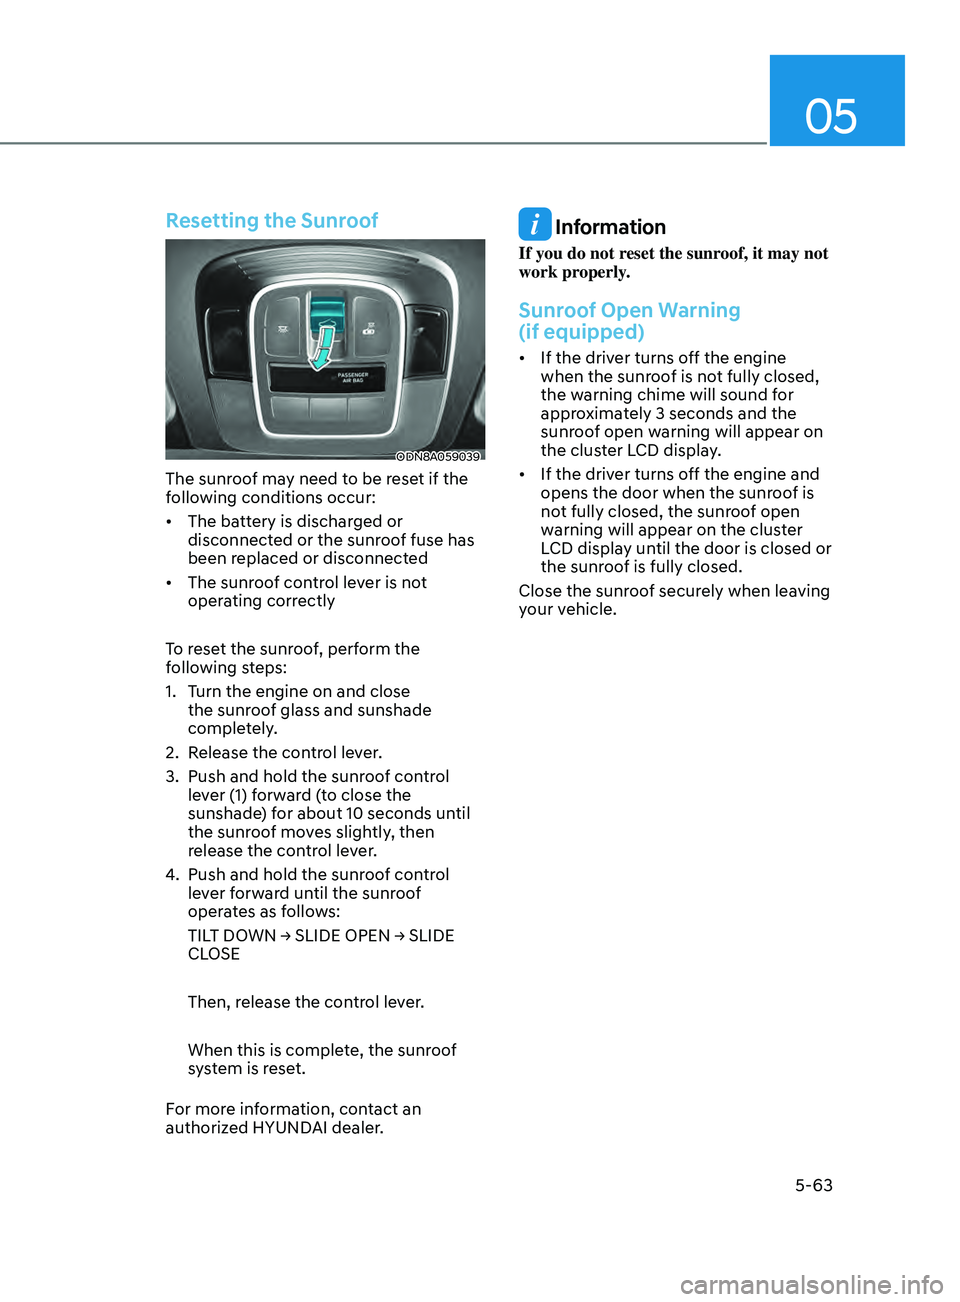
Resetting the Sunroof
ODN8A059039
The sunroof may need to be reset if the
following conditions occur:
• The battery is discharged or
disconnect
ed or the sunroof fuse has
been replaced or disconnected
• The
sunroof control lever is not
oper
ating correctly
To reset the sunroof, perform the
following steps:
1.
T
urn the engine on and close
the sunroof glass and sunshade
completely.
2.
R
elease the control lever.
3.
Push and hold the sunr
oof control
lever (1) forward (to close the
sunshade) for about 10 seconds until
the sunroof moves slightly, then
release the control lever.
4.
Push and hold the sunr
oof control
lever forward until the sunroof
operates as follows:
TILT
DOWN → SLIDE OPEN → SLIDE
CL
OSE
Then, release the control lever.
When this is complete, the sunroof
system is reset.
For more information, contact an
authorized HYUNDAI dealer.
Information
If you do not reset the sunroof, it may not
work properly.
Sunroof Open Warning
(if equipped)
• If the driver turns off the engine when the sunr oof is not fully closed,
the warning chime will sound for
approximately 3 seconds and the
sunroof open warning will appear on
the cluster LCD display.
• If
the driver turns off the engine and
opens the door when the sunr
oof is
not fully closed, the sunroof open
warning will appear on the cluster
LCD display until the door is closed or
the sunroof is fully closed.
Close the sunroof securely when leaving
your vehicle.
Page 196 of 546
Convenient Features
5-66
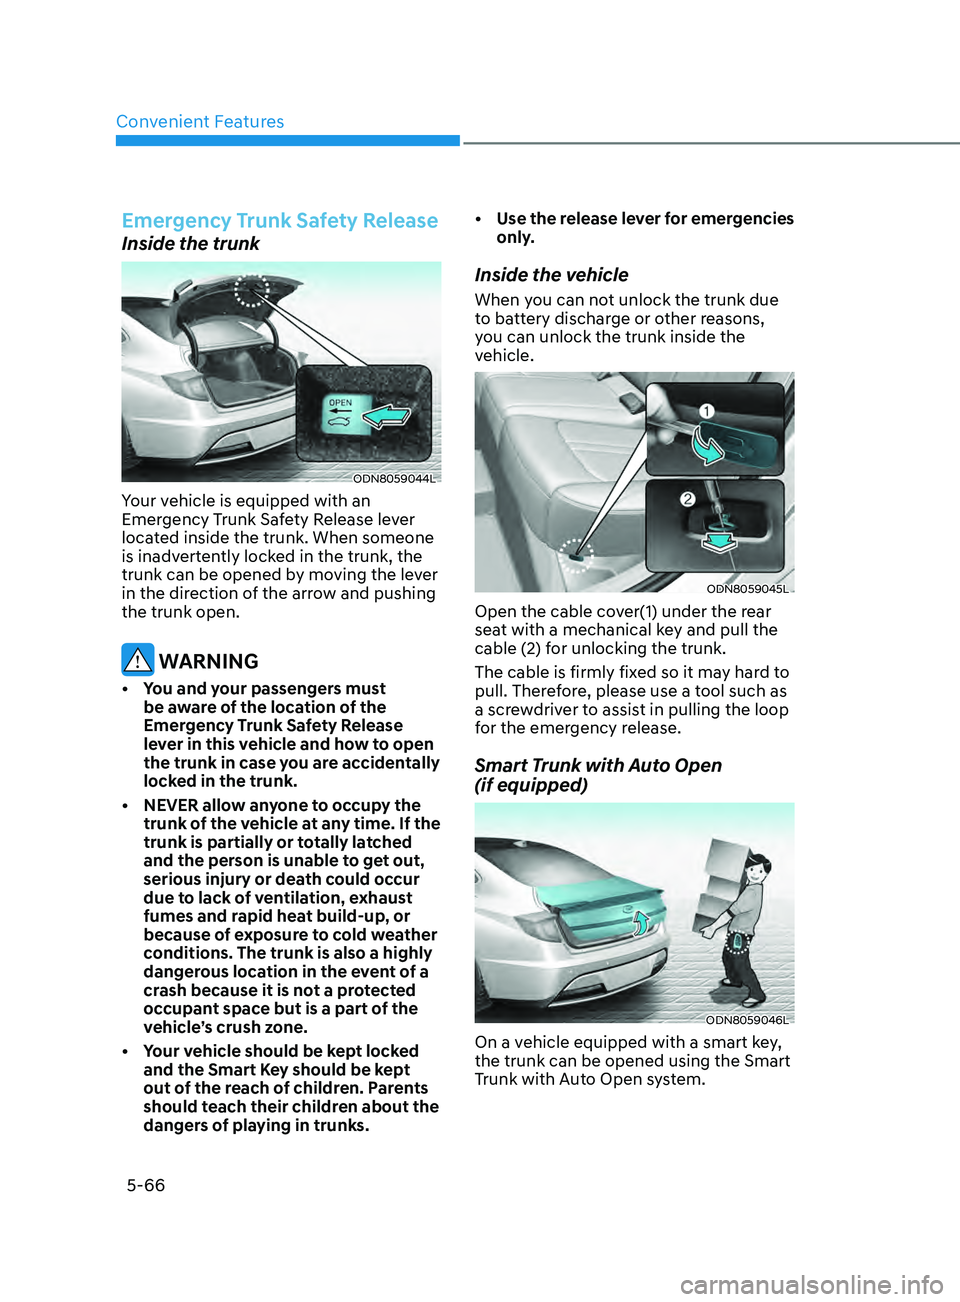
Emergency Trunk Safety Release
Inside the trunk
ODN8059044L
Your vehicle is equipped with an
Emergency Trunk Safety Release lever
located inside the trunk. When someone
is inadvertently locked in the trunk, the
trunk can be opened by moving the lever
in the direction of the arrow and pushing
the trunk open.
WARNING
• You and your passengers must be aware of the location of the
Emergency Trunk Safety Release
lever in this vehicle and how to open
the trunk in case you are accidentally
locked in the trunk.
•
NEVER allo
w anyone to occupy the
trunk of the vehicle at any time. If the
trunk is partially or totally latched
and the person is unable to get out,
serious injury or death could occur
due to lack of ventilation, exhaust
fumes and rapid heat build-up, or
because of exposure to cold weather
conditions. The trunk is also a highly
dangerous location in the event of a
crash because it is not a protected
occupant space but is a part of the
vehicle’s crush zone.
•
Y
our vehicle should be kept locked
and the Smart Key should be kept
out of the reach of children. Parents
should teach their children about the
dangers of playing in trunks. •
U
se the release lever for emergencies
only.
Inside the vehicle
When you can not unlock the trunk due
to battery discharge or other reasons,
you can unlock the trunk inside the
vehicle.
ODN8059045L
Open the cable cover(1) under the rear
seat with a mechanical key and pull the
cable (2) for unlocking the trunk.
The cable is firmly fixed so it may hard to
pull. Therefore, please use a tool such as
a screwdriver to assist in pulling the loop
for the emergency release.
Smart Trunk with Auto Open
(if equipped)
ODN8059046L
On a vehicle equipped with a smart key,
the trunk can be opened using the Smart
Trunk with Auto Open system.
Page 209 of 546
05
5-79
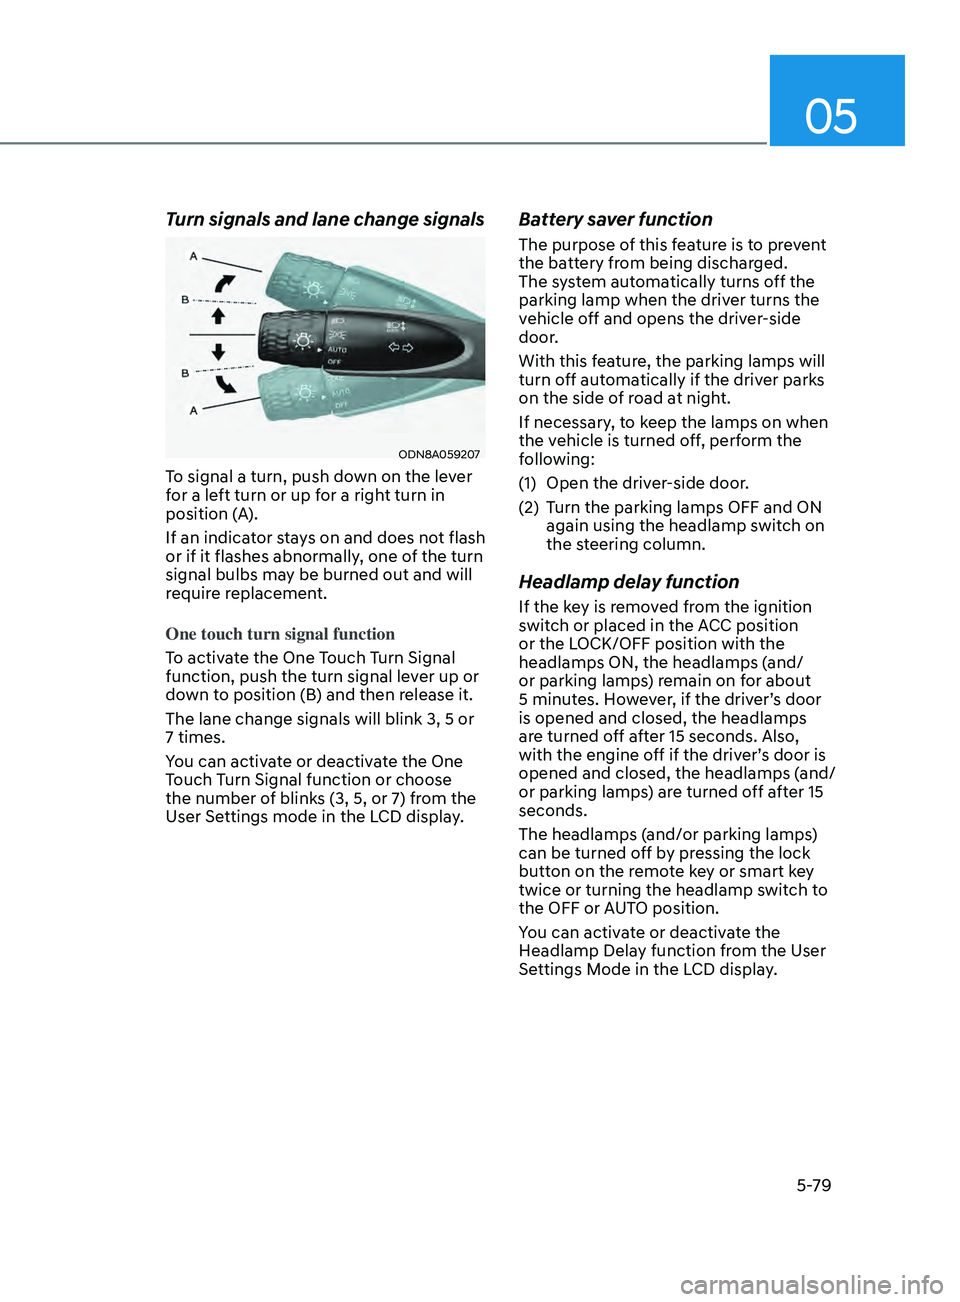
Turn signals and lane change signals
ODN8A059207
To signal a turn, push down on the lever
for a left turn or up for a right turn in
position (A).
If an indicator stays on and does not flash
or if it flashes abnormally, one of the turn
signal bulbs may be burned out and will
require replacement.
One touch turn signal function
To activate the One Touch Turn Signal
function, push the turn signal lever up or
down to position (B) and then release it.
The lane change signals will blink 3, 5 or
7 times.
You can activate or deactivate the One
Touch Turn Signal function or choose
the number of blinks (3, 5, or 7) from the
User Settings mode in the LCD display.
Battery saver function
The purpose of this feature is to prevent
the battery from being discharged.
The system automatically turns off the
parking lamp when the driver turns the
vehicle off and opens the driver-side
door.
With this feature, the parking lamps will
turn off automatically if the driver parks
on the side of road at night.
If necessary, to keep the lamps on when
the vehicle is turned off, perform the
following:
(1)
Open the driv
er-side door.
(2)
T
urn the parking lamps OFF and ON
again using the headlamp switch on
the steering column.
Headlamp delay function
If the key is removed from the ignition
switch or placed in the ACC position
or the LOCK/OFF position with the
headlamps ON, the headlamps (and/
or parking lamps) remain on for about
5 minutes. However, if the driver’s door
is opened and closed, the headlamps
are turned off after 15 seconds. Also,
with the engine off if the driver’s door is
opened and closed, the headlamps (and/
or parking lamps) are turned off after 15
seconds.
The headlamps (and/or parking lamps)
can be turned off by pressing the lock
button on the remote key or smart key
twice or turning the headlamp switch to
the OFF or AUTO position.
You can activate or deactivate the
Headlamp Delay function from the User
Settings Mode in the LCD display.
Page 210 of 546
Convenient Features
5-80
NOTICE
If the driver exits the vehicle through
another door besides the driver
door, the battery saver function
does not operate and the headlamp
delay function does not turn OFF
automatically.
This may cause the battery to
discharge. To avoid battery discharge,
turn OFF the headlamps manually from
the headlamp switch before exiting the
vehicle.
Headlamp leveling device
It automatically adjusts the headlamp
beam level according to the number of
passengers and loading weight in the
luggage area.
And it offers proper headlamp beam
under various conditions.
WARNING
If the function does not work properly,
have the vehicle inspected by an
authorized HYUNDAI dealer. Do not
attempt to inspect or replace the wiring
yourself.
Interior Lights
WARNING
Do not use the interior lights when
driving in the dark. The interior lights
may obscure your view and cause an
accident.
NOTICE
Do not use the interior lights for
extended periods when the vehicle is
turned off or the battery will discharge.
Interior lamp AUTO cut
The interior lamps will automatically go
off approximately 20 minutes after the
engine is turned off and the doors are
closed. If a door is opened, the lamp
will go off 40 minutes after the engine is
turned off. If the doors are locked by the
remote key or smart key and the vehicle
enters the armed stage of the theft
alarm system, the lamps will go off five
seconds later.
Page 212 of 546
Convenient Features
5-82
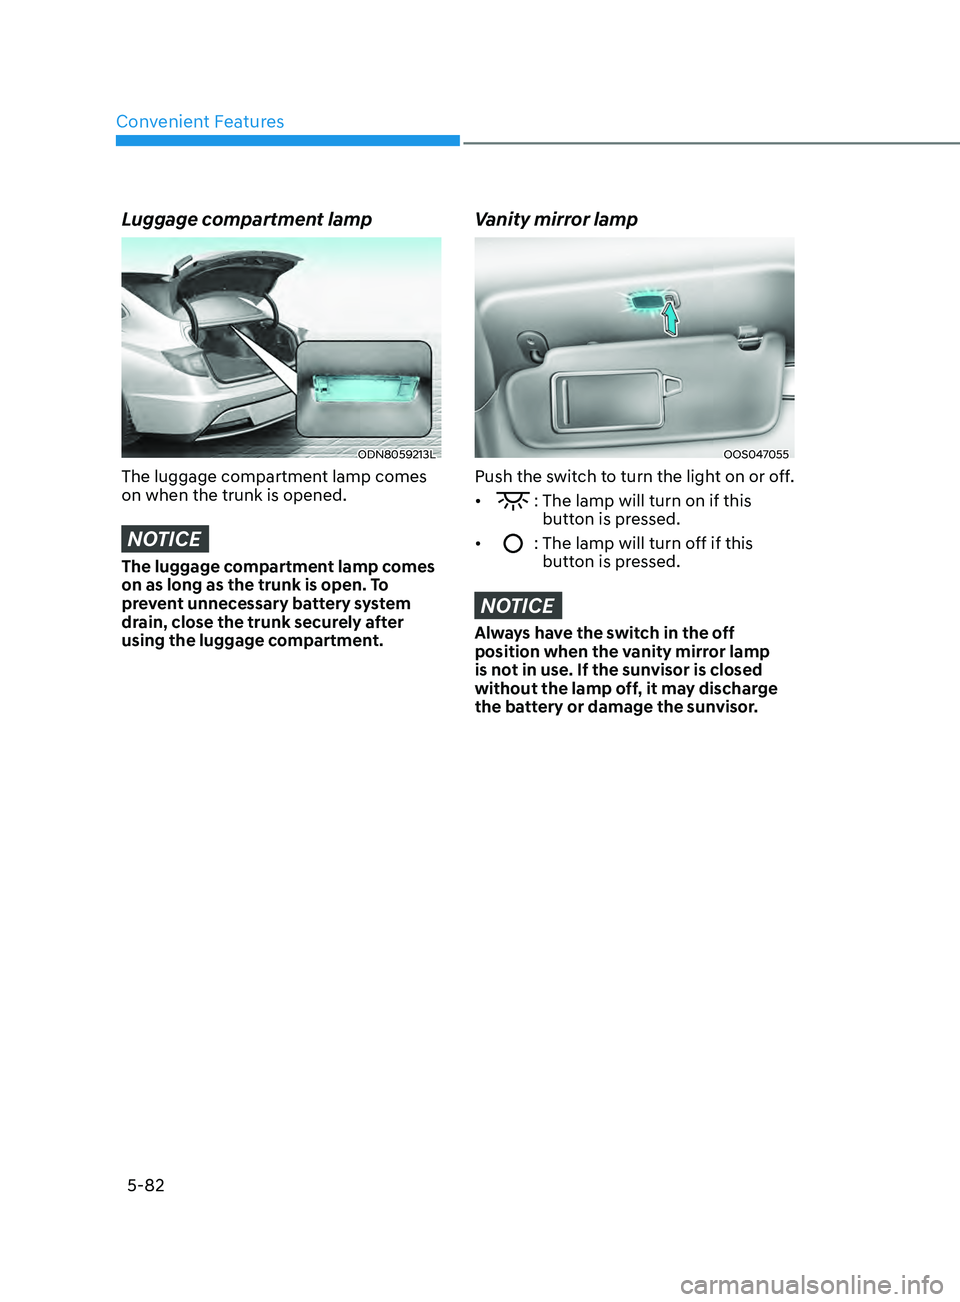
Luggage compartment lamp
ODN8059213L
The luggage compartment lamp comes
on when the trunk is opened.
NOTICE
The luggage compartment lamp comes
on as long as the trunk is open. To
prevent unnecessary battery system
drain, close the trunk securely after
using the luggage compartment.
Vanity mirror lamp
OOS047055
Push the switch to turn the light on or off.
•
: The lamp will turn on if this
button is pressed.
•
: The lamp will turn o ff if this
button is pressed.
NOTICE
Always have the switch in the off
position when the vanity mirror lamp
is not in use. If the sunvisor is closed
without the lamp off, it may discharge
the battery or damage the sunvisor.
Page 235 of 546
05
5-105
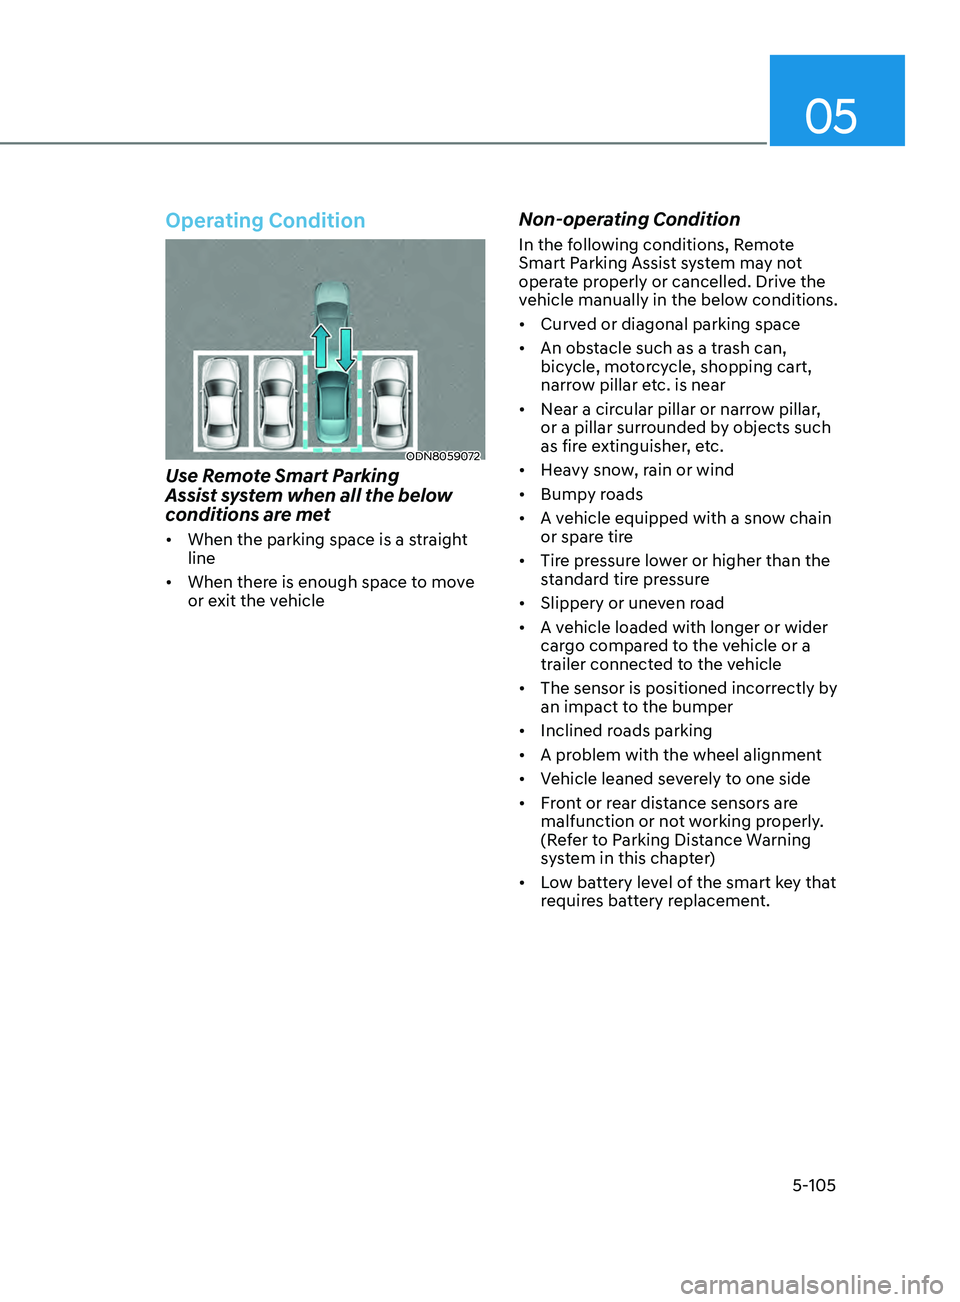
Operating Condition
ODN8059072
Use Remote Smart Parking
Assist system when all the below
conditions are met
• When the parking space is a straight
line
• When there is enough space to move
or exit the vehicle
Non-operating Condition
In the following conditions, Remote
Smart Parking Assist system may not
operate properly or cancelled. Drive the
vehicle manually in the below conditions.
• Curved or diagonal parking space
• An obstacle such as a trash can,
bicycle, motorcycle, shopping cart,
narrow pillar etc. is near
• Near a circular pillar or narrow pillar,
or a pillar surrounded by objects such
as fire extinguisher, etc.
• Heavy snow, rain or wind
• Bumpy roads
• A vehicle equipped with a snow chain
or spare tire
• Tire pressure lower or higher than the
standard tire pressure
• Slippery or uneven road
• A vehicle loaded with longer or wider
cargo compared to the vehicle or a
trailer connected to the vehicle
• The sensor is positioned incorrectly by
an impact to the bumper
• Inclined roads parking
• A problem with the wheel alignment
• Vehicle leaned severely to one side
• Front or rear distance sensors are
malfunction or not working properly.
(Refer to Parking Distance Warning
system in this chapter)
• Low battery level of the smart key that
requires battery replacement.
Page 253 of 546
05
5-123
Information
Using the system primarily in Fresh mode
and Recirculation mode only when needed
is recommended for best results.
Prolonged operation of the heater in
Recirculation mode and without the A/C
ON can cause fogging of the windshield.
In addition, prolonged use of the A/C
ON in Recirculation mode may result in
excessively dry, dehumidified air in the
cabin.
WARNING
• Continued use of the climate control
system operation in Recirculation
mode for a prolonged period of
time may cause drowsiness to the
occupants in the cabin. This may lead
to loss of vehicle control which may
lead to an accident.
• Continued use of the climate control
system operation in Recirculation
mode with the A/C OFF may allow
humidity to increase inside the
cabin. This may cause condensation
to accumulate on the windshield and
obscure visibility.
• Do not sleep in your vehicle or
remain parked in your vehicle with
the windows up and either the
heater or the air conditioning ON for
prolonged periods of time. Doing so
may increase the levels of carbon
dioxide in the cabin which may lead
to serious injury or death.
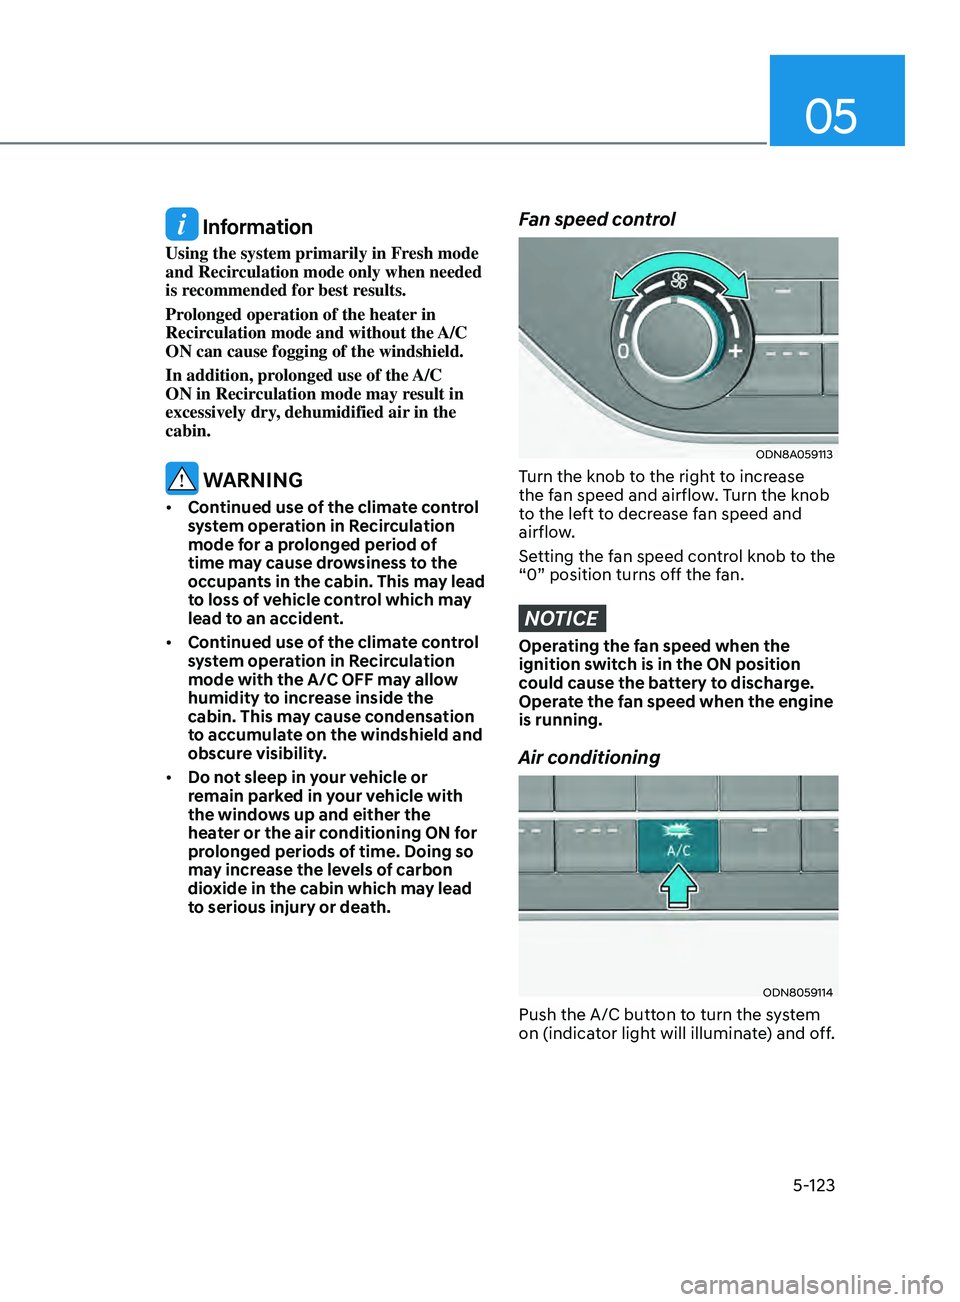
Fan speed control
ODN8A059113
Turn the knob to the right to increase
the fan speed and airflow. Turn the knob
to the left to decrease fan speed and
airflow.
Setting the fan speed control knob to the
“0” position turns off the fan.
NOTICE
Operating the fan speed when the
ignition switch is in the ON position
could cause the battery to discharge.
Operate the fan speed when the engine
is running.
Air conditioning
ODN8059114
Push the A/C button to turn the system
on (indicator light will illuminate) and off.
Page 263 of 546
05
5-133
Temperature conversion
If the battery has been discharged or
disconnected, the temperature mode
display will reset to Centigrade.
To change the temperature unit from °C
to °F or °F to °C :
-
A
utomatic climate control system
Pr
ess the AUTO button for 3 seconds
while pressing the OFF button.
-
Ins
trument cluster
Go
to User Settings → Other →
T
emperature Unit.
The temperature unit on both the cluster
LCD display and the climate control
screen will change.
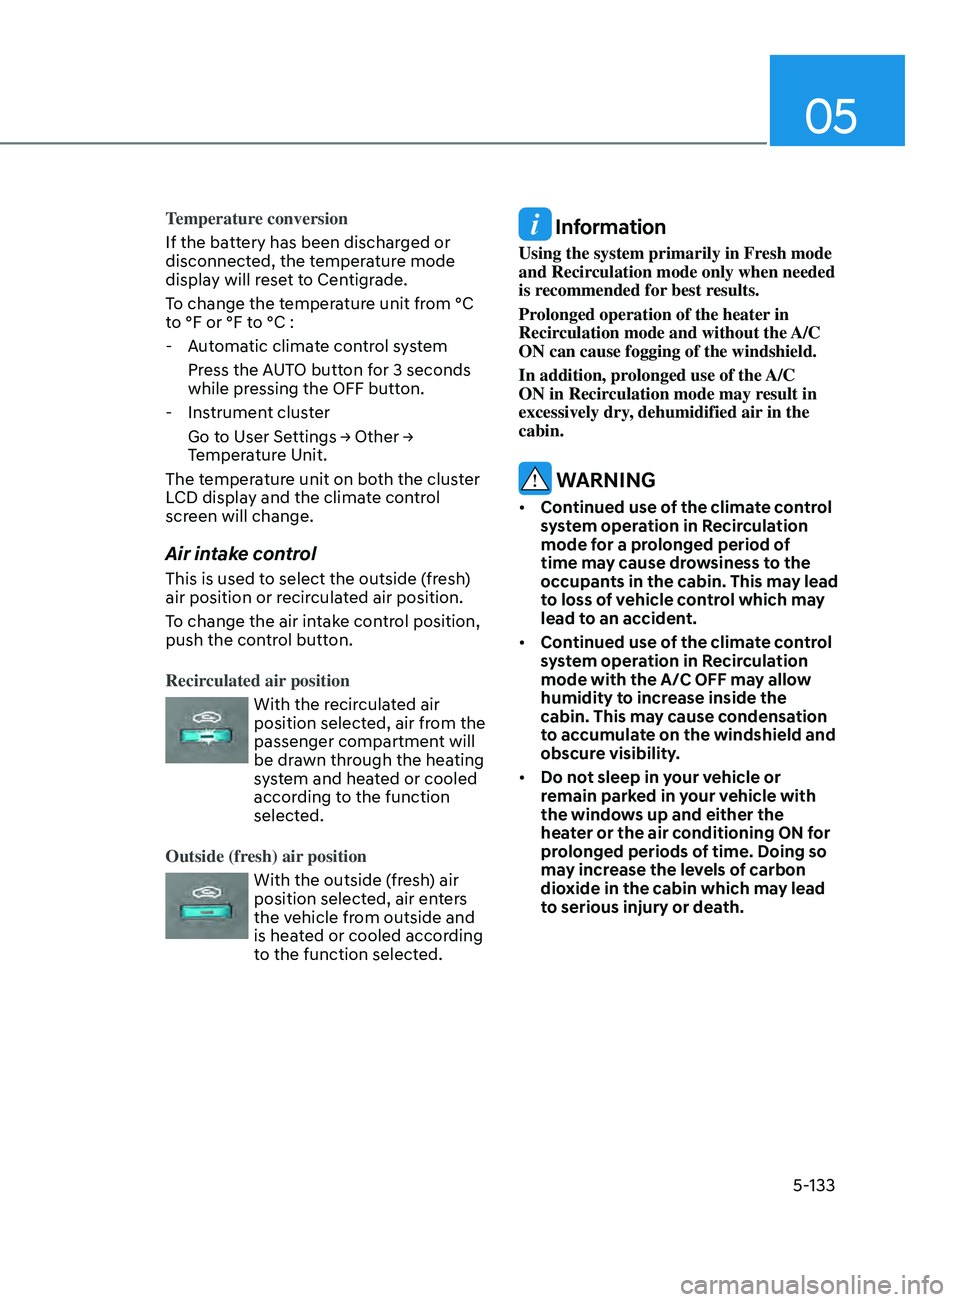
Air intake control
This is used to select the outside (fresh)
air position or recirculated air position.
To change the air intake control position,
push the control button.
Recirculated air position
With the recirculated air
position selected, air from the
passenger compartment will
be drawn through the heating
system and heated or cooled
according to the function
selected.
Outside (fresh) air position
With the outside (fresh) air
position selected, air enters
the vehicle from outside and
is heated or cooled according
to the function selected.
Information
Using the system primarily in Fresh mode
and Recirculation mode only when needed
is recommended for best results.
Prolonged operation of the heater in
Recirculation mode and without the A/C
ON can cause fogging of the windshield.
In addition, prolonged use of the A/C
ON in Recirculation mode may result in
excessively dry, dehumidified air in the
cabin.
WARNING
• Continued use of the climate control
system operation in Recirculation
mode for a prolonged period of
time may cause drowsiness to the
occupants in the cabin. This may lead
to loss of vehicle control which may
lead to an accident.
• Continued use of the climate control
system operation in Recirculation
mode with the A/C OFF may allow
humidity to increase inside the
cabin. This may cause condensation
to accumulate on the windshield and
obscure visibility.
• Do not sleep in your vehicle or
remain parked in your vehicle with
the windows up and either the
heater or the air conditioning ON for
prolonged periods of time. Doing so
may increase the levels of carbon
dioxide in the cabin which may lead
to serious injury or death.
Page 264 of 546
Convenient Features
5-134
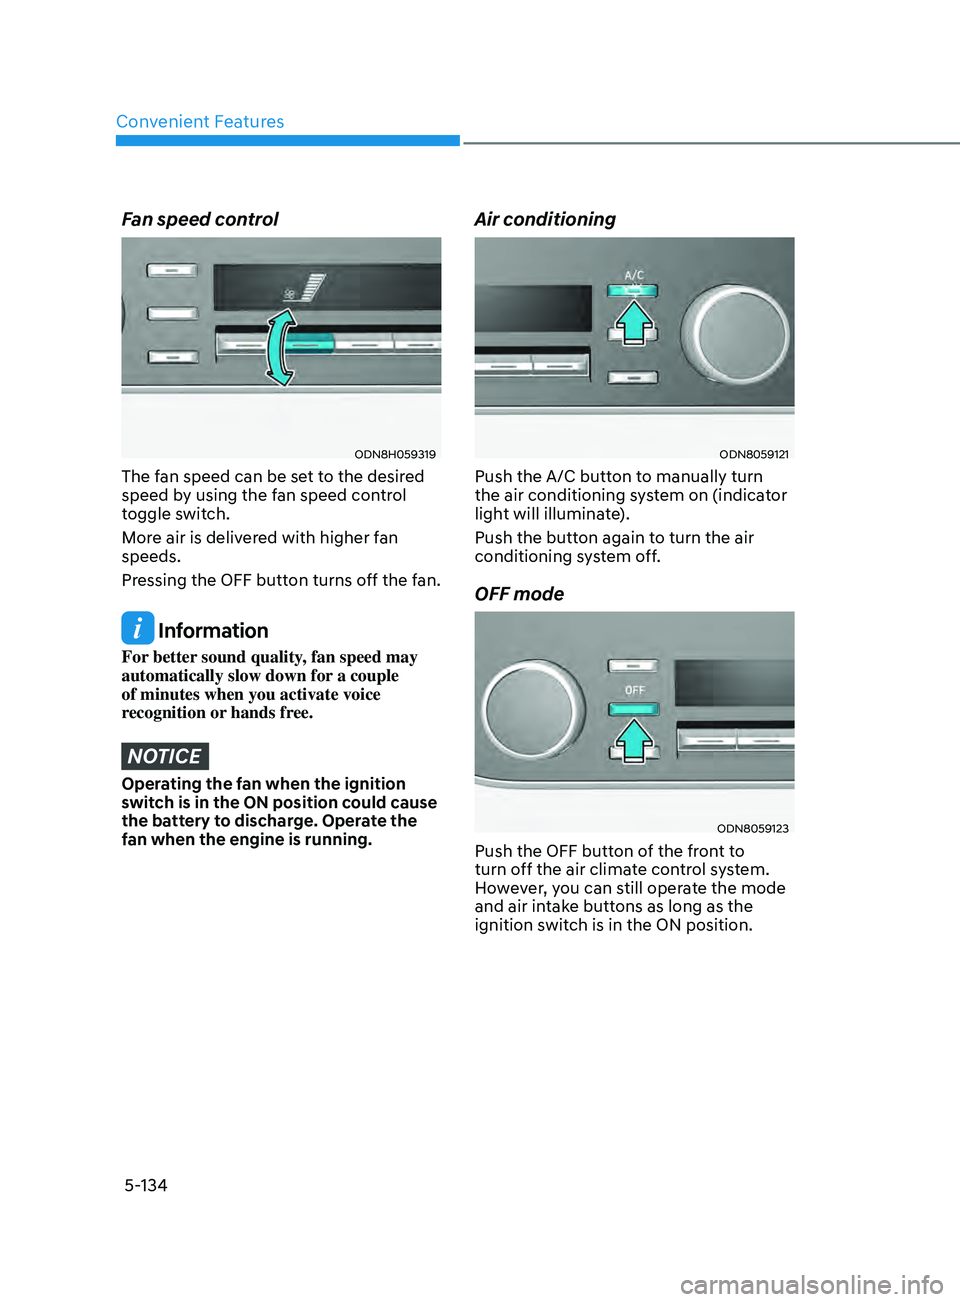
Fan speed control
ODN8H059319
The fan speed can be set to the desired
speed by using the fan speed control
toggle switch.
More air is delivered with higher fan
speeds.
Pressing the OFF button turns off the fan.
Information
For better sound quality, fan speed may
automatically slow down for a couple
of minutes when you activate voice
recognition or hands free.
NOTICE
Operating the fan when the ignition
switch is in the ON position could cause
the battery to discharge. Operate the
fan when the engine is running.
Air conditioning
ODN8059121
Push the A/C button to manually turn
the air conditioning system on (indicator
light will illuminate).
Push the button again to turn the air
conditioning system off.
OFF mode
ODN8059123
Push the OFF button of the front to
turn off the air climate control system.
However, you can still operate the mode
and air intake buttons as long as the
ignition switch is in the ON position.
Page 270 of 546
Convenient Features
5-140
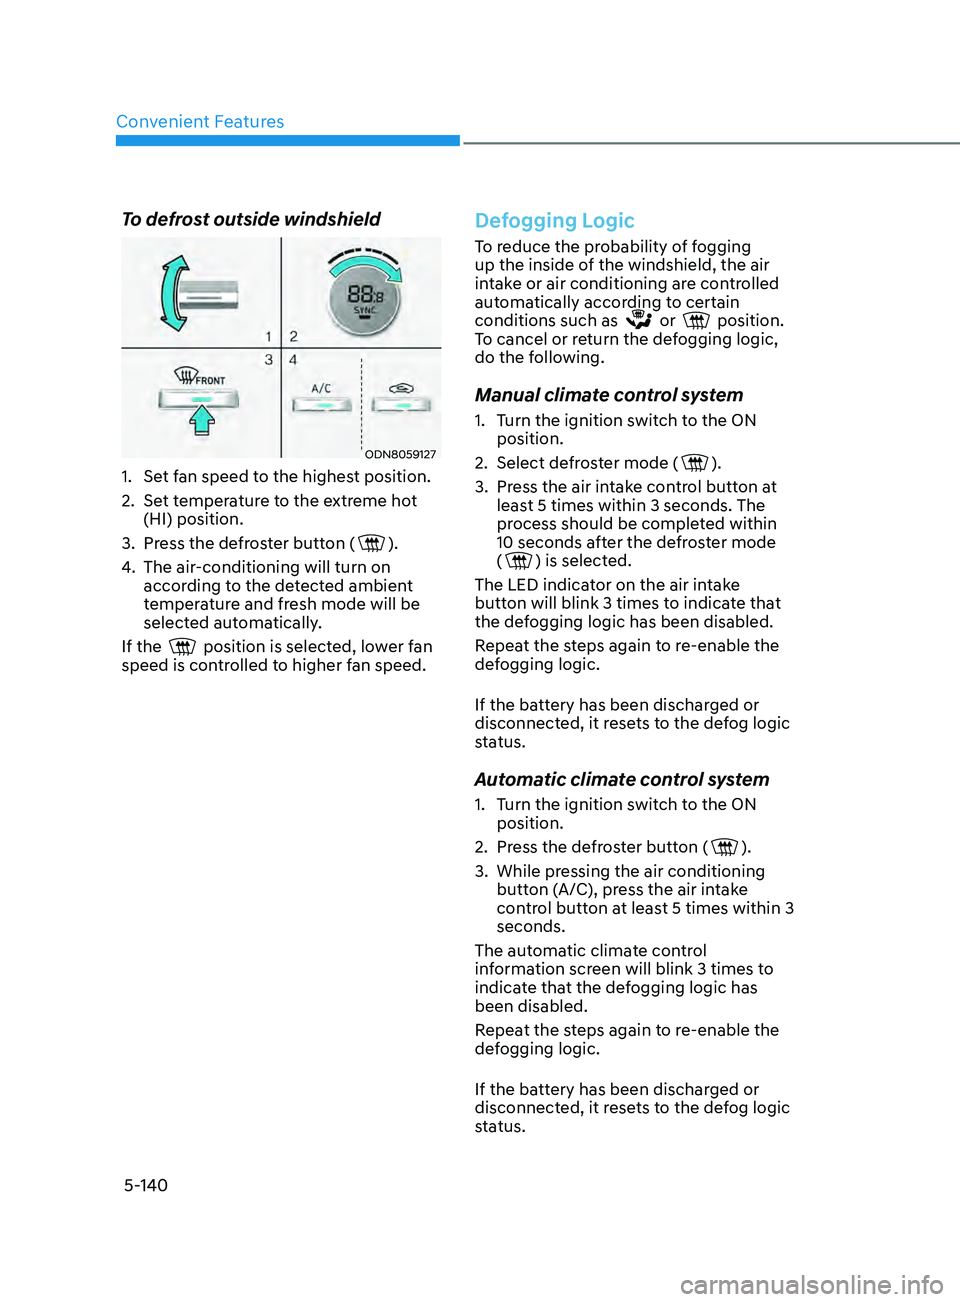
To defrost outside windshield
ODN8059127
1. Set fan speed to the highest position.
2.
Se
t temperature to the extreme hot
(HI) position.
3.
Pr
ess the defroster button (
).
4.
The air
-conditioning will turn on
according to the detected ambient
temperature and fresh mode will be
selected automatically.
If the
position is selected, lower fan
speed is controlled to higher fan speed.
Defogging Logic
To reduce the probability of fogging
up the inside of the windshield, the air
intake or air conditioning are controlled
automatically according to certain
conditions such as
or position.
To cancel or return the defogging logic,
do the following.
Manual climate control system
1. Turn the ignition switch to the ON position.
2.
Select de
froster mode (
).
3.
Pr
ess the air intake control button at
least 5 times within 3 seconds. The
process should be completed within
10 seconds after the defroster mode
(
) is selected.
The LED indicator on the air intake
button will blink 3 times to indicate that
the defogging logic has been disabled.
Repeat the steps again to re-enable the
defogging logic.
If the battery has been discharged or
disconnected, it resets to the defog logic
status.
Automatic climate control system
1. Turn the ignition switch to the ON position.
2.
Pr
ess the defroster button (
).
3.
While pr
essing the air conditioning
button (A/C), press the air intake
control button at least 5 times within 3
seconds.
The automatic climate control
information screen will blink 3 times to
indicate that the defogging logic has
been disabled.
Repeat the steps again to re-enable the
defogging logic.
If the battery has been discharged or
disconnected, it resets to the defog logic
status.