Hyundai Sonata
Manufacturer: HYUNDAI, Model Year: , Model line: , Model:Pages: 276, PDF Size: 12.9 MB
Page 141 of 276
1
FEATURES OF YOUR HYUNDAI
127127
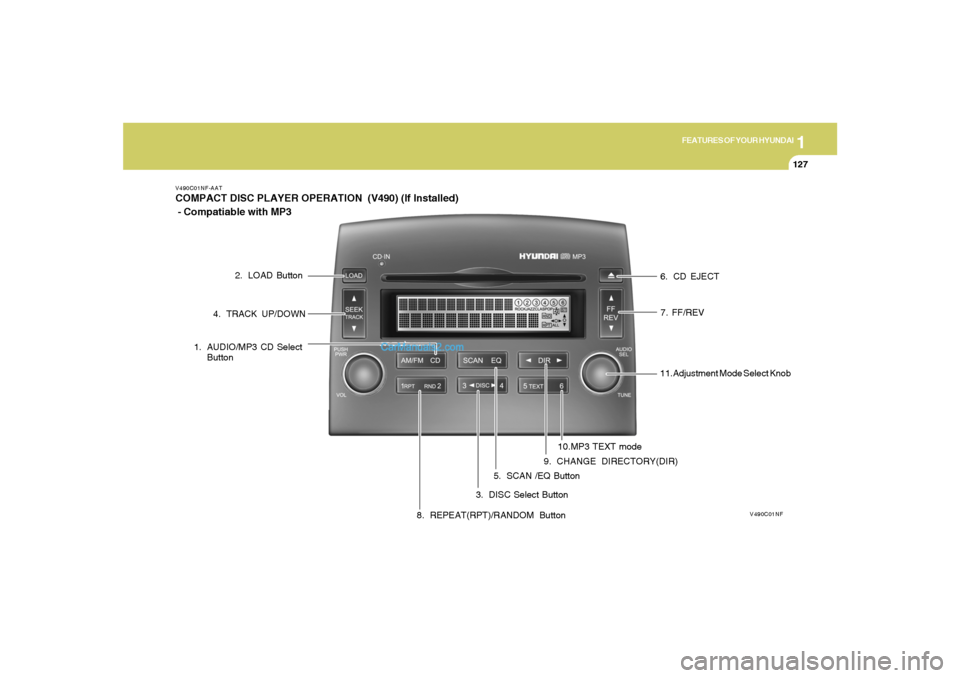
V490C01NF-AATCOMPACT DISC PLAYER OPERATION (V490) (If Installed)
- Compatiable with MP3
V490C01NF
1. AUDIO/MP3 CD Select
Button
3. DISC Select Button 4. TRACK UP/DOWN
5. SCAN /EQ Button 2. LOAD Button
6. CD EJECT
7. FF/REV
8. REPEAT(RPT)/RANDOM Button9. CHANGE DIRECTORY(DIR)10.MP3 TEXT mode11.Adjustment Mode Select Knob
Page 142 of 276
1FEATURES OF YOUR HYUNDAI
128
V490D02NF-AAT1. AUDIO/MP3 CD Select ButtonCD mode may be entered by pressing the CD
button or by loading a CD into the audio system.
The first track of the disc will begin playing.
When returning to CD mode, the CD play will
begin where it stopped last.
If an alternative CD is desired, press the DISC
select button to access the other loaded CDs.
The CD-IN will be on when a disc is present. It
will blink when a disc is loading. NO DISC will
display if the CD button is pressed when there
is not a CD present in the audio system.NOTE:o Do not apply paper, tape, etc., onto the
label side or the recording side of any
discs, as it may cause a malfunction.
o The unit cannot play a CD-R(Recordable
CD) and CD-RW(Rewritable CD) that is
not finalized (closed). Please refer to the
manual of the CD-R/CD-RW recorder or
CD-R/CD-RW software for more infor-
mation on the finalization process.
o Depending on the recording status,
some CD-Rs/CD-RWs may not be play-
able on this unit.
o Playback of MP3, AAC and WMA file
formats are supported. Load to play
time for these formats may be longer
due to the compressed nature of these
discs.
2. LOAD ButtonThe load feature allows you to load single CDs
into the player internal to the audio.
o Press the LOAD button. Wait until the CD
displays the insert CD message.
o Load the CD into the player. The CD-IN LED
will blink while the disc is being loaded.AutoloadThis feature allows you to autoload up to six
discs into the multi-disc CD player internal to the
audio.
o Press and hold the LOAD button until
AUTOLOAD# is displayed.
o Load the desired discs, one at a time. The CD
is loaded into position and the audio system
will display CD#. Each time the audio is ready
for another CD, AUTOLOADING DISC
SLOT# message will be displayed. The CD-
IN LED will blink while a disc is being loaded.
The player will move to the next slot after
each disc has been loaded. The process is
repeated until all six slots are full. The autoload
process can be cancelled by pressing the
load button again.
The audio system plays the last CD loaded and
the display is updated. If some slots are already
full and autoload is activated, the system will fill
all empty slots.
NOTE:o This CD player is suitable only for 4.7
inch discs, do not use irregular shaped
CDs.
o The disc player holds up to six discs. Do
not try to load more than six.
o This six-disc CD player is equipped with
a CD door.
Compact discs should only be inserted
into the player after the door has opened.
Do not attempt to force the door open.
Compact discs should only be loaded by
pressing the LOAD control.
o Playback of multisession discs with up
to 255 directories/files/sessions is sup-
ported.
o Playback of MP3, AAC, and WMA file
formats are supported.
o Only CDDA files will be played on mixed
mode discs.3. DISC Select Buttono Press (left arrow) to select the previous
disc. (Play will begin on the first track of the
disc unless shuffle mode is engaged.) Hold
the button to continue reversing through the
discs.
o Press (right arrow) to select the next disc.
Hold the button to fast-forward through the
remaining discs.
Page 143 of 276
1
FEATURES OF YOUR HYUNDAI
129129
Display descriptionThere are six CD slots in the audio system.
When a disc is loaded into a particular slot (1-
6), the number of a loaded slot is displayed by
a circle to indicate the currently selected CD.4. TRACK UP/DOWNo Press
(down arrow) to revert to the
previous track of the current disc. If the
beginning of the disc is reached, the CD
player seeks to the beginning of the last
track on the current disc and begins playing.
Pressing the down arrow will revert to the
beginning of the current song if play has
advanced beyond 3 s.
o Press (up arrow) to advance to the next
track of the current disc. After the last track
has been completed, the first track of the
current disc will automatically replay.
5. SCAN /EQ ButtonPress the SCAN button to hear a short sampling
of all selections on the CD. (The CD scans in a
forward direction, wrapping back to the first
track at the end of the CD.) To stop on a
particular selection, press the button again.
EQ Button - Equalization FeatureThe radio has five EQ modes: OFF, CLASSI-
CAL, POP, ROCK, and JAZZ.
Each press of the EQ button will advance to the
next EQ setting. Radio and CD have indepen-
dent EQ settings.6. CD EJECTo Press the EJ button to stop and eject a CD.
If a CD is ejected and not removed, the player
will automatically reload the CD. The CD-IN LED
will blink while the disc is ejecting. This feature
may be used when the ignition is ON or OFF.Auto ejecto Press and momentarily hold the EJ button to
engage auto eject. All CDs which are present
in the player will be ejected one at a time. If
a CD is ejected and not removed, the player
will automatically reload the CD. This feature
may be used when the ignition is ON or OFF.7. FF/REVo Press and hold the FF button until the desired
selection is reached. The FF Rate will in-
crease after advancing the track about 10
s. A beep will be heard when the rate changes.
If the end of the disc is reached, the CD will
return to the first track on the first disc.Release the button to disengage fast for-
ward mode. When in fast forward mode, your
audio system will automatically lower the
volume level of the playing media.
o Press and hold the REV button until the
desired selecion is reached. The REV Rate
will increase after reversing the track about
10 s. A beep will be heard when the rate
changes. If the beginning of the disc is
reached, the CD will begin play at the first
track. Release the button to disengage re-
verse mode. When in reverse mode, your
audio system will automatically lower the
volume level of the playing media.
8. REPEAT(RPT)When engaged, the repeat feature has four
different modes: RPT Track, RPT DIR(MP3
only), RPT DISC, RPT OFF.
RPT Track will continuously play the current
track selected. RPT DIR will continuously play
the current MP3 directory, and RPT DISC will
continuously play the current DISC.
o Press the RPT control until the desired
repeat mode is displayed. The audio system
will then engage the desired repeat mode.
Page 144 of 276
1FEATURES OF YOUR HYUNDAI
130
RANDOM(RND)When engaged, the random feature has three
different modes: Random Disc, Random Di-
rectory (MP3 only), and Random Off.
RANDOM DISC randomly plays tracks from
the disc presently in the audio system. RAN-
DOM DIRECTORY plays all the tracks on the
current MP3 directory in random order.
o Press the RND control until the desired
shuffle mode is displayed. The audio sys-
tem will then engage the desired random
mode.9. CHANGE DIRECTORY(DIR)Press DIR control to change MP3 directories.10. MP3 TEXT modeEach press of the TEXT button will advance
through the following MP3 track information:
1) Song Title
2) Artist Name
3) Album Name
4) Filename
5) Directory Name
6) Number of tracks on the current disc
Rotate the AUDIO-SEL knob to view additional
characters.
11. Adjustment Mode Select KnobPressing the AUDIO SEL knob will initiate Audio
Mode. Each subsequent press will select the
next adjustment in the following order.
1) Bass adjust
The bass adjust control allows you to in-
crease or decrease the audio system's
bass output. Rotate the AUDIO SEL knob to
change the bass setting.
2) Midrange adjust
The midrange adjust control allows you to
increase or decrease the audio system's
midrange output. Rotate the AUDIO SEL
knob to change the midrange setting.
3) Treble adjust
The treble adjust control allows you to in-
crease or decrease the audio system's
treble output. Rotate the AUDIO SEL knob to
change the treble setting.
4) Speaker balance adjust
Speaker sound distribution can be adjusted
between the right and left speakers by rotat-
ing the AUDIO SEL knob.
5) Speaker fade adjust
Speaker sound can be adjusted between the
front and rear speakers by rotating the
AUDIO SEL knob.
NOTE:o To assure proper operation of the unit,
keep the vehicle interior temperature
within a normal range by using the
vehicle's air conditioning or heating
system.
o When replacing the fuse, replace it with
a fuse having the correct capacity.
o This equipment is designed to be used
only in a 12 volt DC battery system with
negative ground.
o This unit is made of precision parts. Do
not attempt to disassemble or adjust
any parts.
o When driving your vehicle, be sure to
keep the volume of the unit set low
enough to allow you to hear sounds
coming from the outside.
o Do not expose this equipment (includ-
ing the speakers) to water or excessive
moisture.
Page 145 of 276
1
FEATURES OF YOUR HYUNDAI
131131
!
CAUTION:
o Do not insert warped or poor quality
discs into the CD player as damage to the
unit may occur.
o Do not insert anything like coins into the
player slot as damage to the unit may
occur.
o Do not place beverages close to the
audio system. The playback mechanism
may be damaged if you spill them.
o Do not impact or strike the audio system,
or the playback mechanism could be
damaged.
o Driving off-road or other vibrations may
skip your compact disc. Do not use the
audio system off-road as the discs could
be scratched and damaged.
o Do not grip or pull out the disc with your
hand while the disc is being pulled into
the unit by the self loading mechanism.
These can cause disc scratching to oc-
cur or damage the compact disc player.
o Avoid using CD-Recordable or CD
Rewritable to ensure proper operation.
When using the compact disc player,
professionally recorded CDs are recom-
mended.
Page 146 of 276
1FEATURES OF YOUR HYUNDAI
132
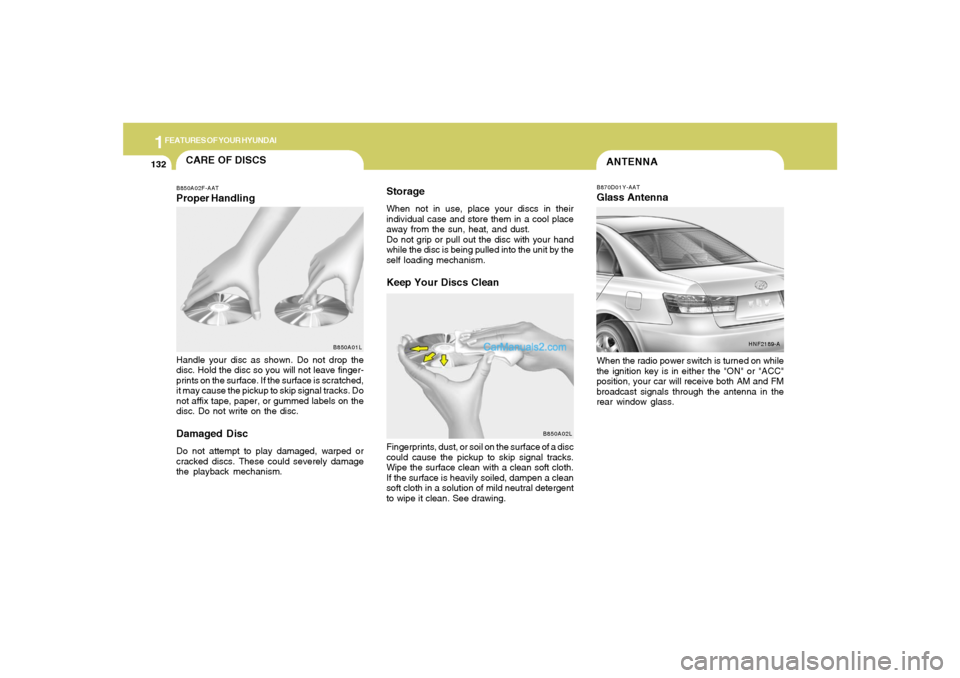
ANTENNAB870D01Y-AATGlass AntennaWhen the radio power switch is turned on while
the ignition key is in either the "ON" or "ACC"
position, your car will receive both AM and FM
broadcast signals through the antenna in the
rear window glass.
HNF2189-A
CARE OF DISCS
B850A02L B850A02F-AAT
Proper HandlingStorage
When not in use, place your discs in their
individual case and store them in a cool place
away from the sun, heat, and dust.
Do not grip or pull out the disc with your hand
while the disc is being pulled into the unit by the
self loading mechanism.Keep Your Discs Clean
Handle your disc as shown. Do not drop the
disc. Hold the disc so you will not leave finger-
prints on the surface. If the surface is scratched,
it may cause the pickup to skip signal tracks. Do
not affix tape, paper, or gummed labels on the
disc. Do not write on the disc.Damaged DiscDo not attempt to play damaged, warped or
cracked discs. These could severely damage
the playback mechanism.Fingerprints, dust, or soil on the surface of a disc
could cause the pickup to skip signal tracks.
Wipe the surface clean with a clean soft cloth.
If the surface is heavily soiled, dampen a clean
soft cloth in a solution of mild neutral detergent
to wipe it clean. See drawing.
B850A01L
Page 147 of 276
1
FEATURES OF YOUR HYUNDAI
133133
CAUTION:
o Do not clean the inner side of the rear
window glass with an abrasive type of
glass cleaner or use a scraper to remove
foreign deposits from the inner surface
of the glass as this may cause damage to
the antenna elements.
o Avoid adding metallic coatings to the
rear window glass, such as Ni, Cd, etc.
These can disturb receiving AM and FM
broadcast signals.
!
Page 148 of 276
DRIVING YOUR HYUNDAI
2
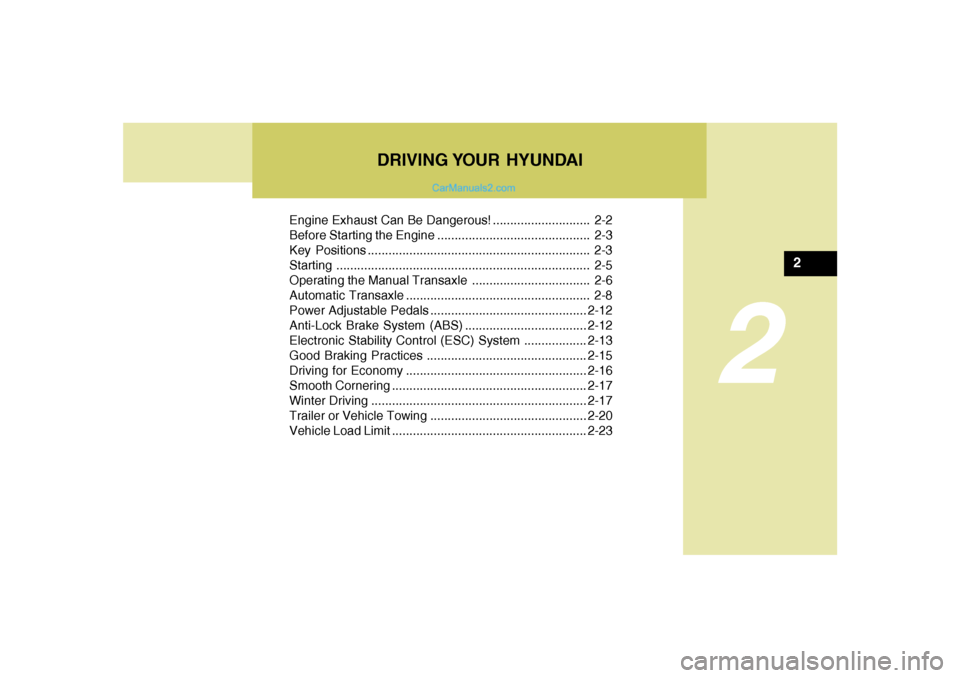
Engine Exhaust Can Be Dangerous! ............................ 2-2
Before Starting the Engine ............................................ 2-3
Key Positions ................................................................ 2-3
Starting .........................................................................2-5
Operating the Manual Transaxle .................................. 2-6
Automatic Transaxle ..................................................... 2-8
Power Adjustable Pedals.............................................2-12
Anti-Lock Brake System (ABS) ...................................2-12
Electronic Stability Control (ESC) System ..................2-13
Good Braking Practices..............................................2-15
Driving for Economy ....................................................2-16
Smooth Cornering........................................................2-17
Winter Driving..............................................................2-17
Trailer or Vehicle Towing .............................................2-20
Vehicle Load Limit........................................................2-23
2
Page 149 of 276
2
DRIVING YOUR HYUNDAI
2
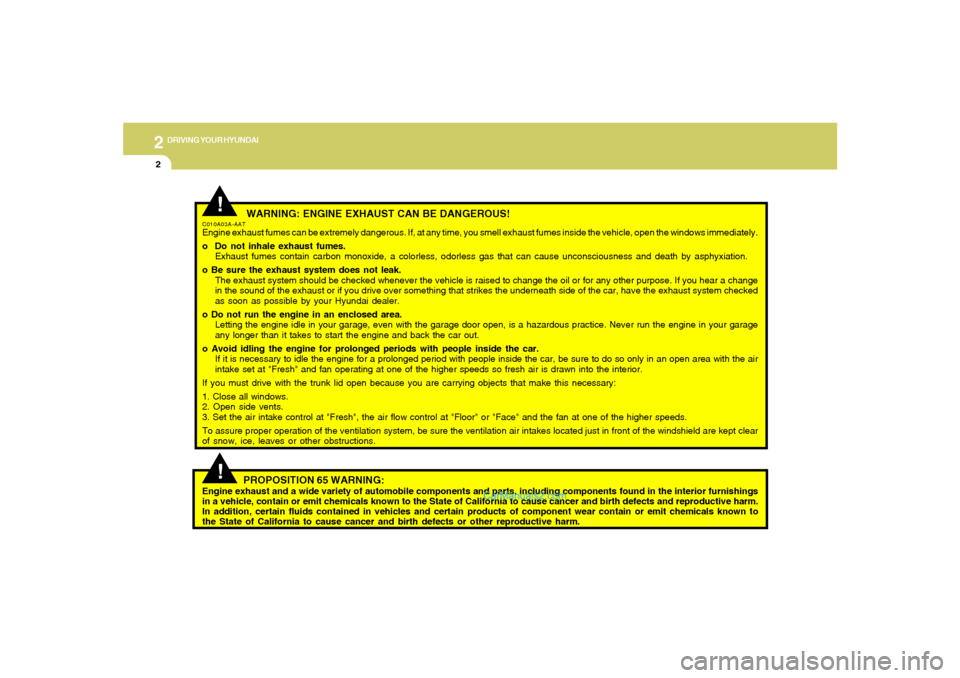
WARNING: ENGINE EXHAUST CAN BE DANGEROUS!
C010A03A-AATEngine exhaust fumes can be extremely dangerous. If, at any time, you smell exhaust fumes inside the vehicle, open the windows immediately.
o Do not inhale exhaust fumes.
Exhaust fumes contain carbon monoxide, a colorless, odorless gas that can cause unconsciousness and death by asphyxiation.
o Be sure the exhaust system does not leak.
The exhaust system should be checked whenever the vehicle is raised to change the oil or for any other purpose. If you hear a change
in the sound of the exhaust or if you drive over something that strikes the underneath side of the car, have the exhaust system checked
as soon as possible by your Hyundai dealer.
o Do not run the engine in an enclosed area.
Letting the engine idle in your garage, even with the garage door open, is a hazardous practice. Never run the engine in your garage
any longer than it takes to start the engine and back the car out.
o Avoid idling the engine for prolonged periods with people inside the car.
If it is necessary to idle the engine for a prolonged period with people inside the car, be sure to do so only in an open area with the air
intake set at "Fresh" and fan operating at one of the higher speeds so fresh air is drawn into the interior.
If you must drive with the trunk lid open because you are carrying objects that make this necessary:
1. Close all windows.
2. Open side vents.
3. Set the air intake control at "Fresh", the air flow control at "Floor" or "Face" and the fan at one of the higher speeds.
To assure proper operation of the ventilation system, be sure the ventilation air intakes located just in front of the windshield are kept clear
of snow, ice, leaves or other obstructions.
!!
PROPOSITION 65 WARNING:
Engine exhaust and a wide variety of automobile components and parts, including components found in the interior furnishings
in a vehicle, contain or emit chemicals known to the State of California to cause cancer and birth defects and reproductive harm.
In addition, certain fluids contained in vehicles and certain products of component wear contain or emit chemicals known to
the State of California to cause cancer and birth defects or other reproductive harm.
Page 150 of 276
2
DRIVING YOUR HYUNDAI
3
!
BEFORE STARTING
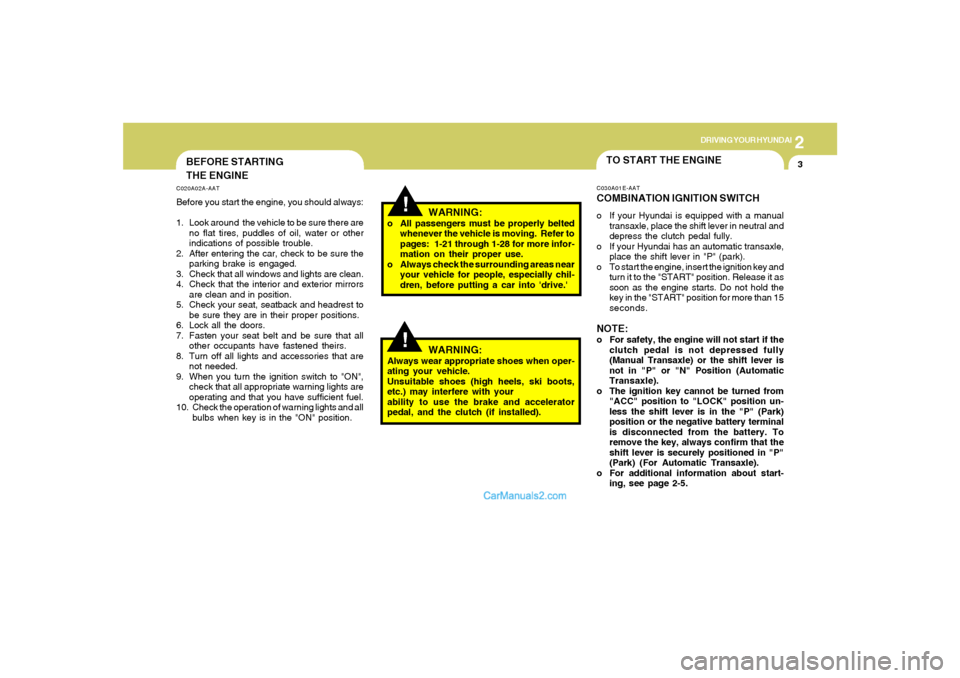
THE ENGINEC020A02A-AATBefore you start the engine, you should always:
1. Look around the vehicle to be sure there are
no flat tires, puddles of oil, water or other
indications of possible trouble.
2. After entering the car, check to be sure the
parking brake is engaged.
3. Check that all windows and lights are clean.
4. Check that the interior and exterior mirrors
are clean and in position.
5. Check your seat, seatback and headrest to
be sure they are in their proper positions.
6. Lock all the doors.
7. Fasten your seat belt and be sure that all
other occupants have fastened theirs.
8. Turn off all lights and accessories that are
not needed.
9. When you turn the ignition switch to "ON",
check that all appropriate warning lights are
operating and that you have sufficient fuel.
10. Check the operation of warning lights and all
bulbs when key is in the "ON" position.
TO START THE ENGINEC030A01E-AATCOMBINATION IGNITION SWITCHo If your Hyundai is equipped with a manual
transaxle, place the shift lever in neutral and
depress the clutch pedal fully.
o If your Hyundai has an automatic transaxle,
place the shift lever in "P" (park).
o To start the engine, insert the ignition key and
turn it to the "START" position. Release it as
soon as the engine starts. Do not hold the
key in the "START" position for more than 15
seconds.NOTE:o For safety, the engine will not start if the
clutch pedal is not depressed fully
(Manual Transaxle) or the shift lever is
not in "P" or "N" Position (Automatic
Transaxle).
o The ignition key cannot be turned from
"ACC" position to "LOCK" position un-
less the shift lever is in the "P" (Park)
position or the negative battery terminal
is disconnected from the battery. To
remove the key, always confirm that the
shift lever is securely positioned in "P"
(Park) (For Automatic Transaxle).
o For additional information about start-
ing, see page 2-5.
WARNING:
o All passengers must be properly belted
whenever the vehicle is moving. Refer to
pages: 1-21 through 1-28 for more infor-
mation on their proper use.
o Always check the surrounding areas near
your vehicle for people, especially chil-
dren, before putting a car into 'drive.'
!
WARNING:
Always wear appropriate shoes when oper-
ating your vehicle.
Unsuitable shoes (high heels, ski boots,
etc.) may interfere with your
ability to use the brake and accelerator
pedal, and the clutch (if installed).