ECU Hyundai Sonata
[x] Cancel search | Manufacturer: HYUNDAI, Model Year: , Model line: , Model:Pages: 271, PDF Size: 12.44 MB
Page 95 of 271
1FEATURES OF YOUR HYUNDAI82
!
Integrated HomeLink
® Wireless Control
System
The HomeLink
® Wireless Control System pro-
vides a convenient way to replace up to three
hand-held radio-frequency (RF) transmitters
with a single built-in device. This innovative
feature will learn the radio frequency codes of
most current transmitters to operate devices
such as gate operators, garage door openers,
entry door locks, security systems, even home
lighting. Both standard and rolling code-equipped
transmitters can be programmed by following
the outlined procedures. Additional HomeLink
®
information can be found at: www.homelink.com
or by calling 1-800-355-3515.
CAUTION:
Before programming HomeLink
® to a ga-
rage door opener or gate operator, make
sure that people and objects are out of the
way of the device to prevent potential harm
or damage. Do not use HomeLink® with any
garage door opener that lacks the safety
stop and reverse features as required by
U.S. federal safety standards (this includes
any garage door opener model manufac-
tured before April 1, 1982). A garage door
that cannot detect an object - signaling the
door to stop and reverse - does not meet
current U.S. federal safety standards. Using
a garage door opener without these fea-
tures increases the risk of serious injury or
death.Programming HomeLink
®
NOTE:o When programming a garage door
opener, it is advised to park the vehicle
outside of the garage.
o It is recommended that a new battery be
placed in the hand-held transmitter of
the device being programmed to
HomeLink
® for quicker training and ac-
curate transmission of the radio-fre-
quency signal.
o Some vehicles may require the ignition
switch to be turned to the second (or
"accessories") position for program-
ming and/or operation of HomeLink.
o In the event that there are still program-
ming difficulties or questions after fol-
lowing the programming steps listed
below, contact HomeLink
® at:
www.homelink.com or 1-800-355-3515.
Retain the original transmitter of the RF device
you are programming for use in other vehicles
as well as for future HomeLink
® programming.
It is also suggested that upon the sale of the
vehicle, the programmed HomeLink
® buttons
be erased for security purposes.
Page 97 of 271
1FEATURES OF YOUR HYUNDAI84
!
then rapidly after several seconds upon suc-
cessful training.
Operating HomeLink
®
To operate, simply press and release the pro-
grammed HomeLink
® button. Activation will now
occur for the trained device (i.e. garage door
opener, gate operator, security system, entry
door lock, home/office lighting, etc.). For con-
venience, the hand-held transmitter of the de-
vice may also be used at any time.
Reprogramming a Single HomeLink
® But-
ton
To program a new device to a previously trained
HomeLink
® button, follow these steps:
1. Press and hold the desired HomeLink
® but-
ton. Do NOT release until step 4 has been
completed.
2. When the indicator light begins to flash slowly
(after 20 seconds), position the handheld
transmitter 1 to 3 inches away from the
HomeLink
® surface.
3. Press and hold the handheld transmitter
button. The HomeLink
® indicator light will
flash, first slowly and then rapidly.
4. When the indicator light begins to flash rap-
idly, release both buttons.
5. Press and hold the just-trained HomeLink
®
button and observe the red Status Indicator
LED. If the indicator light stays on constantly,
programming is complete and your new
device should activate.
Erasing HomeLink
® Buttons
Individual buttons cannot be erased. However,
to erase all three programmed buttons:
1. Press and hold the two outer HomeLink
®
buttons until the indicator light begins to
flash-after 20 seconds.
2. Release both buttons. Do not hold for longer
than 30 seconds.
The Integrated HomeLink
® Wireless Control
System is now in the training (learn) mode and
can be programmed at any time following the
appropriate steps in the Programming sections
above.
FCC ID: NZLZTVHL3
IC: 4112A-ZTVHL3This device complies with Part 15 FCC Rules.
Operation is subject to the following two condi-
tions: (1) this device may not cause harmful
interference, and (2) this device must accept
any interference received, including interfer-
ence that may cause undesired operation.
WARNING:
The transceiver has been tested and com-
plies with FCC and Industry Canada rules.
Changes or modifications not expressly
approved by the party responsible for com-
pliance could void the user's authority to
operate the device.
NVS
® is a registered trademark and Z-Nav™ is
a trademark of the Gentex Corporation, Zeeland,
Michigan. HomeLink
® is a registered trademark
owned by Johnson Controls, Incorporated,
Milwaukee, Wisconsin.
Page 98 of 271
1
FEATURES OF YOUR HYUNDAI
85
!
WARNING:
The trunk lid should always be kept com-
pletely closed while the vehicle is in motion.
If it is left open or ajar, poisonous exhaust
gases may enter the car and serious illness
or death may result. See additional warn-
ings concerning exhaust gases on page 2-
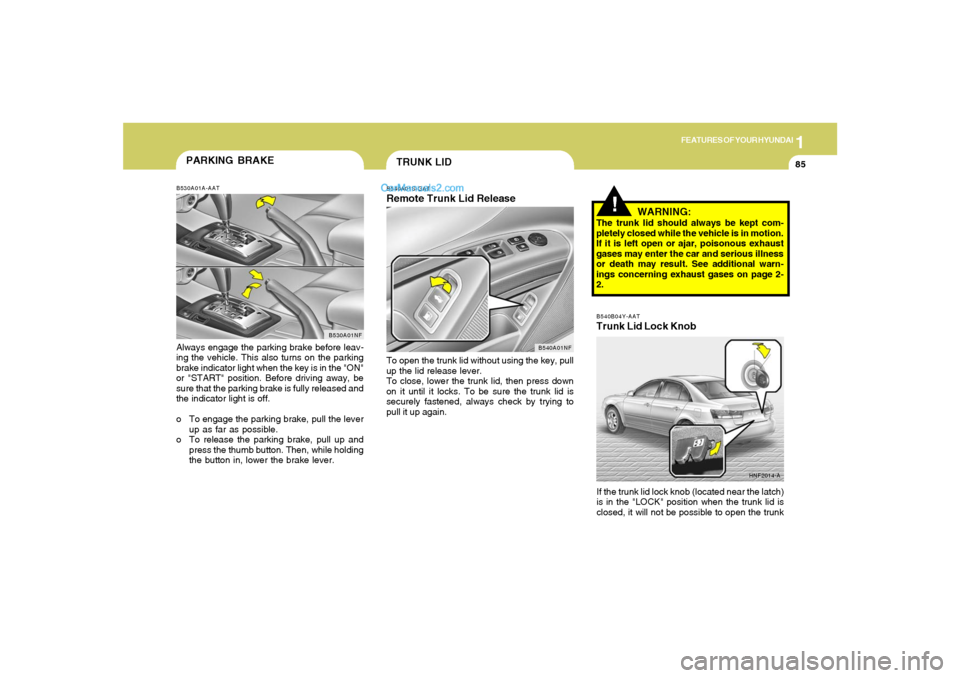
2.B540B04Y-AATTrunk Lid Lock Knob
HNF2014-A
If the trunk lid lock knob (located near the latch)
is in the "LOCK" position when the trunk lid is
closed, it will not be possible to open the trunk
PARKING BRAKEB530A01A-AATAlways engage the parking brake before leav-
ing the vehicle. This also turns on the parking
brake indicator light when the key is in the "ON"
or "START" position. Before driving away, be
sure that the parking brake is fully released and
the indicator light is off.
o To engage the parking brake, pull the lever
up as far as possible.
o To release the parking brake, pull up and
press the thumb button. Then, while holding
the button in, lower the brake lever.
B530A01NF
TRUNK LIDB540A01S-GATRemote Trunk Lid ReleaseTo open the trunk lid without using the key, pull
up the lid release lever.
To close, lower the trunk lid, then press down
on it until it locks. To be sure the trunk lid is
securely fastened, always check by trying to
pull it up again.
B540A01NF
Page 101 of 271
1FEATURES OF YOUR HYUNDAI88
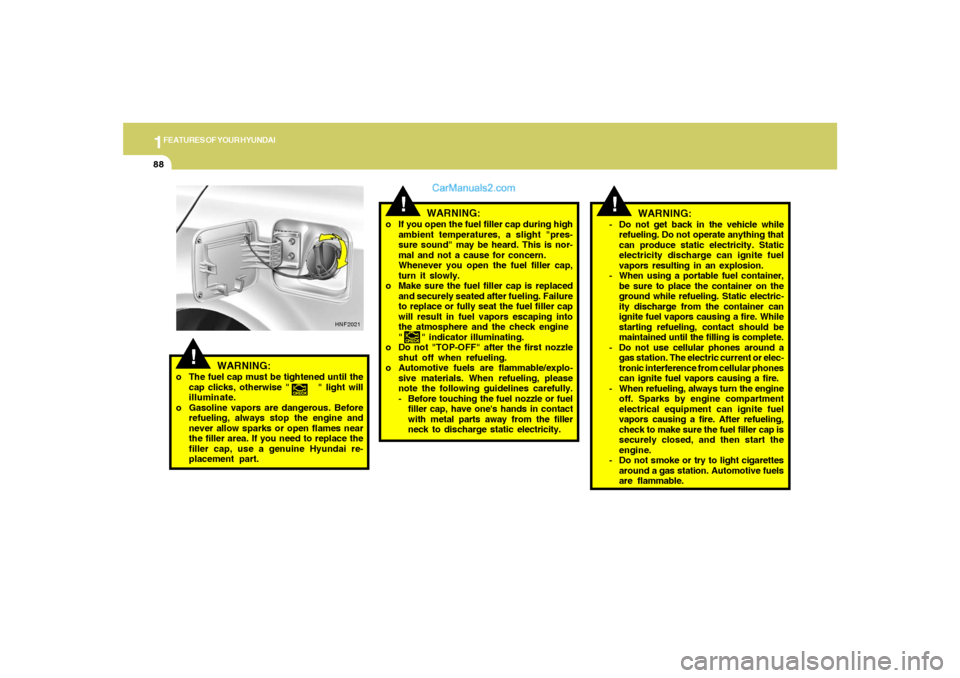
WARNING:
o If you open the fuel filler cap during high
ambient temperatures, a slight "pres-
sure sound" may be heard. This is nor-
mal and not a cause for concern.
Whenever you open the fuel filler cap,
turn it slowly.
o Make sure the fuel filler cap is replaced
and securely seated after fueling. Failure
to replace or fully seat the fuel filler cap
will result in fuel vapors escaping into
the atmosphere and the check engine
" " indicator illuminating.
o Do not "TOP-OFF" after the first nozzle
shut off when refueling.
o Automotive fuels are flammable/explo-
sive materials. When refueling, please
note the following guidelines carefully.
- Before touching the fuel nozzle or fuel
filler cap, have one's hands in contact
with metal parts away from the filler
neck to discharge static electricity.
!
!
WARNING:
o The fuel cap must be tightened until the
cap clicks, otherwise " " light will
illuminate.
o Gasoline vapors are dangerous. Before
refueling, always stop the engine and
never allow sparks or open flames near
the filler area. If you need to replace the
filler cap, use a genuine Hyundai re-
placement part.
HNF2021
!
WARNING:
- Do not get back in the vehicle while
refueling. Do not operate anything that
can produce static electricity. Static
electricity discharge can ignite fuel
vapors resulting in an explosion.
- When using a portable fuel container,
be sure to place the container on the
ground while refueling. Static electric-
ity discharge from the container can
ignite fuel vapors causing a fire. While
starting refueling, contact should be
maintained until the filling is complete.
- Do not use cellular phones around a
gas station. The electric current or elec-
tronic interference from cellular phones
can ignite fuel vapors causing a fire.
- When refueling, always turn the engine
off. Sparks by engine compartment
electrical equipment can ignite fuel
vapors causing a fire. After refueling,
check to make sure the fuel filler cap is
securely closed, and then start the
engine.
- Do not smoke or try to light cigarettes
around a gas station. Automotive fuels
are flammable.
Page 104 of 271
1
FEATURES OF YOUR HYUNDAI
91
!
CAUTION:
After adjusting the steering wheel, try mov-
ing it up and down to make sure it is locked
in position.
!
WARNING:
Do not attempt to adjust the steering wheel
while driving as this may result in loss of
control of the vehicle and serious injury or
death.
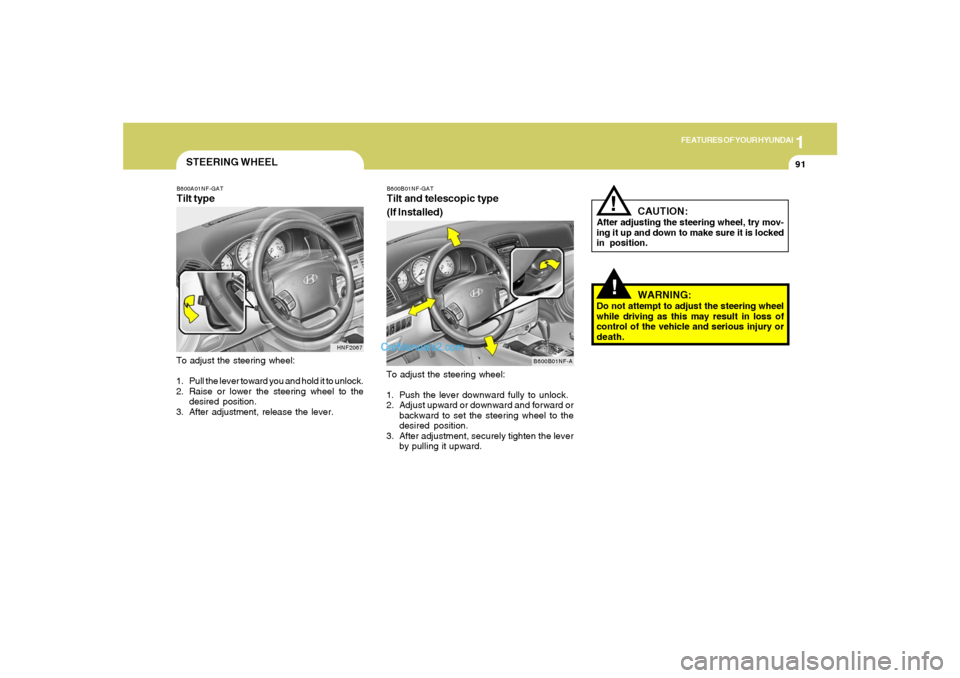
B600B01NF-GATTilt and telescopic type
(If Installed)To adjust the steering wheel:
1. Push the lever downward fully to unlock.
2. Adjust upward or downward and forward or
backward to set the steering wheel to the
desired position.
3. After adjustment, securely tighten the lever
by pulling it upward.
B600B01NF-A
STEERING WHEELB600A01NF-GATTilt typeTo adjust the steering wheel:
1. Pull the lever toward you and hold it to unlock.
2. Raise or lower the steering wheel to the
desired position.
3. After adjustment, release the lever.
HNF2067
Page 147 of 271
2
DRIVING YOUR HYUNDAI
3
BEFORE STARTING
THE ENGINEC020A01A-AATBefore you start the engine, you should always:
1. Look around the vehicle to be sure there are
no flat tires, puddles of oil, water or other
indications of possible trouble.
2. After entering the car, check to be sure the
parking brake is engaged.
3. Check that all windows and lights are clean.
4. Check that the interior and exterior mirrors
are clean and in position.
5. Check your seat, seatback and headrest to
be sure they are in their proper positions.
6. Lock all the doors.
7. Fasten your seat belt and be sure that all
other occupants have fastened theirs.
8. Turn off all lights and accessories that are
not needed.
9. When you turn the ignition switch to "ON",
check that all appropriate warning lights are
operating and that you have sufficient fuel.
10. Check the operation of warning lights and all
bulbs when key is in the "ON" position.
TO START THE ENGINEC030A01E-AATCOMBINATION IGNITION SWITCHo If your Hyundai is equipped with a manual
transaxle, place the shift lever in neutral and
depress the clutch pedal fully.
o If your Hyundai has an automatic transaxle,
place the shift lever in "P" (park).
o To start the engine, insert the ignition key and
turn it to the "START" position. Release it as
soon as the engine starts. Do not hold the
key in the "START" position for more that 15
seconds.NOTE:o For safety, the engine will not start if the
clutch pedal is not depressed fully
(Manual Transaxle) or the shift lever is
not in "P" or "N" Position (Automatic
Transaxle).
o The ignition key cannot be turned from
"ACC" position to "LOCK" position un-
less the shift lever is in the "P" (Park)
position or the negative battery terminal
is disconnected from the battery. To
remove the key, always confirm that the
shift lever is securely positioned in "P"
(Park) (For Automatic Transaxle).
o For additional information about start-
ing, see page 2-4.
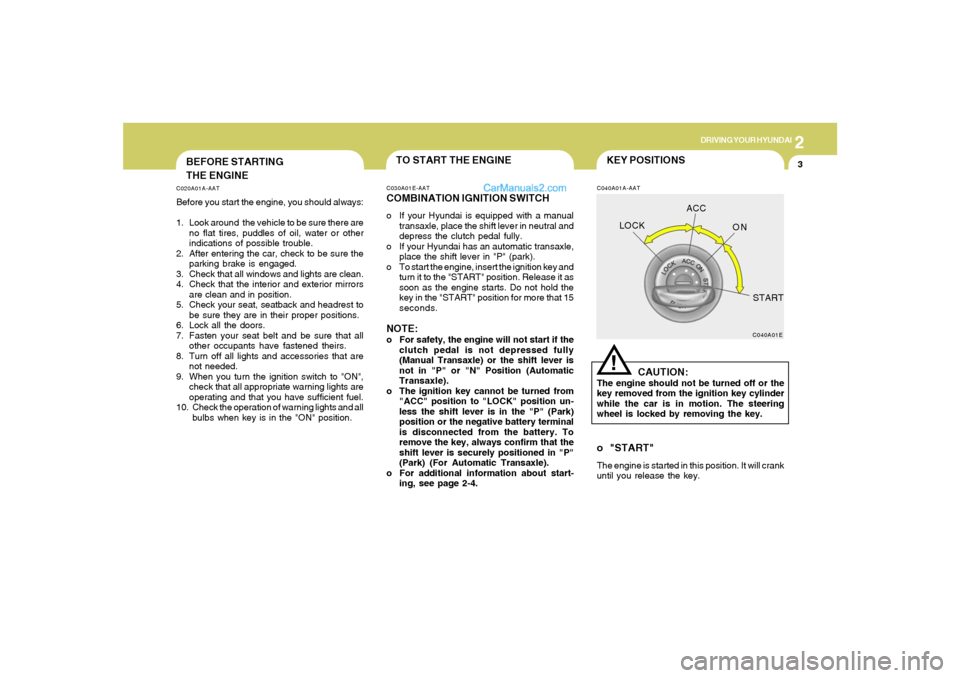
KEY POSITIONSC040A01A-AAT
CAUTION:
The engine should not be turned off or the
key removed from the ignition key cylinder
while the car is in motion. The steering
wheel is locked by removing the key.
C040A01E
LOCKACC
ON
START!
o "START"The engine is started in this position. It will crank
until you release the key.
Page 153 of 271
2
DRIVING YOUR HYUNDAI
9
C090E01NF-GATo D (Drive):Use for normal driving. The transaxle will auto-
matically shift through a four/five gear sequence.C090D02A-AATo N (Neutral):In the "N" position, the transaxle is in neutral,
which means that no gears are engaged. The
engine can be started with the shift lever in "N"
position, although this is not recommended
except if the engine stalls while the car is
moving.C090C01A-AATo R (Reverse):Use for backing up the vehicle. Bring the car to
a complete stop before shifting the selector
lever to "R" position.
CAUTION:
o In sports mode, the driver must execute
upward shifts in accordance with pre-
vailing road conditions, taking care to
keep the engine speed below the red
zone.
o For engine protection, upward shifts are
made automatically when the engine
rpm reaches the red zone.
o By rapidly moving the selector lever
backwards (-) twice it is possible to skip
one gear, i.e., 3rd to 1st, 4th to 2nd or 5th
to 3rd. Since sudden engine braking
and/or rapid acceleration can cause a
loss of traction, however, downshifts
must be made carefully in accordance
with the vehicle's speed.
!
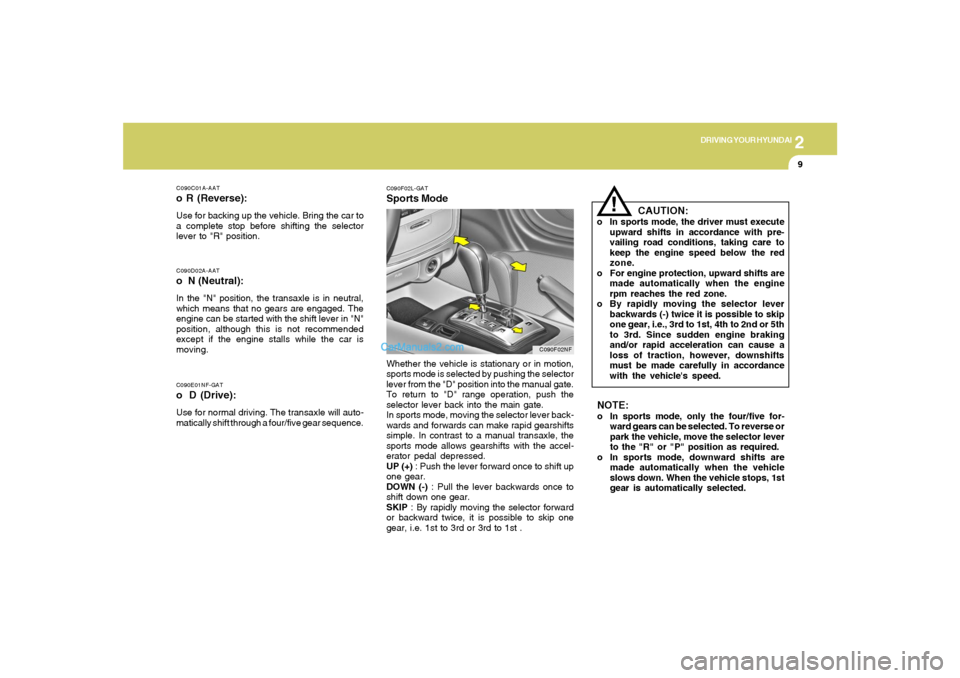
C090F02L-GATSports ModeWhether the vehicle is stationary or in motion,
sports mode is selected by pushing the selector
lever from the "D" position into the manual gate.
To return to "D" range operation, push the
selector lever back into the main gate.
In sports mode, moving the selector lever back-
wards and forwards can make rapid gearshifts
simple. In contrast to a manual transaxle, the
sports mode allows gearshifts with the accel-
erator pedal depressed.
UP (+) : Push the lever forward once to shift up
one gear.
DOWN (-) : Pull the lever backwards once to
shift down one gear.
SKIP : By rapidly moving the selector forward
or backward twice, it is possible to skip one
gear, i.e. 1st to 3rd or 3rd to 1st .
C090F02NF
NOTE:o In sports mode, only the four/five for-
ward gears can be selected. To reverse or
park the vehicle, move the selector lever
to the "R" or "P" position as required.
o In sports mode, downward shifts are
made automatically when the vehicle
slows down. When the vehicle stops, 1st
gear is automatically selected.
Page 154 of 271
2
DRIVING YOUR HYUNDAI
10
!
C090I03L-GAT
CAUTION:
o Shift into "R" and "P" position only when
the vehicle has completely stopped.
o Do not accelerate the engine in reverse
or any of the forward positions with the
brakes applied.
o Always apply the footbrake when shift-
ing from "P" or "N", to "R" or "D"position.
o Do not use the "P" (Park) position in
place of the parking brake. Always set
the parking brake, shift the transaxle
into "P" (Park) position and turn off the
ignition when you leave the vehicle, even
momentarily. Never leave the vehicle
unattended while the engine is running.
o When accelerating from a stop on a
steep hill, the vehicle may have a ten-
dency to roll backwards. Shifting the
shift lever into 2nd gear while in Sport
mode will help prevent the vehicle from
rolling backwards.
o Check the automatic transaxle fluid level
regularly, and add fluid as necessary.
o See the maintenance schedule for the
proper fluid recommendation.
C090H01L-GATNOTE:o For smooth and safe operation, depress
the brake pedal when shifting from "Neu-
tral" position or "Park" position to a
forward or reverse gear.
o The ignition key must be in the "ON"
position and the brake pedal fully de-
pressed in order to move the shift lever
from the "P" (Park) position to any of the
other positions.
o It is always possible to shift from "R",
"N", or "D" position to "P" position. The
vehicle must be fully stopped to avoid
transaxle damage. o To maintain the required levels of ve-
hicle performance and safety, the sys-
tem may not execute certain gearshifts
when the selector lever is operated.
o Before driving away from a stop on a
slippery road, push the selector lever
forward into the +(UP) position. This
causes the transaxle to shift into 2nd
gear which is better for smooth driving
away on a slippery road. Push the selec-
tor lever to the -(DOWN) side to shift
back to 1st gear.
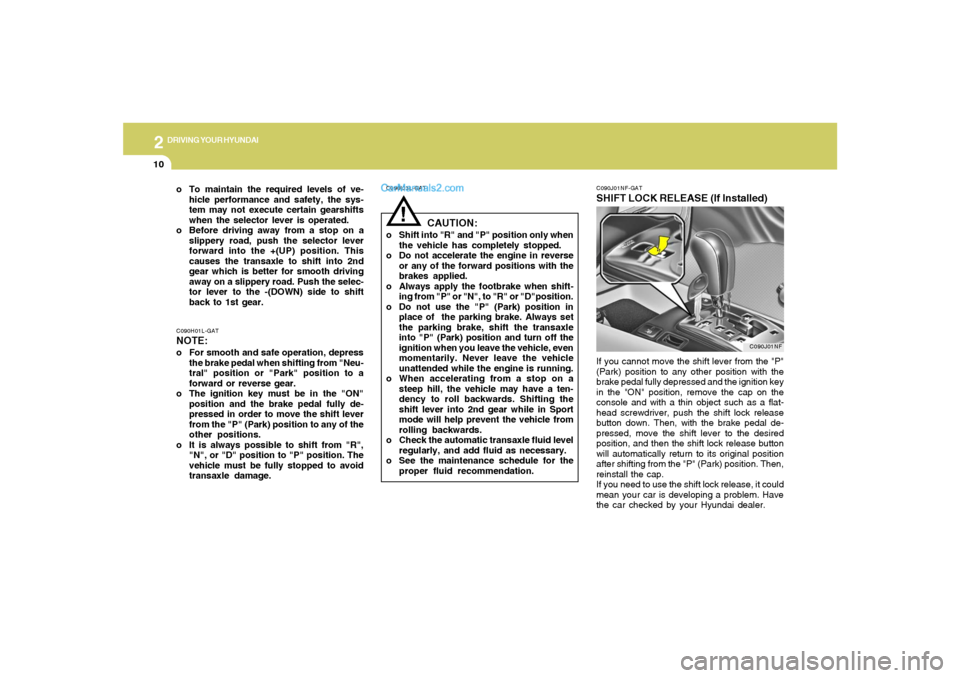
C090J01NF-GATSHIFT LOCK RELEASE (If Installed)If you cannot move the shift lever from the "P"
(Park) position to any other position with the
brake pedal fully depressed and the ignition key
in the "ON" position, remove the cap on the
console and with a thin object such as a flat-
head screwdriver, push the shift lock release
button down. Then, with the brake pedal de-
pressed, move the shift lever to the desired
position, and then the shift lock release button
will automatically return to its original position
after shifting from the "P" (Park) position. Then,
reinstall the cap.
If you need to use the shift lock release, it could
mean your car is developing a problem. Have
the car checked by your Hyundai dealer.
C090J01NF
Page 163 of 271
2
DRIVING YOUR HYUNDAI
19
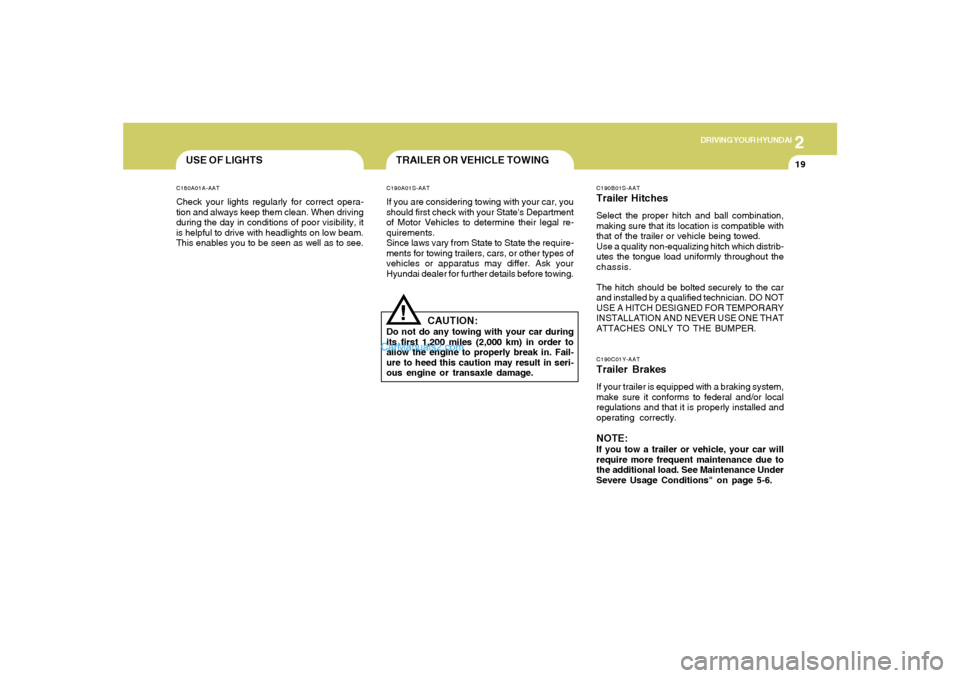
C190B01S-AATTrailer HitchesSelect the proper hitch and ball combination,
making sure that its location is compatible with
that of the trailer or vehicle being towed.
Use a quality non-equalizing hitch which distrib-
utes the tongue load uniformly throughout the
chassis.
The hitch should be bolted securely to the car
and installed by a qualified technician. DO NOT
USE A HITCH DESIGNED FOR TEMPORARY
INSTALLATION AND NEVER USE ONE THAT
ATTACHES ONLY TO THE BUMPER.C190C01Y-AATTrailer BrakesIf your trailer is equipped with a braking system,
make sure it conforms to federal and/or local
regulations and that it is properly installed and
operating correctly.NOTE:If you tow a trailer or vehicle, your car will
require more frequent maintenance due to
the additional load. See Maintenance Under
Severe Usage Conditions" on page 5-6.
TRAILER OR VEHICLE TOWING!
C190A01S-AATIf you are considering towing with your car, you
should first check with your State's Department
of Motor Vehicles to determine their legal re-
quirements.
Since laws vary from State to State the require-
ments for towing trailers, cars, or other types of
vehicles or apparatus may differ. Ask your
Hyundai dealer for further details before towing.
CAUTION:
Do not do any towing with your car during
its first 1,200 miles (2,000 km) in order to
allow the engine to properly break in. Fail-
ure to heed this caution may result in seri-
ous engine or transaxle damage.
USE OF LIGHTSC180A01A-AATCheck your lights regularly for correct opera-
tion and always keep them clean. When driving
during the day in conditions of poor visibility, it
is helpful to drive with headlights on low beam.
This enables you to be seen as well as to see.
Page 165 of 271
2
DRIVING YOUR HYUNDAI
21
C190F01Y-GATTrailer or Vehicle Towing Tips1. Before towing, check hitch and safety chain
connections as well as proper operation of
the trailer running lights, brake lights, and
turn signals.
2. Always drive your vehicle at a moderate
speed. (Less than 60 mph)
3. Trailer towing requires more fuel than normal
conditions.
4. To maintain engine braking efficiency and
electrical charging performance, do not tow
a trailer with the transaxle in fifth gear (manual
transaxle).
5. Always secure items in the trailer to prevent
load shift while driving.
6. Check the condition and air pressure of all
tires on the trailer and your car. Low tire
pressure can seriously affect the handling.
Also check the spare tire.
7. The vehicle/trailer combination is more af-
fected by crosswind and buffeting.
When being passed by a large vehicle, keep
a constant speed and steer straight ahead.
If there is too much wind buffeting, slow down
to get out of the other vehicle's air turbulence.
!
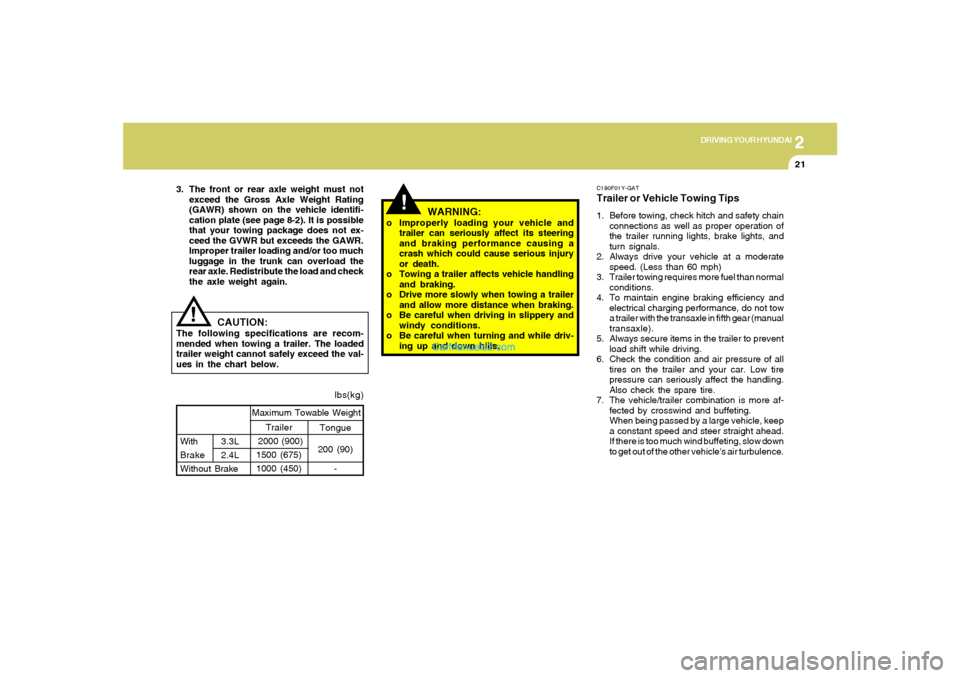
lbs(kg)
!
Tongue
200 (90)
- With3.3L
Brake 2.4L
Without BrakeMaximum Towable Weight
Trailer
2000 (900)
1500 (675)
1000 (450)
CAUTION:
The following specifications are recom-
mended when towing a trailer. The loaded
trailer weight cannot safely exceed the val-
ues in the chart below.
WARNING:
o Improperly loading your vehicle and
trailer can seriously affect its steering
and braking performance causing a
crash which could cause serious injury
or death.
o Towing a trailer affects vehicle handling
and braking.
o Drive more slowly when towing a trailer
and allow more distance when braking.
o Be careful when driving in slippery and
windy conditions.
o Be careful when turning and while driv-
ing up and down hills. 3. The front or rear axle weight must not
exceed the Gross Axle Weight Rating
(GAWR) shown on the vehicle identifi-
cation plate (see page 8-2). It is possible
that your towing package does not ex-
ceed the GVWR but exceeds the GAWR.
Improper trailer loading and/or too much
luggage in the trunk can overload the
rear axle. Redistribute the load and check
the axle weight again.