cool Hyundai Sonata Hybrid 2011 Owner's Manual
[x] Cancel search | Manufacturer: HYUNDAI, Model Year: 2011, Model line: Sonata Hybrid, Model: Hyundai Sonata Hybrid 2011Pages: 404, PDF Size: 11.04 MB
Page 19 of 404
H12
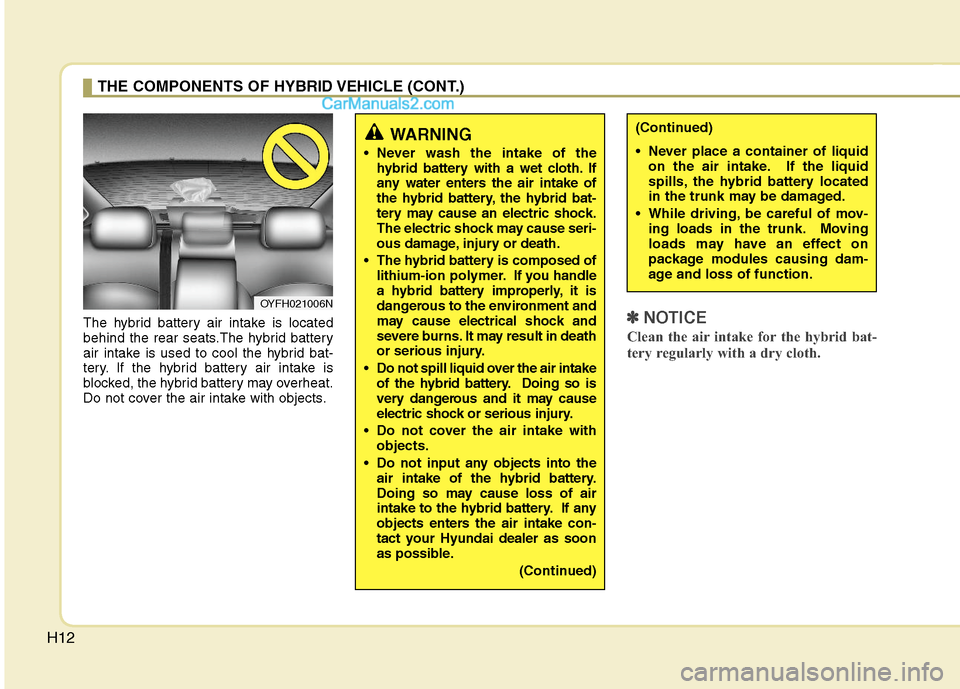
The hybrid battery air intake is located
behind the rear seats.The hybrid battery
air intake is used to cool the hybrid bat-
tery. If the hybrid battery air intake is
blocked, the hybrid battery may overheat.
Do not cover the air intake with objects.✽ ✽
NOTICE
Clean the air intake for the hybrid bat-
tery regularly with a dry cloth.
THE COMPONENTS OF HYBRID VEHICLE (CONT.)
WARNING
Never wash the intake of the
hybrid battery with a wet cloth. If
any water enters the air intake of
the hybrid battery, the hybrid bat-
tery may cause an electric shock.
The electric shock may cause seri-
ous damage, injury or death.
The hybrid battery is composed of
lithium-ion polymer. If you handle
a hybrid battery improperly, it is
dangerous to the environment and
may cause electrical shock and
severe burns. It may result in death
or serious injury.
Do not spill liquid over the air intake
of the hybrid battery. Doing so is
very dangerous and it may cause
electric shock or serious injury.
Do not cover the air intake with
objects.
Do not input any objects into the
air intake of the hybrid battery.
Doing so may cause loss of air
intake to the hybrid battery. If any
objects enters the air intake con-
tact your Hyundai dealer as soon
as possible.
(Continued)
(Continued)
Never place a container of liquid
on the air intake. If the liquid
spills, the hybrid battery located
in the trunk may be damaged.
While driving, be careful of mov-
ing loads in the trunk. Moving
loads may have an effect on
package modules causing dam-
age and loss of function.
OYFH021006N
Page 31 of 404
Your vehicle at a glance
4 2
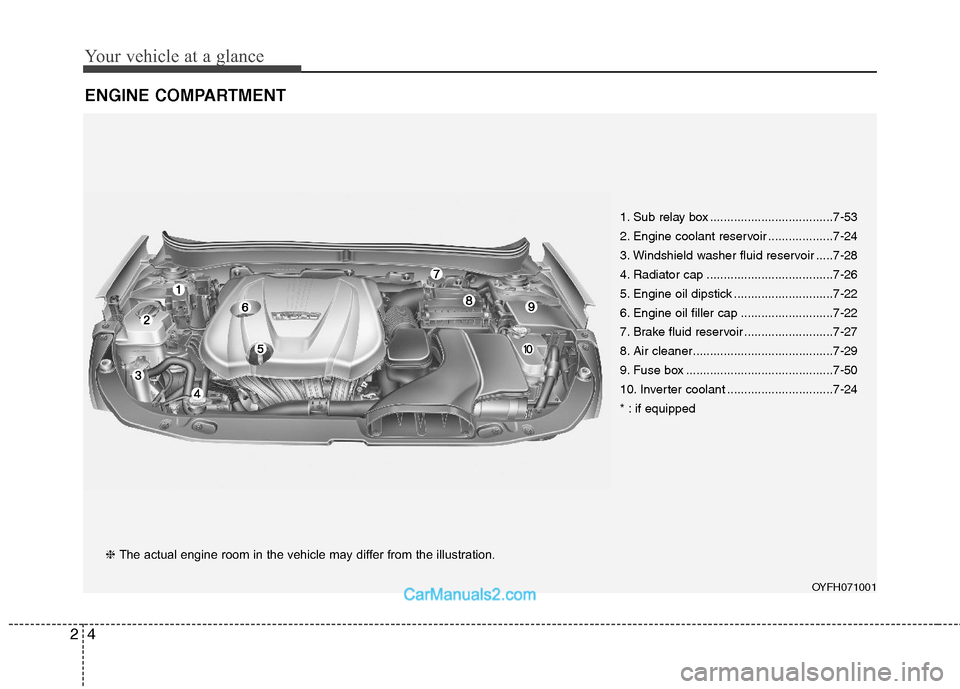
ENGINE COMPARTMENT
OYFH071001
❈ The actual engine room in the vehicle may differ from the illustration.1. Sub relay box ....................................7-53
2. Engine coolant reservoir ...................7-24
3. Windshield washer fluid reservoir .....7-28
4. Radiator cap .....................................7-26
5. Engine oil dipstick .............................7-22
6. Engine oil filler cap ...........................7-22
7. Brake fluid reservoir ..........................7-27
8. Air cleaner.........................................7-29
9. Fuse box ...........................................7-50
10. Inverter coolant ...............................7-24
* : if equipped
Page 32 of 404
25
Your vehicle at a glance
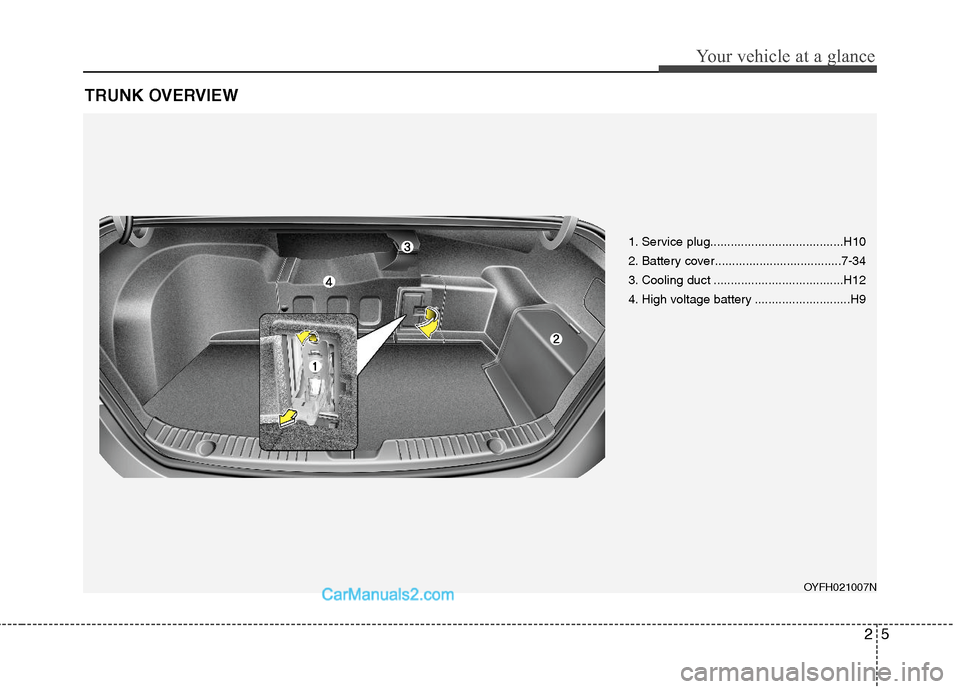
TRUNK OVERVIEW
OYFH021007N
1. Service plug.......................................H10
2. Battery cover.....................................7-34
3. Cooling duct ......................................H12
4. High voltage battery ............................H9
Page 136 of 404
Features of your vehicle
42 4
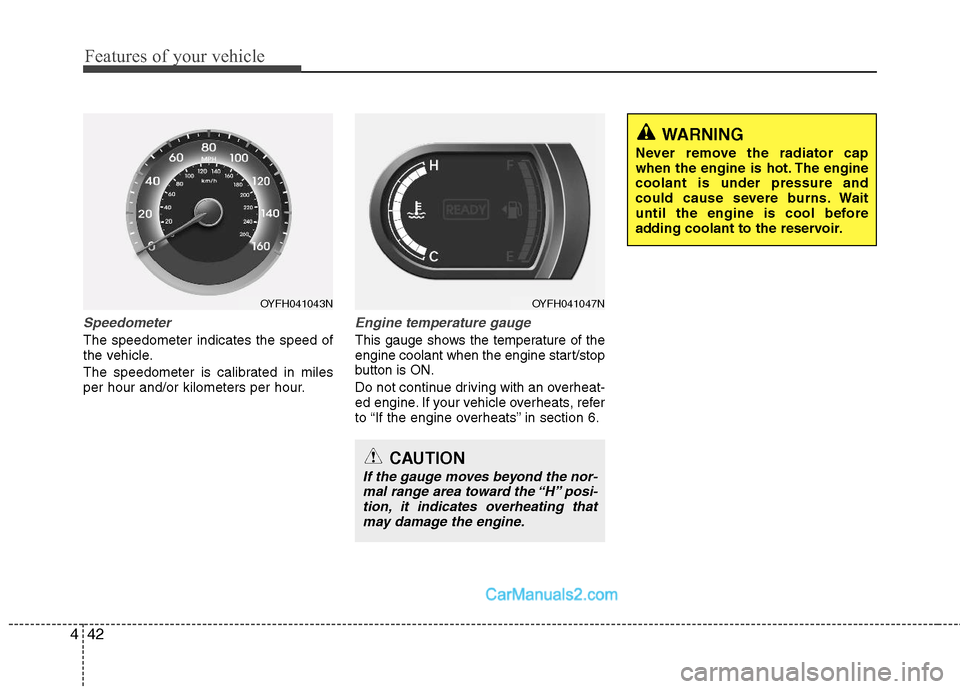
Speedometer
The speedometer indicates the speed of
the vehicle.
The speedometer is calibrated in miles
per hour and/or kilometers per hour.
Engine temperature gauge
This gauge shows the temperature of the
engine coolant when the engine start/stop
button is ON.
Do not continue driving with an overheat-
ed engine. If your vehicle overheats, refer
to “If the engine overheats” in section 6.
WARNING
Never remove the radiator cap
when the engine is hot. The engine
coolant is under pressure and
could cause severe burns. Wait
until the engine is cool before
adding coolant to the reservoir.
OYFH041047NOYFH041043N
CAUTION
If the gauge moves beyond the nor-
mal range area toward the “H” posi-
tion, it indicates overheating that
may damage the engine.
Page 153 of 404
459
Features of your vehicle
Low fuel level warning light
This warning light indicates the fuel tank
is nearly empty. When it comes on, you
should add fuel as soon as possible.
Driving with the fuel level warning light on
or with the fuel level below “E” can cause
the engine to misfire and damage the
catalytic converter.
Engine coolant
temperature warning light
(if equipped)
The warning light illuminates if the tem-
perature of the engine coolant is above
257±4.5°F (125±2.5°C).
Do not continue driving with an overheat-
ed engine. If your vehicle overheats, refer
to “Overheating” in section 6.
Malfunction indicator light
(MIL) (check engine light)
This indicator light is part of the Engine
Control System which monitors various
emission control system components. If
this light illuminates while driving, it indi-
cates that a potential malfunction has
been detected somewhere in the emis-
sion control system.
This light will also illuminate when the
engine start/stop button is turned to the
ON position, and will go out in a few sec-
onds after the engine is started. If it illu-
minates while driving, or does not illumi-
nate when the engine start/stop button is
turned to the ON position, take your vehi-
cle to your nearest authorized HYUNDAI
dealer and have the system checked.
Generally, your vehicle will continue to be
drivable, but have the system checked by
an authorized HYUNDAI dealer promptly.
CAUTION
Prolonged driving with the
Malfunction Indicator Light illumi-
nated may cause damage to the
emission control systems which
could effect drivability and/or fuel
economy.
If the Malfunction Indicator Light
illuminates, potential catalytic
converter damage is possible.
This could result in loss of engine
power. Have the Engine Control
System inspected as soon as pos-
sible by an authorized HYUNDAI
dealer.
Page 175 of 404
481
Features of your vehicle
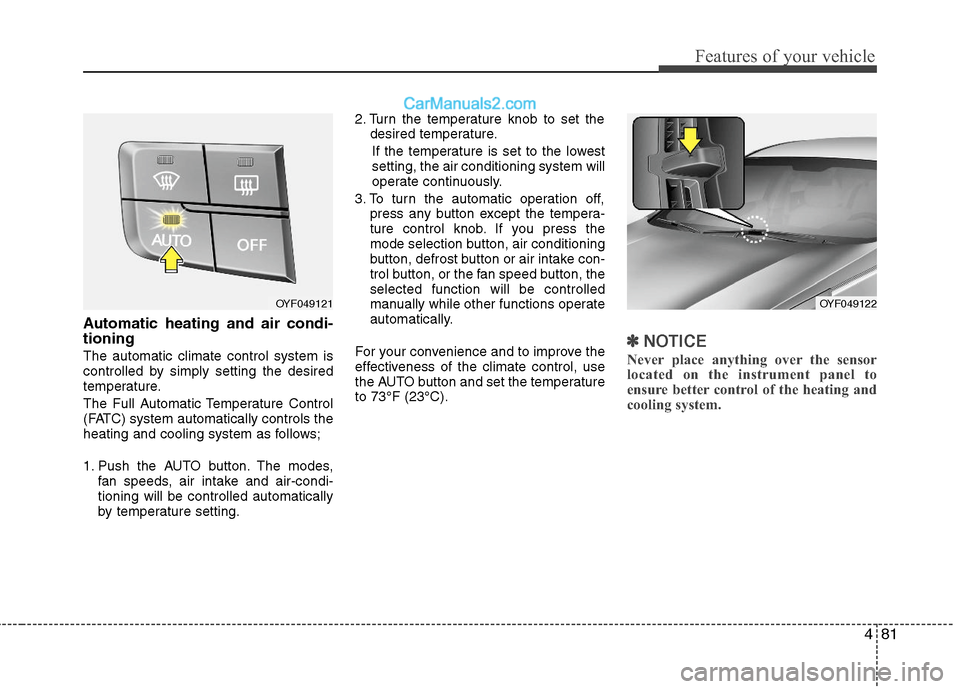
Automatic heating and air condi-
tioning
The automatic climate control system is
controlled by simply setting the desired
temperature.
The Full Automatic Temperature Control
(FATC) system automatically controls the
heating and cooling system as follows;
1. Push the AUTO button. The modes,
fan speeds, air intake and air-condi-
tioning will be controlled automatically
by temperature setting.2. Turn the temperature knob to set the
desired temperature.
If the temperature is set to the lowest
setting, the air conditioning system will
operate continuously.
3. To turn the automatic operation off,
press any button except the tempera-
ture control knob. If you press the
mode selection button, air conditioning
button, defrost button or air intake con-
trol button, or the fan speed button, the
selected function will be controlled
manually while other functions operate
automatically.
For your convenience and to improve the
effectiveness of the climate control, use
the AUTO button and set the temperature
to 73°F (23°C).✽ ✽
NOTICE
Never place anything over the sensor
located on the instrument panel to
ensure better control of the heating and
cooling system.
OYF049122OYF049121
Page 176 of 404
Features of your vehicle
82 4
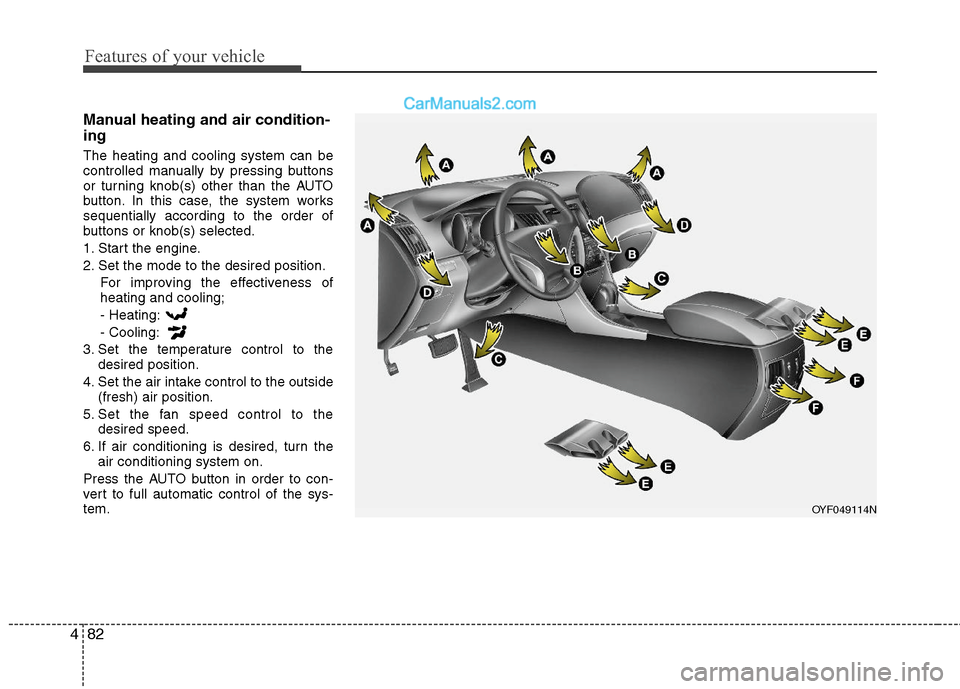
Manual heating and air condition-
ing
The heating and cooling system can be
controlled manually by pressing buttons
or turning knob(s) other than the AUTO
button. In this case, the system works
sequentially according to the order of
buttons or knob(s) selected.
1. Start the engine.
2. Set the mode to the desired position.
For improving the effectiveness of
heating and cooling;
- Heating:
- Cooling:
3. Set the temperature control to the
desired position.
4. Set the air intake control to the outside
(fresh) air position.
5. Set the fan speed control to the
desired speed.
6. If air conditioning is desired, turn the
air conditioning system on.
Press the AUTO button in order to con-
vert to full automatic control of the sys-
tem.
OYF049114N
Page 178 of 404
Features of your vehicle
84 4
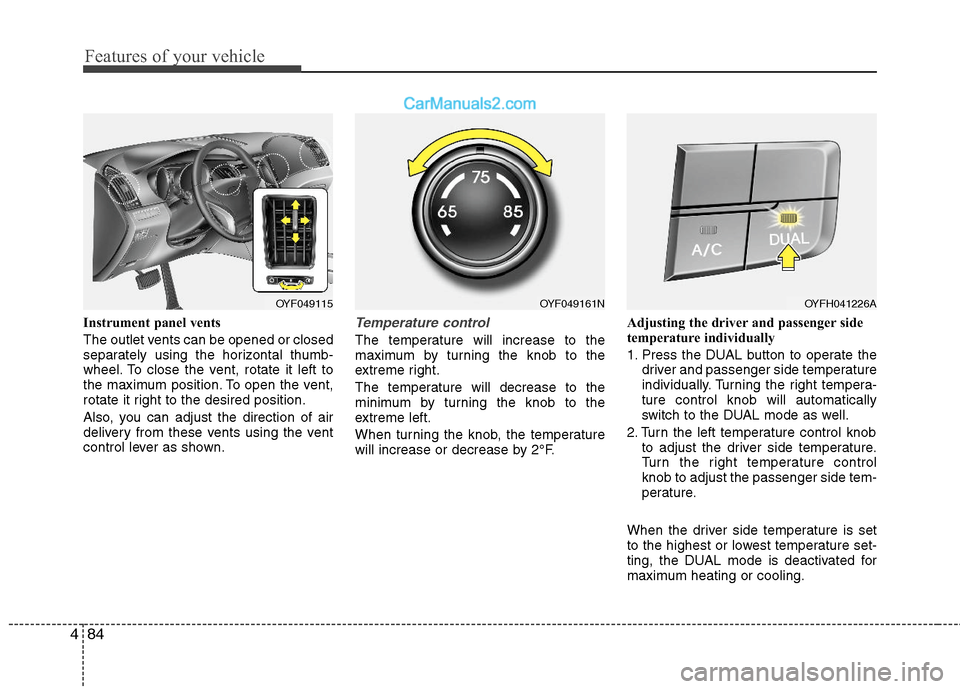
Instrument panel vents
The outlet vents can be opened or closed
separately using the horizontal thumb-
wheel. To close the vent, rotate it left to
the maximum position. To open the vent,
rotate it right to the desired position.
Also, you can adjust the direction of air
delivery from these vents using the vent
control lever as shown.Temperature control
The temperature will increase to the
maximum by turning the knob to the
extreme right.
The temperature will decrease to the
minimum by turning the knob to the
extreme left.
When turning the knob, the temperature
will increase or decrease by 2°F.Adjusting the driver and passenger side
temperature individually
1. Press the DUAL button to operate the
driver and passenger side temperature
individually. Turning the right tempera-
ture control knob will automatically
switch to the DUAL mode as well.
2. Turn the left temperature control knob
to adjust the driver side temperature.
Turn the right temperature control
knob to adjust the passenger side tem-
perature.
When the driver side temperature is set
to the highest or lowest temperature set-
ting, the DUAL mode is deactivated for
maximum heating or cooling.
OYF049115OYF049161NOYFH041226A
Page 179 of 404
485
Features of your vehicle
Adjusting the driver and passenger side
temperature equally
1. Press the DUAL button again to deac-
tivate DUAL mode. The passenger
side temperature will be set to the
same temperature as the driver side
temperature.
2. Turn the left temperature control knob.
The driver and passenger side tem-
perature will be adjusted equally.
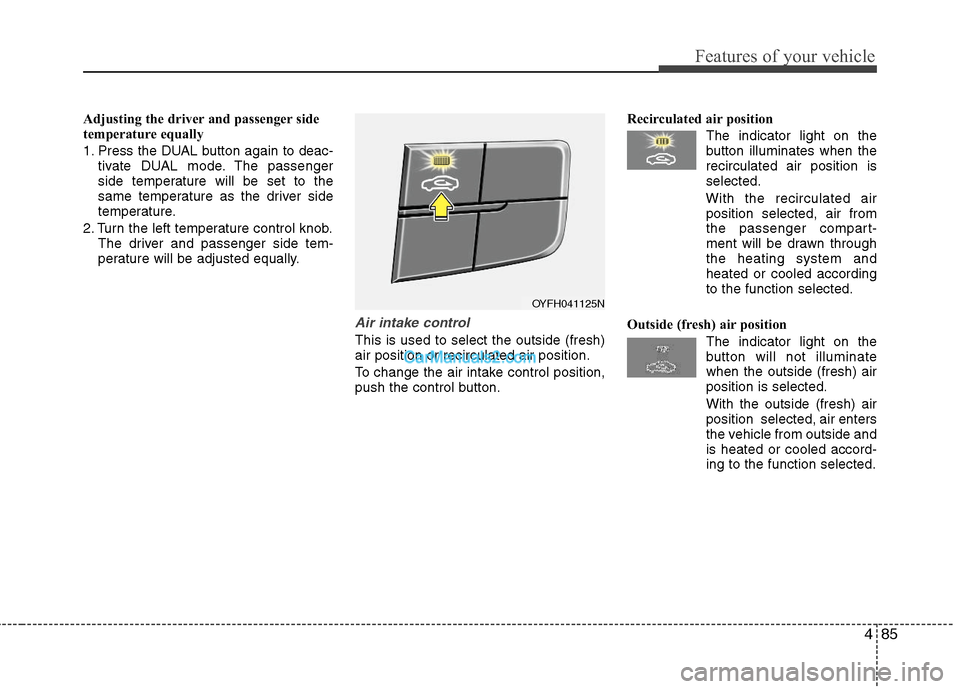
Air intake control
This is used to select the outside (fresh)
air position or recirculated air position.
To change the air intake control position,
push the control button.Recirculated air position
The indicator light on the
button illuminates when the
recirculated air position is
selected.
With the recirculated air
position selected, air from
the passenger compart-
ment will be drawn through
the heating system and
heated or cooled according
to the function selected.
Outside (fresh) air position
The indicator light on the
button will not illuminate
when the outside (fresh) air
position is selected.
With the outside (fresh) air
position selected, air enters
the vehicle from outside and
is heated or cooled accord-
ing to the function selected.
OYFH041125N
Page 182 of 404
Features of your vehicle
88 4
System operation
Ventilation
1. Set the mode to the position.
2. Set the air intake control to the outside
(fresh) air position.
3. Set the temperature control to the
desired position.
4. Set the fan speed control to the
desired speed.
Heating
1. Set the mode to the position.
2. Set the air intake control to the outside
(fresh) air position.
3. Set the temperature control to the
desired position.
4. Set the fan speed control to the
desired speed.
5. If dehumidified heating is desired, turn
the air conditioning system (if
equipped) on.
If the windshield fogs up, set the mode
to the
,position.Operation Tips
To prevent dust or unpleasant fumes
from entering the vehicle through the
ventilation system, temporarily set the
air intake control to the recirculated air
position. Be sure to return the control
to the fresh air position when the irrita-
tion has passed to keep fresh air in the
vehicle. This will help keep the driver
alert and comfortable.
Air for the heating/cooling system is
drawn in through the grilles just ahead
of the windshield. Care should be
taken that these are not blocked by
leaves, snow, ice or other obstructions.
To prevent interior fog on the wind-
shield, set the air intake control to the
fresh air position and fan speed to the
desired position, turn on the air condi-
tioning system, and adjust the temper-
ature control to desired temperature.
Air conditioning
All HYUNDAI Air Conditioning Systems
are filled with environmentally friendly
R-134a refrigerant which does not dam-
age the ozone layer.
1. Start the engine. Push the air condi-
tioning button.
2. Set the mode to the position.
3. Set the air intake control to the recir-
culated air position. However, pro-
longed operation of the reticulated air
position will excessively dry the air. In
this case, change the air position.
4. Adjust the fan speed control and tem-
perature control to maintain maximum
comfort.
When maximum cooling is desired, set
the temperature control to the extreme
left position then set the fan speed
control to the highest speed.