turn signal Hyundai Sonata Hybrid 2016 Owner's Manual
[x] Cancel search | Manufacturer: HYUNDAI, Model Year: 2016, Model line: Sonata Hybrid, Model: Hyundai Sonata Hybrid 2016Pages: 708, PDF Size: 25.92 MB
Page 19 of 708
F19
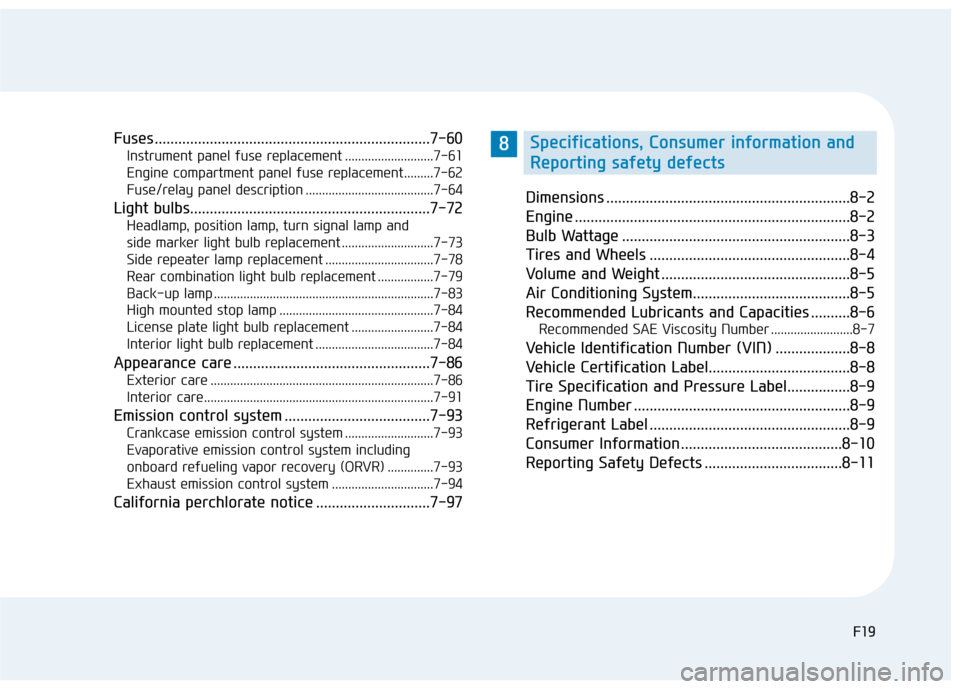
Fuses ......................................................................7-\
60
Instrument panel fuse replacement ...........................7-61
Engine compartment panel fuse replacement.........7-62
Fuse/relay panel description .......................................7-64
Light bulbs.............................................................7-72
Headlamp, position lamp, turn signal lamp and
side marker light bulb replacement ............................7-73
Side repeater lamp replacement .................................7-78
Rear combination light bulb replacement .................7-79
Back-up lamp ...................................................................7-83
High mounted stop lamp ...............................................7-84
License plate light bulb replacement .........................7-84
Interior light bulb replacement ....................................7-84
Appearance care ..................................................7-86
Exterior care ....................................................................7-86\
Interior care......................................................................7-\
91
Emission control system .....................................7-93
Crankcase emission control system ...........................7-93
Evaporative emission control system including
onboard refueling vapor recovery (ORVR) ..............7-93
Exhaust emission control system ...............................7-94
California perchlorate notice .............................7-97 Dimensions ..............................................................8-2
Engine ......................................................................8-\
2
Bulb Wattage ..........................................................8-3
Tires and Wheels ...................................................8-4
Volume and Weight ................................................8-5
Air Conditioning System........................................8-5
Recommended Lubricants and Capacities ..........8-6
Recommended SAE Viscosity Number .........................8-7
Vehicle Identification Number (VIN) ...................8-8
Vehicle Certification Label....................................8-8
Tire Specification and Pressure Label................8-9
Engine Number .......................................................8-9
Refrigerant Label ...................................................8-9
Consumer Information .........................................8-10
Reporting Safety Defects ...................................8-11
F19
8Specifications, Consumer information and
Reporting safety defects
Page 24 of 708
I
IN
N S
ST
T R
R U
U M
M E
EN
N T
T
P
P A
A N
N E
EL
L
O
O V
VE
ER
R V
V I
IE
E W
W
1-5
Your vehicle at a glance
1
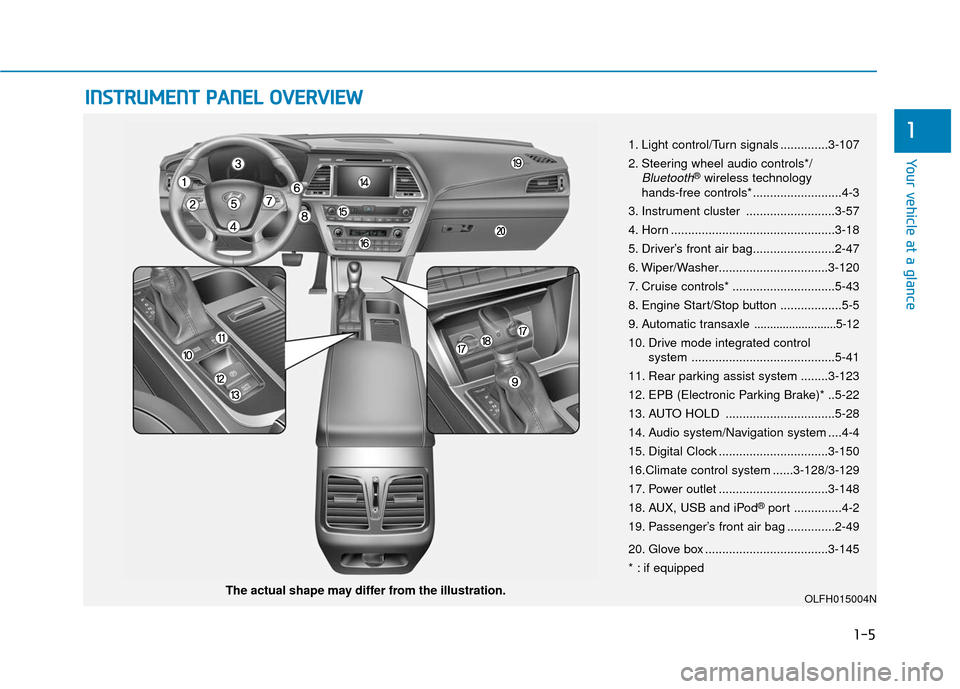
The actual shape may differ from the illustration. 1. Light control/Turn signals ..............3-107
2. Steering wheel audio controls*/
Bluetooth®wireless technology
hands-free controls* ..........................4-3
3. Instrument cluster ..........................3-57
4. Horn ................................................3-18
5. Driver’s front air bag........................2-47
6. Wiper/Washer................................3-120
7. Cruise controls* ..............................5-43
8. Engine Start/Stop button ..................5-5
9. Automatic transaxle
..........................5-12
10. Drive mode integrated control system ..........................................5-41
11. Rear parking assist system ........3-123
12. EPB (Electronic Parking Brake)* ..5-22
13. AUTO HOLD ................................5-28
14. Audio system/Navigation system ....4-4
15. Digital Clock ................................3-150
16.Climate control system ......3-128/3-129
17. Power outlet ................................3-148
18. AUX, USB and iPod
®port ..............4-2
19. Passenger’s front air bag ..............2-49
20. Glove box ....................................3-145
* : if equipped
OLFH015004N
Page 121 of 708
3-26
Convenient features of your vehicle
6. Firmly press and release the "learn" or "smart" button. (The
name and color of the button vary
by manufacturer). There are 30
seconds to initiate step 7.
7. Return to the vehicle and firmly press, hold for 2 seconds and
release the programmed
HomeLink
®button. Repeat the
"press/hold/release" sequence a
second time, and, depending on the
brand of the garage door opener (or
other rolling code equipped device),
repeat this sequence a third time to
complete the programming
process.
HomeLink
®should now activate your
rolling code equipped device.
Gate operator & Canadian program- ming
During programming, your handheld
transmitter may automatically stop
transmitting. Continue to press the
Integrated HomeLink
®Wireless
Control System button (note steps 2
through 3 in the Programming portion
of this document) while you press
and re-press ("cycle") your handheld
transmitter every two seconds until
the frequency signal has been
learned. The indicator light will flash
slowly and then rapidly after several
seconds upon successful training.
Operating HomeLink®
To operate, simply press and release
the programmed HomeLink®button.
Activation will now occur for the
trained device (i.e. garage door
opener, gate operator, security sys-
tem, entry door lock, home/office
lighting, etc.). For convenience, the
hand-held transmitter of the device
may also be used at any time.
Reprogramming a single HomeLink®
button
To program a device to HomeLink®
using a HomeLink®button previously
trained, follow these steps:
1.Press and hold the desired HomeLink
®button. DO NOT
release the button.
2.The indicator light will begin to flash after 20 seconds. Without releasing
the HomeLink
®button, proceed
with "Programming" step 2.
For questions or comments, contact
HomeLink
®at www.homelink.comor
1-800-355-3515.
Page 126 of 708
3-31
Convenient features of your vehicle
3
Programming HomeLink®
Please note the following:
When programming a garage dooropener, it is advised to park the
vehicle outside of the garage.
It is recommended that a new bat- tery be placed in the hand-held
transmitter of the device being pro-
grammed to HomeLink
®for quicker
training and accurate transmission
of the radio-frequency signal.
Some vehicles may require the engine Start/Stop button to be
placed in the ACC position for pro-
gramming and/or operation of
HomeLink
®.
In the event that there are still pro- gramming difficulties or questions
after following the programming
steps listed below, contact
HomeLink
®at: www.homelink.com
or by calling 1-800-355-3515.
Rolling code programming
Rolling code devices which are
"code-protected" and manufactured
after 1996 may be determined by the
following:
Reference the device owner’s manual for verification.
The handheld transmitter appears to program the HomeLink
®
Universal Transceiver but does not
activate the device.
Press and hold the trained HomeLink button. The device has
the rolling code feature if the indi-
cator light flashes rapidly and then
turns solid after 2 seconds.
Before programming HomeLink
®
to a garage door opener or gate
operator, make sure people and
objects are out of the way of the
device to prevent potential harm
or damage. Do not use the
HomeLink
®with any garage door
opener that lacks the safety stop
and reverse features required by
U.S. federal safety standards (this
includes any garage door opener
model manufactured before April
1, 1982). A garage door that can-
not detect an object - signaling
the door to stop and reverse -
does not meet current U.S. feder-
al safety standards. Using a
garage door opener without
these features increases the risk
of serious injury or death.
WARNING
Page 127 of 708
3-32
Convenient features of your vehicle
To train rolling code devices, follow
these instructions:
1. At the garage door opener receiv- er (motor-head unit) in the garage,
locate the "learn" or "smart" but-
ton. This can usually be found
where the hanging antenna wire is
attached to the motor-head unit.
Exact location and color of the but-
ton may vary by garage door
opener brand. If there is difficulty
locating the training button, refer-
ence the device owner’s manual or
please visit our Web site at
www.homelink.com.
2. Firmly press and release the "learn" or "smart" button (which
activates the "training light"). You
will have 30 seconds to initiate
step 3. 3. Return to the vehicle and firmly
press, hold for two seconds and
then release the desired
HomeLink
®button. Repeat the
"press/hold/release" sequence a
second time to complete the pro-
gramming. (Some devices may
require you to repeat this
sequence a third time to complete
the programming.)
4. Press and hold the just-trained HomeLink
®button and observe
the red Status Indicator LED. If the
indicator light stays on constantly,
programming is complete and
your device should activate.
5. To program the remaining two HomeLink
®buttons, follow either
steps 1 through 4 above for other
Rolling Code devices or steps 2
through 5 in Standard Programming
for standard devices.
Standard programming
To train most devices, follow these
instructions:
1. For first-time programming, press and hold the two outside buttons,
HomeLink
®Channel 1 and
Channel 3 Buttons, until the indi-
cator light begins to flash (after 20
seconds). Release both buttons.
Do not hold the buttons for longer
than 30 seconds.
2. Position the end of your hand-held transmitter 1-3 inches (2-8 cm)
away from the HomeLink
®buttons
while keeping the indicator light in
view.
3. Simultaneously press and hold both the HomeLink
®and hand-
held transmitter button. DO NOT
release the buttons until step 4
has been completed.
4. While continuing to hold the but- tons the red Indicator Status LED
will flash slowly and then rapidly
after HomeLink
®successfully
trains to the frequency signal from
the hand-held transmitter. Release
both buttons.
Page 168 of 708
3-73
Convenient features of your vehicle
3
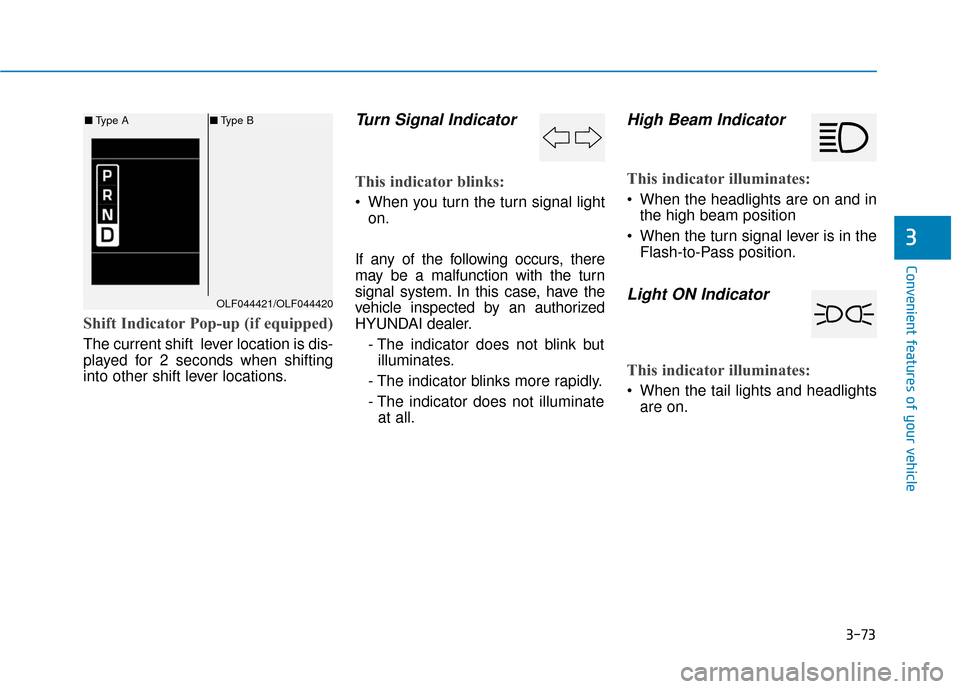
Shift Indicator Pop-up (if equipped)
The current shift lever location is dis-
played for 2 seconds when shifting
into other shift lever locations.
Turn Signal Indicator
This indicator blinks:
When you turn the turn signal lighton.
If any of the following occurs, there
may be a malfunction with the turn
signal system. In this case, have the
vehicle inspected by an authorized
HYUNDAI dealer. - The indicator does not blink butilluminates.
- The indicator blinks more rapidly.
- The indicator does not illuminate at all.
High Beam Indicator
This indicator illuminates:
When the headlights are on and in the high beam position
When the turn signal lever is in the Flash-to-Pass position.
Light ON Indicator
This indicator illuminates:
When the tail lights and headlightsare on.
OLF044421/OLF044420
■ Type A ■Type B
Page 190 of 708
3-95
Convenient features of your vehicle
3
Light
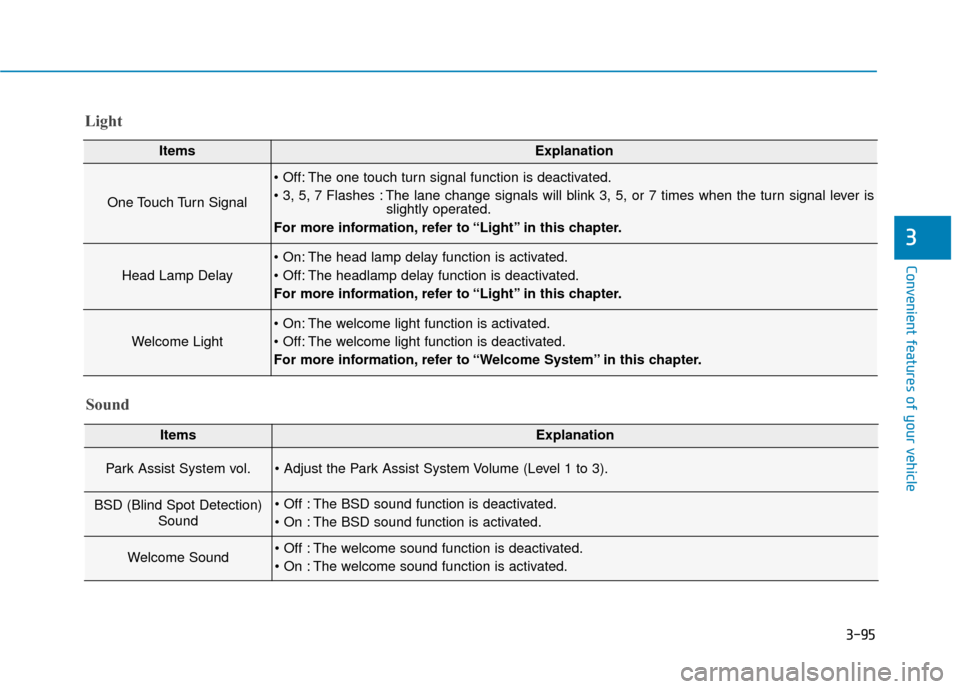
ItemsExplanation
One Touch Turn Signal
The one touch turn signal function is deactivated.
The lane change signals will blink 3, 5, or 7 times when the turn signal lever isslightly operated.
For more information, refer to “Light” in this chapter.
Head Lamp Delay
The head lamp delay function is activated.
The headlamp delay function is deactivated.
For more information, refer to “Light” in this chapter.
Welcome Light
The welcome light function is activated.
The welcome light function is deactivated.
For more information, refer to “Welcome System” in this chapter.
Sound
ItemsExplanation
Park Assist System vol.
BSD (Blind Spot Detection) Sound The BSD sound function is deactivated.
The BSD sound function is activated.
Welcome Sound The welcome sound function is deactivated.
The welcome sound function is activated.
Page 207 of 708
3-112
Convenient features of your vehicle
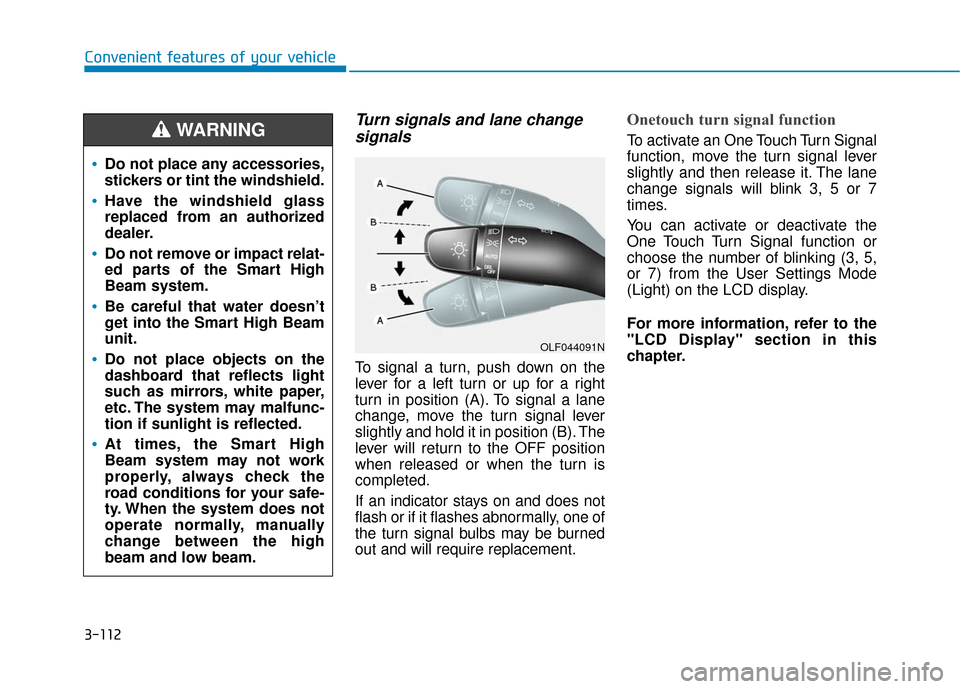
Turn signals and lane changesignals
To signal a turn, push down on the
lever for a left turn or up for a right
turn in position (A). To signal a lane
change, move the turn signal lever
slightly and hold it in position (B). The
lever will return to the OFF position
when released or when the turn is
completed.
If an indicator stays on and does not
flash or if it flashes abnormally, one of
the turn signal bulbs may be burned
out and will require replacement.
Onetouch turn signal function
To activate an One Touch Turn Signal
function, move the turn signal lever
slightly and then release it. The lane
change signals will blink 3, 5 or 7
times.
You can activate or deactivate the
One Touch Turn Signal function or
choose the number of blinking (3, 5,
or 7) from the User Settings Mode
(Light) on the LCD display.
For more information, refer to the
"LCD Display" section in this
chapter.
OLF044091N
Do not place any accessories,
stickers or tint the windshield.
Have the windshield glass
replaced from an authorized
dealer.
Do not remove or impact relat-
ed parts of the Smart High
Beam system.
Be careful that water doesn’t
get into the Smart High Beam
unit.
Do not place objects on the
dashboard that reflects light
such as mirrors, white paper,
etc. The system may malfunc-
tion if sunlight is reflected.
At times, the Smart High
Beam system may not work
properly, always check the
road conditions for your safe-
ty. When the system does not
operate normally, manually
change between the high
beam and low beam.
WARNING
Page 274 of 708
4-26
Multimedia System
S
Si
ir
r i
iu
u s
sX
X M
M
R
R A
A D
DI
IO
O
Using SiriusXMSatellite Radio
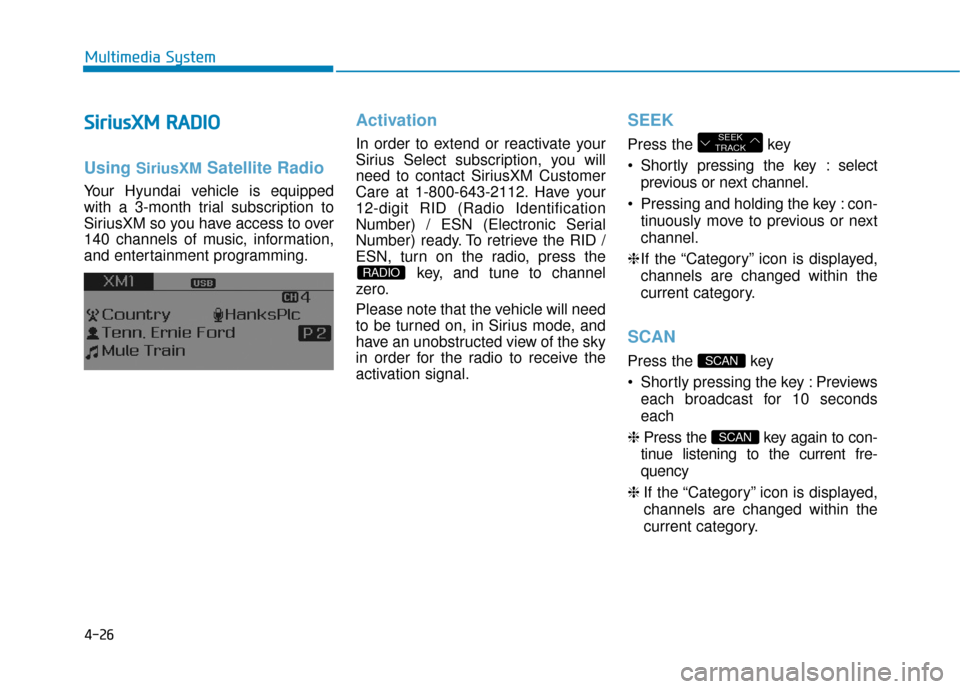
Your Hyundai vehicle is equipped
with a 3-month trial subscription to
SiriusXM so you have access to over
140 channels of music, information,
and entertainment programming.
Activation
In order to extend or reactivate your
Sirius Select subscription, you will
need to contact SiriusXM Customer
Care at 1-800-643-2112. Have your
12-digit RID (Radio Identification
Number) / ESN (Electronic Serial
Number) ready. To retrieve the RID /
ESN, turn on the radio, press the
key, and tune to channel
zero.
Please note that the vehicle will need
to be turned on, in Sirius mode, and
have an unobstructed view of the sky
in order for the radio to receive the
activation signal.
SEEK
Press the key
Shortly pressing the key : select
previous or next channel.
Pressing and holding the key : con- tinuously move to previous or next
channel.
❈ If the “Category” icon is displayed,
channels are changed within the
current category.
SCAN
Press the key
Shortly pressing the key : Previews each broadcast for 10 seconds
each
❈ Press the key again to con-
tinue listening to the current fre-
quency
❈ If the “Category” icon is displayed,
channels are changed within the
current category.
SCAN
SCAN
SEEK
TRACK
RADIO
Page 311 of 708
4-63
Multimedia System
4
S
Si
ir
r i
iu
u s
sX
X M
M R
RA
A D
DI
IO
O
M
M O
OD
DE
E
Basic Mode Screen
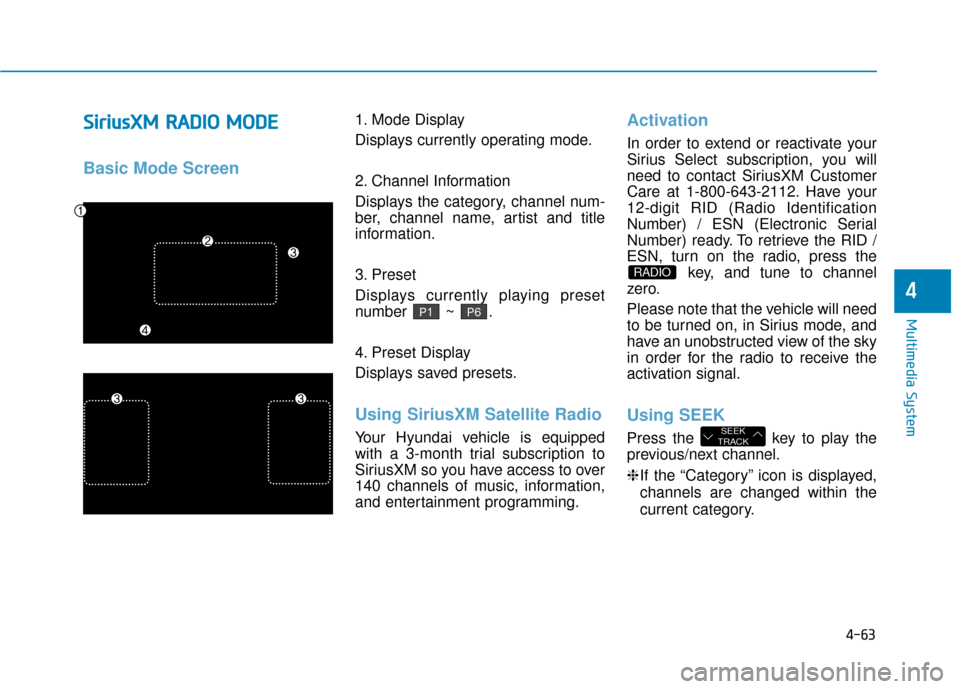
1. Mode Display
Displays currently operating mode.
2. Channel Information
Displays the category, channel num-
ber, channel name, artist and title
information.
3. Preset
Displays currently playing preset
number ~ .
4. Preset Display
Displays saved presets.
Using SiriusXM Satellite Radio
Your Hyundai vehicle is equipped
with a 3-month trial subscription to
SiriusXM so you have access to over
140 channels of music, information,
and entertainment programming.
Activation
In order to extend or reactivate your
Sirius Select subscription, you will
need to contact SiriusXM Customer
Care at 1-800-643-2112. Have your
12-digit RID (Radio Identification
Number) / ESN (Electronic Serial
Number) ready. To retrieve the RID /
ESN, turn on the radio, press the
key, and tune to channel
zero.
Please note that the vehicle will need
to be turned on, in Sirius mode, and
have an unobstructed view of the sky
in order for the radio to receive the
activation signal.
Using SEEK
Press the key to play the
previous/next channel.
❈ If the “Category” icon is displayed,
channels are changed within the
current category.SEEK
TRACK
RADIO
P6P1