mirror HYUNDAI SONATA HYBRID 2019 Owners Manual
[x] Cancel search | Manufacturer: HYUNDAI, Model Year: 2019, Model line: SONATA HYBRID, Model: HYUNDAI SONATA HYBRID 2019Pages: 546, PDF Size: 78.75 MB
Page 62 of 546
1-2
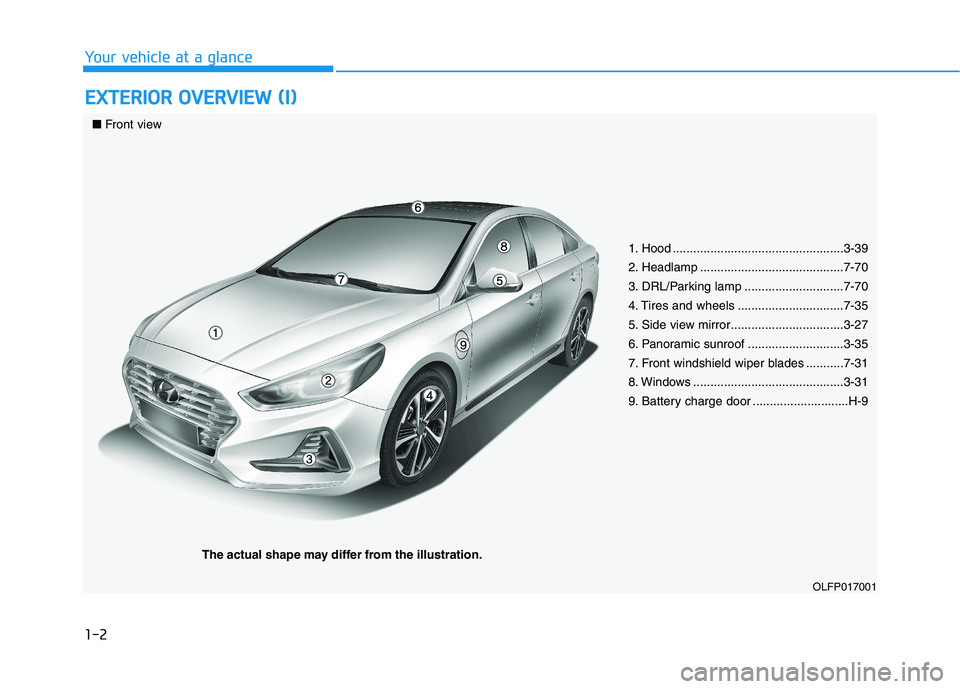
EEXX TTEERR IIOO RR OO VVEERR VV IIEE WW (( II))
Your vehicle at a glance
OLFP017001
■ Front view
1. Hood ..................................................3-39
2. Headlamp ..........................................7-70
3. DRL/Parking lamp .............................7-70
4. Tires and wheels ...............................7-35
5. Side view mirror.................................3-27
6. Panoramic sunroof ............................3-35
7. Front windshield wiper blades ...........7-31
8. Windows ............................................3-31
9. Battery charge door ............................H-9
The actual shape may differ from the illustration.
Page 64 of 546
1-4
Your vehicle at a glanceI
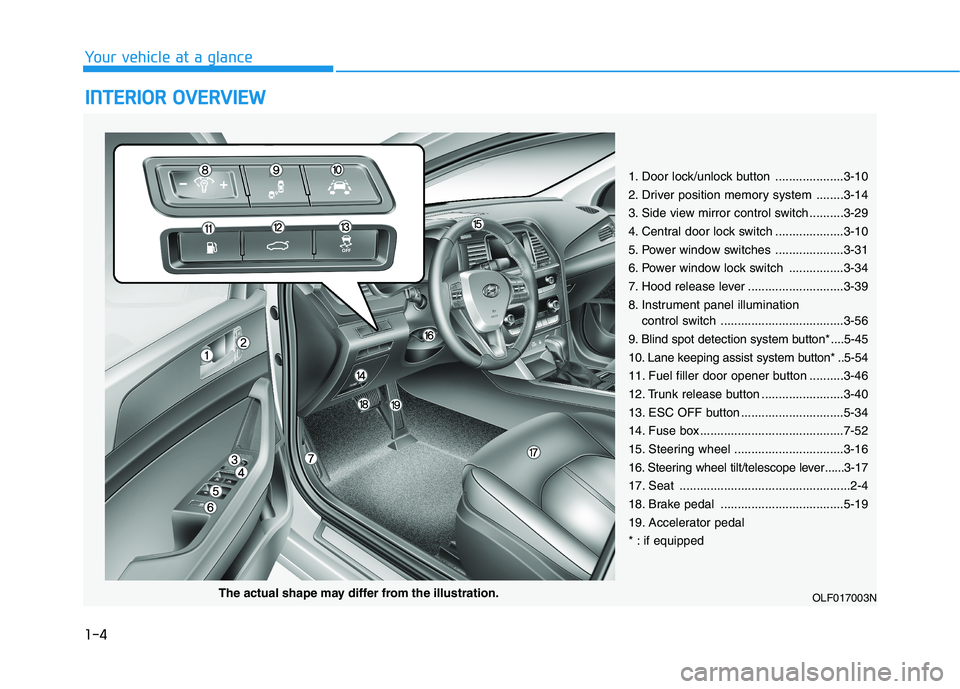
I NN TTEERR IIOO RR OO VVEERR VV IIEE WW
OLF017003N
1. Door lock/unlock button ....................3-10
2. Driver position memory system ........3-14
3. Side view mirror control switch ..........3-29
4. Central door lock switch ....................3-10
5. Power window switches ....................3-31
6. Power window lock switch ................3-34
7. Hood release lever ............................3-39
8. Instrument panel illumination
control switch ....................................3-56
9. Blind spot detection system button* ....5-45
10. Lane keeping assist system button* ..5-54
11. Fuel filler door opener button ..........3-46
12. Trunk release button ........................3-40
13. ESC OFF button ..............................5-34
14. Fuse box ..........................................7-52
15. Steering wheel ................................3-16
16. Steering wheel tilt/telescope lever ......3-17
17. Seat ..................................................2-4
18. Brake pedal ....................................5-19
19. Accelerator pedal
* : if equipped
The actual shape may differ from the illustration.
Page 116 of 546
2-50
Safety system of your vehicle
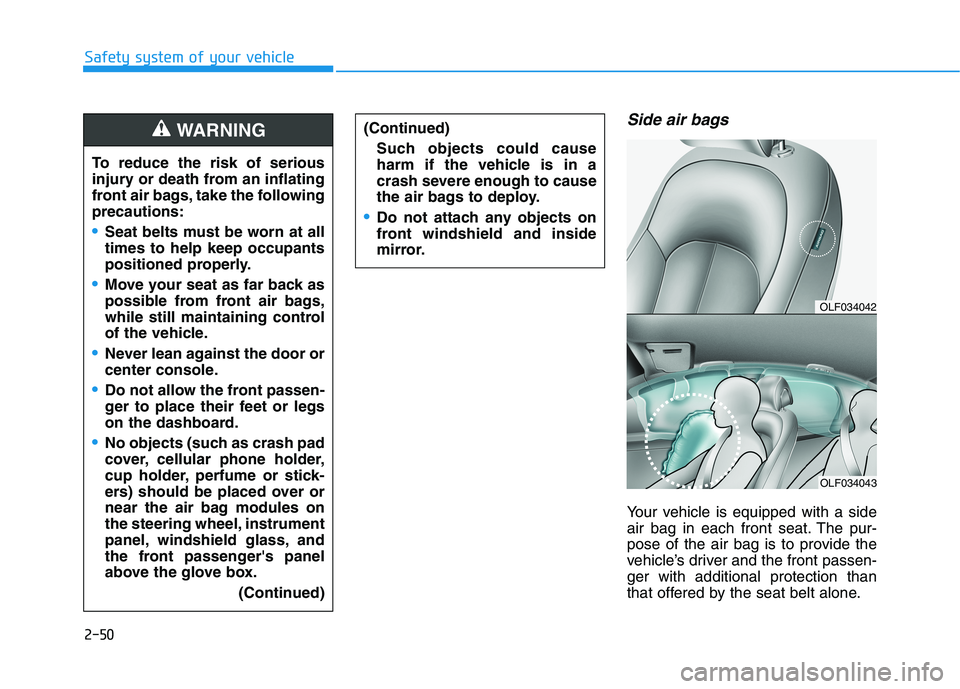
Side air bags
Your vehicle is equipped with a side
air bag in each front seat. The pur-
pose of the air bag is to provide the
vehicle’s driver and the front passen-ger with additional protection than
that offered by the seat belt alone.
OLF034042
OLF034043
To reduce the risk of serious
injury or death from an inflating
front air bags, take the followingprecautions:
Seat belts must be worn at all times to help keep occupants
positioned properly.
Move your seat as far back as
possible from front air bags,
while still maintaining control
of the vehicle.
Never lean against the door or
center console.
Do not allow the front passen-
ger to place their feet or legs
on the dashboard.
No objects (such as crash pad
cover, cellular phone holder,
cup holder, perfume or stick-
ers) should be placed over or
near the air bag modules on
the steering wheel, instrument
panel, windshield glass, and
the front passenger's panel
above the glove box.(Continued)
(Continued)
Such objects could cause
harm if the vehicle is in a
crash severe enough to cause
the air bags to deploy.
Do not attach any objects on
front windshield and inside
mirror.
WARNING
Page 137 of 546
Convenient features of your vehicle
Accessing your vehicle .........................................3-3Smart Key ............................................................................3-3
Immobilizer System ...........................................................3-8
Door locks ...............................................................3-9 Operating Door Locks from Outside the Vehicle ......3-9
Operating Door Locks from Inside the Vehicle .......3-10
Auto Door Lock/Unlock Features ...............................3-12
Child-Protector Rear Door locks ................................3-12
Theft-alarm system.............................................3-13
Driver position memory system .........................3-14 Storing Positions into Memory ....................................3-14
Easy Access Function ....................................................3-15
Steering wheel......................................................3-16 Electric Power Steering (EPS) .....................................3-16
Tilt Steering / Telescope Steering ..............................3-17
Heated Steering Wheel ..................................................3-18
Horn ....................................................................................3-18
Mirrors ...................................................................3-19 Inside Rearview Mirror ..................................................3-19
Side View Mirrors ...........................................................3-27
Reverse Parking Aid Function......................................3-30
Windows ................................................................3-31 Power Windows ...............................................................3-32 Panoramic sunroof ..............................................3-35
Sunshade ...........................................................................3-36
Sliding the sunroof .........................................................3-36
Tilting the sunroof ..........................................................3-37
Closing the sunroof ........................................................3-37
Resetting the sunroof ....................................................3-38
Exterior features .................................................3-39 Hood ...................................................................................3-39
Trunk ..................................................................................3-40
Smart Trunk ......................................................................3-43
Fuel Filler Door (Hybrid) ...............................................3-46
Fuel Filler Door (Plug-in hybrid).................................3-50
Instrument cluster................................................3-54 Instrument cluster control ............................................3-56
Gauges ...............................................................................3-57
Warning and indicator lights ........................................3-61
Warning messages ..........................................................3-75
LCD display ...........................................................3-85 LCD display control.........................................................3-85
Trip computer .......................................................3-93 Trip modes ........................................................................3-93
3
Page 150 of 546
3-14
Convenient features of your vehicle
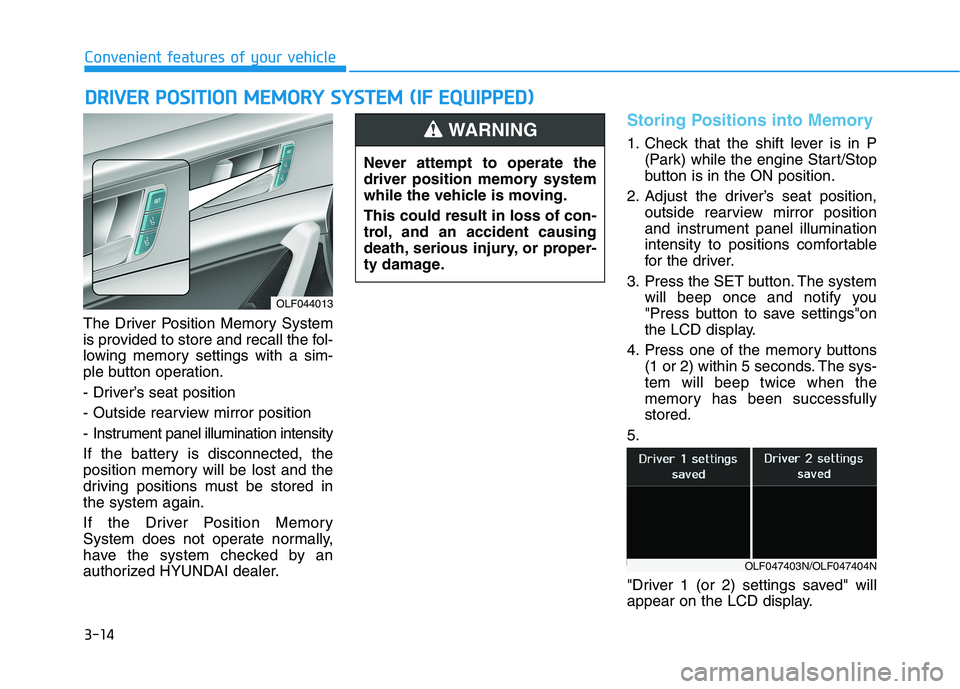
The Driver Position Memory System
is provided to store and recall the fol-
lowing memory settings with a sim-
ple button operation.
- Driver’s seat position
- Outside rearview mirror position
- Instrument panel illumination intensity
If the battery is disconnected, the
position memory will be lost and the
driving positions must be stored inthe system again.
If the Driver Position Memory
System does not operate normally,
have the system checked by an
authorized HYUNDAI dealer.
Storing Positions into Memory
1. Check that the shift lever is in P(Park) while the engine Start/Stop
button is in the ON position.
2. Adjust the driver’s seat position, outside rearview mirror position
and instrument panel illumination
intensity to positions comfortable
for the driver.
3. Press the SET button. The system will beep once and notify you
"Press button to save settings"on
the LCD display.
4. Press one of the memory buttons (1 or 2) within 5 seconds. The sys-tem will beep twice when the
memory has been successfullystored.
5.
"Driver 1 (or 2) settings saved" will
appear on the LCD display.
DD RRIIVV EERR PP OO SSIITT IIOO NN MM EEMM OORRYY SS YY SSTT EEMM (( IIFF EE QQ UUIIPP PPEEDD ))
OLF044013 Never attempt to operate the
driver position memory system
while the vehicle is moving. This could result in loss of con-
trol, and an accident causing
death, serious injury, or proper-
ty damage.
WARNING
OLF047403N/OLF047404N
Page 151 of 546
3-15
Convenient features of your vehicle
3
Recalling positions from memory
1. Check that the shift lever is in P(Park) while the engine Start/Stop
button is in the ON position.
2. Press the desired memory button (1 or 2). The system will beep
once, and then the driver's seat
position, outside rearview mirror
position and instrument panel illu-mination intensity will automatical-
ly adjust to the stored positions.
3.
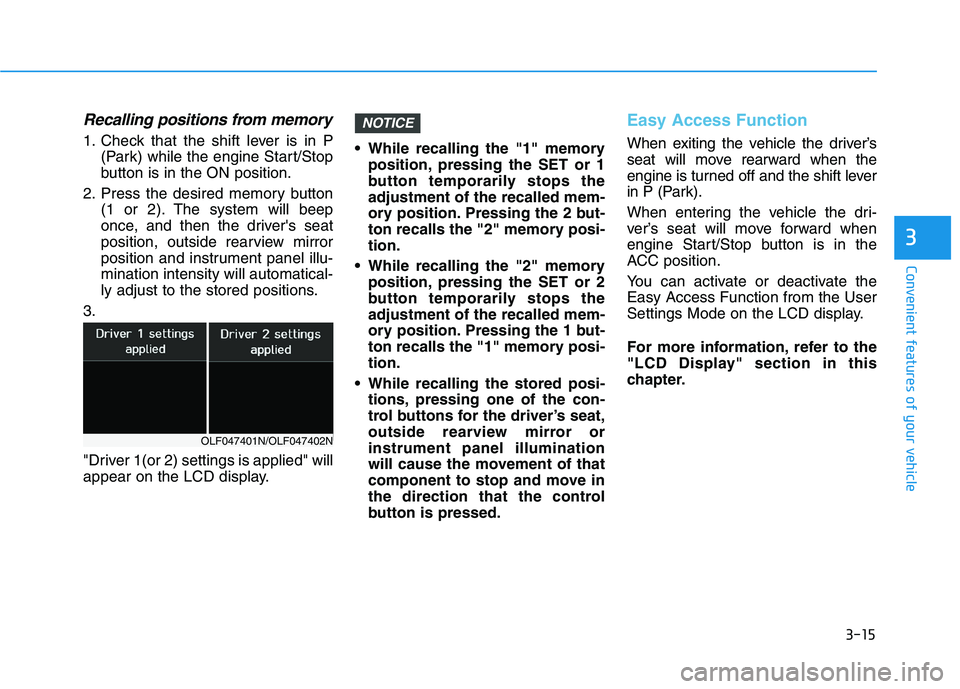
"Driver 1(or 2) settings is applied" will
appear on the LCD display. While recalling the "1" memory
position, pressing the SET or 1
button temporarily stops theadjustment of the recalled mem-
ory position. Pressing the 2 but-
ton recalls the "2" memory posi-tion.
While recalling the "2" memory position, pressing the SET or 2
button temporarily stops theadjustment of the recalled mem-
ory position. Pressing the 1 but-
ton recalls the "1" memory posi-tion.
While recalling the stored posi- tions, pressing one of the con-
trol buttons for the driver’s seat,
outside rearview mirror orinstrument panel illumination
will cause the movement of that
component to stop and move in
the direction that the control
button is pressed.
Easy Access Function
When exiting the vehicle the driver’s
seat will move rearward when the
engine is turned off and the shift lever
in P (Park).
When entering the vehicle the dri-
ver’s seat will move forward when
engine Start/Stop button is in the
ACC position.
You can activate or deactivate the Easy Access Function from the User
Settings Mode on the LCD display.
For more information, refer to the
"LCD Display" section in this
chapter.
NOTICE
OLF047401N/OLF047402N
Page 155 of 546
3-19
Convenient features of your vehicle
3
MMIIRR RROO RRSS
Inside Rearview Mirror
Before you start driving, adjust the
rearview mirror to the center on the
view through the rear window.
When cleaning the mirror, use a
paper towel or similar material
dampened with glass cleaner. Do
not spray glass cleaner directly on
the mirror as this may cause the
liquid cleaner to enter the mirrorhousing.
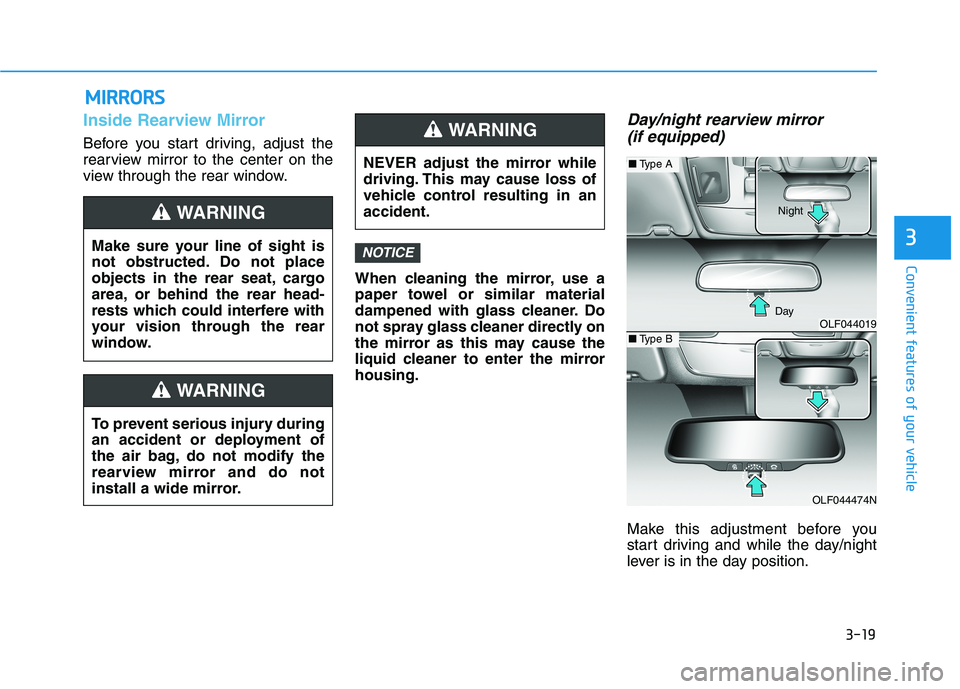
Day/night rearview mirror (if equipped)
Make this adjustment before you
start driving and while the day/night
lever is in the day position.
NOTICEMake sure your line of sight is
not obstructed. Do not place
objects in the rear seat, cargo
area, or behind the rear head-
rests which could interfere with
your vision through the rear
window.
WARNING
NEVER adjust the mirror while
driving. This may cause loss of
vehicle control resulting in anaccident.
WARNING
To prevent serious injury during
an accident or deployment of
the air bag, do not modify the
rearview mirror and do not
install a wide mirror.
WARNING
OLF044019
OLF044474N
■ Type A
■Type B
DayNight
Page 156 of 546
3-20
Convenient features of your vehicle
Pull the day/night lever toward you to reduce glare from the headlamps of
the vehicles behind you during night
driving.
Remember that you lose some
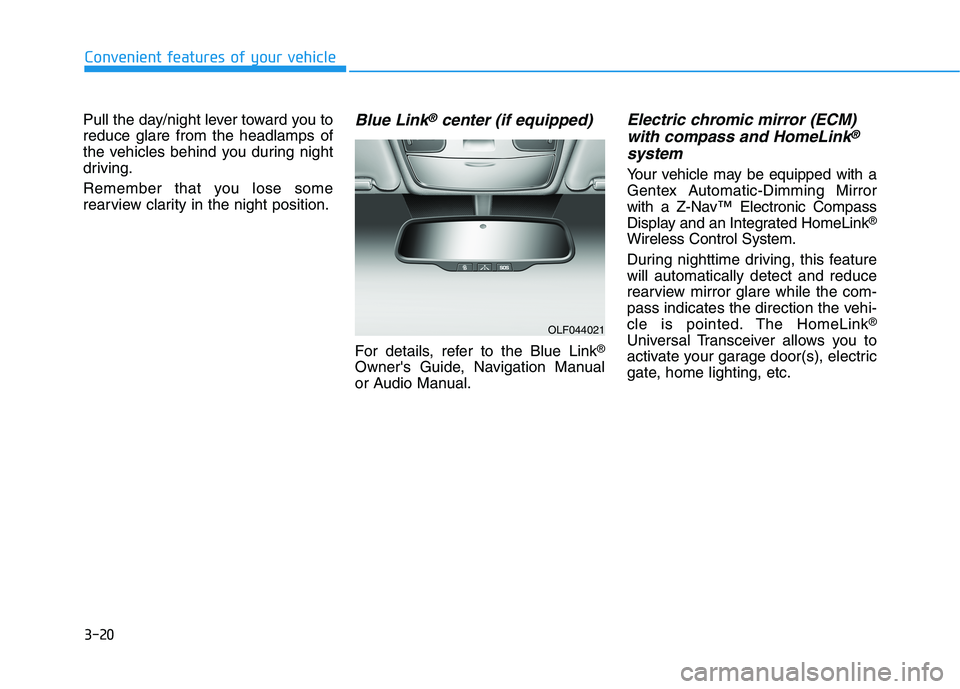
rearview clarity in the night position.Blue Link®center (if equipped)
For details, refer to the Blue Link®
Owner's Guide, Navigation Manual
or Audio Manual.
Electric chromic mirror (ECM) with compass and HomeLink®
system
Your vehicle may be equipped with a
Gentex Automatic-Dimming Mirror
with a Z-Nav™ Electronic Compass
Display and an Integrated HomeLink ®
Wireless Control System.
During nighttime driving, this feature will automatically detect and reduce
rearview mirror glare while the com-
pass indicates the direction the vehi-
cle is pointed. The HomeLink ®
Universal Transceiver allows you to
activate your garage door(s), electric
gate, home lighting, etc.
OLF044021
Page 157 of 546
3-21
Convenient features of your vehicle
3
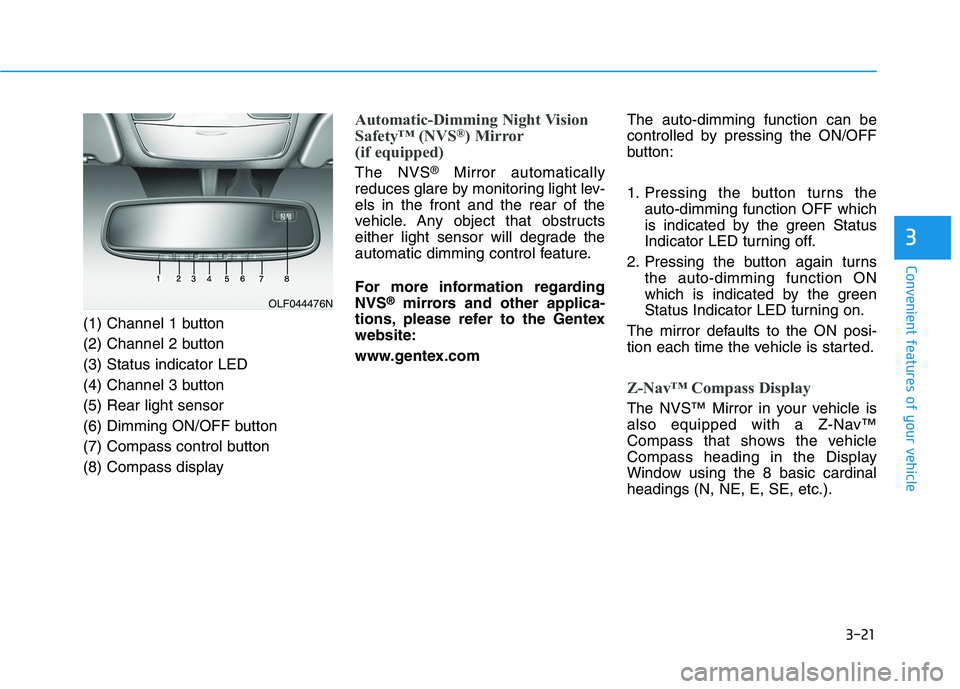
(1) Channel 1 button
(2) Channel 2 button(3) Status indicator LED
(4) Channel 3 button(5) Rear light sensor
(6) Dimming ON/OFF button
(7) Compass control button
(8) Compass display
Automatic-Dimming Night Vision
Safety™ (NVS®
) Mirror
(if equipped)
The NVS ®
Mirror automatically
reduces glare by monitoring light lev- els in the front and the rear of the
vehicle. Any object that obstructs
either light sensor will degrade the
automatic dimming control feature.
For more information regarding NVS ®
mirrors and other applica-
tions, please refer to the Gentexwebsite:
www.gentex.com The auto-dimming function can be
controlled by pressing the ON/OFF
button:
1. Pressing the button turns the
auto-dimming function OFF which
is indicated by the green Status
Indicator LED turning off.
2. Pressing the button again turns the auto-dimming function ON
which is indicated by the green
Status Indicator LED turning on.
The mirror defaults to the ON posi-
tion each time the vehicle is started.
Z-Nav™ Compass Display
The NVS™ Mirror in your vehicle is
also equipped with a Z-Nav™
Compass that shows the vehicle
Compass heading in the Display
Window using the 8 basic cardinalheadings (N, NE, E, SE, etc.).
OLF044476N
Page 163 of 546
3-27
Convenient features of your vehicle
3
Erasing HomeLink®buttons
Individual buttons cannot be erased.
However, to erase all three pro-
grammed buttons:
1. Press and hold the two outerHomeLink ®
buttons until the indi-
cator light begins to flash-after 20
seconds.
2. Release both buttons. Do not hold for longer than 30 seconds.
The Integrated HomeLink ®
Wireless
Control System is now in the training
(learn) mode and can be pro-
grammed at any time following the
appropriate steps in the
Programming chapters above. NVS ®
is a registered trademark and
Z-Nav™ is a trademark of the Gentex
Corporation, Zeeland, Michigan.HomeLink ®
is a registered trademark
owned by Johnson Controls,
Incorporated, Milwaukee, Wisconsin.
FCC ID: NZLZTVHL3
IC: 4112A-ZTVHL3 Information
This device complies with Industry
Canada RSS-210 standard(s).
Operation is subject to the following
three conditions:
1. This device may not cause interfer- ence.
2. This device must accept any inter- ference, including interference that
may cause undesired operation of
the device.
3. The transceiver has been tested and complies with FCC and Industry
Canada rules. Changes or modifica-
tions not expressly approved by the
party responsible for compliance
could void the user's authority to
operate the device.
Side View Mirrors
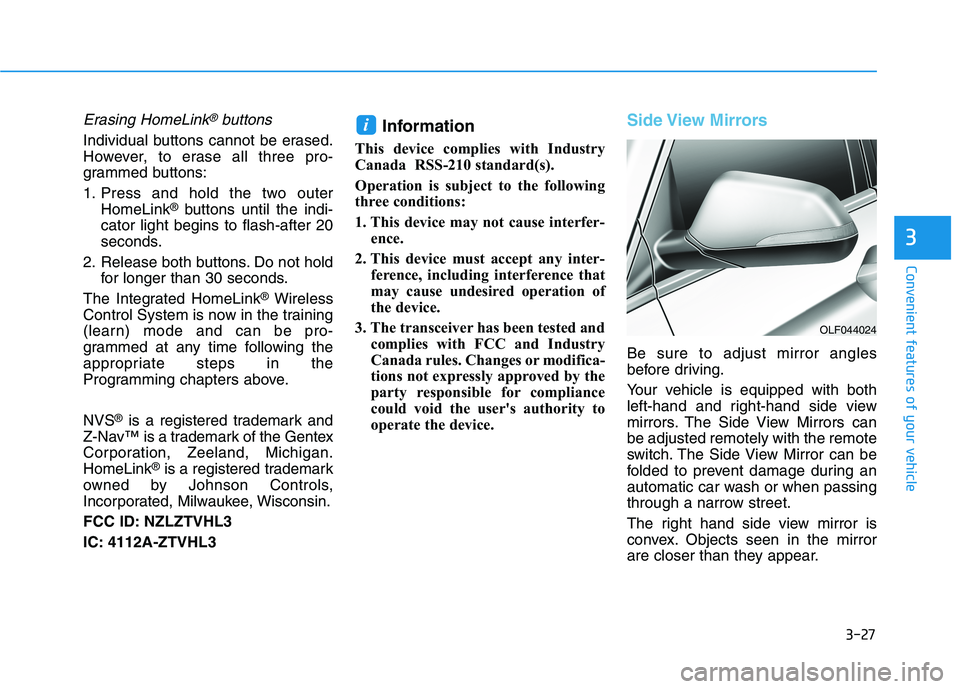
Be sure to adjust mirror angles
before driving.
Your vehicle is equipped with both
left-hand and right-hand side view
mirrors. The Side View Mirrors canbe adjusted remotely with the remote
switch. The Side View Mirror can be
folded to prevent damage during an
automatic car wash or when passing
through a narrow street.
The right hand side view mirror is
convex. Objects seen in the mirror
are closer than they appear.
i
OLF044024