ECO mode HYUNDAI SONATA HYBRID 2022 Workshop Manual
[x] Cancel search | Manufacturer: HYUNDAI, Model Year: 2022, Model line: SONATA HYBRID, Model: HYUNDAI SONATA HYBRID 2022Pages: 527, PDF Size: 64.14 MB
Page 386 of 527
While Driving
6-110
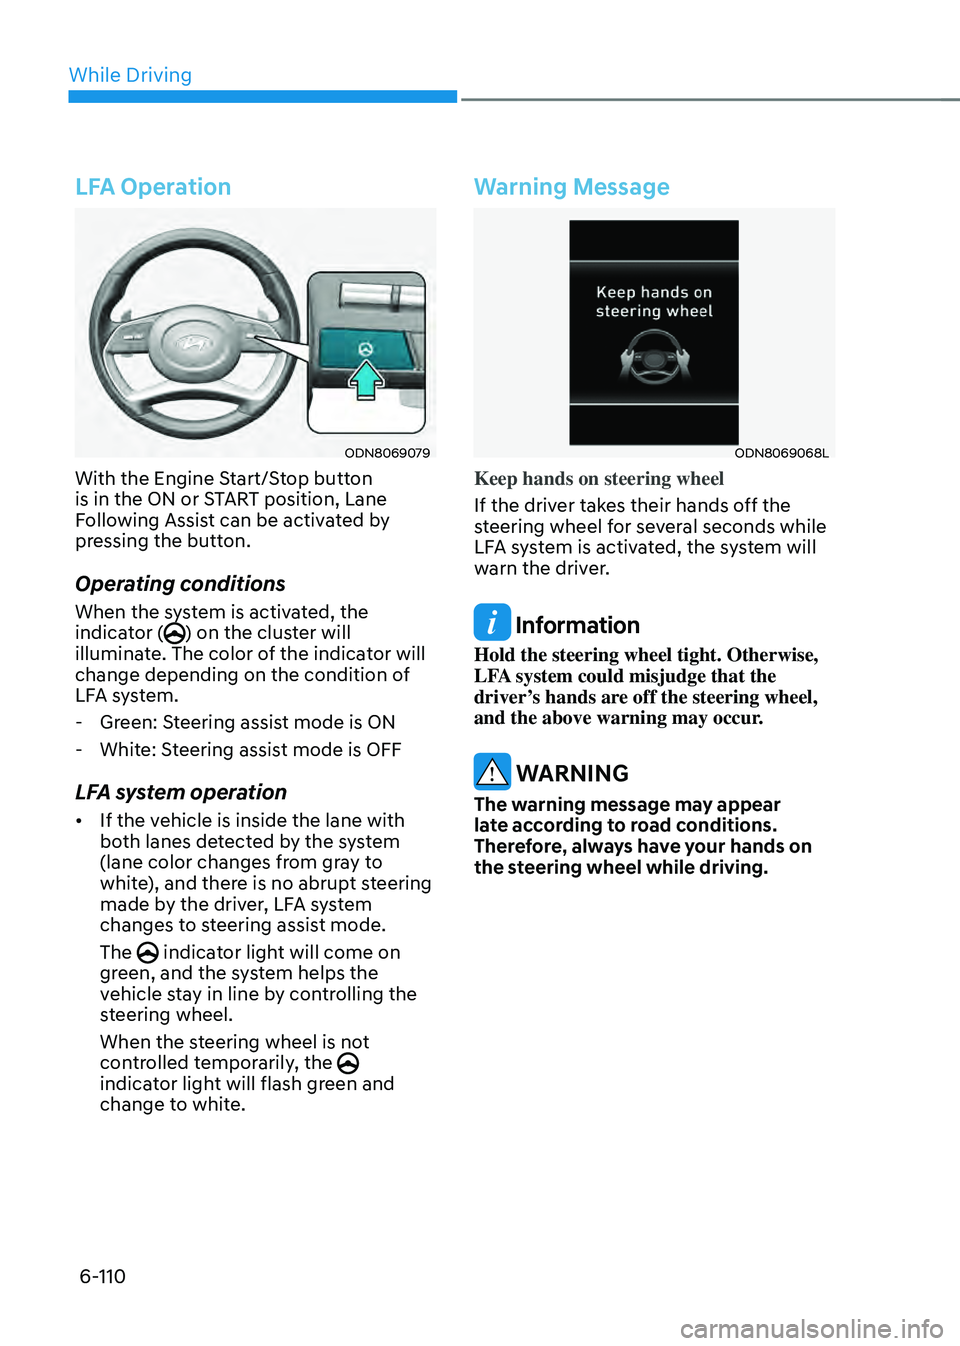
LFA Operation
ODN8069079
With the Engine Start/Stop button
is in the ON or START position, Lane
Following Assist can be activated by
pressing the button.
Operating conditions
When the system is activated, the
indicator () on the cluster will
illuminate. The color of the indicator will
change depending on the condition of
LFA system.
- Green: Steering assist mode is ON
-White: Steering assist mode is OFF
LFA system operation
• If the vehicle is inside the lane with
both lanes detected by the system
(lane color changes from gray to
white), and there is no abrupt steering
made by the driver, LFA system
changes to steering assist mode.
The
indicator light will come on green, and the system helps the
vehicle stay in line by controlling the
steering wheel.
When the steering wheel is not
controlled temporarily, the
indicator light will flash green and
change to white.
Warning Message
ODN8069068L
Keep hands on steering wheel
If the driver takes their hands off the
steering wheel for several seconds while
LFA system is activated, the system will
warn the driver.
Information
Hold the steering wheel tight. Otherwise,
LFA system could misjudge that the
driver’s hands are off the steering wheel,
and the above warning may occur.
WARNING
The warning message may appear
late according to road conditions.
Therefore, always have your hands on
the steering wheel while driving.
Page 394 of 527
While Driving
6-118
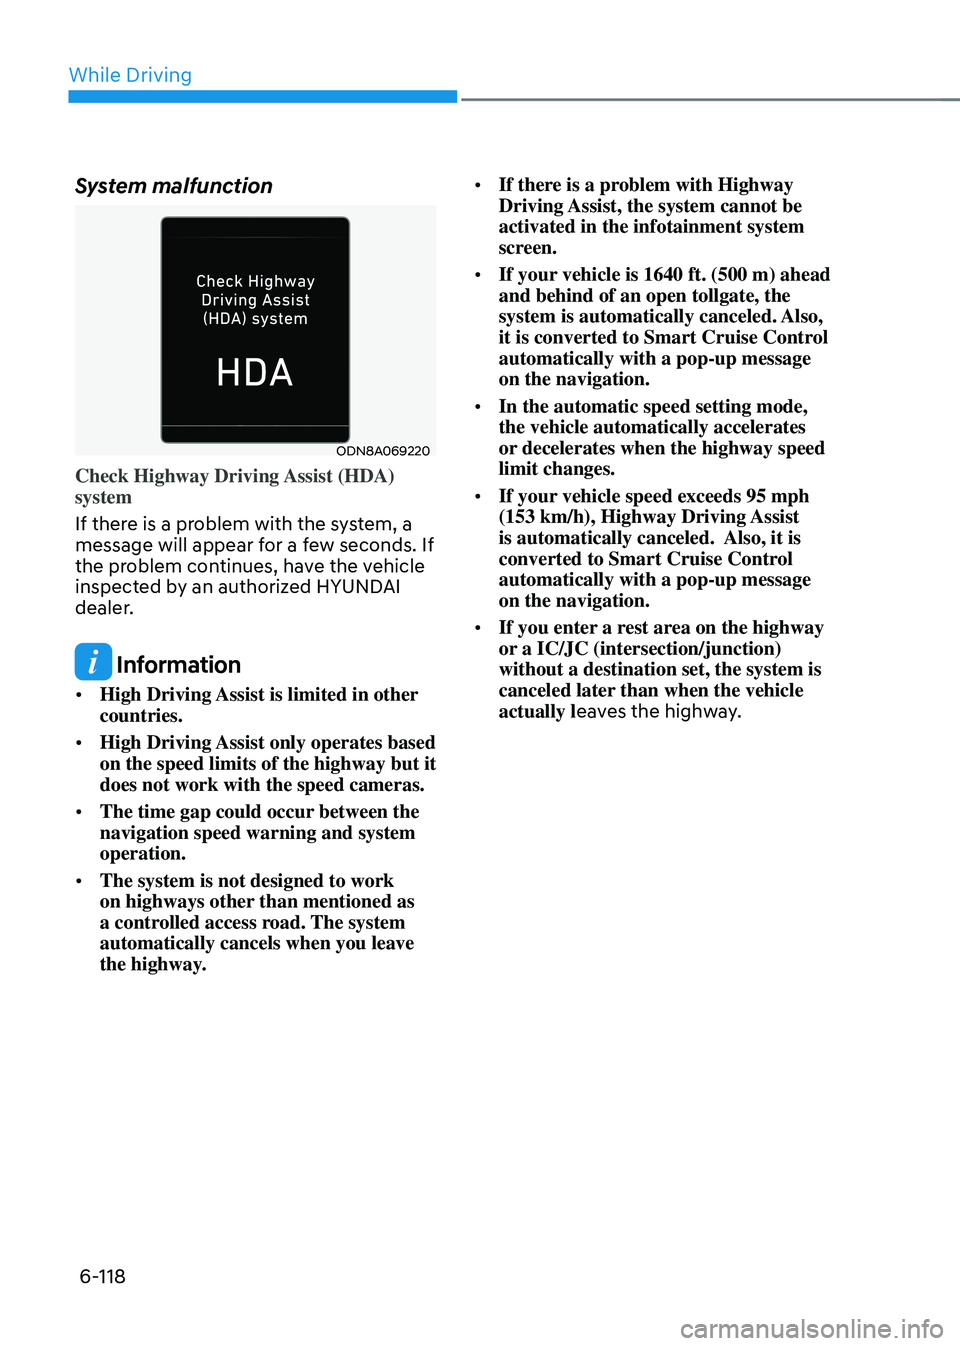
System malfunction
ODN8A069220
Check Highway Driving Assist (HDA)
system
If there is a problem with the system, a
message will appear for a few seconds. If
the problem continues, have the vehicle
inspected by an authorized HYUNDAI
dealer.
Information
• High Driving Assist is limited in other
countries.
• High Driving Assist only operates based
on the speed limits of the highway but it
does not work with the speed cameras.
• The time gap could occur between the
navigation speed warning and system
operation.
• The system is not designed to work
on highways other than mentioned as
a controlled access road. The system
automatically cancels when you leave
the highway. •
If there is a problem with Highway
Driving Assist, the system cannot be
activated in the infotainment system
screen.
• If your vehicle is 1640 ft. (500 m) ahead
and behind of an open tollgate, the
system is automatically canceled. Also,
it is converted to Smart Cruise Control
automatically with a pop-up message
on the navigation.
• In the automatic speed setting mode,
the vehicle automatically accelerates
or decelerates when the highway speed
limit changes.
• If your vehicle speed exceeds 95 mph
(153 km/h), Highway Driving Assist
is automatically canceled. Also, it is
converted to Smart Cruise Control
automatically with a pop-up message
on the navigation.
• If you enter a rest area on the highway
or a IC/JC (intersection/junction)
without a destination set, the system is
canceled later than when the vehicle
actually l eaves the highway.
Page 423 of 527
07
7-3
If You Have a Flat Tire While
Driving
If a tire goes flat while you are driving:
• Take your foot off the accelerator
pedal and let the vehicle slow down
while driving straight ahead. Do not
apply the brakes immediately or
attempt to pull off the road as this
may cause loss of vehicle control
resulting in an accident. When the
vehicle has slowed to such a speed
that it is safe to do so, brake carefully
and pull off the road. Drive off the
road as far as possible and park on
firm, level ground. If you are on a
divided highway, do not park in the
median area between the two traffic
lanes.
• When the vehicle is stopped, press the
hazard warning flasher button, shift
the gear to P (Park), apply the parking
brake, and press the Engine Start/Stop
button to the OFF position.
• Have all passengers get out of the
vehicle. Be sure they all get out on the
side of the vehicle that is away from
traffic.
• When changing a flat tire, follow the
instructions provided later in this
chapter.
IF THE ENGINE WILL NOT
S TA RT
• Be sure to shift the gear to P (Park).
The vehicle starts only when the gear
is in P (Park).
• This vehicle does not have a regular
12V battery that needs periodic
replacement. It is lithium ion polymer
type integrated into the HEV high
voltage battery. The vehicle has a
12V battery protection system that
cuts 12V battery from vehicle draw
to prevent full discharge. If vehicle
will not start, first try pressing the
12V Battery Reset switch (left side of
the steering wheel near the fuel door
open switch) to reconnect the 12V
battery, but you must start vehicle
within 15 seconds of pressing the 12V
Battery Reset switch. After starting
the vehicle (
indicator ON ),
operate the vehicle safely outdoors in
ready mode stopped and/or drive it
for 30 minutes total to charge the 12V
battery fully.
• Check the fuel level and add fuel if
necessary.
If the vehicle still does not start, call
an authorized HYUNDAI dealer for
assistance.
NOTICE
Push or pull starting the vehicle may
cause the catalytic converter to
overload which can lead to damage to
the emission control system.
Page 424 of 527
Emergency situations
7-4
Before Jump Starting
This vehicle does not have a regular 12V
battery that needs periodic replacement.
It is lithium ion polymer type integrated
into the HEV high voltage battery. The
vehicle has a 12V battery protection
system that cuts 12V battery from vehicle
draw to prevent full discharge.
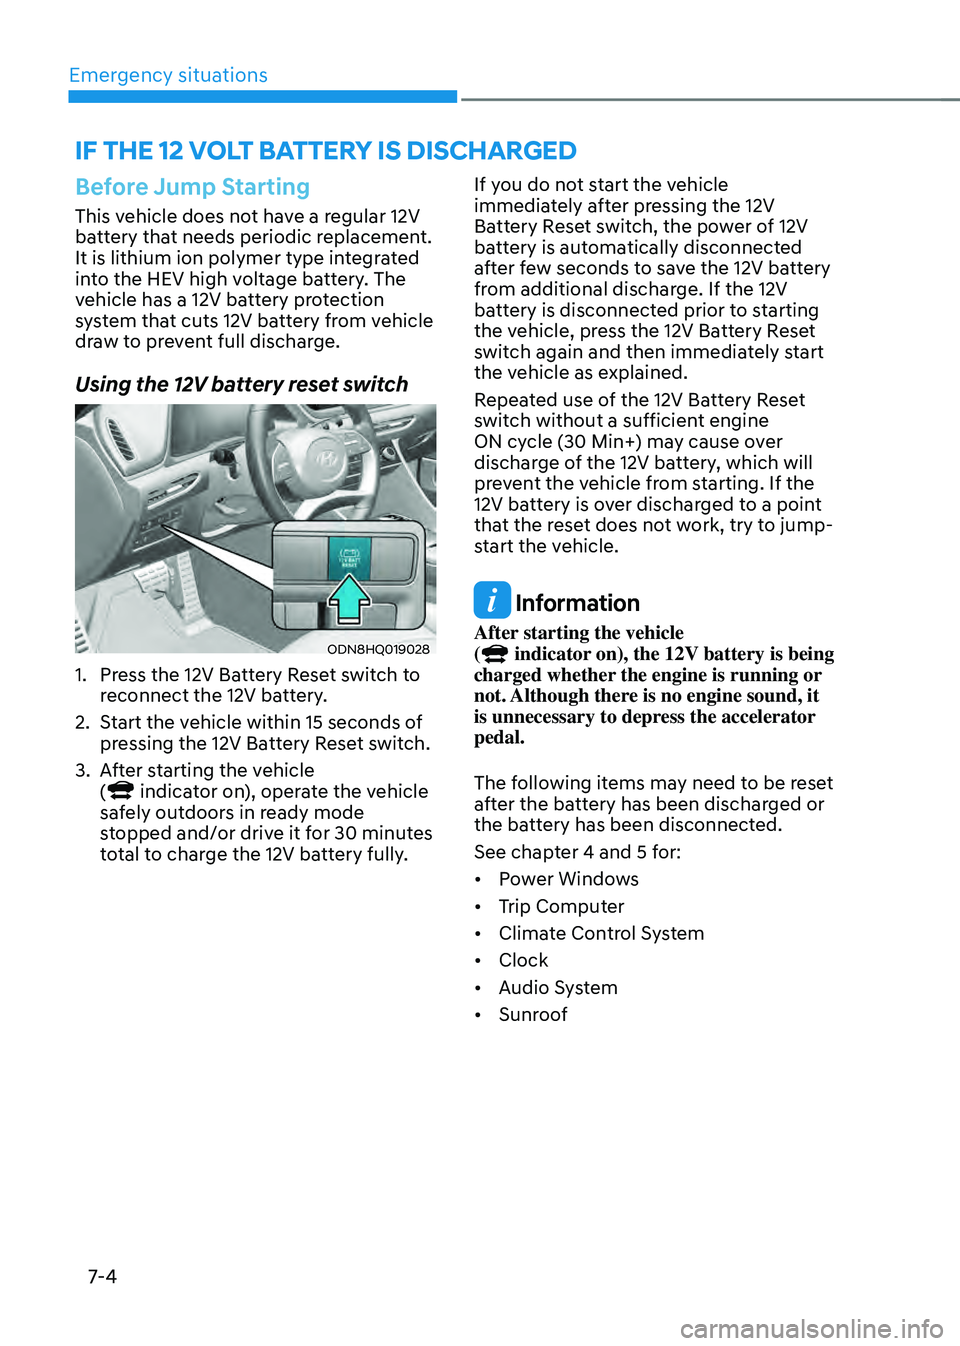
Using the 12V battery reset switch
ODN8HQ019028
1. Press the 12V Battery Reset switch to
reconnect the 12V battery.
2. Start the vehicle within 15 seconds of
pressing the 12V Battery Reset switch.
3. After starting the vehicle
( indicator on), operate the vehicle
safely outdoors in ready mode
stopped and/or drive it for 30 minutes
total to charge the 12V battery fully. If you do not start the vehicle
immediately after pressing the 12V
Battery Reset switch, the power of 12V
battery is automatically disconnected
after few seconds to save the 12V battery
from additional discharge. If the 12V
battery is disconnected prior to starting
the vehicle, press the 12V Battery Reset
switch again and then immediately start
the vehicle as explained.
Repeated use of the 12V Battery Reset
switch without a sufficient engine
ON cycle (30 Min+) may cause over
discharge of the 12V battery, which will
prevent the vehicle from starting. If the
12V battery is over discharged to a point
that the reset does not work, try to jump-
start the vehicle.
Information
After starting the vehicle
( indicator on), the 12V battery is being
charged whether the engine is running or
not. Although there is no engine sound, it
is unnecessary to depress the accelerator
pedal.
The following items may need to be reset
after the battery has been discharged or
the battery has been disconnected.
See chapter 4 and 5 for:
• Power Windows
• Trip Computer
• Climate Control System
• Clock
• Audio System
• Sunroof
IF THE 12 VOLT BATTERY IS DISCHARGED
Page 426 of 527
Emergency situations
7-6
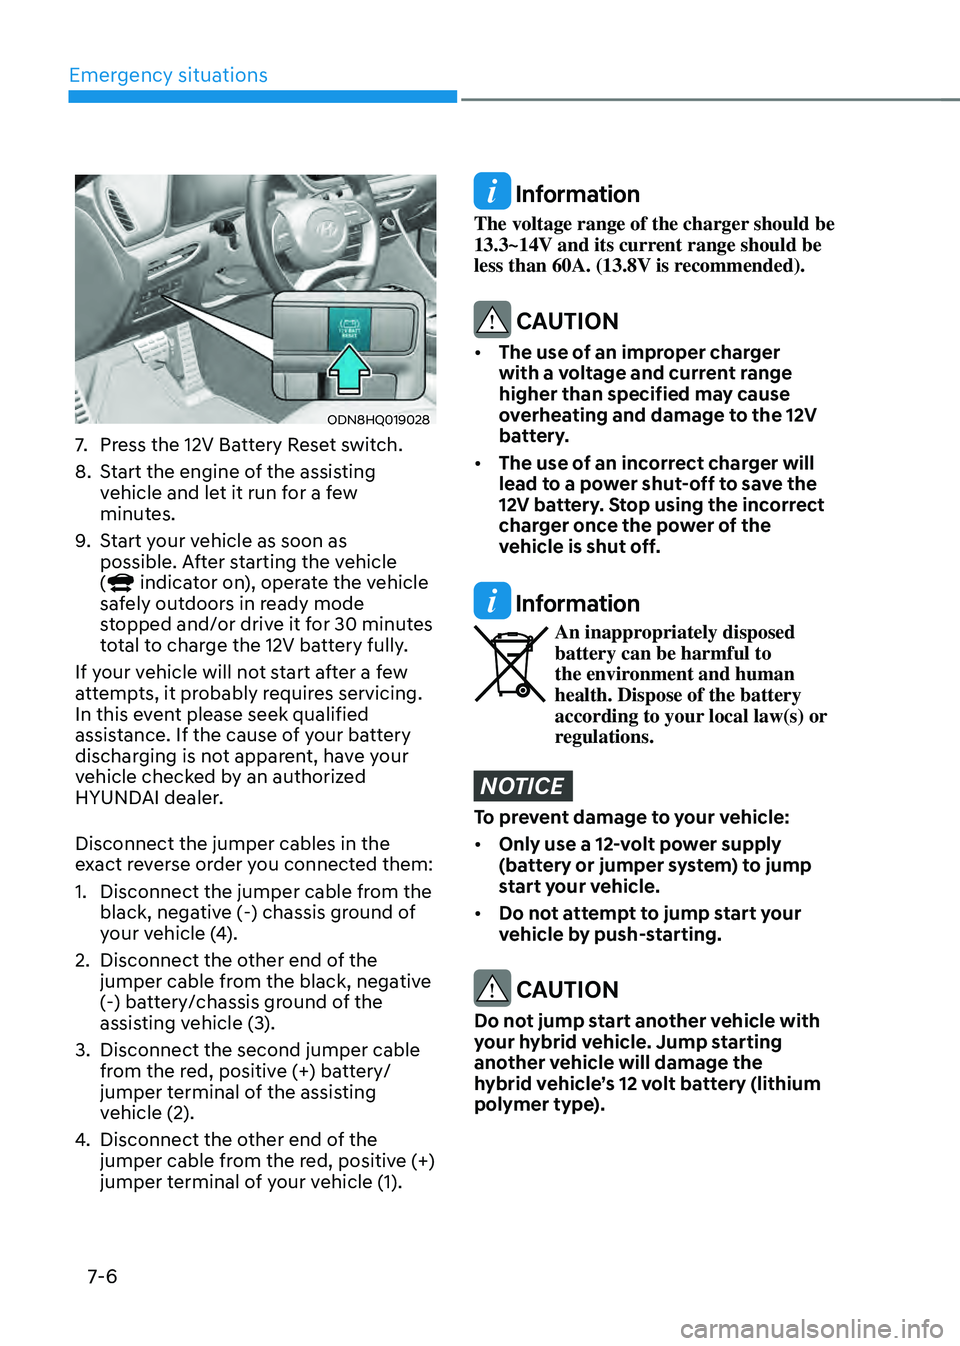
ODN8HQ019028
7. Press the 12V Battery Reset switch.
8. Start the engine of the assisting
vehicle and let it run for a few
minutes.
9. Start your vehicle as soon as
possible. After starting the vehicle
(
indicator on), operate the vehicle
safely outdoors in ready mode
stopped and/or drive it for 30 minutes
total to charge the 12V battery fully.
If your vehicle will not start after a few
attempts, it probably requires servicing.
In this event please seek qualified
assistance. If the cause of your battery
discharging is not apparent, have your
vehicle checked by an authorized
HYUNDAI dealer.
Disconnect the jumper cables in the
exact reverse order you connected them:
1. Disconnect the jumper cable from the
black, negative (-) chassis ground of
your vehicle (4).
2. Disconnect the other end of the
jumper cable from the black, negative
(-) battery/chassis ground of the
assisting vehicle (3).
3. Disconnect the second jumper cable
from the red, positive (+) battery/
jumper terminal of the assisting
vehicle (2).
4. Disconnect the other end of the
jumper cable from the red, positive (+)
jumper terminal of your vehicle (1).
Information
The voltage range of the charger should be
13.3~14V and its current range should be
less than 60A. (13.8V is recommended).
CAUTION
• The use of an improper charger
with a voltage and current range
higher than specified may cause
overheating and damage to the 12V
battery.
• The use of an incorrect charger will
lead to a power shut-off to save the
12V battery. Stop using the incorrect
charger once the power of the
vehicle is shut off.
Information
An inappropriately disposed battery can be harmful to
the environment and human
health. Dispose of the battery
according to your local law(s) or
regulations.
NOTICE
To prevent damage to your vehicle:
• Only use a 12-volt power supply
(battery or jumper system) to jump
start your vehicle.
• Do not attempt to jump start your
vehicle by push-starting.
CAUTION
Do not jump start another vehicle with
your hybrid vehicle. Jump starting
another vehicle will damage the
hybrid vehicle’s 12 volt battery (lithium
polymer type).
Page 430 of 527
Emergency situations
7-10
Tire Pressure Monitoring System
WARNING
Over-inflation or under-inflation can
reduce tire life, adversely affect vehicle
handling, and lead to sudden tire failure
that may cause loss of vehicle control
resulting in an accident.
Each tire, including the spare (if
provided), should be checked monthly
when cold and inflated to the inflation
pressure recommended by the vehicle
manufacturer on the vehicle placard
or tire inflation pressure label. (If your
vehicle has tires of a different size than
the size indicated on the vehicle placard
or tire inflation pressure label, you should
determine the proper tire inflation
pressure for those tires.)
As an added safety feature, your
vehicle has been equipped with a tire
pressure monitoring system (TPMS)
that illuminates a low tire pressure
telltale when one or more of your tires is
significantly under-inflated. Accordingly,
when the low tire pressure telltale
illuminates, you should stop and check
your tires as soon as possible, and inflate
them to the proper pressure. Driving on
a significantly under-inflated tire causes
the tire to overheat and can lead to tire
failure.
Under-inflation also reduces fuel
efficiency and tire tread life, and may
affect the vehicle’s handling and
stopping ability.
Please note that the TPMS is not a
substitute for proper tire maintenance,
and it is the driver’s responsibility to
maintain correct tire pressure, even if
under-inflation has not reached the level
to trigger illumination of the TPMS low
tire pressure telltale.
Your vehicle has also been equipped with
a TPMS malfunction indicator to indicate
when the system is not operating
properly. The TPMS malfunction
indicator is combined with the low
tire pressure telltale. When the system
detects a malfunction, the telltale will
flash for approximately one minute and
then remain continuously illuminated.
This sequence will continue upon
subsequent vehicle start-ups as long as
the malfunction exists.
When the malfunction indicator is
illuminated, the system may not be able
to detect or signal low tire pressure as
intended. TPMS malfunctions may occur
for a variety of reasons, including the
installation of replacement or alternate
tires or wheels on the vehicle that
prevent the TPMS from functioning
properly.
Always check the TPMS malfunction
telltale after replacing one or more tires
or wheels on your vehicle to ensure that
the replacement or alternate tires and
wheels allow the TPMS to continue to
function properly.
NOTICE
If any of the below happens, have
the system checked by an authorized
HYUNDAI dealer.
1. The Low Tire Pressure Telltale/TPMS
Malfunction Indicator does not
illuminate for 3 seconds when the
Engine Start/Stop button is pressed
to the ON position or the vehicle is in
the ready (
) mode.
2. The TPMS Malfunction Indicator
remains illuminated after blinking for
approximately 1 minute.
3. The Low Tire Pressure Position
Telltale remains illuminated.
Page 445 of 527
07
7-25
Checking the Tire Inflation
Pressure
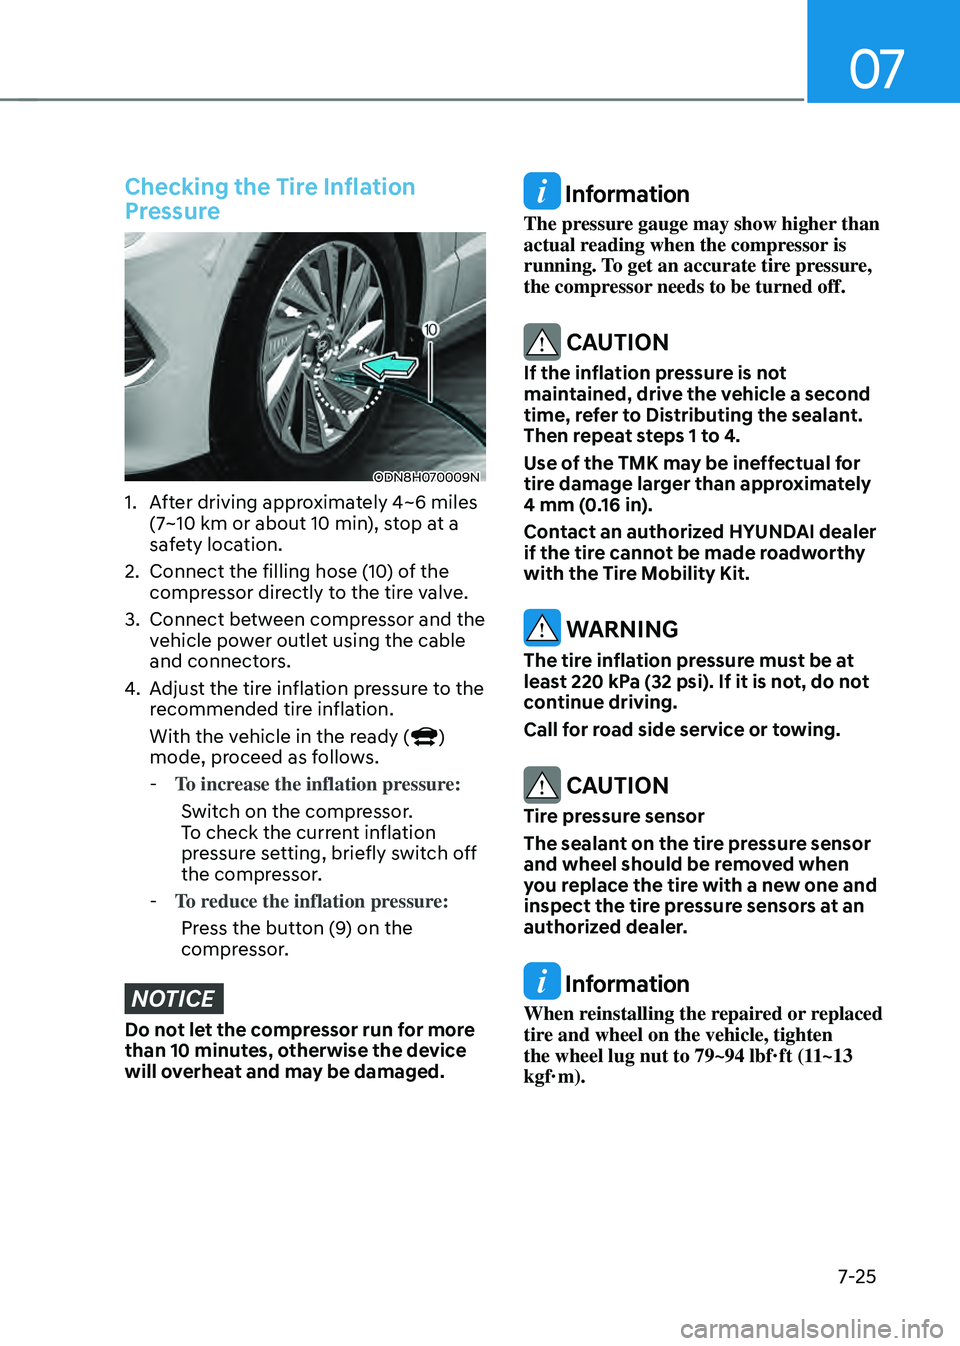
ODN8H070009N
1. After driving approximately 4~6 miles
(7~10 km or about 10 min), stop at a
safety location.
2. Connect the filling hose (10) of the
compressor directly to the tire valve.
3. Connect between compressor and the
vehicle power outlet using the cable
and connectors.
4. Adjust the tire inflation pressure to the
recommended tire inflation.
With the vehicle in the ready (
)
mode, proceed as follows.
- To increase the inflation pressure:
Switch on the compressor.
To check the current inflation
pressure setting, briefly switch off
the compressor.
- To reduce the inflation pressure:
Press the button (9) on the
compressor.
NOTICE
Do not let the compressor run for more
than 10 minutes, otherwise the device
will overheat and may be damaged.
Information
The pressure gauge may show higher than
actual reading when the compressor is
running. To get an accurate tire pressure,
the compressor needs to be turned off.
CAUTION
If the inflation pressure is not
maintained, drive the vehicle a second
time, refer to Distributing the sealant.
Then repeat steps 1 to 4.
Use of the TMK may be ineffectual for
tire damage larger than approximately
4 mm (0.16 in).
Contact an authorized HYUNDAI dealer
if the tire cannot be made roadworthy
with the Tire Mobility Kit.
WARNING
The tire inflation pressure must be at
least 220 kPa (32 psi). If it is not, do not
continue driving.
Call for road side service or towing.
CAUTION
Tire pressure sensor
The sealant on the tire pressure sensor
and wheel should be removed when
you replace the tire with a new one and
inspect the tire pressure sensors at an
authorized dealer.
Information
When reinstalling the repaired or replaced
tire and wheel on the vehicle, tighten
the wheel lug nut to 79~94 lbf·ft (11~13
kgf·m).
Page 484 of 527
08
8-35
Outward Facing Sidewall
An asymmetrical tire has a particular
side that faces outward when
mounted on a vehicle. The outward
facing sidewall bears white lettering
or bears manufacturer, brand, and/or
model name molding that is higher
or deeper than the same moldings
on the inner facing sidewall.
Passenger (P-Metric) tire
A tire used on passenger cars
and some light duty trucks and
multipurpose vehicles.
Ply
A layer of rubber-coated parallel
cords.
Pneumatic tire
A mechanical device made of rubber,
chemicals, fabric and steel or other
materials, that, when mounted on
an automotive wheel provides the
traction and contains the gas or fluid
that sustains the load.
Pneumatic options weight
The combined weight of installed
regular production options weighing
over 5 lb. (2.3 kg) in excess of the
standard items which they replace,
not previously considered in
curb weight or accessory weight,
including heavy duty breaks, ride
levelers, roof rack, heavy duty
battery, and special trim.
Recommended Inflation Pressure
Vehicle manufacturer’s
recommended tire inflation pressure
as shown on the tire placard.Radial Ply Tire
A pneumatic tire in which the ply
cords that extend to the beads are
laid at 90 degrees to the centerline
of the tread.
Rim
A metal support for a tire and upon
which the tire beads are seated.
Sidewall
The portion of a tire between the
tread and the bead.
Speed Rating
An alphanumeric code assigned to a
tire indicating the maximum speed
at which a tire can operate.
Traction
The friction between the tire and
the road surface. The amount of grip
provided.
Tread
The portion of a tire that comes into
contact with the road.
Treadwear Indicators
Narrow bands, sometimes called
“wear bars”, that show across the
tread of a tire when only 1/16 inch of
tread remains.
UTQGS
Uniform Tire Quality Grading
Standards is a tire information
system that provides consumers
with ratings for a tire’s traction,
temperature and treadwear.
Ratings are determined by tire
manufacturers using government
testing procedures. The ratings are
molded into the sidewall of the tire.
Page 485 of 527
Maintenance
8-36
Vehicle Capacity Weight
The number of designated seating
positions multiplied by 150 lbs. (68
kg) plus the rated cargo and luggage
load.
Vehicle Maximum Load on the Tire
Load on an individual tire due to curb
and accessory weight plus maximum
occupant and cargo weight.
Vehicle Normal Load on the Tire
Load on an individual tire that is
determined by distributing to each
axle its share of the curb weight,
accessory weight, and normal
occupant weight and dividing by 2.
Vehicle Placard
A label permanently attached
to a vehicle showing the
original equipment tire size and
recommended inflation pressure.
All Season Tires
HYUNDAI specifies all season
tires on some models to provide
good performance for use all year
round, including snowy and icy
road conditions. All season tires
are identified by ALL SEASON and/
or M+S (Mud and Snow) on the tire
sidewall. Snow tires have better
snow traction than all season tires
and may be more appropriate in
some areas.
Summer Tires
HYUNDAI specifies summer tires on
some models to provide superior
performance on dry roads. Summer
tire performance is substantially
reduced in snow and ice. Summer
tires do not have the tire traction
rating M+S (Mud and Snow) on
the tire side wall. If you plan to
operate your vehicle in snowy or icy
conditions, HYUNDAI recommends
the use of snow tires or all season
tires on all four wheels.
Snow Tires
If you equip your car with snow
tires, they should be the same size
and have the same load capacity as
the original tires. Snow tires should
be installed on all four wheels;
otherwise, poor handling may result.
Snow tires should carry 4 psi (28 kPa)
more air pressure than the pressure
recommended for the standard
tires on the tire label on the driver’s
side of the center pillar, or up to the
maximum pressure shown on the tire
sidewall, whichever is less. Do not
drive faster than 75 mph (120 km/h)
when your vehicle is equipped with
snow tires.
Radial-Ply Tires
Radial-ply tires provide improved
tread life, road hazard resistance
and smoother high speed ride. The
radial-ply tires used on this vehicle
are of belted construction, and are
selected to complement the ride
and handling characteristics of your
vehicle.