display Hyundai Sonata Plug-in Hybrid 2016 Owner's Manual
[x] Cancel search | Manufacturer: HYUNDAI, Model Year: 2016, Model line: Sonata Plug-in Hybrid, Model: Hyundai Sonata Plug-in Hybrid 2016Pages: 685, PDF Size: 41.8 MB
Page 500 of 685
5-52
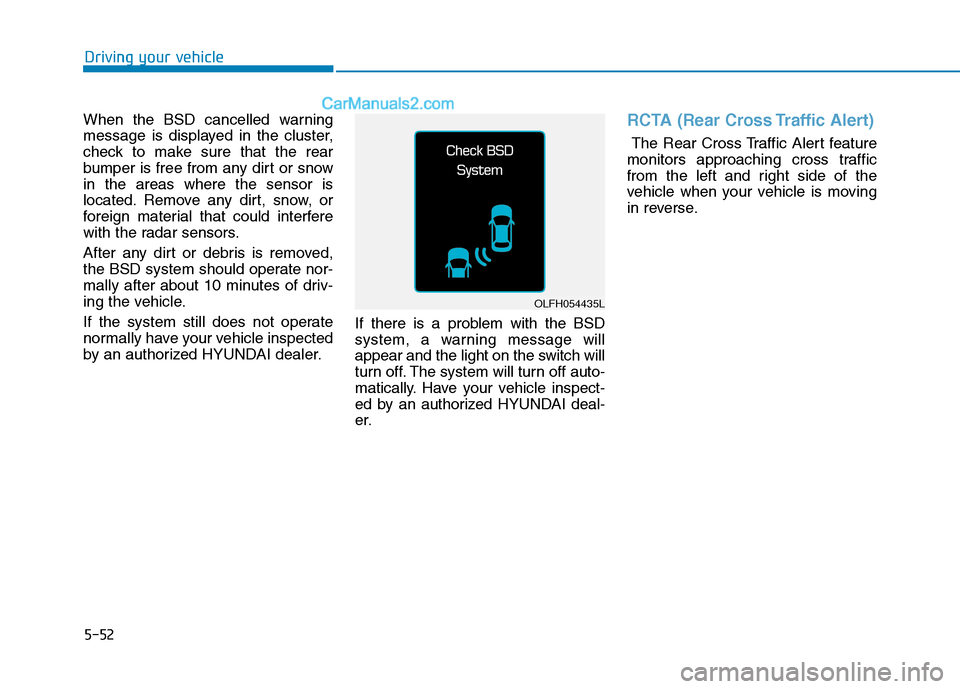
When the BSD cancelled warning
message is displayed in the cluster,
check to make sure that the rear
bumper is free from any dirt or snow
in the areas where the sensor is
located. Remove any dirt, snow, or
foreign material that could interfere
with the radar sensors.
After any dirt or debris is removed,
the BSD system should operate nor-
mally after about 10 minutes of driv-
ing the vehicle.
If the system still does not operate
normally have your vehicle inspected
by an authorized HYUNDAI dealer.If there is a problem with the BSD
system, a warning message will
appear and the light on the switch will
turn off. The system will turn off auto-
matically. Have your vehicle inspect-
ed by an authorized HYUNDAI deal-
er.RCTA (Rear Cross Traffic Alert)
The Rear Cross Traffic Alert feature
monitors approaching cross traffic
from the left and right side of the
vehicle when your vehicle is moving
in reverse.
Driving your vehicle
OLFH054435L
Page 501 of 685
5-53
Driving your vehicle
Operating conditions
To operate:
Go to the User Settings Mode
(Driving Assist) and select RCTA
(Rear Cross Traffic Alert) on the LCD
display (For more information,
refer to "LCD Display" in chapter
3.). The system will turn on and
standby to activate. The system will
activate when vehicle speed is below
6 mph (10 km/h) with the shift lever in
R (Reverse).
Information
The Rear Cross Traffic Alert (RCTA)
detecting range is approximately 1 -
65 ft (0.5 – 20 m). An approaching
vehicle will be detected if their vehicle
speed is within 2.5 - 22.5 mph (4 - 36
km/h).
Note that the detecting range may
vary under certain conditions. As
always, use caution and pay close
attention to your surroundings when
backing your vehicle.
Warning type
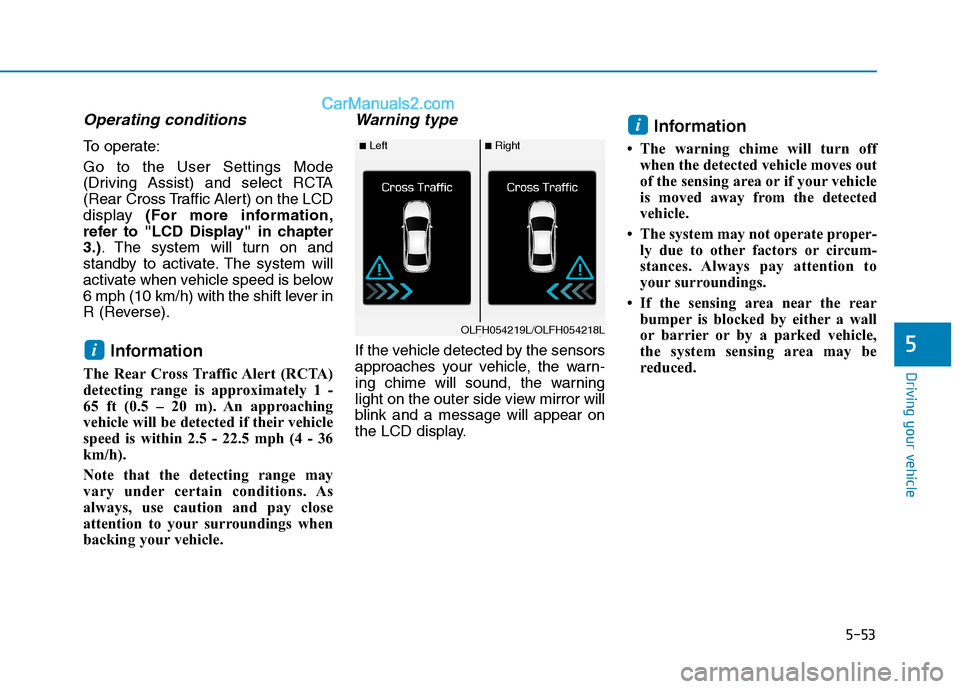
If the vehicle detected by the sensors
approaches your vehicle, the warn-
ing chime will sound, the warning
light on the outer side view mirror will
blink and a message will appear on
the LCD display.
Information
• The warning chime will turn off
when the detected vehicle moves out
of the sensing area or if your vehicle
is moved away from the detected
vehicle.
• The system may not operate proper-
ly due to other factors or circum-
stances. Always pay attention to
your surroundings.
• If the sensing area near the rear
bumper is blocked by either a wall
or barrier or by a parked vehicle,
the system sensing area may be
reduced.
i
i5
■Left■Right
OLFH054219L/OLFH054218L
Page 505 of 685
5-57
Driving your vehicle
LDWS Operation
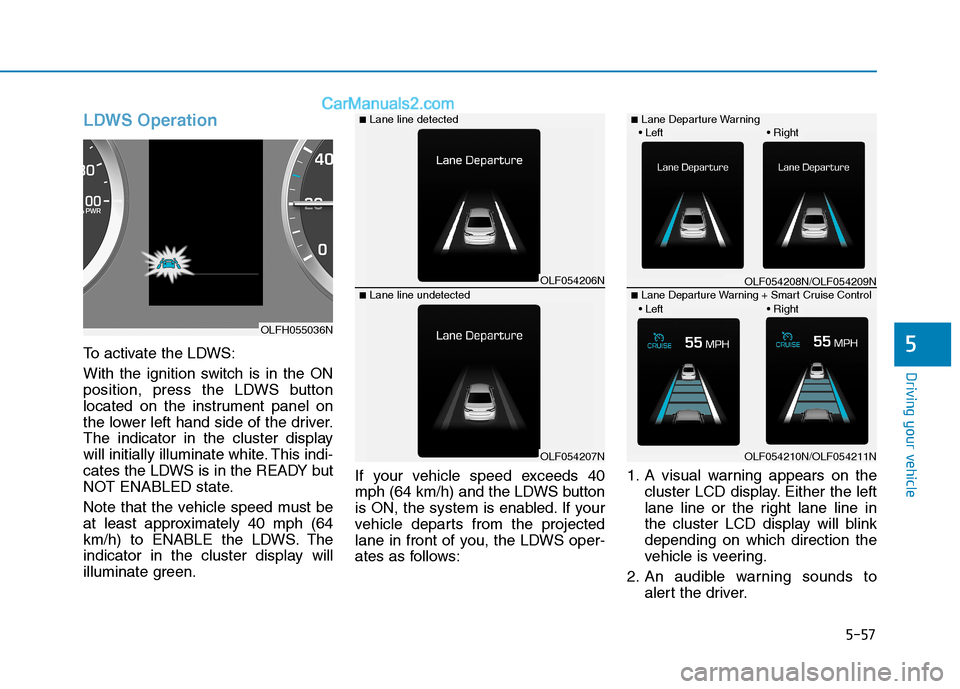
To activate the LDWS:
With the ignition switch is in the ON
position, press the LDWS button
located on the instrument panel on
the lower left hand side of the driver.
The indicator in the cluster display
will initially illuminate white. This indi-
cates the LDWS is in the READY but
NOT ENABLED state.
Note that the vehicle speed must be
at least approximately 40 mph (64
km/h) to ENABLE the LDWS. The
indicator in the cluster display will
illuminate green.If your vehicle speed exceeds 40
mph (64 km/h) and the LDWS button
is ON, the system is enabled. If your
vehicle departs from the projected
lane in front of you, the LDWS oper-
ates as follows:1. A visual warning appears on the
cluster LCD display. Either the left
lane line or the right lane line in
the cluster LCD display will blink
depending on which direction the
vehicle is veering.
2. An audible warning sounds to
alert the driver.5
OLF054206N
OLF054207N
■Lane line detected
■Lane line undetected
OLFH055036N
OLF054208N/OLF054209N
OLF054210N/OLF054211N
■Lane Departure Warning
■Lane Departure Warning + Smart Cruise Control
Page 516 of 685
5-68
Driving your vehicle
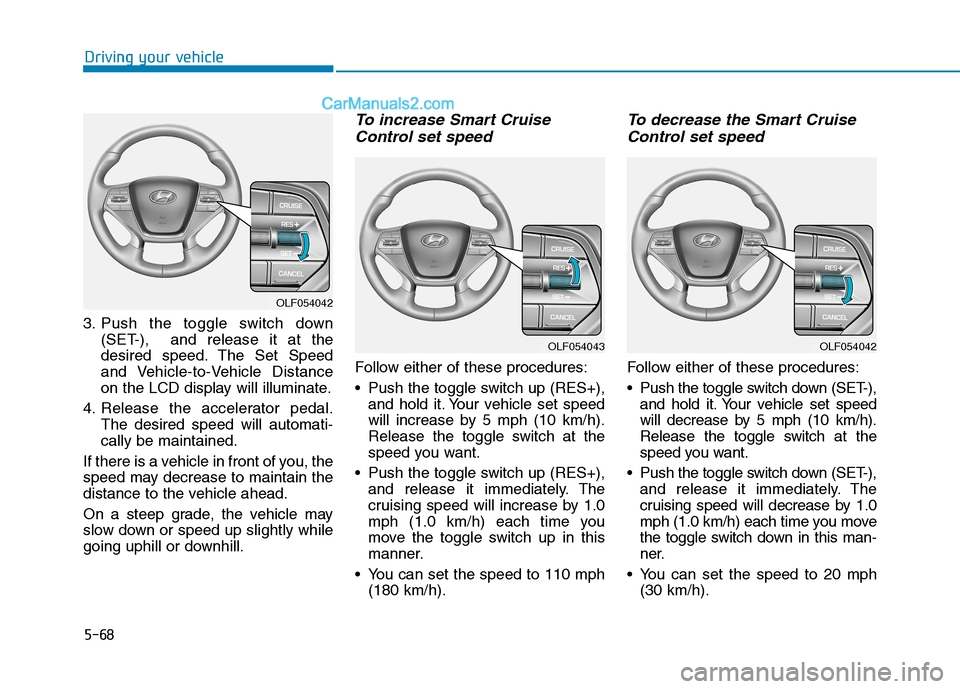
3. Push the toggle switch down
(SET-), and release it at the
desired speed. The Set Speed
and Vehicle-to-Vehicle Distance
on the LCD display will illuminate.
4. Release the accelerator pedal.
The desired speed will automati-
cally be maintained.
If there is a vehicle in front of you, the
speed may decrease to maintain the
distance to the vehicle ahead.
On a steep grade, the vehicle may
slow down or speed up slightly while
going uphill or downhill.
To increase Smart Cruise
Control set speed
Follow either of these procedures:
Push the toggle switch up (RES+),
and hold it. Your vehicle set speed
will increase by 5 mph (10 km/h).
Release the toggle switch at the
speed you want.
Push the toggle switch up (RES+),
and release it immediately. The
cruising speed will increase by 1.0
mph (1.0 km/h) each time you
move the toggle switch up in this
manner.
You can set the speed to 110 mph
(180 km/h).
To decrease the Smart Cruise
Control set speed
Follow either of these procedures:
Push the toggle switch down (SET-),
and hold it. Your vehicle set speed
will decrease by 5 mph (10 km/h).
Release the toggle switch at the
speed you want.
Push the toggle switch down (SET-),
and release it immediately. The
cruising speed will decrease by 1.0
mph (1.0 km/h) each time you move
the toggle switch down in this man-
ner.
You can set the speed to 20 mph
(30 km/h).
OLF054042
OLF054043OLF054042
Page 517 of 685
5-69
Driving your vehicle
5
To temporarily accelerate with
the Smart Cruise Control on
If you want to speed up temporarily
when the Smart Cruise Control is on,
depress the accelerator pedal.
Increased speed will not interfere
with Smart Cruise Control operation
or change the set speed.
To return to the set speed, take your
foot off the accelerator.
If you push the toggle switch down
(SET-) at increased speed, the cruis-
ing speed will be set again.
Smart Cruise Control will be
temporarily canceled when:
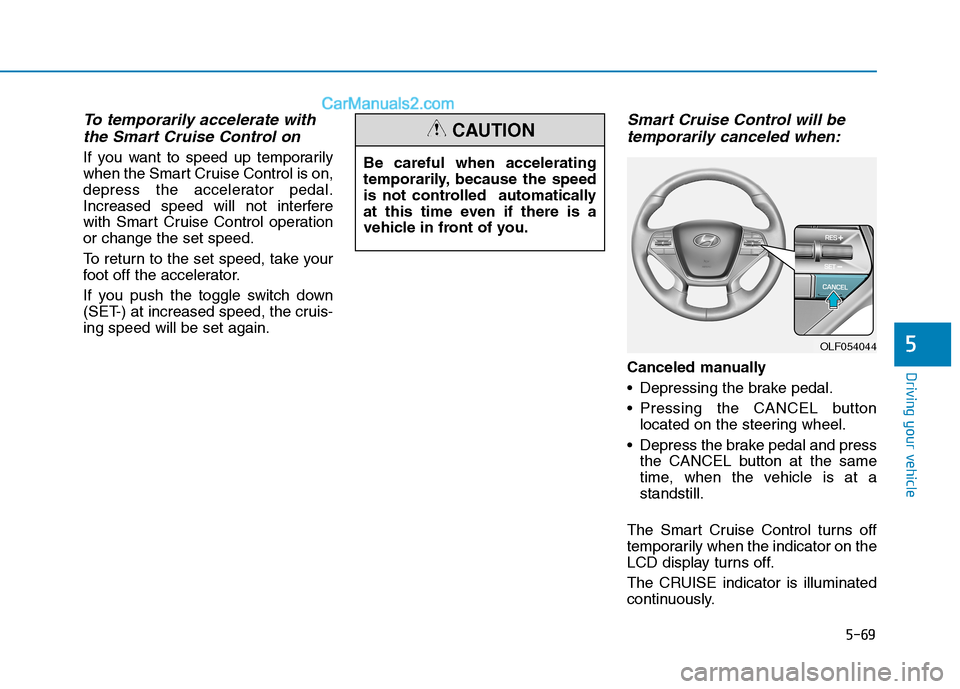
Canceled manually
Depressing the brake pedal.
Pressing the CANCEL button
located on the steering wheel.
Depress the brake pedal and press
the CANCEL button at the same
time, when the vehicle is at a
standstill.
The Smart Cruise Control turns off
temporarily when the indicator on the
LCD display turns off.
The CRUISE indicator is illuminated
continuously. Be careful when accelerating
temporarily, because the speed
is not controlled automatically
at this time even if there is a
vehicle in front of you.
CAUTION
OLF054044
Page 518 of 685
5-70
Driving your vehicle
Canceled automatically
The driver’s door is opened.
The shift lever is shifted to N
(Neutral), R (Reverse) or P (Park).
The EPB (Electronic Parking
Brake) is applied.
The vehicle speed is over 120 mph
(190 km/h)
The ESC (Electronic Stability
Control), TCS (Traction Control
System) or ABS is operating.
The ESC is turned off.
The radar or the cover is dirty or
blocked with foreign matter.
The SCC system has malfunc-
tioned.
When the vehicle is stopped for
more than 5 minutes.
The driver starts driving by pushing
the toggle switch up (RES +) or
down (SET -) or depressing the
accelerator pedal, approximately 3
seconds after the vehicle is
stopped by the Smart Cruise
Control System with no other vehi-
cle ahead. The driver starts driving by pushing
the toggle switch up (RES +) or
down (SET -) or depressing the
accelerator pedal, after stopping
the vehicle with a vehicle stopped
far away in front.
The accelerator pedal is continu-
ously depressed for more than one
minute.
Each of these actions will cancel
the Smart Cruise Control opera-
tion. (The Set Speed and Vehicle-
to-Vehicle Distance on the LCD
display will go off.)
In a condition the Smart Cruise
Control is canceled automatically,
the Smart Cruise Control will not
resume even though the RES+ or
SET- toggle switch is pushed. Also,
the EPB will be applied when the
vehicle is stopped.
If the Smart Cruise Control is can-
celed by other than the reasons
mentioned, have your vehicle
checked by an authorized HYUNDAI
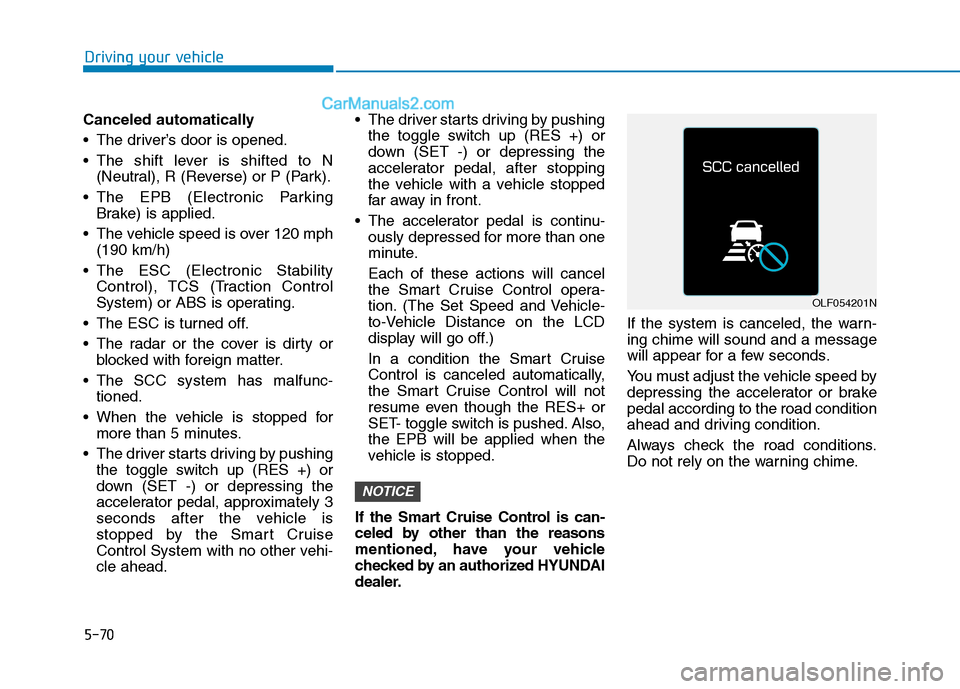
dealer.If the system is canceled, the warn-
ing chime will sound and a message
will appear for a few seconds.
You must adjust the vehicle speed by
depressing the accelerator or brake
pedal according to the road condition
ahead and driving condition.
Always check the road conditions.
Do not rely on the warning chime.
NOTICE
OLF054201N
Page 523 of 685
5-75
Driving your vehicle
5
Warning message
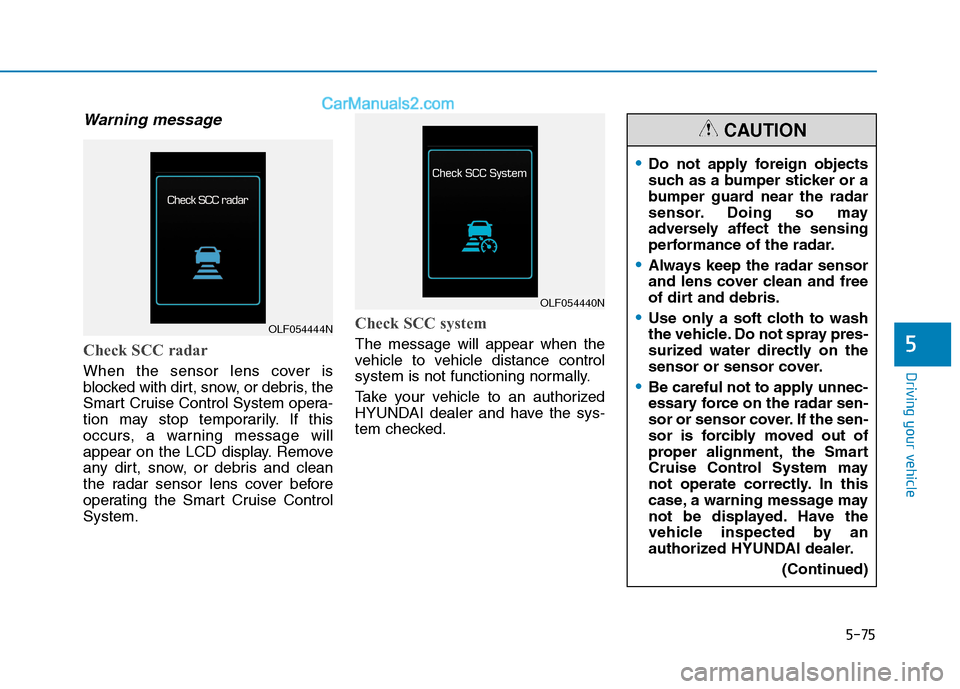
Check SCC radar
When the sensor lens cover is
blocked with dirt, snow, or debris, the
Smart Cruise Control System opera-
tion may stop temporarily. If this
occurs, a warning message will
appear on the LCD display. Remove
any dirt, snow, or debris and clean
the radar sensor lens cover before
operating the Smart Cruise Control
System.
Check SCC system
The message will appear when the
vehicle to vehicle distance control
system is not functioning normally.
Take your vehicle to an authorized
HYUNDAI dealer and have the sys-
tem checked.
OLF054444N
OLF054440N
Do not apply foreign objects
such as a bumper sticker or a
bumper guard near the radar
sensor. Doing so may
adversely affect the sensing
performance of the radar.
Always keep the radar sensor
and lens cover clean and free
of dirt and debris.
Use only a soft cloth to wash
the vehicle. Do not spray pres-
surized water directly on the
sensor or sensor cover.
Be careful not to apply unnec-
essary force on the radar sen-
sor or sensor cover. If the sen-
sor is forcibly moved out of
proper alignment, the Smart
Cruise Control System may
not operate correctly. In this
case, a warning message may
not be displayed. Have the
vehicle inspected by an
authorized HYUNDAI dealer.
(Continued)
CAUTION
Page 544 of 685
What to do in an emergency
6
Hazard warning flasher ........................................6-2
In case of an emergency while driving ..............6-2
If the vehicle stalls while driving...................................6-2
If the vehicle stalls at a crossroad or crossing .........6-2
If you have a flat tire while driving..............................6-3
If the vehicle will not start ...................................6-3
If the engine turns over normally but doesn't
start.....................................................................\
..................6-3
Jump starting ..........................................................6-4
If the engine overheats ........................................6-7
Tire pressure monitoring system (TPMS) ..........6-9
Check tire pressure...........................................................6-9
Tire Pressure Monitoring System ...............................6-10
Low tire pressure indicator ..........................................6-11
Low tire pressure LCD display with position
indicator........................................................................\
.....6-11
TPMS Malfunction Indicator ........................................6-12
Changing a Tire with TPMS..........................................6-13
If you have a flat tire..........................................6-15 Towing ...................................................................6-22
Towing service .................................................................6-22
Removable towing hook ................................................6-23
Emergency Towing..........................................................6-24
If an accident occurs...........................................6-26
Page 552 of 685
6-9
What to do in an emergency
6
T TI
IR
RE
E
P
PR
RE
ES
SS
SU
UR
RE
E
M
MO
ON
NI
IT
TO
OR
RI
IN
NG
G
S
SY
YS
ST
TE
EM
M
(
(T
TP
PM
MS
S)
)
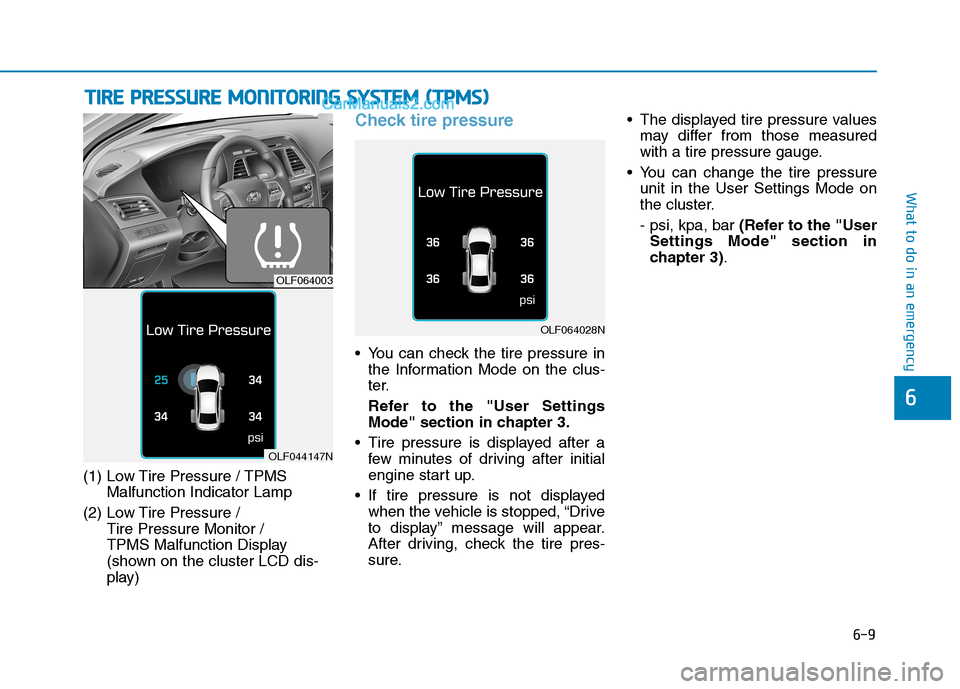
(1) Low Tire Pressure / TPMS
Malfunction Indicator Lamp
(2) Low Tire Pressure /
Tire Pressure Monitor /
TPMS Malfunction Display
(shown on the cluster LCD dis-
play)
Check tire pressure
You can check the tire pressure in
the Information Mode on the clus-
ter.
Refer to the "User Settings
Mode" section in chapter 3.
Tire pressure is displayed after a
few minutes of driving after initial
engine start up.
If tire pressure is not displayed
when the vehicle is stopped, “Drive
to display” message will appear.
After driving, check the tire pres-
sure. The displayed tire pressure values
may differ from those measured
with a tire pressure gauge.
You can change the tire pressure
unit in the User Settings Mode on
the cluster.
- psi, kpa, bar (Refer to the "User
Settings Mode" section in
chapter 3).
OLF064003
OLF044147N
OLF064028N
Page 553 of 685
6-10
What to do in an emergency
Tire Pressure Monitoring
System
Each tire, including the spare (if pro-
vided), should be checked monthly
when cold and inflated to the inflation
pressure recommended by the vehi-
cle manufacturer on the vehicle plac-
ard or tire inflation pressure label. (If
your vehicle has tires of a different
size than the size indicated on the
vehicle placard or tire inflation pres-
sure label, you should determine the
proper tire inflation pressure for
those tires.)As an added safety feature, your
vehicle is equipped with a tire pres-
sure monitoring system (TPMS) with
LCD display that monitors continu-
ously the individual tire pressures of
each tire and illuminates when one
or more of your tires is significantly
under-inflated. When the LCD dis-
play indicates that one of your tires is
under-inflated, you should stop and
check your tires as soon as possible,
and inflate them to the proper pres-
sure. Driving on a significantly under-
inflated tire causes the tire to over-
heat and can lead to tire failure.
Under-inflation also reduces fuel effi-
ciency and tire tread life, and may
affect the vehicle’s handling and
stopping ability.
Please note that the TPMS is not a
substitute for proper tire mainte-
nance, and it is the driver’s responsi-
bility to maintain correct tire pres-
sure, even if under-inflation has not
reached the level to trigger illumina-
tion of the TPMS low tire pressure
LCD display.Your vehicle has also been equipped
with a TPMS malfunction indicator
that will illuminate when the system
is not operating properly. The TPMS
malfunction indicator is combined
with the low tire pressure LCD dis-
play. When the system detects a mal-
function, the indicator lamp will flash
for approximately one minute and
then remain continuously illuminat-
ed. This sequence will continue upon
subsequent vehicle start-ups as long
as the malfunction exists.
When the malfunction indicator is
illuminated, the system may not be
able to detect or signal low tire pres-
sure as intended. TPMS malfunc-
tions may occur for a variety of rea-
sons, including the installation of
replacement or alternate tires or
wheels on the vehicle that prevent
the TPMS from functioning properly.
Always check the TPMS malfunction
LCD display after replacing one or
more tires or wheels on your vehicle
to ensure that the replacement or
alternate tires and wheels allow the
TPMS to continue to function proper-
ly. Over-inflation or under-inflation
can reduce tire life, adversely
affect vehicle handling, and
lead to sudden tire failure that
may cause loss of vehicle con-
trol resulting in an accident.
WARNING