display Hyundai Terracan 2005 Owner's Manual
[x] Cancel search | Manufacturer: HYUNDAI, Model Year: 2005, Model line: Terracan, Model: Hyundai Terracan 2005Pages: 539, PDF Size: 18.03 MB
Page 82 of 539
1FEATURES OF YOUR HYUNDAI
68
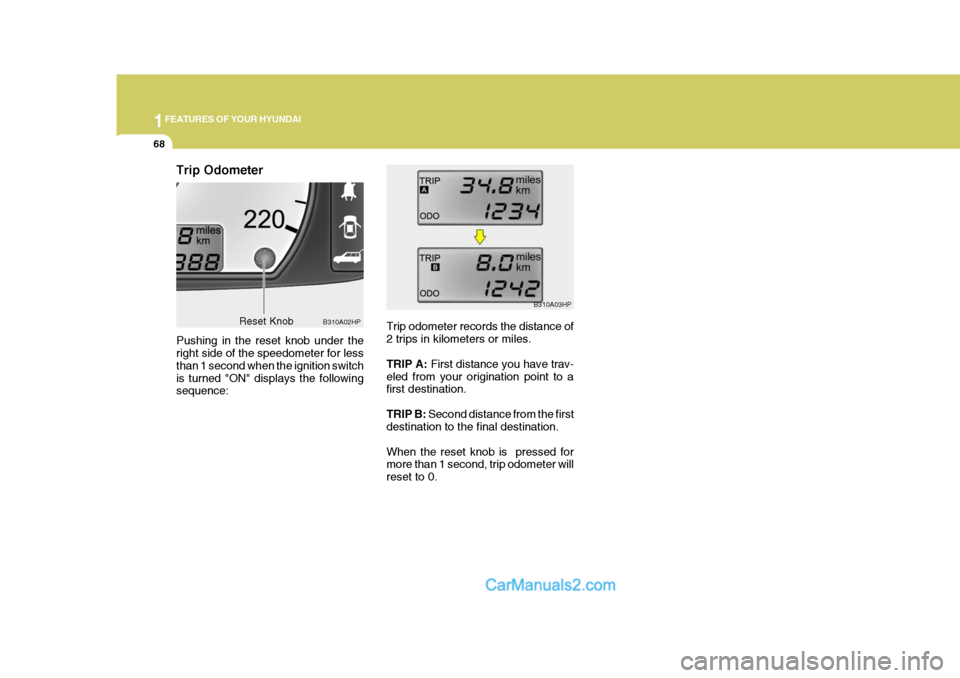
Trip odometer records the distance of 2 trips in kilometers or miles. TRIP A:
First distance you have trav-
eled from your origination point to a first destination. TRIP B: Second distance from the first
destination to the final destination.When the reset knob is pressed for more than 1 second, trip odometer will reset to 0. B310A03HPB310A02HP
Trip Odometer Pushing in the reset knob under the right side of the speedometer for less than 1 second when the ignition switchis turned "ON" displays the following sequence:
Reset Knob
Page 83 of 539
1
FEATURES OF YOUR HYUNDAI
69MULTIMETER
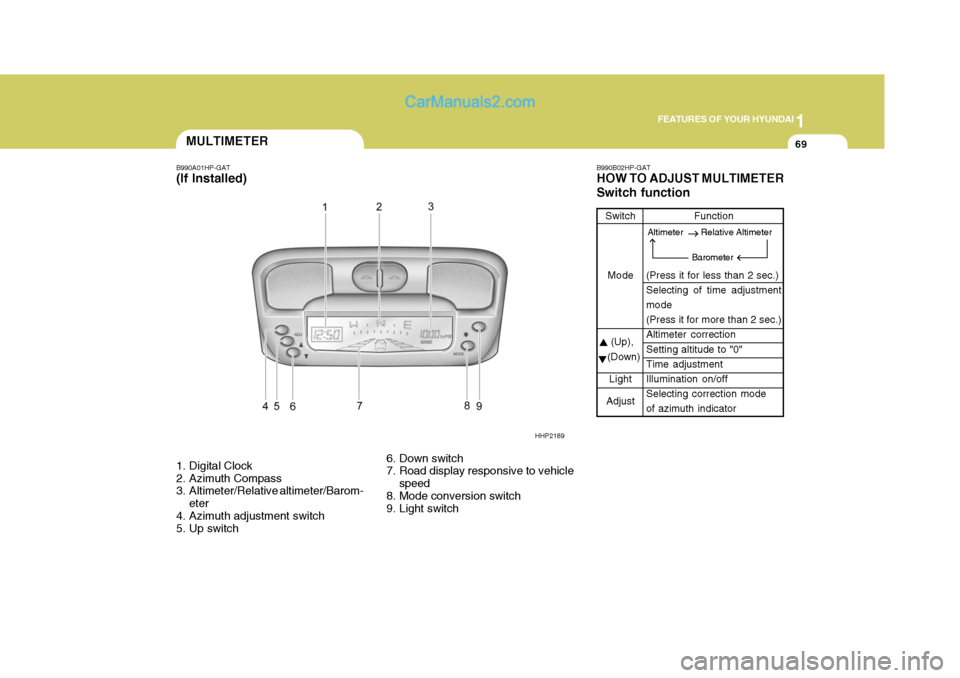
B990A01HP-GAT (If Installed)
1. Digital Clock
2. Azimuth Compass
3. Altimeter/Relative altimeter/Barom-
eter
4. Azimuth adjustment switch
5. Up switch 6. Down switch
7. Road display responsive to vehicle
speed
8. Mode conversion switch
9. Light switch B990B02HP-GAT HOW TO ADJUST MULTIMETER Switch function
Switch
Mode
(Up),
(Down)
Light
Adjust Function
(Press it for less than 2 sec.) Selecting of time adjustment mode (Press it for more than 2 sec.)Altimeter correction Setting altitude to "0" Time adjustmentIllumination on/off Selecting correction mode of azimuth indicator
HHP2189
Altimeter Relative Altimeter
Barometer
Page 84 of 539
1FEATURES OF YOUR HYUNDAI
70
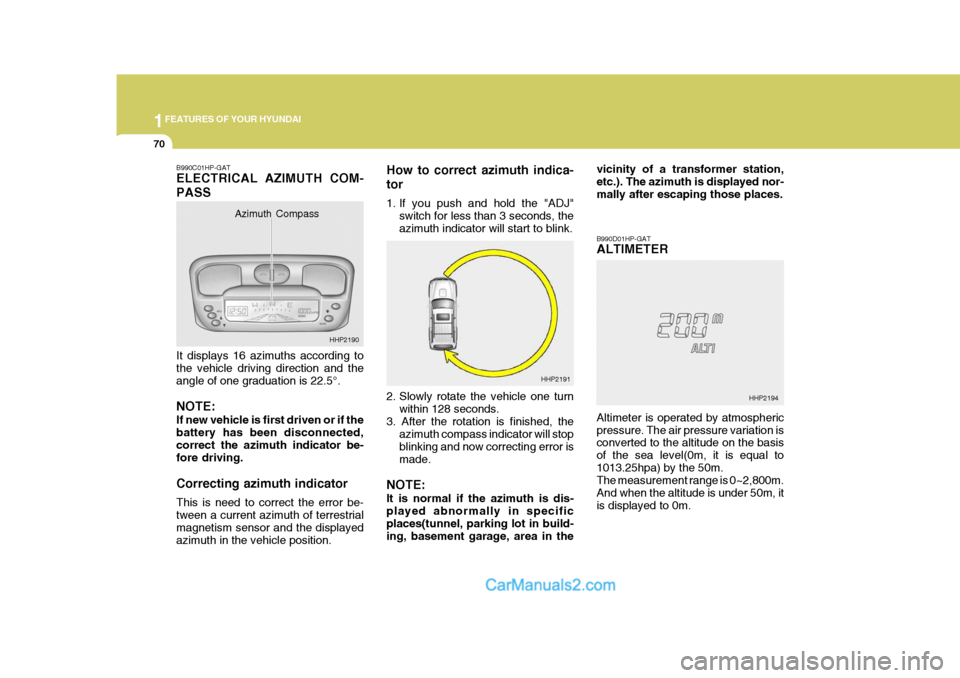
B990C01HP-GAT ELECTRICAL AZIMUTH COM- PASS It displays 16 azimuths according to the vehicle driving direction and theangle of one graduation is 22.5°. NOTE: If new vehicle is first driven or if the battery has been disconnected, correct the azimuth indicator be- fore driving. Correcting azimuth indicator This is need to correct the error be- tween a current azimuth of terrestrialmagnetism sensor and the displayed azimuth in the vehicle position. How to correct azimuth indica- tor
1. If you push and hold the "ADJ"
switch for less than 3 seconds, the azimuth indicator will start to blink.
2. Slowly rotate the vehicle one turn within 128 seconds.
3. After the rotation is finished, the azimuth compass indicator will stopblinking and now correcting error ismade.
NOTE: It is normal if the azimuth is dis- played abnormally in specificplaces(tunnel, parking lot in build- ing, basement garage, area in the B990D01HP-GAT ALTIMETER Altimeter is operated by atmospheric pressure. The air pressure variation is converted to the altitude on the basis of the sea level(0m, it is equal to1013.25hpa) by the 50m. The measurement range is 0~2,800m. And when the altitude is under 50m, itis displayed to 0m.
Azimuth Compass
HHP2191vicinity of a transformer station,etc.). The azimuth is displayed nor-mally after escaping those places.
HHP2194
HHP2190
Page 85 of 539
1
FEATURES OF YOUR HYUNDAI
71
Altitude Correction Displayed altitude could vary even at same place because of air pressurevariation at sea level(0m point). So you can correct this display error in ±300m range by pushing " (up)", " (down)"as listed in following table.
Altitude Increasing by 50m Increasing by 50m graduallyDecreasing by 50mDecreasing by 50m gradually
Switch
(Up)
(Down) Pushing time
Less than 0.5 sec.
More than 0.5 sec.
Less than 0.5 sec.
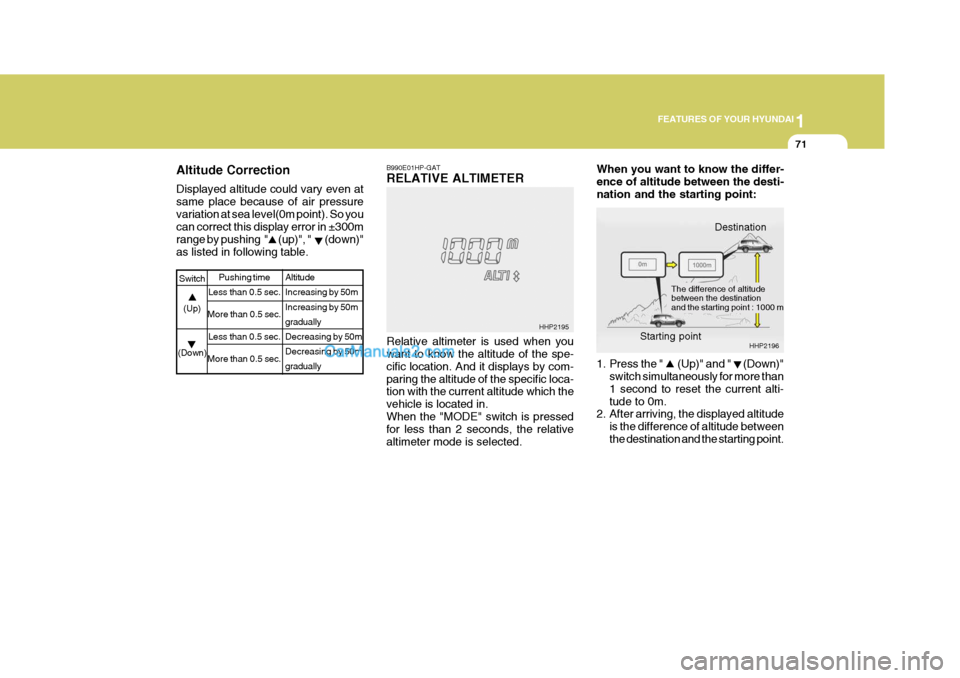
More than 0.5 sec.B990E01HP-GAT RELATIVE ALTIMETER Relative altimeter is used when you want to know the altitude of the spe- cific location. And it displays by com-paring the altitude of the specific loca- tion with the current altitude which the vehicle is located in.When the "MODE" switch is pressed for less than 2 seconds, the relative altimeter mode is selected. 1. Press the " (Up)" and " (Down)"
switch simultaneously for more than1 second to reset the current alti-tude to 0m.
2. After arriving, the displayed altitude
is the difference of altitude betweenthe destination and the starting point.
HHP2195 When you want to know the differ- ence of altitude between the desti-nation and the starting point:
HHP2196
Destination
Starting point
The difference of altitude between the destinationand the starting point : 1000 m
Page 86 of 539
1FEATURES OF YOUR HYUNDAI
72
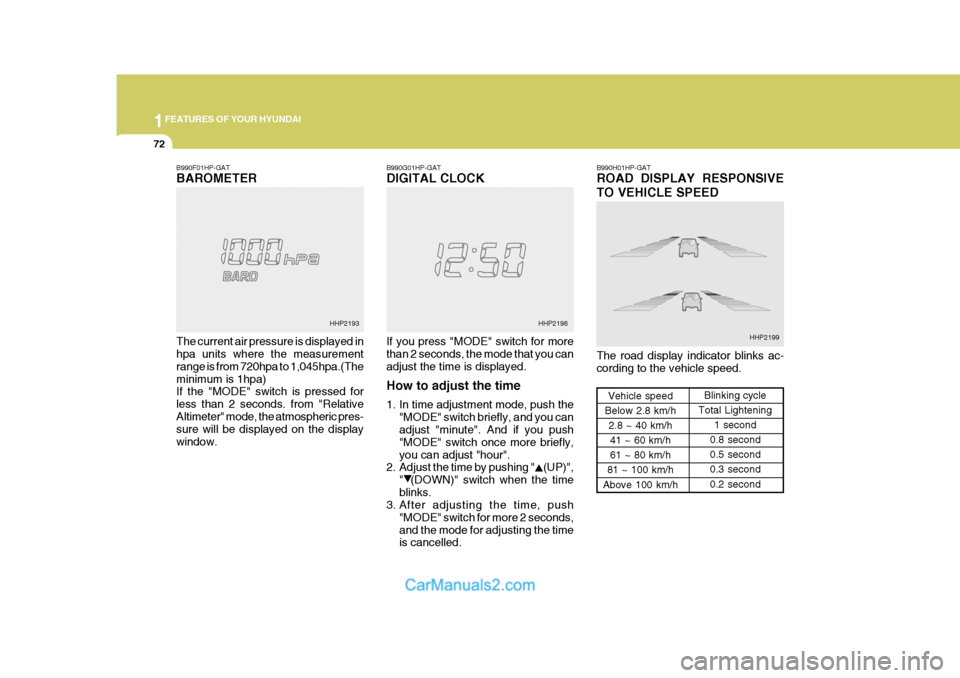
B990F01HP-GAT BAROMETER The current air pressure is displayed in hpa units where the measurement range is from 720hpa to 1,045hpa.(Theminimum is 1hpa) If the "MODE" switch is pressed for less than 2 seconds. from "RelativeAltimeter" mode, the atmospheric pres- sure will be displayed on the display window. B990G01HP-GAT DIGITAL CLOCK If you press "MODE" switch for more than 2 seconds, the mode that you can adjust the time is displayed. How to adjust the time
1. In time adjustment mode, push the
"MODE" switch briefly, and you can adjust "minute". And if you push "MODE" switch once more briefly,you can adjust "hour".
2. Adjust the time by pushing " (UP)",
" (DOWN)" switch when the timeblinks.
3. After adjusting the time, push
"MODE" switch for more 2 seconds,and the mode for adjusting the time is cancelled. B990H01HP-GAT ROAD DISPLAY RESPONSIVE TO VEHICLE SPEED The road display indicator blinks ac- cording to the vehicle speed.
Vehicle speed
Below 2.8 km/h 2.8 ~ 40 km/h
41 ~ 60 km/h 61 ~ 80 km/h
81 ~ 100 km/h
Above 100 km/h Blinking cycle
Total Lightening
1 second
0.8 second0.5 second0.3 second 0.2 second
HHP2193 HHP2198
HHP2199
Page 93 of 539
1
FEATURES OF YOUR HYUNDAI
79INSTRUMENT PANEL LIGHT CONTROL (RHEOSTAT)DIGITAL CLOCK
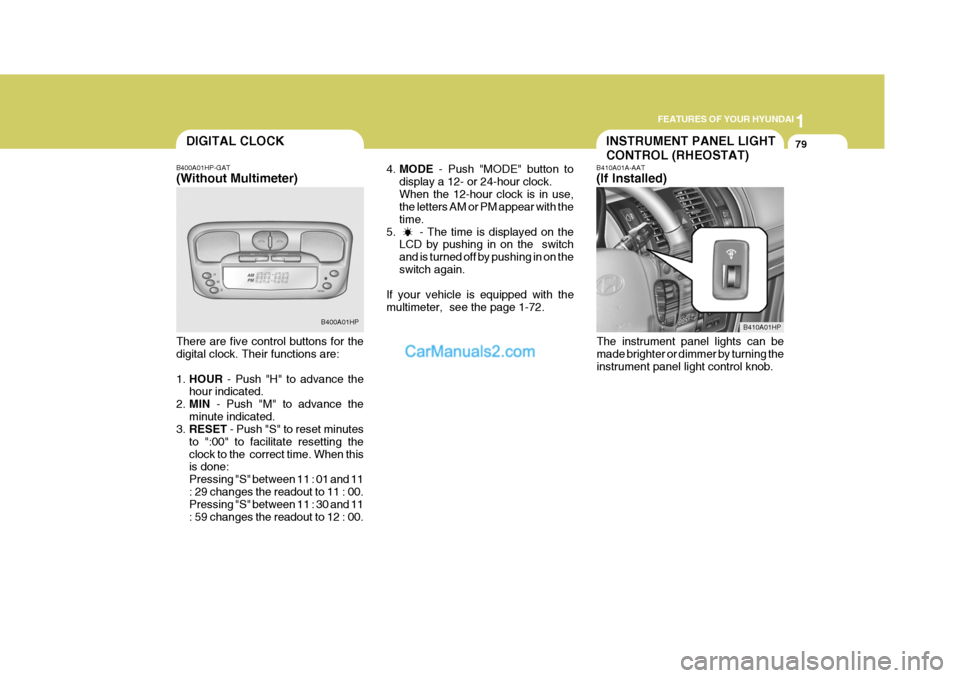
B400A01HP-GAT (Without Multimeter) There are five control buttons for the digital clock. Their functions are: 1. HOUR - Push "H" to advance the
hour indicated.
2. MIN - Push "M" to advance the
minute indicated.
3. RESET - Push "S" to reset minutes
to ":00" to facilitate resetting the clock to the correct time. When this is done: Pressing "S" between 11 : 01 and 11: 29 changes the readout to 11 : 00. Pressing "S" between 11 : 30 and 11 : 59 changes the readout to 12 : 00. B400A01HP
4.
MODE - Push "MODE" button to
display a 12- or 24-hour clock.When the 12-hour clock is in use, the letters AM or PM appear with the time.
5. - The time is displayed on the LCD by pushing in on the switchand is turned off by pushing in on theswitch again.
If your vehicle is equipped with themultimeter, see the page 1-72. B410A01A-AAT (If Installed)
The instrument panel lights can be made brighter or dimmer by turning the instrument panel light control knob.
B410A01HP
Page 126 of 539
1FEATURES OF YOUR HYUNDAI
112AUTOMATIC HEATING AND COOLING CONTROL SYSTEM
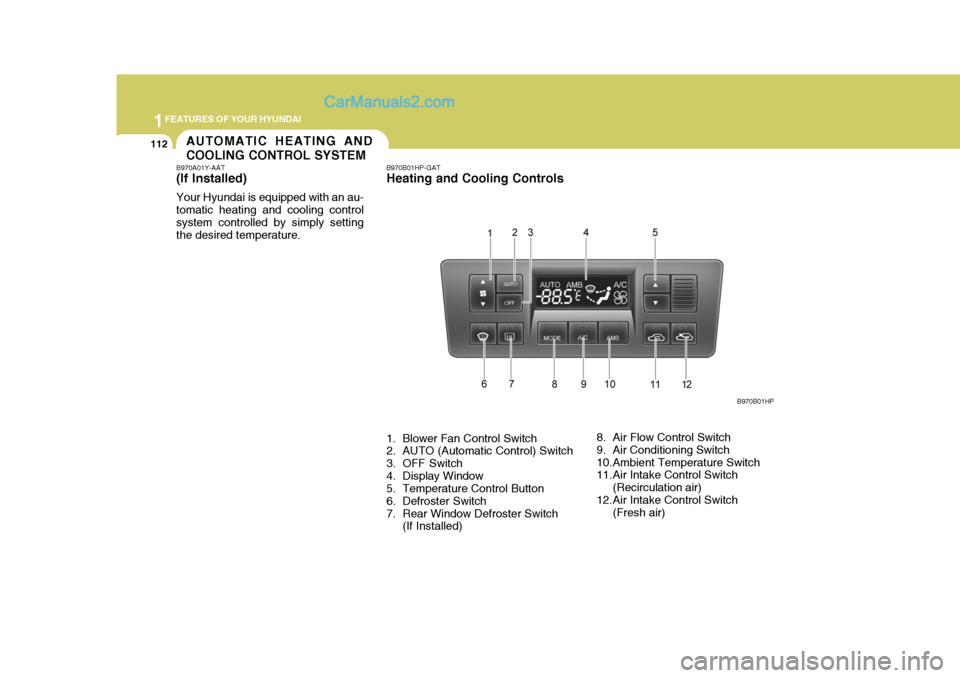
B970A01Y-AAT (If lnstalled) Your Hyundai is equipped with an au- tomatic heating and cooling controlsystem controlled by simply setting the desired temperature. B970B01HP-GAT Heating and Cooling Controls
1. Blower Fan Control Switch
2. AUTO (Automatic Control) Switch
3. OFF Switch
4. Display Window
5. Temperature Control Button
6. Defroster Switch
7. Rear Window Defroster Switch
(If Installed) 8. Air Flow Control Switch
9. Air Conditioning Switch
10.Ambient Temperature Switch
11.Air Intake Control Switch
(Recirculation air)
12.Air Intake Control Switch (Fresh air) B970B01HP
Page 127 of 539
1
FEATURES OF YOUR HYUNDAI
113
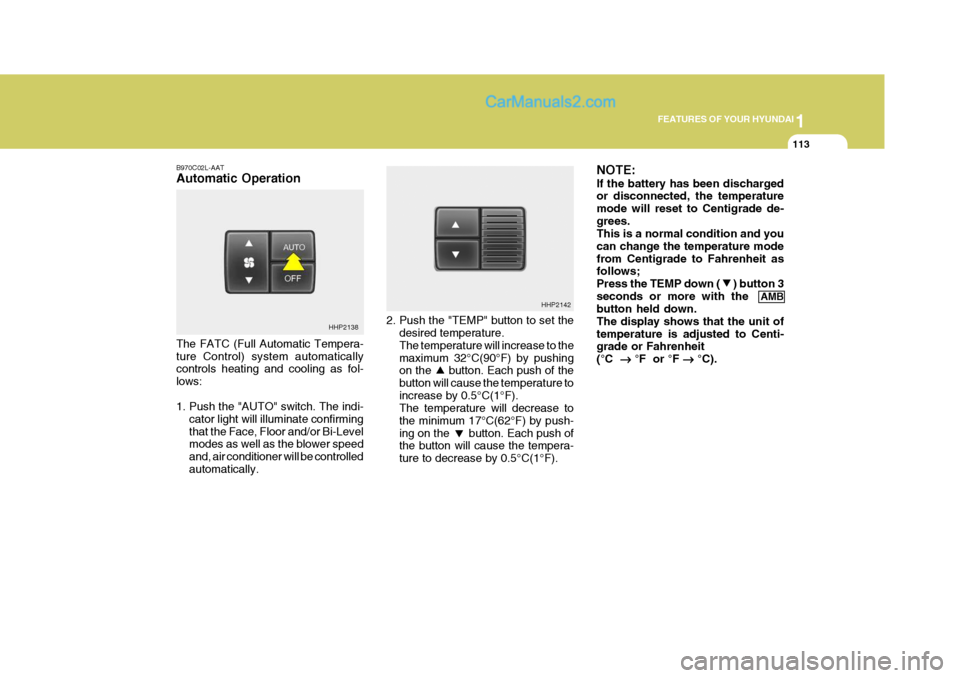
B970C02L-AAT Automatic Operation The FATC (Full Automatic Tempera- ture Control) system automatically controls heating and cooling as fol- lows:
1. Push the "AUTO" switch. The indi-
cator light will illuminate confirming that the Face, Floor and/or Bi-Level modes as well as the blower speed and, air conditioner will be controlledautomatically. 2. Push the "TEMP" button to set the
desired temperature. The temperature will increase to the maximum 32°C(90°F) by pushing on the button. Each push of the button will cause the temperature toincrease by 0.5°C(1°F). The temperature will decrease to the minimum 17°C(62°F) by push-ing on the button. Each push of the button will cause the tempera- ture to decrease by 0.5°C(1°F). NOTE: If the battery has been discharged or disconnected, the temperature mode will reset to Centigrade de-grees. This is a normal condition and you can change the temperature modefrom Centigrade to Fahrenheit as follows; Press the TEMP down ( ) button 3seconds or more with the
AMB
button held down.The display shows that the unit oftemperature is adjusted to Centi- grade or Fahrenheit (°C ��
��
� °F or °F
��
��
� °C).
HHP2138 HHP2142
Page 128 of 539
1FEATURES OF YOUR HYUNDAI
114
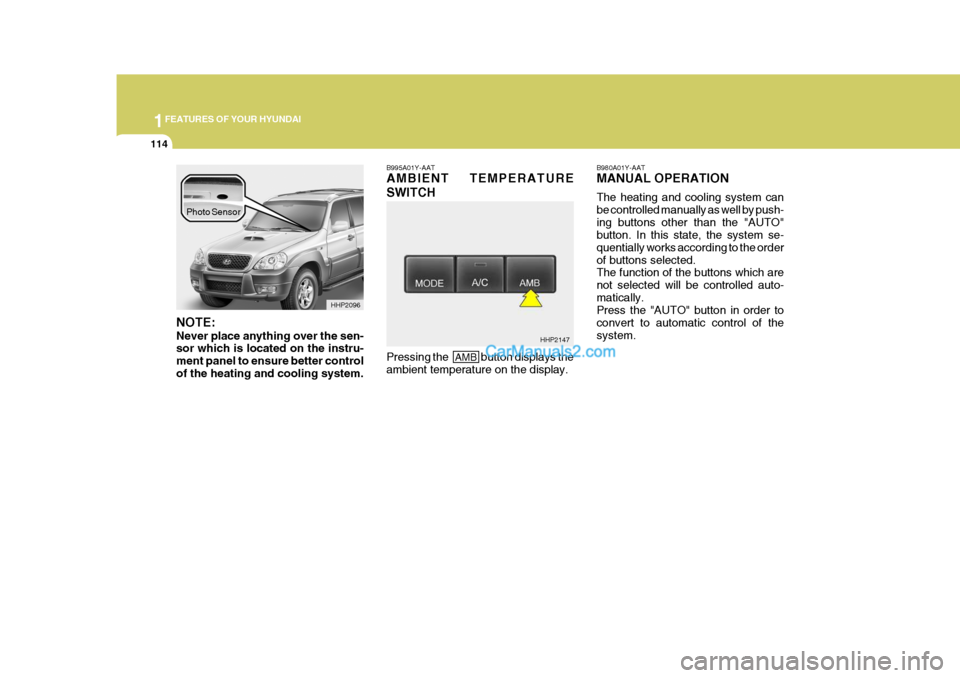
NOTE: Never place anything over the sen- sor which is located on the instru- ment panel to ensure better controlof the heating and cooling system. B995A01Y-AAT AMBIENT TEMPERATURE SWITCH
B980A01Y-AAT MANUAL OPERATION The heating and cooling system can be controlled manually as well by push-ing buttons other than the "AUTO" button. In this state, the system se- quentially works according to the orderof buttons selected. The function of the buttons which are not selected will be controlled auto-matically. Press the "AUTO" button in order to convert to automatic control of thesystem.
HHP2096
Pressing the
AMB button displays the
ambient temperature on the display. HHP2147
Photo Sensor
Page 136 of 539
1FEATURES OF YOUR HYUNDAI
122
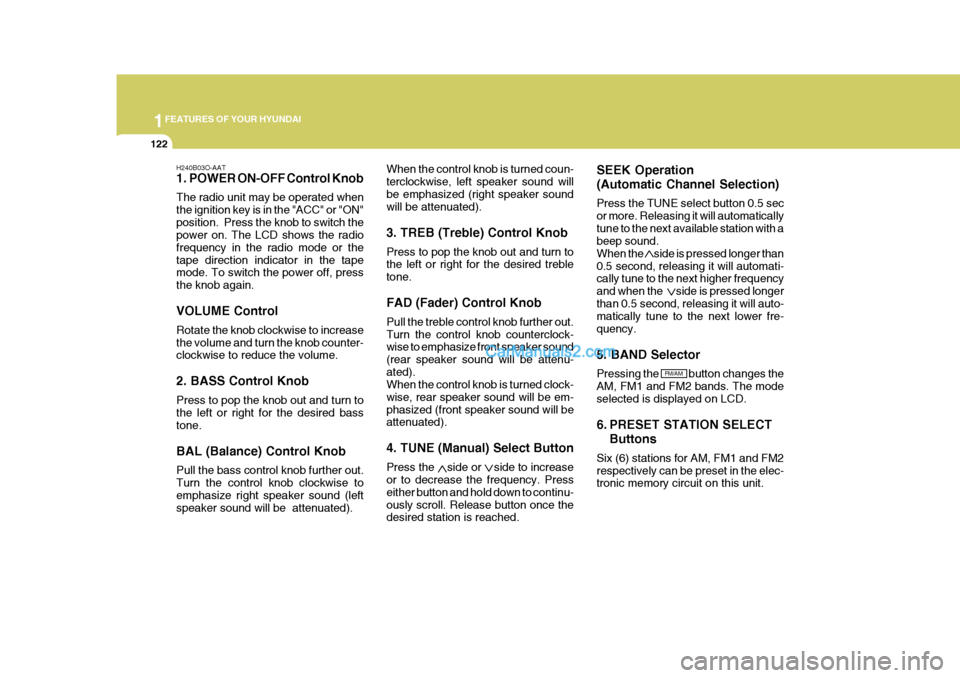
H240B03O-AAT
1. POWER ON-OFF Control Knob The radio unit may be operated when the ignition key is in the "ACC" or "ON"position. Press the knob to switch the power on. The LCD shows the radio frequency in the radio mode or thetape direction indicator in the tape mode. To switch the power off, press the knob again. VOLUME Control Rotate the knob clockwise to increase the volume and turn the knob counter- clockwise to reduce the volume. 2. BASS Control Knob Press to pop the knob out and turn to the left or right for the desired bass tone. BAL (Balance) Control Knob Pull the bass control knob further out. Turn the control knob clockwise to emphasize right speaker sound (left speaker sound will be attenuated). When the control knob is turned coun-terclockwise, left speaker sound willbe emphasized (right speaker sound will be attenuated). 3. TREB (Treble) Control Knob Press to pop the knob out and turn to the left or right for the desired treble tone. FAD (Fader) Control Knob Pull the treble control knob further out. Turn the control knob counterclock- wise to emphasize front speaker sound (rear speaker sound will be attenu-ated). When the control knob is turned clock- wise, rear speaker sound will be em-phasized (front speaker sound will be attenuated). 4. TUNE (Manual) Select Button Press the side or side to increase or to decrease the frequency. Press either button and hold down to continu-ously scroll. Release button once the desired station is reached. SEEK Operation (Automatic Channel Selection) Press the TUNE select button 0.5 sec or more. Releasing it will automaticallytune to the next available station with a beep sound. When the side is pressed longer than0.5 second, releasing it will automati- cally tune to the next higher frequency and when the side is pressed longerthan 0.5 second, releasing it will auto- matically tune to the next lower fre- quency. 5. BAND Selector Pressing the button changes the AM, FM1 and FM2 bands. The modeselected is displayed on LCD.
6. PRESET STATION SELECT
Buttons
Six (6) stations for AM, FM1 and FM2 respectively can be preset in the elec- tronic memory circuit on this unit.
FM/AM