ECO mode Hyundai Tiburon 2003 Owner's Manual
[x] Cancel search | Manufacturer: HYUNDAI, Model Year: 2003, Model line: Tiburon, Model: Hyundai Tiburon 2003Pages: 169, PDF Size: 3.04 MB
Page 10 of 169
FEATURES OF YOUR HYUNDAI
1- 2
B020A01S-AAT
BREAKING IN YOUR NEW HYUNDAI
During the First 1,200 Miles (2,000
Km)
No formal “break-in” procedure is required with
your new Hyundai. However, you can contrib-
ute to the economical operation and durability of
your Hyundai by observing the following recom-
mendations during the first 1,200 miles (2,000
km).
o Don't drive faster than 55 MPH (88 km/h).
o While driving, keep your engine speed (rpm,
or revolutions per minute) between 2,000
rpm and 4,000 rpm.
o Use moderate acceleration. Don't start quick-
ly or depress the accelerator pedal fully.
o For the first 200 miles (300 km), try to avoid
hard stops.
o Don't lug the engine (in other words, don't
drive so slowly in too high a gear that the
engine "bucks"-shift to a lower gear).
o Whether going fast or slow, vary your speed
from time to time.
o Don't let the engine idle longer than 3 min-
utes at one time.
o Don't tow a trailer during the first 1,200 miles
(2,000 km) of operation.
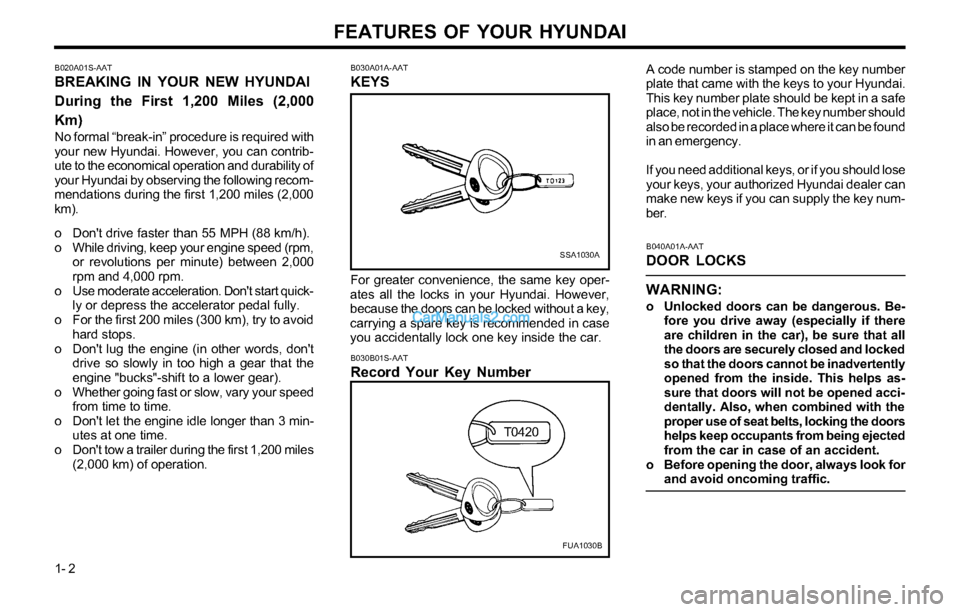
B030B01S-AAT
Record Your Key Number
A code number is stamped on the key number
plate that came with the keys to your Hyundai.
This key number plate should be kept in a safe
place, not in the vehicle. The key number should
also be recorded in a place where it can be found
in an emergency.
If you need additional keys, or if you should lose
your keys, your authorized Hyundai dealer can
make new keys if you can supply the key num-
ber.
B040A01A-AAT
DOOR LOCKS
WARNING:
o Unlocked doors can be dangerous. Be-
fore you drive away (especially if there
are children in the car), be sure that all
the doors are securely closed and locked
so that the doors cannot be inadvertently
opened from the inside. This helps as-
sure that doors will not be opened acci-
dentally. Also, when combined with the
proper use of seat belts, locking the doors
helps keep occupants from being ejected
from the car in case of an accident.
o Before opening the door, always look for
and avoid oncoming traffic.
B030A01A-AAT
KEYS
SSA1030A
For greater convenience, the same key oper-
ates all the locks in your Hyundai. However,
because the doors can be locked without a key,
carrying a spare key is recommended in case
you accidentally lock one key inside the car.
FUA1030B
T0420
Page 21 of 169
FEATURES OF YOUR HYUNDAI
1- 13 belt is adjusted manually so that it fits snugly
around your hips. When the seat belt is fully
extended from the retractor to allow the instal-
lation of a child restraint system, the seat belt
operation changes to allow the belt to retract,
but not to extend. (Automatic Locking Retractor
Type)
NOTE:Although the combination retractor provides
the same level of protection for seated pas-
sengers in either emergency or automatic
locking modes, it is recommended that
seated passengers use the emergency lock-
ing feature for improved convenience. The
automatic locking function is intended to
facilitate child restraint installation. To con-
vert from the automatic locking feature to
the emergency locking operation mode, al-
low the unbuckled seat belt to fully retract.
WARNING:o For maximum restraint system protec-
tion, seat belts must always be used
whenever the car is moving.
o Seat belts are most effective when
seatbacks are in the upright position.
o Children must always be seatbelted in
the rear seats. Never allow children to
ride in the front passenger seat.
o The shoulder belt should be positioned
midway over the shoulder nearest the
door for the most effective protection.
Never wear the seat belt under the arm
nearest the door. Wearing the belt under
the arm nearest the door could cause
serious or fatal injuries in an accident.
o Avoid wearing twisted seat belts. A twist-
ed belt can't do its job as well. In a
collision, it could even cut into you. Be
sure the belt is straight and not twisted.
o Be careful not to damage the belt web-
bing or hardware. If the belt webbing or
hardware is damaged, replace it.
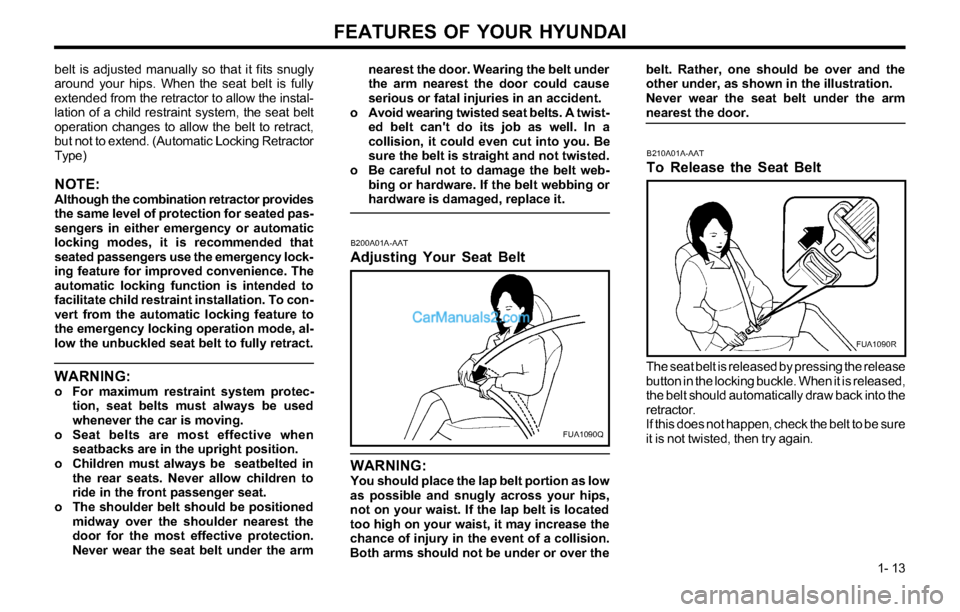
WARNING:You should place the lap belt portion as low
as possible and snugly across your hips,
not on your waist. If the lap belt is located
too high on your waist, it may increase the
chance of injury in the event of a collision.
Both arms should not be under or over the
B200A01A-AAT
Adjusting Your Seat Belt
FUA1090Q
B210A01A-AAT
To Release the Seat Belt
The seat belt is released by pressing the release
button in the locking buckle. When it is released,
the belt should automatically draw back into the
retractor.
If this does not happen, check the belt to be sure
it is not twisted, then try again.
FUA1090R
belt. Rather, one should be over and the
other under, as shown in the illustration.
Never wear the seat belt under the arm
nearest the door.
Page 23 of 169
FEATURES OF YOUR HYUNDAI
1- 15
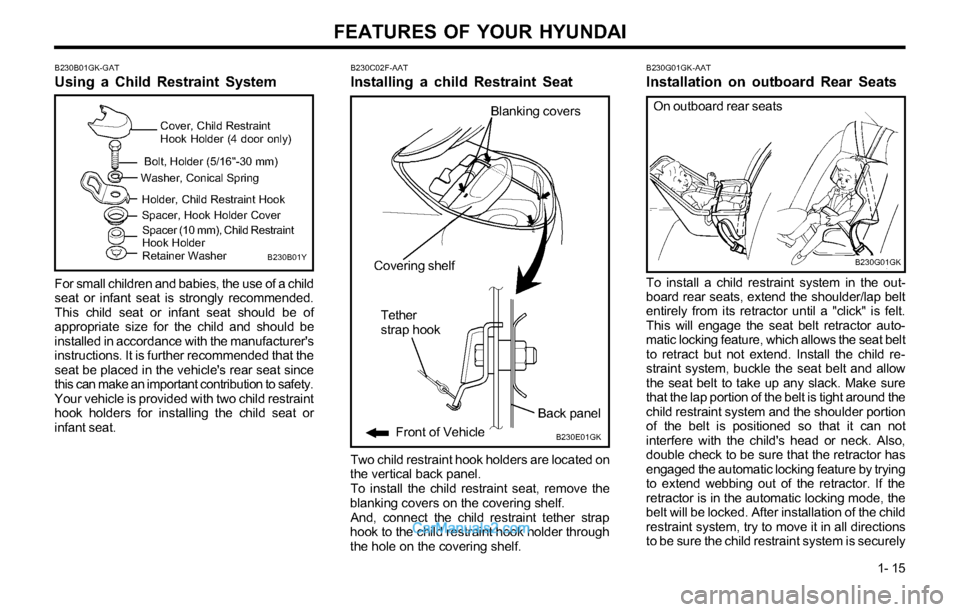
B230B01GK-GAT
Using a Child Restraint System
For small children and babies, the use of a child
seat or infant seat is strongly recommended.
This child seat or infant seat should be of
appropriate size for the child and should be
installed in accordance with the manufacturer's
instructions. It is further recommended that the
seat be placed in the vehicle's rear seat since
this can make an important contribution to safety.
Your vehicle is provided with two child restraint
hook holders for installing the child seat or
infant seat.
B230B01Y
Cover, Child Restraint
Hook Holder (4 door only)
Bolt, Holder (5/16"-30 mm)
Washer, Conical Spring
Holder, Child Restraint Hook
Spacer (10 mm), Child Restraint
Hook Holder
Retainer Washer Spacer, Hook Holder Cover
B230C02F-AAT
Installing a child Restraint Seat
Two child restraint hook holders are located on
the vertical back panel.
To install the child restraint seat, remove the
blanking covers on the covering shelf.
And, connect the child restraint tether strap
hook to the child restraint hook holder through
the hole on the covering shelf.
B230E01GK
Covering shelf
Back panel
Front of Vehicle
Tether
strap hook
Blanking covers
To install a child restraint system in the out-
board rear seats, extend the shoulder/lap belt
entirely from its retractor until a "click" is felt.
This will engage the seat belt retractor auto-
matic locking feature, which allows the seat belt
to retract but not extend. Install the child re-
straint system, buckle the seat belt and allow
the seat belt to take up any slack. Make sure
that the lap portion of the belt is tight around the
child restraint system and the shoulder portion
of the belt is positioned so that it can not
interfere with the child's head or neck. Also,
double check to be sure that the retractor has
engaged the automatic locking feature by trying
to extend webbing out of the retractor. If the
retractor is in the automatic locking mode, the
belt will be locked. After installation of the child
restraint system, try to move it in all directions
to be sure the child restraint system is securely
B230G01GK-AAT
Installation on outboard Rear Seats
B230G01GK
On outboard rear seats
Page 56 of 169
FEATURES OF YOUR HYUNDAI
1- 48
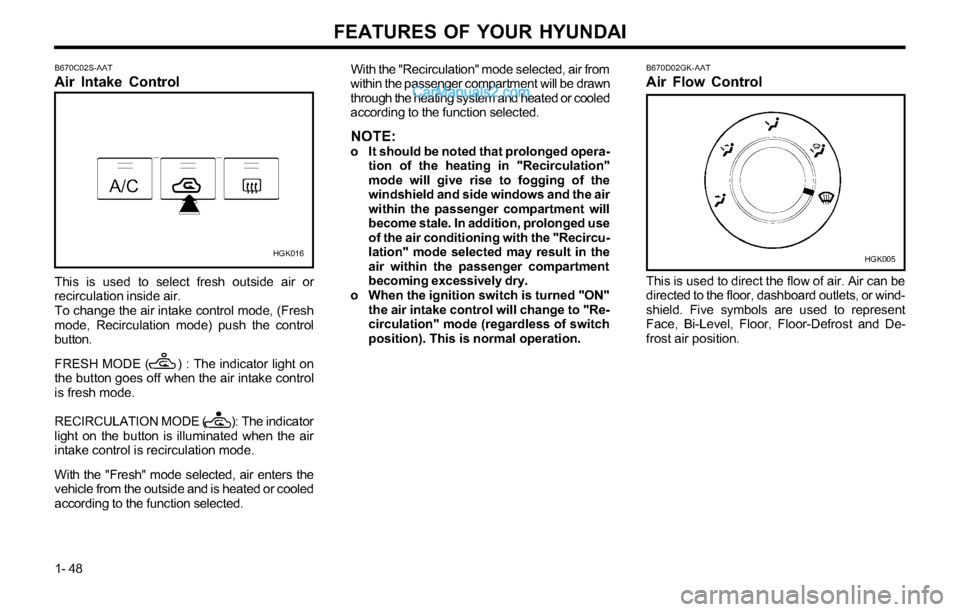
HGK016B670D02GK-AAT
Air Flow Control
This is used to direct the flow of air. Air can be
directed to the floor, dashboard outlets, or wind-
shield. Five symbols are used to represent
Face, Bi-Level, Floor, Floor-Defrost and De-
frost air position.
HGK005 B670C02S-AAT
Air Intake Control
This is used to select fresh outside air or
recirculation inside air.
To change the air intake control mode, (Fresh
mode, Recirculation mode) push the control
button.
FRESH MODE ( ) : The indicator light on
the button goes off when the air intake control
is fresh mode.
RECIRCULATION MODE ( ): The indicator
light on the button is illuminated when the air
intake control is recirculation mode.
With the "Fresh" mode selected, air enters the
vehicle from the outside and is heated or cooled
according to the function selected.With the "Recirculation" mode selected, air from
within the passenger compartment will be drawn
through the heating system and heated or cooled
according to the function selected.
NOTE:o It should be noted that prolonged opera-
tion of the heating in "Recirculation"
mode will give rise to fogging of the
windshield and side windows and the air
within the passenger compartment will
become stale. In addition, prolonged use
of the air conditioning with the "Recircu-
lation" mode selected may result in the
air within the passenger compartment
becoming excessively dry.
o When the ignition switch is turned "ON"
the air intake control will change to "Re-
circulation" mode (regardless of switch
position). This is normal operation.
Page 62 of 169
FEATURES OF YOUR HYUNDAI
1- 54
B970C02E-AAT
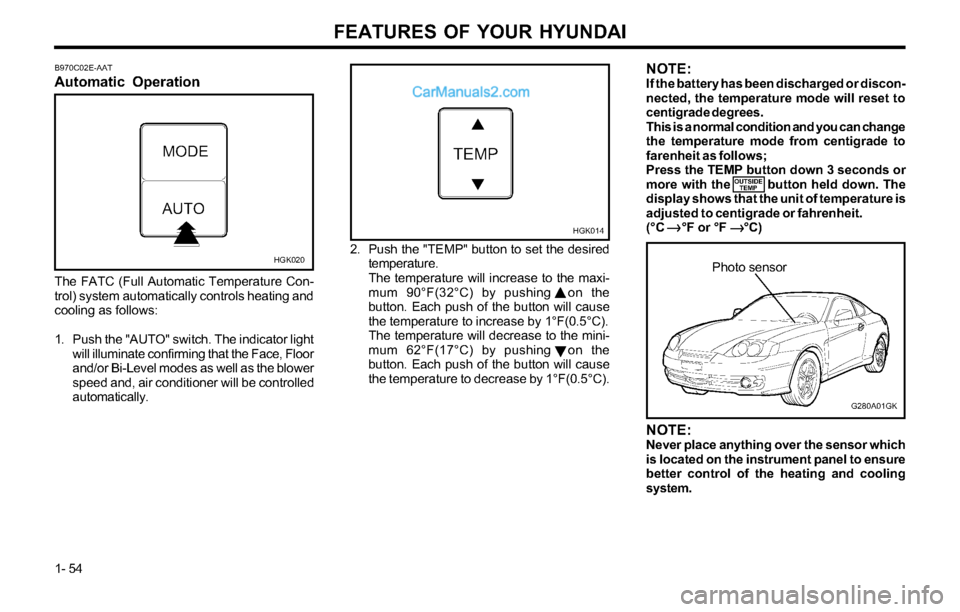
Automatic Operation
HGK020
The FATC (Full Automatic Temperature Con-
trol) system automatically controls heating and
cooling as follows:
1. Push the "AUTO" switch. The indicator light
will illuminate confirming that the Face, Floor
and/or Bi-Level modes as well as the blower
speed and, air conditioner will be controlled
automatically.2. Push the "TEMP" button to set the desired
temperature.
The temperature will increase to the maxi-
mum 90°F(32°C) by pushing on the
button. Each push of the button will cause
the temperature to increase by 1°F(0.5°C).
The temperature will decrease to the mini-
mum 62°F(17°C) by pushing on the
button. Each push of the button will cause
the temperature to decrease by 1°F(0.5°C).
G280A01GK
Photo sensor
HGK014
NOTE:Never place anything over the sensor which
is located on the instrument panel to ensure
better control of the heating and cooling
system.
NOTE:If the battery has been discharged or discon-
nected, the temperature mode will reset to
centigrade degrees.
This is a normal condition and you can change
the temperature mode from centigrade to
farenheit as follows;
Press the TEMP button down 3 seconds or
more with the button held down. The
display shows that the unit of temperature is
adjusted to centigrade or fahrenheit.
(°C °F or °F °C)
OUTSIDE
TEMP
Page 64 of 169
FEATURES OF YOUR HYUNDAI
1- 56
With the "Recirculation" mode selected, air from
within the passenger compartment will be drawn
through the heating system and heated or cooled
according to the function selected.
NOTE:o It should be noted that prolonged opera-
tion of the heating system in "recircula-
tion" mode will give rise to fogging of the
windshield and side windows and the air
within the passenger compartment will
become stale. In addition, prolonged use
of the air conditioning with the "Recircu-
lation" mode selected may result in the
air within the passenger compartment
becoming excessively dry.
o When the ignition switch is turned "ON"
the air intake control will change to "
"
mode (regardless of switch position). This
is normal operation. The air intake con-
trol operates in "AUTO" mode when turn-
ing the ignition to the ON position if the
"AUTO" mode was used before shutting
off the engine.Exhaust gas cutoff mode :
Air enters the vehicle from the outside.
But if exhaust gas enters the vehicle from the
outside, the exhaust gas cutoff mode ( ) is
automatically converted to the mode, to
prevent exhaust gas from entering the vehicle.
NOTE:o It should be noted that prolonged opera-
tion of the heating system in recircula-
tion mode ( ) will give rise to misting
of the windshield and side windows and
the air within the passenger compart-
ment will become stale. In addition, pro-
longed use of the air conditioning with
the recirculation mode ( ) selected
may result in the air within the passenger
compartment becoming excessively dry.
o When the ignition switch is turned "ON"
the air intake control will change to
"Fresh" mode (regardless of switch posi-
tion). This is normal operation. The air
intake control is operated in "AUTO"
mode when turning the ignition to the
ON position if the "AUTO" mode was
used before shutting off the engine.
CAUTION:If the windows fog up with the Recirculation
or A.Q.S mode selected, set the air intake
control to the Fresh air position or A.Q.S
control to "OFF".
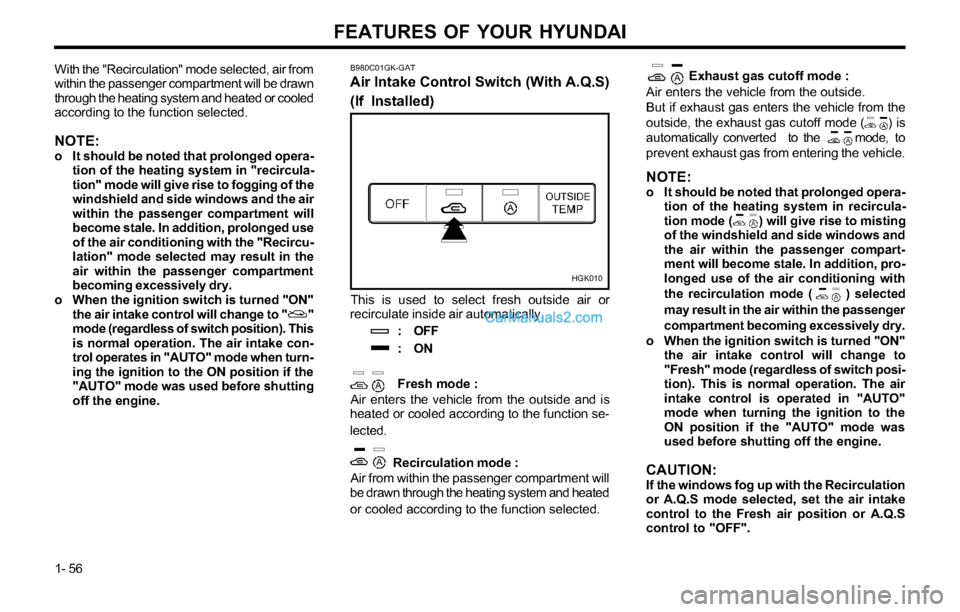
This is used to select fresh outside air or
recirculate inside air automatically.
: OFF
:ON
Fresh mode :
Air enters the vehicle from the outside and is
heated or cooled according to the function se-
lected.
Recirculation mode :
Air from within the passenger compartment will
be drawn through the heating system and heated
or cooled according to the function selected.
B980C01GK-GAT
Air Intake Control Switch (With A.Q.S)
(If Installed)
HGK010
Page 70 of 169
FEATURES OF YOUR HYUNDAI
1- 62
FAD (Fader Control) Knob
Pull the treble control knob further out.
Turn the control knob counterclockwise to em-
phasize front speaker sound. (Rear speaker
sound will be attenuated)
When the control knob is turned clockwise,
rear speaker sound will be emphasized.
(Front speaker sound will be attenuated)
4. TUNE (Manual) Select Button
Press the side or side to increase or to
decrease the frequency. Press either button
and hold down to continuously scroll. Release
button once the desired station is reached.
SEEK Operation (Automatic Channel
Selection)
Press the TUNE select button 1 sec or
more.Releasing will automatically tune to the
next available station with a beep sound.
When the side is pressed longer than 1
second, releasing will automatically tune to the
next higher frequency and when the side is
pressed longer than 1 second, releasing will
automatically tune to the next lower frequency.
5. BAND Selector
Pressing the button changes the AM, FM1
and FM2 bands. The mode selected is dis-
played on LCD.
6. PRESET STATION SELECT Button
Six (6) stations for AM, FM and FM2 respec-
tively can be preset in the electronic memory
circuit on this unit.
HOW TO PRESET STATIONS
Six AM and twelve FM stations may be pro-
grammed into the memory of the radio. Then,
by simply pressing the band select button and/
or one of the six station select buttons, you
may recall any of these stations instantly. To
program the stations, follow these steps:
o Press band selector to set the band for AM,
FM, or FM2.
o Select the desired station to be stored by
seek or manual tuning.
o Determine the preset station select button
you wish to use to access that station.
o Press the station select button for more
than two seconds. A select button indicator
will show in the display indicating which
select button you have depressed. The
frequency display will flash after it has
been stored into the memory with a beep
sound. You should then release the button,
and proceed to program the next desired
station. A total of 18 stations can be pro-
grammed by selecting one AM and two FM
stations per button.
o When completed, any preset station may
be recalled by selecting AM, FM or FM2
band and the appropriate station button.
H240B03O-GAT
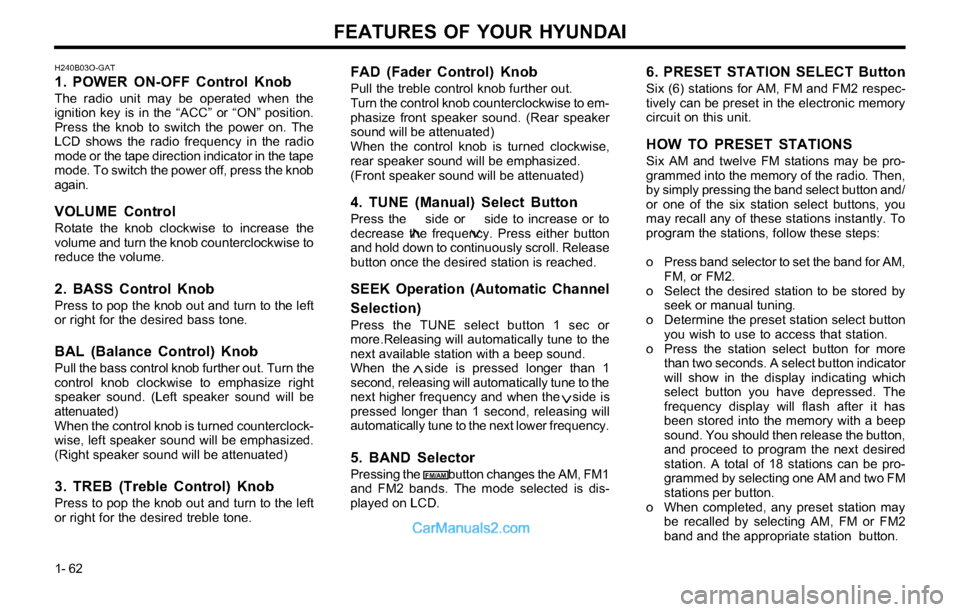
1. POWER ON-OFF Control Knob
The radio unit may be operated when the
ignition key is in the “ACC” or “ON” position.
Press the knob to switch the power on. The
LCD shows the radio frequency in the radio
mode or the tape direction indicator in the tape
mode. To switch the power off, press the knob
again.
VOLUME Control
Rotate the knob clockwise to increase the
volume and turn the knob counterclockwise to
reduce the volume.
2. BASS Control Knob
Press to pop the knob out and turn to the left
or right for the desired bass tone.
BAL (Balance Control) Knob
Pull the bass control knob further out. Turn the
control knob clockwise to emphasize right
speaker sound. (Left speaker sound will be
attenuated)
When the control knob is turned counterclock-
wise, left speaker sound will be emphasized.
(Right speaker sound will be attenuated)
3. TREB (Treble Control) Knob
Press to pop the knob out and turn to the left
or right for the desired treble tone.
FM/AM
Page 77 of 169
FEATURES OF YOUR HYUNDAI
1- 69
3. BASS Control Knob
Press to pop the knob out and turn to the left or
right for the desired bass tone.
TREB (Treble Control) Knob
Pull the bass control knob further out. Turn to
the left or right for the desired treble tone.
4. SCAN Button
When the scan button is pressed, the fre-
quency will increase and the receivable sta-
tions will be tuned in one after another, receiv-
ing each station for 5 seconds. To stop scan-
ning, press the scan button again.
5. TUNE (Manual) Select Button
Press the ( ) side or ( ) side to increase or
to decrease the frequency. Press either button
and hold down to continuously scroll. Release
button once the desired station is reached.
SEEK Operation (Automatic Channel
Selection)
Press the TUNE select button for 1 sec or
more. Releasing it will automatically tune to the
next available station with a beep sound.
When the ( ) side is pressed longer than 1
second, releasing will automatically tune to the
next higher frequency and when the ( ) side
is pressed longer than 1 second, releasing will
automatically tune to the next lower frequency.
6. BAND Selector
Pressing the button changes the AM, FM1
and FM2 bands. The mode selected is dis-
played on LCD.
7. PRESET STATION SELECT Button
Six (6) stations for AM, FM or FM2 respectively
can be preset in the electronic memory circuit
on this unit.
HOW TO PRESET STATIONS
Six AM and twelve FM stations may be pro-
grammed into the memory of the radio. Then,
by simply pressing the band select button and/
or one of the six station select buttons, you may
recall any of these stations instantly. To pro-
gram the stations, follow these steps:
o Press band selector to set the band for AM,
FM or FM2.
o Select the desired station to be stored by
seek, scan or manual tuning.
o Determine the preset station select button
you wish to use to access that station.
o Press the station select button for more than
two seconds. A select button indicator will
show in the display indicating which select
button you have depressed. The frequency
display will flash after it has been stored into
the memory.
H260B03E-AAT
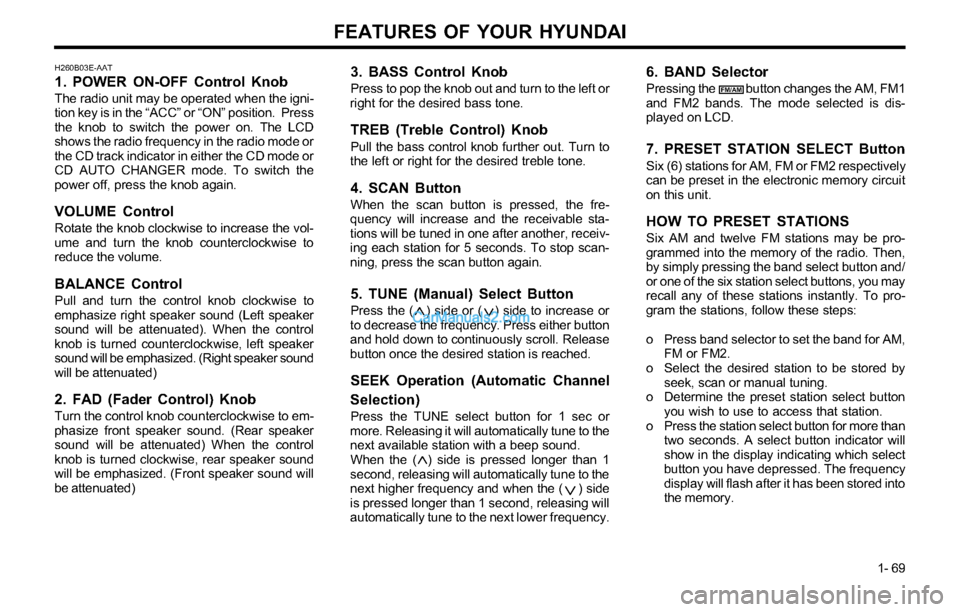
1. POWER ON-OFF Control Knob
The radio unit may be operated when the igni-
tion key is in the “ACC” or “ON” position. Press
the knob to switch the power on. The LCD
shows the radio frequency in the radio mode or
the CD track indicator in either the CD mode or
CD AUTO CHANGER mode. To switch the
power off, press the knob again.
VOLUME Control
Rotate the knob clockwise to increase the vol-
ume and turn the knob counterclockwise to
reduce the volume.
BALANCE Control
Pull and turn the control knob clockwise to
emphasize right speaker sound (Left speaker
sound will be attenuated). When the control
knob is turned counterclockwise, left speaker
sound will be emphasized. (Right speaker sound
will be attenuated)
2. FAD (Fader Control) Knob
Turn the control knob counterclockwise to em-
phasize front speaker sound. (Rear speaker
sound will be attenuated) When the control
knob is turned clockwise, rear speaker sound
will be emphasized. (Front speaker sound will
be attenuated)
FM/AM
Page 84 of 169
FEATURES OF YOUR HYUNDAI
1- 76
H290B03E-GAT
1. POWER ON-OFF Control Knob
The radio unit may be operated when the igni-
tion key is in the "ACC" or "ON" position. Press
the button to switch the power on. The display
shows the radio frequency in the radio mode,
the tape direction indicator in the tape mode or
CD track in either the CD mode or CD AUTO
CHANGER mode. To switch the power off,
press the button again.
VOLUME Control
Rotate the knob clockwise to increase the vol-
ume and turn the knob counterclockwise to
reduce the volume.
2. BASS/BALANCE Control Knob
BASS Control Knob
Press to pop the knob out. To increase the
bass, rotate the knob clockwise, while to de-
crease the bass, rotate the knob counterclock-
wise.
BALANCE Control knob
Pull the Bass control knob out further. Rotate
the knob clockwise to emphasize right speaker
sound. (Left speaker sound will be attenuated)
When the control knob is turned counterclock-
wise, left speaker sound will be emphasized
(Right speaker sound will be attenuated).
3. TREBLE/FAD Knob
TREBLE Control Knob
Press to pop the knob out and turn to the left or
right for the desired treble tone.
FAD (Fader Control) Knob
Pull the Treble control knob out further. Turn the
control knob counterclockwise to emphasize
front speaker sound. (Rear speaker sound will
be attenuated) When the control knob is turned
clockwise, rear speaker sound will be empha-
sized. (Front speaker sound will be attenuated)
4. TUNE (Manual) Select Button
Press the ( ) side or ( ) side to increase or
to decrease the frequency. Press either button
and hold down to continuously scroll. Release
button once the desired station is reached.
SEEK Operation (Automatic Channel
Selection)
Press the TUNE select button for 0.5 sec or
more. Releasing it will automatically tune to the
next available station with a beep sound.
When the ( ) side is pressed longer than 0.5
second, releasing will automatically tune to the
next higher frequency and when the ( ) side is
pressed longer than 0.5 second, releasing will
automatically tune to the next lower frequency.
5. PRESET STATION Select Buttons
Six (6) stations for AM, FM and FM2 respec-
tively can be preset in the electronic memory
circuit.
HOW TO PRESET STATIONS
Six AM and twelve FM stations may be pro-
grammed into the memory of the radio. Then,
by simply pressing the band select button and/
or one of the six station select buttons, you may
recall any of these stations instantly. To pro-
gram the stations, follow these steps:
o Press band selector to set the band for AM,
FM or FM2.
o Select the desired station to be stored by
seek or manual tuning.
o Determine the preset station select button
you wish to use to access that station.
o Press the station select button for more than
two seconds. A select button indicator will
show in the display indicating which select
button you have depressed. The frequency
display will flash after it has been stored into
the memory with beep sound. You should
then release the button, and proceed to
program the next desired station. A total of
18 stations can be programmed by selecting
one AM and two FM station per button.
o When completed, any preset station may be
recalled by selecting AM, FM or FM2 band
and the appropriate station button.
Page 85 of 169
FEATURES OF YOUR HYUNDAI
1- 77
6. BAND Selector
Pressing the button changes the AM, FM1
and FM2 bands. The mode selected is shown
on the display.
7. EQUALIZER Button
Press the EQ button to select the CLASSIC,
JAZZ, ROCK and DEFEAT MODE for the de-
sired tone quality. Each press of the button
changes the display as follows;
8. Best Station Memory Button (BSM)
(If installed)
When the BSM button is pressed for two sec-
onds or longer, the six channels from the high-
est field intensity are selected next and stored
in memory. The stations selected are stored in
the sequence frequency from the first preset
key.
SCAN Button (If installed)
When the scan button is pressed, the fre-
quency will increase and the receivable sta-
tions will be tuned in one after another, receiv-
ing each station for 5 seconds. To stop scan-
ning, press the scan button again.CLASSIC ® JAZZ ® ROCK ® DEFEAT
FM/AM