manual Hyundai Tiburon 2003 Owner's Manual
[x] Cancel search | Manufacturer: HYUNDAI, Model Year: 2003, Model line: Tiburon, Model: Hyundai Tiburon 2003Pages: 169, PDF Size: 3.04 MB
Page 3 of 169
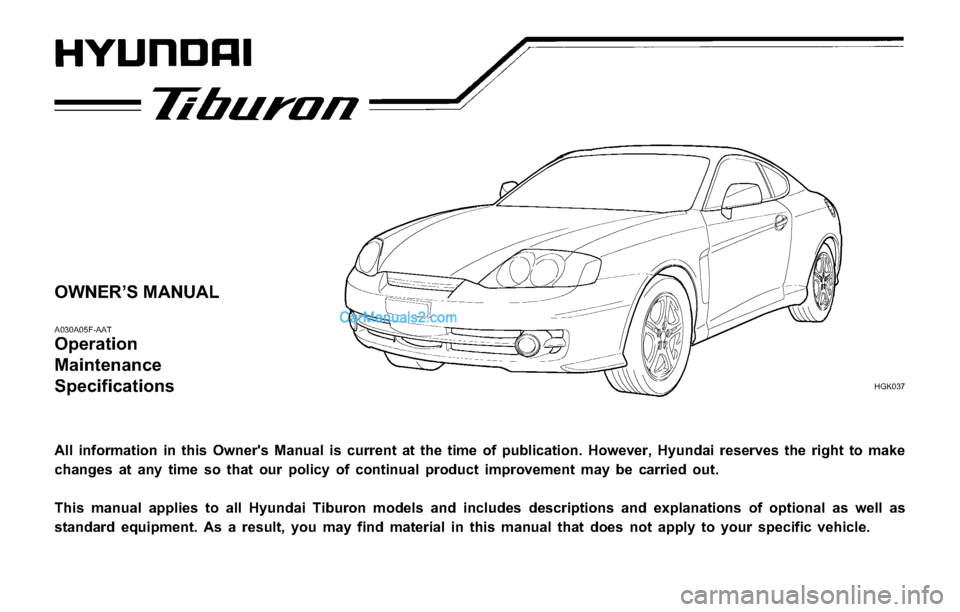
OWNER’S MANUAL
A030A05F-AAT
Operation
Maintenance
Specifications
All information in this Owner's Manual is current at the time of publication. However, Hyundai reserves the right to make
changes at any time so that our policy of continual product improvement may be carried out.
This manual applies to all Hyundai Tiburon models and includes descriptions and explanations of optional as well as
standard equipment. As a result, you may find material in this manual that does not apply to your specific vehicle.
HGK037
Page 4 of 169
A040A01A-AATFOREWORD
Thank you for choosing Hyundai. We are pleased to welcome you to the growing number of discriminating
people who drive Hyundais. The advanced engineering and high-quality construction of each Hyundai we
build is something of which we're very proud.
Your Owner's Manual will introduce you to the features and operation of your new Hyundai. It is suggested
that you read it carefully since the information it contains can contribute greatly to the satisfaction you
receive from your new car.
The manufacturer also recommends that all service and maintenance on your car be performed by an
authorized Hyundai dealer. Hyundai dealers are prepared to provide high-quality service, maintenance and
any other assistance that may be required.
A050A04A-AAT
HYUNDAI MOTOR COMPANY
Note:Because future owners will also need the information included in this manual, if you sell this
Hyundai, please leave the manual in the vehicle for their use. Thank you.
CAUTION: Severe engine and transaxle damage may result from the use of poor quality fuels and
lubricants that do not meet Hyundai specifications. You must always use high quality fuels and
lubricants that meet the specifications listed on Page 9-3 in the Vehicle Specifications section of
the Owner's Manual and which also appear in the Service Station Information on the back cover
of the Owner's Manual.
Copyright 2002 Hyundai Motor Company. All rights reserved. No part of this publication may be
reproduced, stored in any retrieval system or transmitted in any form or by any means without the prior
written permission of Hyundai Motor Company.
Page 6 of 169
A090A01A-AAT
SAFETY AND VEHICLE DAMAGE WARNING
This manual includes information titled as WARNING, CAUTION and NOTE.
These titles indicate the following:
WARNING:
This indicates that a condition may result in harm, serious injury or death to you or
other persons if the warning is not heeded. Follow the advice provided with the
warning.
CAUTION:
This indicates that a condition may result in damage to your vehicle or its equipment
if the caution is not heeded. Follow the advice provided with the caution.
NOTE:
This indicates that interesting or helpful information is being provided.
Page 20 of 169
FEATURES OF YOUR HYUNDAI
1- 12
B190A01GK-AAT
SEAT BELTS Rear Seat 3-Point Sys-
tem with Combination Locking Re-
tractor
To Fasten Your Belt
Combination retractor type seat belts are in-
stalled in the rear seat positions to help accom-
modate the installation of child restraint sys-
tems. Although a combination retractor is also
installed in the front passenger seat position,
Hyundai strongly recommends that children al-
ways be seated in the rear seat. NEVER place
any infant restraint system in the front seat of
the vehicle.
This type of seat belt combines the features of
both an emergency locking retractor seat belt
and an automatic locking retractor seat belt. To
fasten your seat belt, pull it out of the retractor
and insert the metal tab into the buckle. There
will be an audible "click" when the tab locks into
the buckle. When not securing a child restraint,
the seat belt operates in the same way as
driver's seat belt (Emergency Locking Retrac-
tor Type). It automatically adjusts to the proper
length only after the lap belt portion of the seat
FUA1090P B180A01GK-AAT
SEAT BELT-Driver's and front pas-
sengers 3-Point System with Emer-
gency Locking Retractor
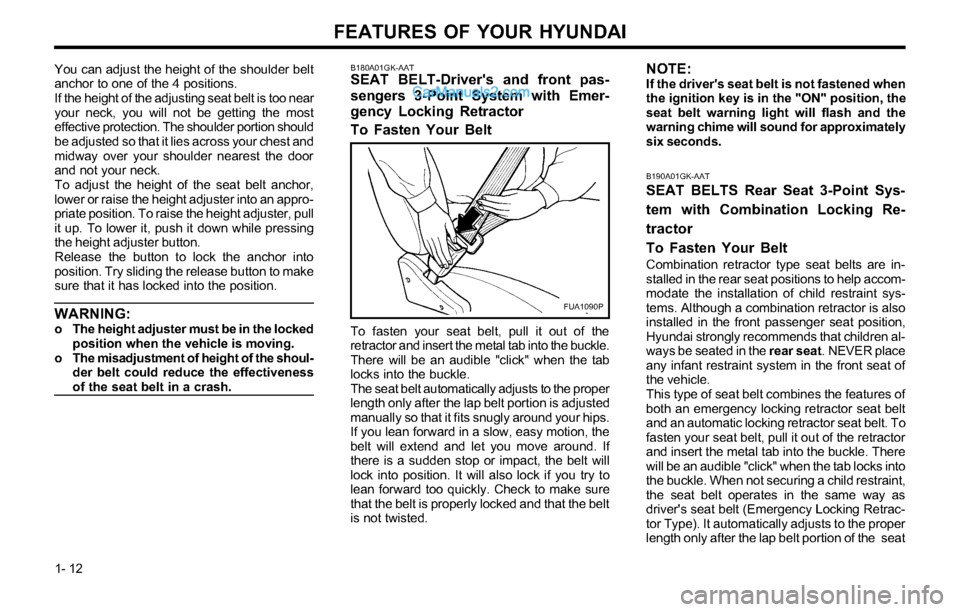
To Fasten Your BeltYou can adjust the height of the shoulder belt
anchor to one of the 4 positions.
If the height of the adjusting seat belt is too near
your neck, you will not be getting the most
effective protection. The shoulder portion should
be adjusted so that it lies across your chest and
midway over your shoulder nearest the door
and not your neck.
To adjust the height of the seat belt anchor,
lower or raise the height adjuster into an appro-
priate position. To raise the height adjuster, pull
it up. To lower it, push it down while pressing
the height adjuster button.
Release the button to lock the anchor into
position. Try sliding the release button to make
sure that it has locked into the position.
WARNING:o The height adjuster must be in the locked
position when the vehicle is moving.
o The misadjustment of height of the shoul-
der belt could reduce the effectiveness
of the seat belt in a crash.To fasten your seat belt, pull it out of the
retractor and insert the metal tab into the buckle.
There will be an audible "click" when the tab
locks into the buckle.
The seat belt automatically adjusts to the proper
length only after the lap belt portion is adjusted
manually so that it fits snugly around your hips.
If you lean forward in a slow, easy motion, the
belt will extend and let you move around. If
there is a sudden stop or impact, the belt will
lock into position. It will also lock if you try to
lean forward too quickly. Check to make sure
that the belt is properly locked and that the belt
is not twisted.
NOTE:If the driver's seat belt is not fastened when
the ignition key is in the "ON" position, the
seat belt warning light will flash and the
warning chime will sound for approximately
six seconds.
Page 21 of 169
FEATURES OF YOUR HYUNDAI
1- 13 belt is adjusted manually so that it fits snugly
around your hips. When the seat belt is fully
extended from the retractor to allow the instal-
lation of a child restraint system, the seat belt
operation changes to allow the belt to retract,
but not to extend. (Automatic Locking Retractor
Type)
NOTE:Although the combination retractor provides
the same level of protection for seated pas-
sengers in either emergency or automatic
locking modes, it is recommended that
seated passengers use the emergency lock-
ing feature for improved convenience. The
automatic locking function is intended to
facilitate child restraint installation. To con-
vert from the automatic locking feature to
the emergency locking operation mode, al-
low the unbuckled seat belt to fully retract.
WARNING:o For maximum restraint system protec-
tion, seat belts must always be used
whenever the car is moving.
o Seat belts are most effective when
seatbacks are in the upright position.
o Children must always be seatbelted in
the rear seats. Never allow children to
ride in the front passenger seat.
o The shoulder belt should be positioned
midway over the shoulder nearest the
door for the most effective protection.
Never wear the seat belt under the arm
nearest the door. Wearing the belt under
the arm nearest the door could cause
serious or fatal injuries in an accident.
o Avoid wearing twisted seat belts. A twist-
ed belt can't do its job as well. In a
collision, it could even cut into you. Be
sure the belt is straight and not twisted.
o Be careful not to damage the belt web-
bing or hardware. If the belt webbing or
hardware is damaged, replace it.
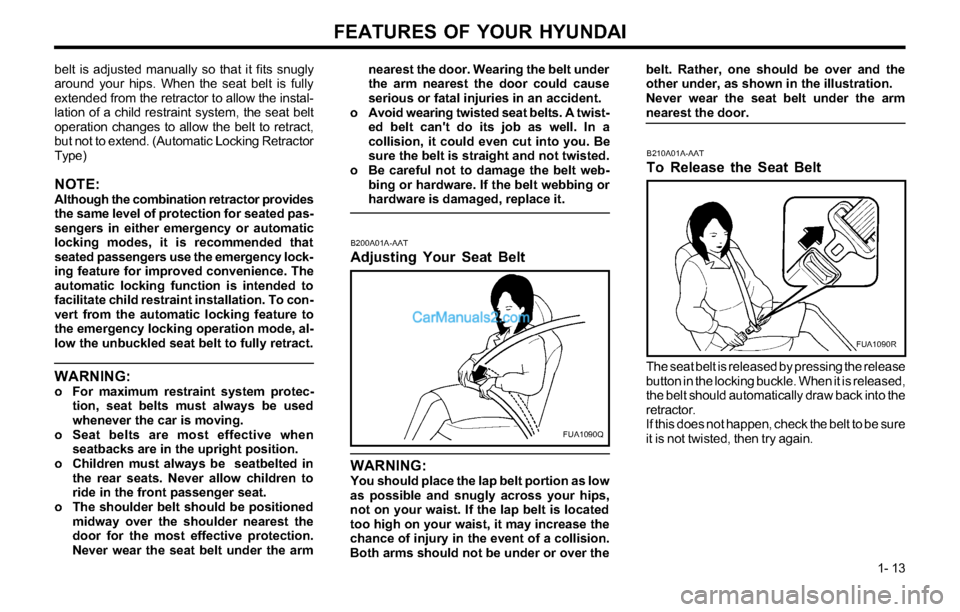
WARNING:You should place the lap belt portion as low
as possible and snugly across your hips,
not on your waist. If the lap belt is located
too high on your waist, it may increase the
chance of injury in the event of a collision.
Both arms should not be under or over the
B200A01A-AAT
Adjusting Your Seat Belt
FUA1090Q
B210A01A-AAT
To Release the Seat Belt
The seat belt is released by pressing the release
button in the locking buckle. When it is released,
the belt should automatically draw back into the
retractor.
If this does not happen, check the belt to be sure
it is not twisted, then try again.
FUA1090R
belt. Rather, one should be over and the
other under, as shown in the illustration.
Never wear the seat belt under the arm
nearest the door.
Page 31 of 169
FEATURES OF YOUR HYUNDAI
1- 23
o If components of the airbag system must
be discarded, or if the vehicle must be
scrapped, certain safety precautions
must be observed. Your Hyundai dealer
knows these precautions and can give
you the necessary information. Failure to
follow these precautions and procedures
could increase the risk of personal in-
jury.
o If you sell your vehicle, be sure to inform
the new owner of these important points
and make certain that this manual is
transferred to the new owner.
o If your car was flooded and has soaked
carpeting or water on the floor, you
shouldn't try to start the engine; have the
car towed to an authorized Hyundai deal-
er.
Page 39 of 169
FEATURES OF YOUR HYUNDAI
1- 31
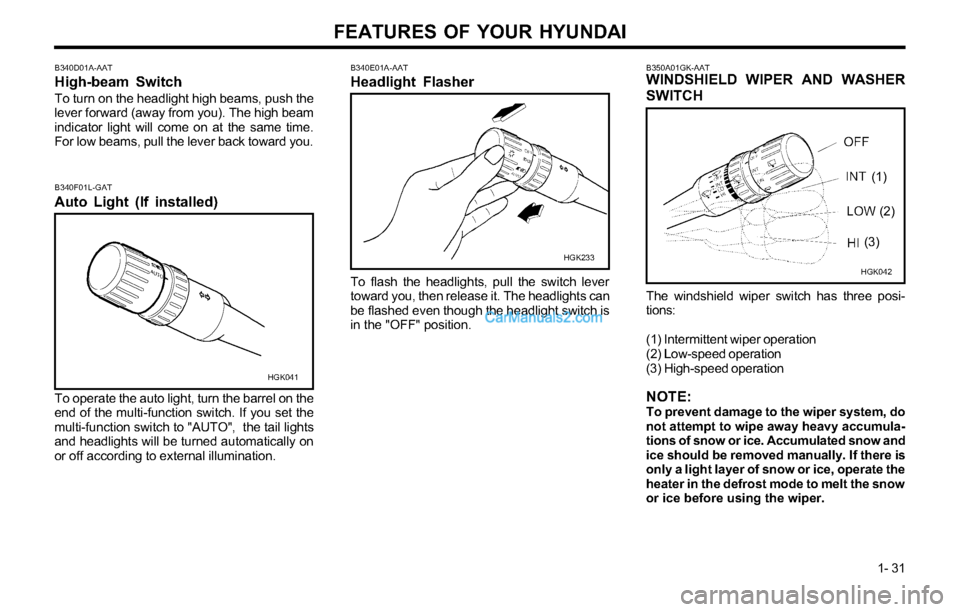
B340E01A-AAT
Headlight Flasher
To flash the headlights, pull the switch lever
toward you, then release it. The headlights can
be flashed even though the headlight switch is
in the "OFF" position.
B350A01GK-AATWINDSHIELD WIPER AND WASHER
SWITCH
The windshield wiper switch has three posi-
tions:
(1) Intermittent wiper operation
(2) Low-speed operation
(3) High-speed operation
NOTE:To prevent damage to the wiper system, do
not attempt to wipe away heavy accumula-
tions of snow or ice. Accumulated snow and
ice should be removed manually. If there is
only a light layer of snow or ice, operate the
heater in the defrost mode to melt the snow
or ice before using the wiper.
HGK233
To operate the auto light, turn the barrel on the
end of the multi-function switch. If you set the
multi-function switch to "AUTO", the tail lights
and headlights will be turned automatically on
or off according to external illumination.
B340F01L-GAT
Auto Light (If installed)
HGK041
B340D01A-AAT
High-beam Switch
To turn on the headlight high beams, push the
lever forward (away from you). The high beam
indicator light will come on at the same time.
For low beams, pull the lever back toward you.
HGK042
(1)
(3)(2)
Page 43 of 169
FEATURES OF YOUR HYUNDAI
1- 35
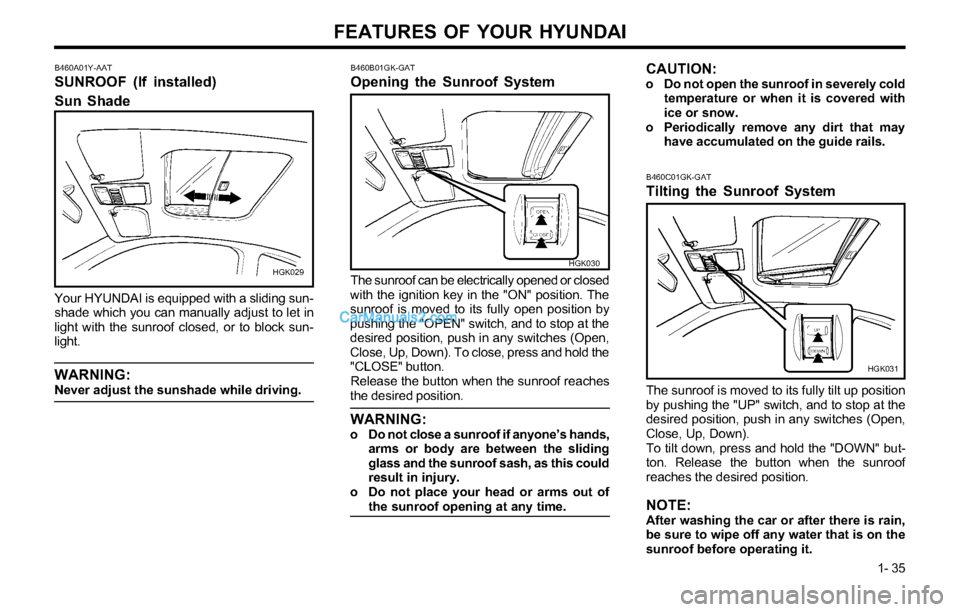
B460A01Y-AAT
SUNROOF (If installed)
Sun Shade
HGK029
Your HYUNDAI is equipped with a sliding sun-
shade which you can manually adjust to let in
light with the sunroof closed, or to block sun-
light.
WARNING:Never adjust the sunshade while driving.
B460B01GK-GAT
Opening the Sunroof System
HGK030
The sunroof can be electrically opened or closed
with the ignition key in the "ON" position. The
sunroof is moved to its fully open position by
pushing the "OPEN" switch, and to stop at the
desired position, push in any switches (Open,
Close, Up, Down). To close, press and hold the
"CLOSE" button.
Release the button when the sunroof reaches
the desired position.
WARNING:o Do not close a sunroof if anyone’s hands,
arms or body are between the sliding
glass and the sunroof sash, as this could
result in injury.
o Do not place your head or arms out of
the sunroof opening at any time.
CAUTION:o Do not open the sunroof in severely cold
temperature or when it is covered with
ice or snow.
o Periodically remove any dirt that may
have accumulated on the guide rails.
B460C01GK-GAT
Tilting the Sunroof System
HGK031
The sunroof is moved to its fully tilt up position
by pushing the "UP" switch, and to stop at the
desired position, push in any switches (Open,
Close, Up, Down).
To tilt down, press and hold the "DOWN" but-
ton. Release the button when the sunroof
reaches the desired position.
NOTE:After washing the car or after there is rain,
be sure to wipe off any water that is on the
sunroof before operating it.
Page 44 of 169
FEATURES OF YOUR HYUNDAI
1- 36
B491A02F-AAT
SPECTACLE CASE
HGK036
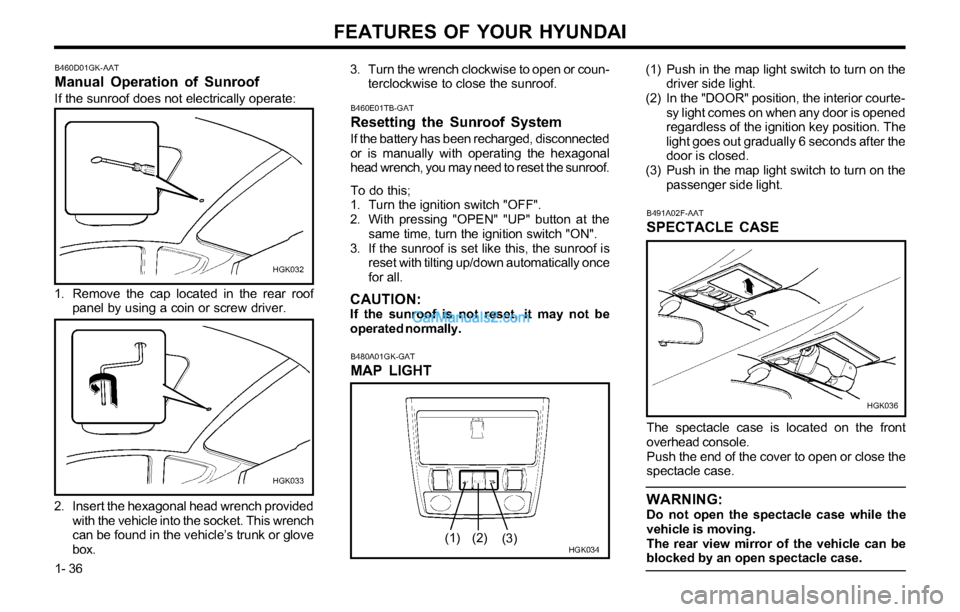
The spectacle case is located on the front
overhead console.
Push the end of the cover to open or close the
spectacle case.
WARNING:Do not open the spectacle case while the
vehicle is moving.
The rear view mirror of the vehicle can be
blocked by an open spectacle case.
B460D01GK-AAT
Manual Operation of Sunroof
If the sunroof does not electrically operate:
HGK032
1. Remove the cap located in the rear roof
panel by using a coin or screw driver.
2. Insert the hexagonal head wrench provided
with the vehicle into the socket. This wrench
can be found in the vehicle’s trunk or glove
box.
HGK033
3. Turn the wrench clockwise to open or coun-
terclockwise to close the sunroof.
B480A01GK-GAT
MAP LIGHT
HGK034
(1) Push in the map light switch to turn on the
driver side light.
(2) In the "DOOR" position, the interior courte-
sy light comes on when any door is opened
regardless of the ignition key position. The
light goes out gradually 6 seconds after the
door is closed.
(3) Push in the map light switch to turn on the
passenger side light.
(1)
(2)
(3)
B460E01TB-GAT
Resetting the Sunroof System
If the battery has been recharged, disconnected
or is manually with operating the hexagonal
head wrench, you may need to reset the sunroof.
To do this;
1. Turn the ignition switch "OFF".
2. With pressing "OPEN" "UP" button at the
same time, turn the ignition switch "ON".
3. If the sunroof is set like this, the sunroof is
reset with tilting up/down automatically once
for all.
CAUTION:If the sunroof is not reset, it may not be
operated normally.
Page 52 of 169
FEATURES OF YOUR HYUNDAI
1- 44
B660B01GK B660B01E-AAT
To Set the Cruise Speed
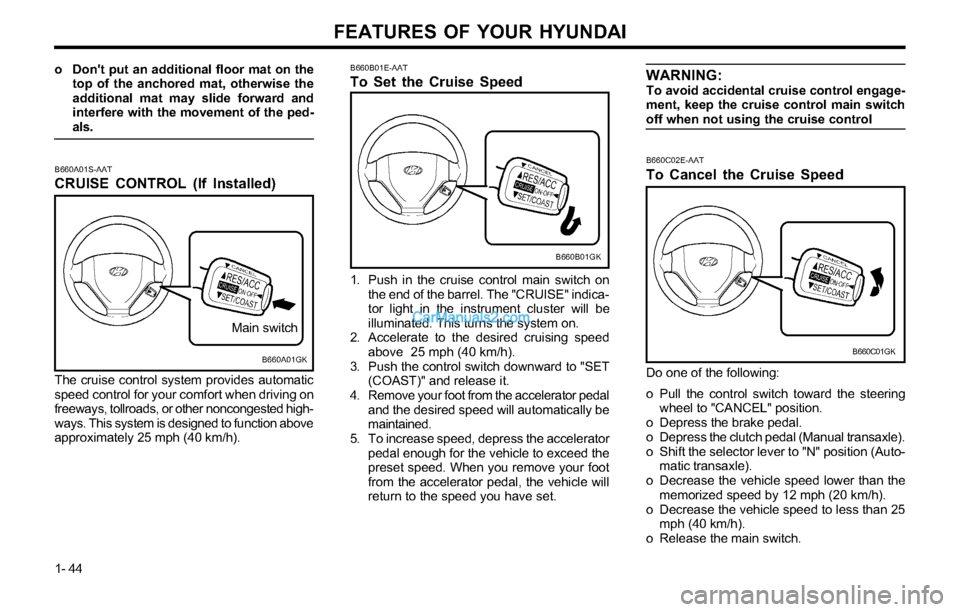
1. Push in the cruise control main switch on
the end of the barrel. The "CRUISE" indica-
tor light in the instrument cluster will be
illuminated. This turns the system on.
2. Accelerate to the desired cruising speed
above 25 mph (40 km/h).
3. Push the control switch downward to "SET
(COAST)" and release it.
4. Remove your foot from the accelerator pedal
and the desired speed will automatically be
maintained.
5. To increase speed, depress the accelerator
pedal enough for the vehicle to exceed the
preset speed. When you remove your foot
from the accelerator pedal, the vehicle will
return to the speed you have set. The cruise control system provides automatic
speed control for your comfort when driving on
freeways, tollroads, or other noncongested high-
ways. This system is designed to function above
approximately 25 mph (40 km/h).
B660C02E-AAT
To Cancel the Cruise Speed
Do one of the following:
o Pull the control switch toward the steering
wheel to "CANCEL" position.
o Depress the brake pedal.
o Depress the clutch pedal (Manual transaxle).
o Shift the selector lever to "N" position (Auto-
matic transaxle).
o Decrease the vehicle speed lower than the
memorized speed by 12 mph (20 km/h).
o Decrease the vehicle speed to less than 25
mph (40 km/h).
o Release the main switch.
B660C01GKB660A01GK
Main switch
B660A01S-AAT
CRUISE CONTROL (If Installed)
o Don't put an additional floor mat on the
top of the anchored mat, otherwise the
additional mat may slide forward and
interfere with the movement of the ped-
als.WARNING:To avoid accidental cruise control engage-
ment, keep the cruise control main switch
off when not using the cruise control