clock reset Hyundai Tiburon 2004 Owner's Manual
[x] Cancel search | Manufacturer: HYUNDAI, Model Year: 2004, Model line: Tiburon, Model: Hyundai Tiburon 2004Pages: 224, PDF Size: 18.86 MB
Page 58 of 224

1FEATURES OF YOUR HYUNDAI
45DIGITAL CLOCK
B400A01F-AAT
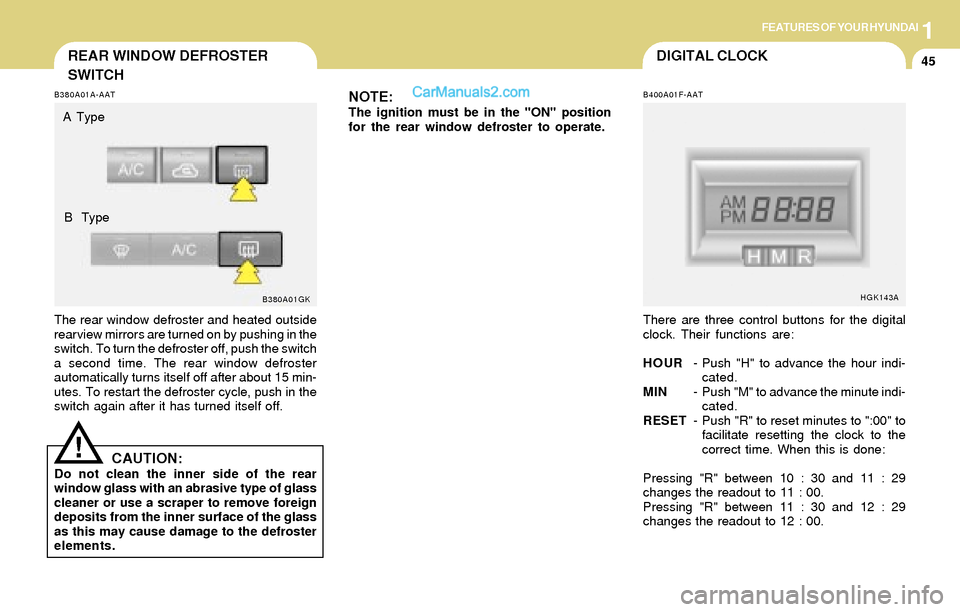
There are three control buttons for the digital
clock. Their functions are:
HOUR- Push "H" to advance the hour indi-
cated.
MIN- Push "M" to advance the minute indi-
cated.
RESET- Push "R" to reset minutes to ":00" to
facilitate resetting the clock to the
correct time. When this is done:
Pressing "R" between 10 : 30 and 11 : 29
changes the readout to 11 : 00.
Pressing "R" between 11 : 30 and 12 : 29
changes the readout to 12 : 00.
HGK143A
REAR WINDOW DEFROSTER
SWITCH
B380A01GK B380A01A-AAT
The rear window defroster and heated outside
rearview mirrors are turned on by pushing in the
switch. To turn the defroster off, push the switch
a second time. The rear window defroster
automatically turns itself off after about 15 min-
utes. To restart the defroster cycle, push in the
switch again after it has turned itself off.
NOTE:The ignition must be in the "ON" position
for the rear window defroster to operate.
CAUTION:Do not clean the inner side of the rear
window glass with an abrasive type of glass
cleaner or use a scraper to remove foreign
deposits from the inner surface of the glass
as this may cause damage to the defroster
elements.
!
A Type
B Type
Page 62 of 224

1FEATURES OF YOUR HYUNDAI
49INTERIOR LIGHT
B480A01GK-GAT
Map Light
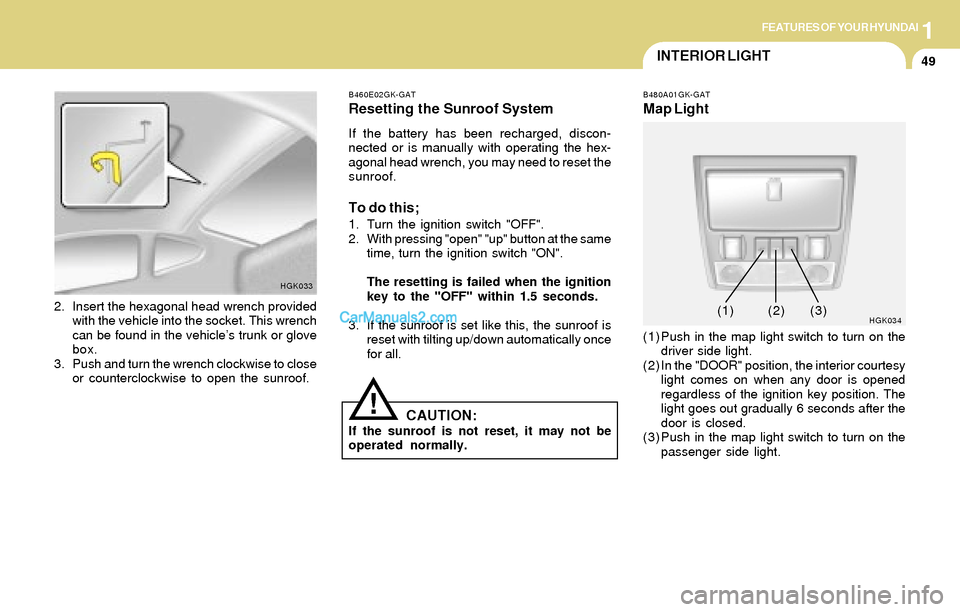
(1) Push in the map light switch to turn on the
driver side light.
(2) In the "DOOR" position, the interior courtesy
light comes on when any door is opened
regardless of the ignition key position. The
light goes out gradually 6 seconds after the
door is closed.
(3) Push in the map light switch to turn on the
passenger side light.
HGK0342. Insert the hexagonal head wrench provided
with the vehicle into the socket. This wrench
can be found in the vehicle’s trunk or glove
box.
3. Push and turn the wrench clockwise to close
or counterclockwise to open the sunroof.
HGK033B460E02GK-GAT
Resetting the Sunroof System
If the battery has been recharged, discon-
nected or is manually with operating the hex-
agonal head wrench, you may need to reset the
sunroof.
To do this;
1. Turn the ignition switch "OFF".
2. With pressing "open" "up" button at the same
time, turn the ignition switch "ON".
The resetting is failed when the ignition
key to the "OFF" within 1.5 seconds.
3. If the sunroof is set like this, the sunroof is
reset with tilting up/down automatically once
for all.
CAUTION:If the sunroof is not reset, it may not be
operated normally.
!
(1)(2) (3)
Page 104 of 224

1FEATURES OF YOUR HYUNDAI
91
H290B03E-GAT
1. POWER ON-OFF Control Knob
The radio unit may be operated when the ignition
key is in the "ACC" or "ON" position. Press the
button to switch the power on. The display
shows the radio frequency in the radio mode,
the tape direction indicator in the tape mode or
CD track in either the CD mode or CD AUTO
CHANGER mode. To switch the power off,
press the button again.
VOLUME Control
Rotate the knob clockwise to increase the
volume and turn the knob counterclockwise to
reduce the volume.
2. BASS/BALANCE Control Knob
BASS Control Knob
Press to pop the knob out. To increase the bass,
rotate the knob clockwise, while to decrease the
bass, rotate the knob counterclockwise.
BALANCE Control knob
Pull the Bass control knob out further. Rotate the
knob clockwise to emphasize right speaker
sound (left speaker sound will be attenuated).
When the control knob is turned counterclock-
wise, left speaker sound will be emphasized
(right speaker sound will be attenuated).
3. TREBLE/FAD Knob
TREBLE Control Knob
Press to pop the knob out and turn to the left or
right for the desired treble tone.
FAD (Fader Control) Knob
Pull the Treble control knob out further. Turn the
control knob counterclockwise to emphasize
front speaker sound (rear speaker sound will be
attenuated). When the control knob is turned
clockwise, rear speaker sound will be empha-
sized (front speaker sound will be attenuated).
4. TUNE (Manual) Select Button
Press the ( ) side or ( ) side to increase or to
decrease the frequency. Press either button
and hold down to continuously scroll. Release
button once the desired station is reached.
SEEK Operation (Automatic Channel
Selection)
Press the TUNE select button for 0.5 sec or
more. Releasing it will automatically tune to the
next available station with a beep sound.
When the ( ) side is pressed longer than 0.5
second, releasing will automatically tune to the
next higher frequency and when the ( ) side is
pressed longer than 0.5 second, releasing will
automatically tune to the next lower frequency.
5. PRESET STATION Select Buttons
Six (6) stations for AM, FM and FM2 respec-
tively can be preset in the electronic memory
circuit.
HOW TO PRESET STATIONS
Six AM and twelve FM stations may be pro-
grammed into the memory of the radio. Then, by
simply pressing the band select button and/or
one of the six station select buttons, you may
recall any of these stations instantly. To pro-
gram the stations, follow these steps: