ECO mode HYUNDAI TUCSON 2005 Owners Manual
[x] Cancel search | Manufacturer: HYUNDAI, Model Year: 2005, Model line: TUCSON, Model: HYUNDAI TUCSON 2005Pages: 273, PDF Size: 11.53 MB
Page 14 of 273
1
FEATURES OF YOUR HYUNDAI
3
KEYS
BREAKING IN YOUR NEW HYUNDAI
B010F01A-AATOperation in Foreign CountriesIf you are going to drive your Hyundai in another
country, be sure to:
o Observe all regulations regarding registra-
tion and insurance.
o Determine that acceptable fuel is available.B010E01A-AATGasolines for Cleaner AirTo help contribute to cleaner air, Hyundai rec-
ommends that you use gasolines treated with
detergent additives, which help prevent deposit
formation in the engine. These gasolines will
help the engine run cleaner and enhance per-
formance of the Emission Control System.
B020A01S-AATDuring the First 1,200 Miles (2,000 Km)No formal "break-in" procedure is required with
your new Hyundai. However, you can contrib-
ute to the economical operation and durability of
your Hyundai by observing the following recom-
mendations during the first 1,200 miles (2,000
km).
o Don't drive faster than 55 MPH (88 km/h).
o While driving, keep your engine speed (rpm,
or revolutions per minute) between 2,000
rpm and 4,000 rpm.
o Use moderate acceleration. Don't start
quickly or depress the accelerator pedal
fully.
o For the first 200 miles (300 km), try to avoid
hard stops.
o Don't lug the engine (in other words, don't
drive so slowly in too high a gear that the
engine "bucks"-shift to a lower gear).
o Whether going fast or slow, vary your speed
from time to time.
o Don't let the engine idle longer than 3 minutes
at one time.
o Don't tow a trailer during the first 1,200 miles
(2,000 km) of operation.
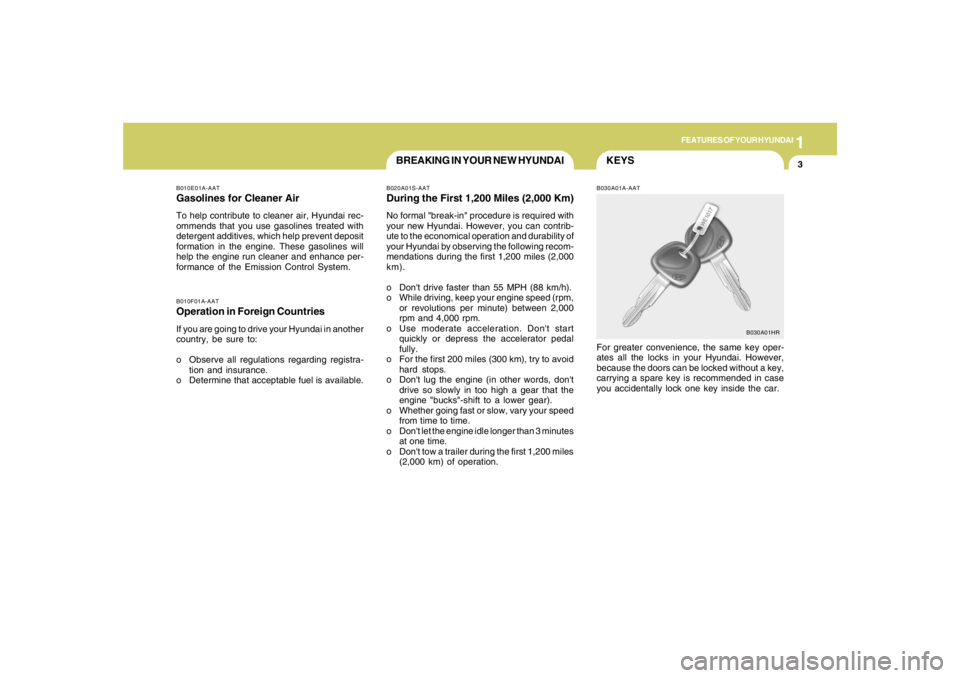
B030A01A-AATFor greater convenience, the same key oper-
ates all the locks in your Hyundai. However,
because the doors can be locked without a key,
carrying a spare key is recommended in case
you accidentally lock one key inside the car.
B030A01HR
Page 32 of 273
1
FEATURES OF YOUR HYUNDAI
21
!
NOTE:Although the combination retractor pro-
vides the same level of protection for seated
passengers in either emergency or auto-
matic locking modes, it is recommended
that seated passengers use the emergency
locking feature for improved convenience.
The automatic locking function is intended
to facilitate child restraint installation. To
convert from the automatic locking feature
to the emergency locking operation mode,
allow the unbuckled seat belt to fully re-
tract.
WARNING:
o For maximum restraint system protec-
tion, the seat belts must always be used
whenever the car is moving.
o Seat belts are most effective when
seatbacks are in the upright position.
o Children must always be seatbelted in
the rear seats. Never allow children to
ride in the front passanger seat.
o The shoulder belt should be positioned
midway over the shoulder nearest the
door for the most effective protection.
Never wear the seat belt under the arm
nearest the door. Wearing the belt under
the arm nearest the door could cause
serious or fatal injuries in an accident.
WARNING:
o Avoid wearing twisted seat belts. A
twisted belt can't do its job as well. In a
collision, it could even cut into you. Be
sure the belt webbing is straight and not
twisted.
o Be careful not to damage the belt web-
bing or hardware. If the belt webbing or
hardware is damaged, replace it.
!
WARNING:
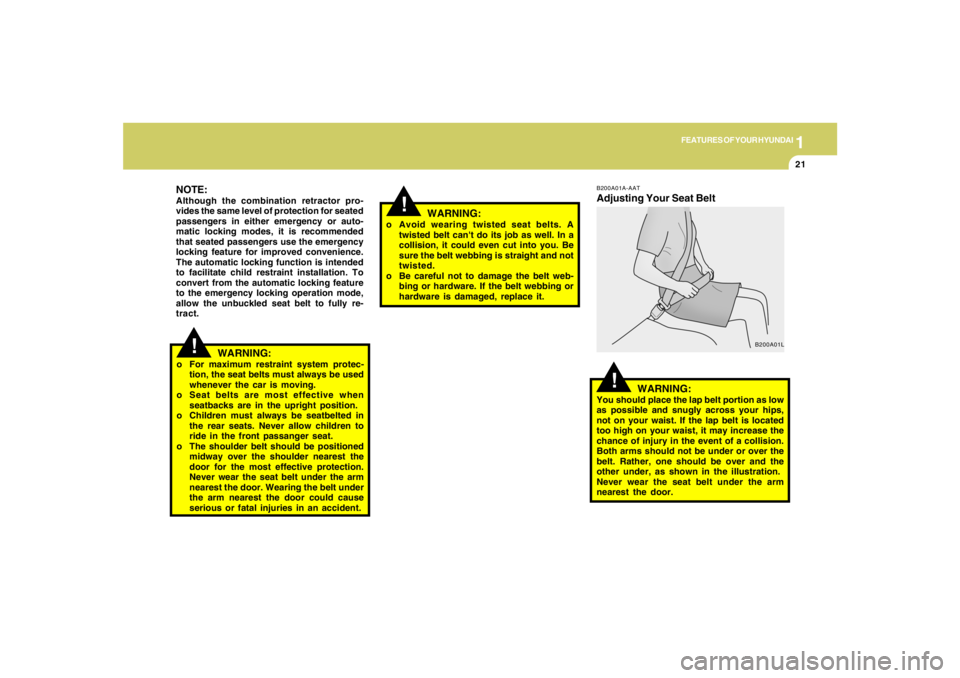
You should place the lap belt portion as low
as possible and snugly across your hips,
not on your waist. If the lap belt is located
too high on your waist, it may increase the
chance of injury in the event of a collision.
Both arms should not be under or over the
belt. Rather, one should be over and the
other under, as shown in the illustration.
Never wear the seat belt under the arm
nearest the door.
!
B200A01A-AATAdjusting Your Seat Belt
B200A01L
Page 41 of 273
1FEATURES OF YOUR HYUNDAI30
!
WARNING:
o Pre-tensioners are designed to operate
only one time. After activation, pre-
tensioner seat belts must be replaced.
All seat belts, of any type, should always
be replaced after they have been worn
during a collision.
o The pre-tensioner seat belt assembly
mechanisms become hot during activa-
tion. Do not touch the pre-tensioner seat
belt assemblies for several minutes after
they have been activated.
o Do not attempt to inspect or replace the
pre-tensioner seat belts yourself. This
must be done by an authorized Hyundai
dealer.
o Do not strike the pre-tensioner seat belt
assemblies.
o Do not attempt to service or repair the
pre-tensioner seat belt system in any
manner.
o Improper handling of the pre-tensioner
seat belt assemblies, and failure to heed
the warnings to not strike, modify, in-
spect, replace, service or repair the pre-
tensioner seat belt assemblies may lead
to improper operation or inadvertent
activation and serious injury.
o Always wear seat belts when driving or
riding in a motor vehicle.
ADVANCED SUPPLEMENTAL
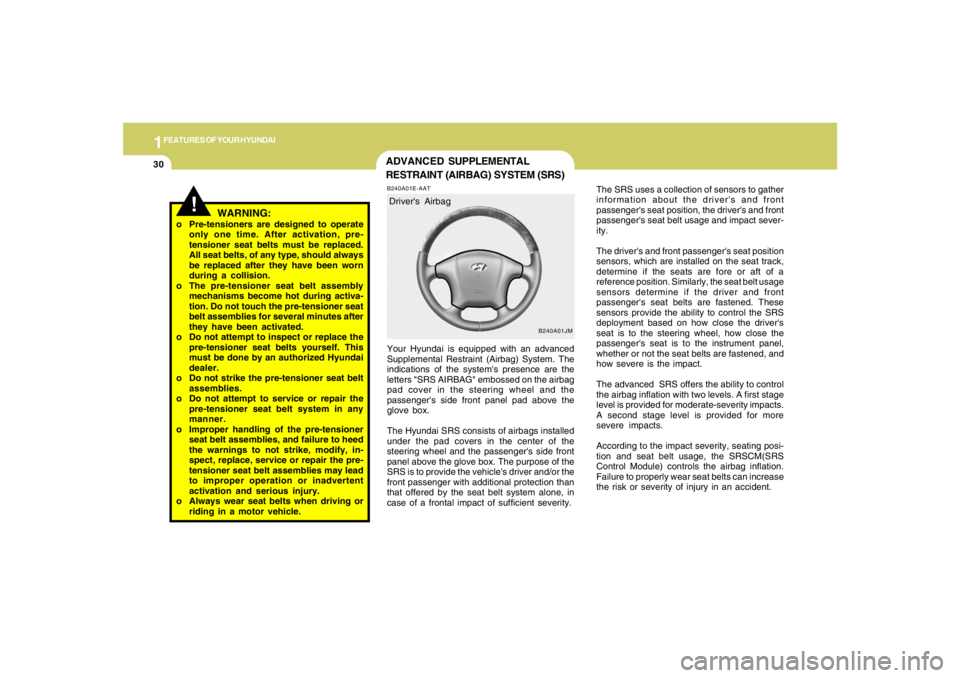
RESTRAINT (AIRBAG) SYSTEM (SRS)B240A01E-AATYour Hyundai is equipped with an advanced
Supplemental Restraint (Airbag) System. The
indications of the system's presence are the
letters "SRS AIRBAG" embossed on the airbag
pad cover in the steering wheel and the
passenger's side front panel pad above the
glove box.
The Hyundai SRS consists of airbags installed
under the pad covers in the center of the
steering wheel and the passenger's side front
panel above the glove box. The purpose of the
SRS is to provide the vehicle's driver and/or the
front passenger with additional protection than
that offered by the seat belt system alone, in
case of a frontal impact of sufficient severity.The SRS uses a collection of sensors to gather
information about the driver's and front
passenger's seat position, the driver's and front
passenger's seat belt usage and impact sever-
ity.
The driver's and front passenger's seat position
sensors, which are installed on the seat track,
determine if the seats are fore or aft of a
reference position. Similarly, the seat belt usage
sensors determine if the driver and front
passenger's seat belts are fastened. These
sensors provide the ability to control the SRS
deployment based on how close the driver's
seat is to the steering wheel, how close the
passenger's seat is to the instrument panel,
whether or not the seat belts are fastened, and
how severe is the impact.
The advanced SRS offers the ability to control
the airbag inflation with two levels. A first stage
level is provided for moderate-severity impacts.
A second stage level is provided for more
severe impacts.
According to the impact severity, seating posi-
tion and seat belt usage, the SRSCM(SRS
Control Module) controls the airbag inflation.
Failure to properly wear seat belts can increase
the risk or severity of injury in an accident.
B240A01JM
Driver's Airbag
Page 61 of 273
1FEATURES OF YOUR HYUNDAI50
Reset
Switch
B310B02JMHJM2185
A Type
B Type
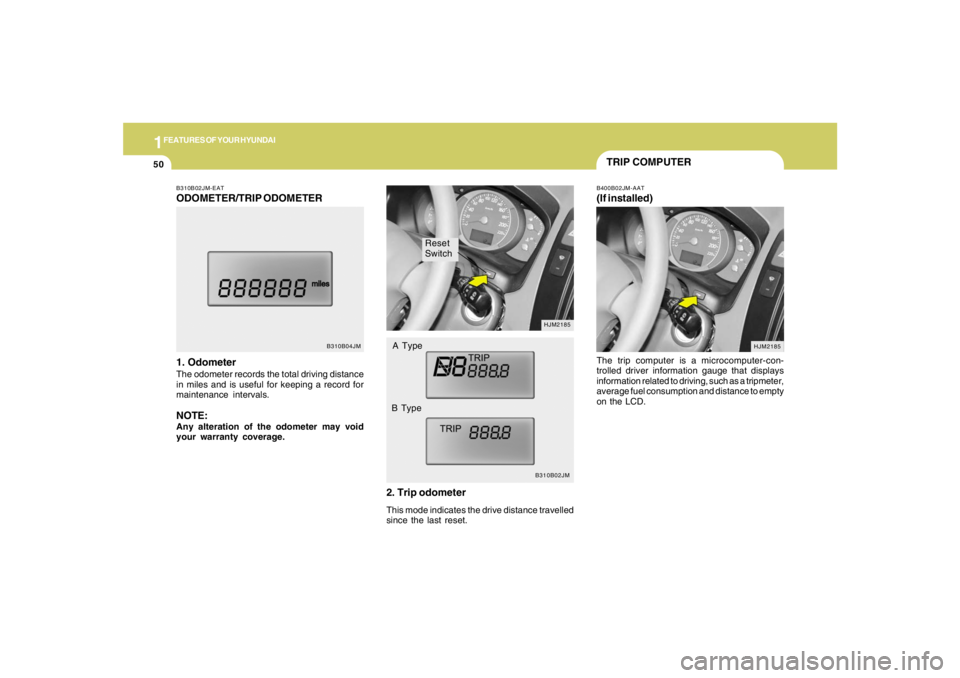
B310B02JM-EATODOMETER/TRIP ODOMETER
1. OdometerThe odometer records the total driving distance
in miles and is useful for keeping a record for
maintenance intervals.NOTE:Any alteration of the odometer may void
your warranty coverage.
B310B04JM
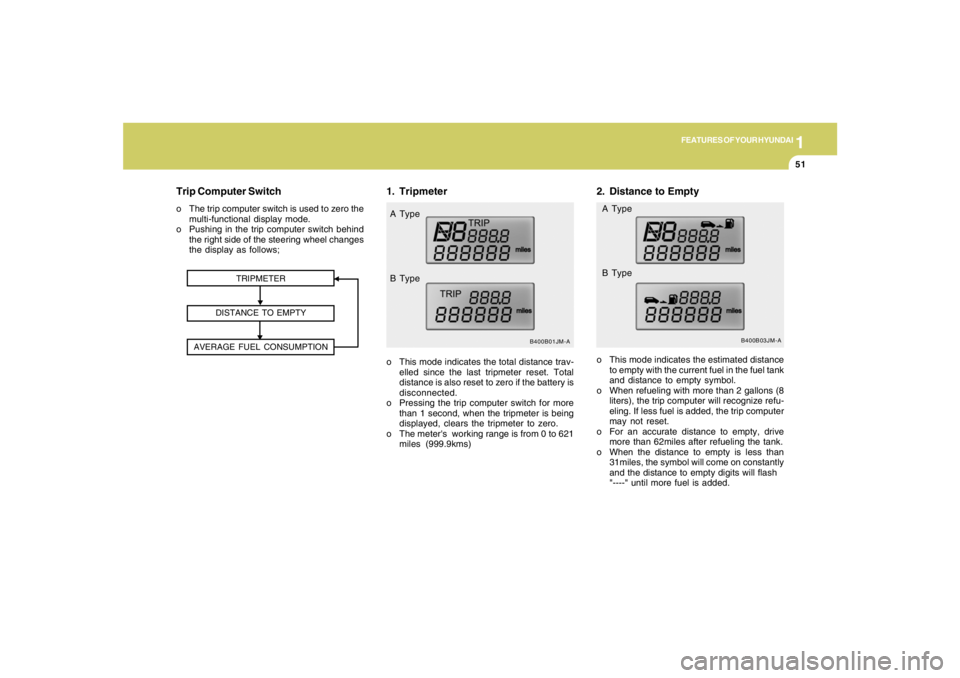
2. Trip odometerThis mode indicates the drive distance travelled
since the last reset.
TRIP COMPUTERB400B02JM-AAT(If installed)The trip computer is a microcomputer-con-
trolled driver information gauge that displays
information related to driving, such as a tripmeter,
average fuel consumption and distance to empty
on the LCD.
HJM2185
Page 62 of 273
1
FEATURES OF YOUR HYUNDAI
51
2. Distance to Empty
B400B03JM-A
o This mode indicates the estimated distance
to empty with the current fuel in the fuel tank
and distance to empty symbol.
o When refueling with more than 2 gallons (8
liters), the trip computer will recognize refu-
eling. If less fuel is added, the trip computer
may not reset.
o For an accurate distance to empty, drive
more than 62miles after refueling the tank.
o When the distance to empty is less than
31miles, the symbol will come on constantly
and the distance to empty digits will flash
"----" until more fuel is added. A Type
B Type
1. Tripmeter
TRIPMETER
DISTANCE TO EMPTY
AVERAGE FUEL CONSUMPTION
B400B01JM-A
o This mode indicates the total distance trav-
elled since the last tripmeter reset. Total
distance is also reset to zero if the battery is
disconnected.
o Pressing the trip computer switch for more
than 1 second, when the tripmeter is being
displayed, clears the tripmeter to zero.
o The meter's working range is from 0 to 621
miles (999.9kms) A Type
B Type
Trip Computer Switcho The trip computer switch is used to zero the
multi-functional display mode.
o Pushing in the trip computer switch behind
the right side of the steering wheel changes
the display as follows;
Page 65 of 273
1FEATURES OF YOUR HYUNDAI54
WINDSHIELD WIPER AND WASHER
SWITCH
B340G01L-GATAuto Light (If installed)To operate the automatic light feature, turn the
barrel on the end of the multi-function switch. If
you set the multi-function switch to "AUTO", the
tail lights and headlights will be turned automati-
cally on or off according to external illumination.
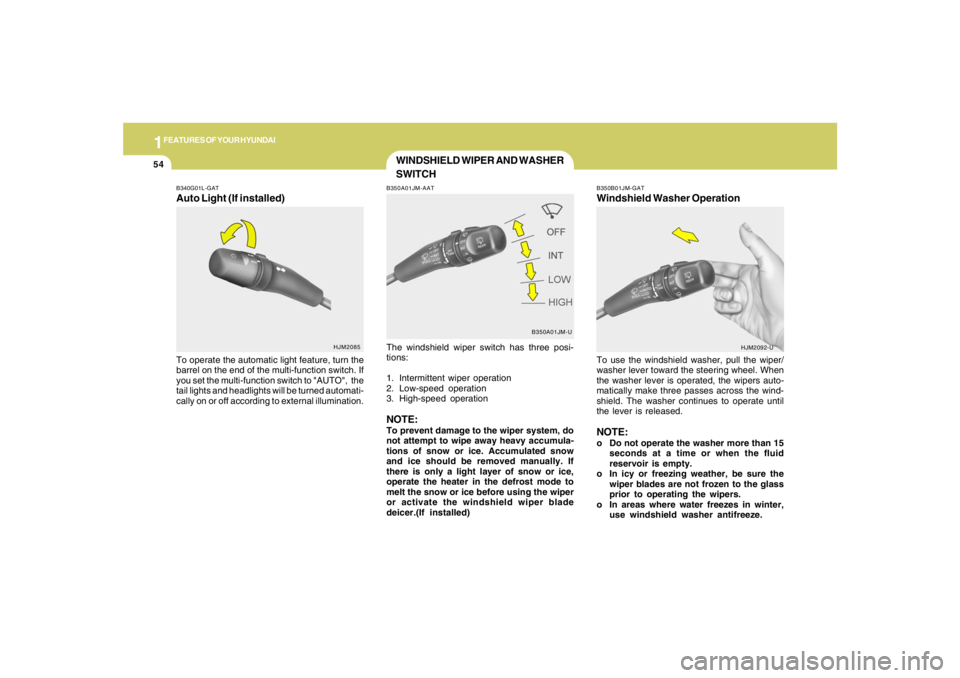
B350A01JM-AATThe windshield wiper switch has three posi-
tions:
1. Intermittent wiper operation
2. Low-speed operation
3. High-speed operationNOTE:To prevent damage to the wiper system, do
not attempt to wipe away heavy accumula-
tions of snow or ice. Accumulated snow
and ice should be removed manually. If
there is only a light layer of snow or ice,
operate the heater in the defrost mode to
melt the snow or ice before using the wiper
or activate the windshield wiper blade
deicer.(If installed)
B350B01JM-GATWindshield Washer OperationTo use the windshield washer, pull the wiper/
washer lever toward the steering wheel. When
the washer lever is operated, the wipers auto-
matically make three passes across the wind-
shield. The washer continues to operate until
the lever is released.NOTE:o Do not operate the washer more than 15
seconds at a time or when the fluid
reservoir is empty.
o In icy or freezing weather, be sure the
wiper blades are not frozen to the glass
prior to operating the wipers.
o In areas where water freezes in winter,
use windshield washer antifreeze.
HJM2085
HJM2092-U B350A01JM-U
Page 97 of 273
1FEATURES OF YOUR HYUNDAI86
With the "Fresh" mode selected, air enters the
vehicle from the outside and is heated or cooled
according to the function selected.
With the "Recirculation" mode selected, air from
within the passenger compartment will be drawn
through the heating system and heated or
cooled according to the function selected.NOTE:o It should be noted that prolonged opera-
tion of the heating in "Recirculation"
mode ( ) may result in fogging of the
windshield and side windows and the air
within the passenger compartment will
become stale. In addition, prolonged
use of the air conditioning with the "Re-
circulation" mode ( ) selected may
result in the air within the passenger
compartment becoming excessively dry.
o When the ignition switch is turned "ON"
the air intake control will change to
"Fresh" mode ( ) in floor, floor-defrost
and defrost position. This is normal op-
eration.
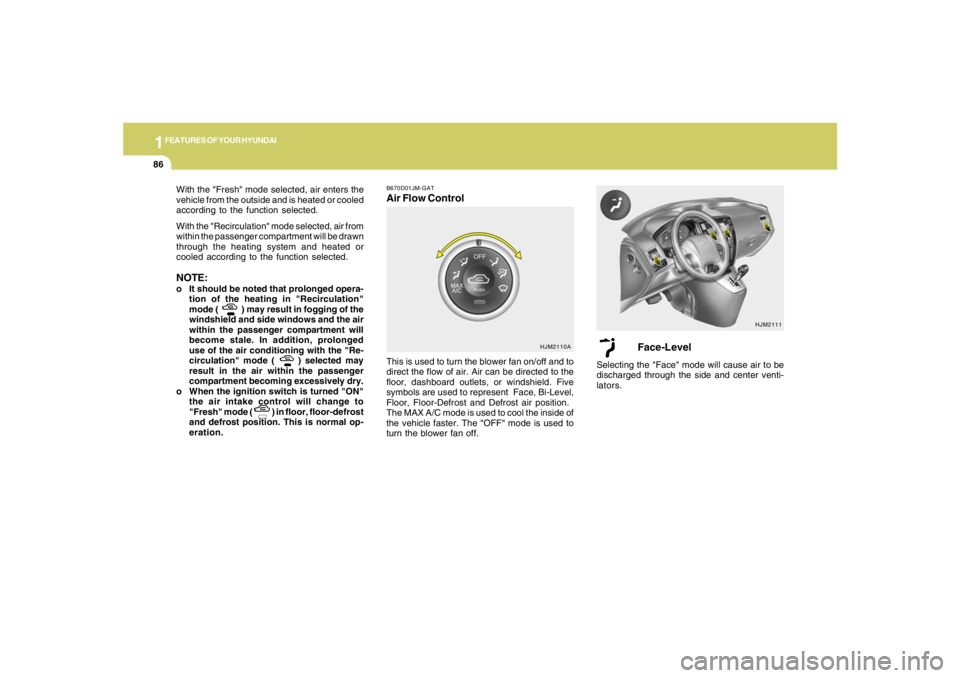
B670D01JM-GATAir Flow Control
HJM2111
HJM2110A
This is used to turn the blower fan on/off and to
direct the flow of air. Air can be directed to the
floor, dashboard outlets, or windshield. Five
symbols are used to represent Face, Bi-Level,
Floor, Floor-Defrost and Defrost air position.
The MAX A/C mode is used to cool the inside of
the vehicle faster. The "OFF" mode is used to
turn the blower fan off.
Face-Level
Selecting the "Face" mode will cause air to be
discharged through the side and center venti-
lators.
Page 108 of 273
1
FEATURES OF YOUR HYUNDAI
97
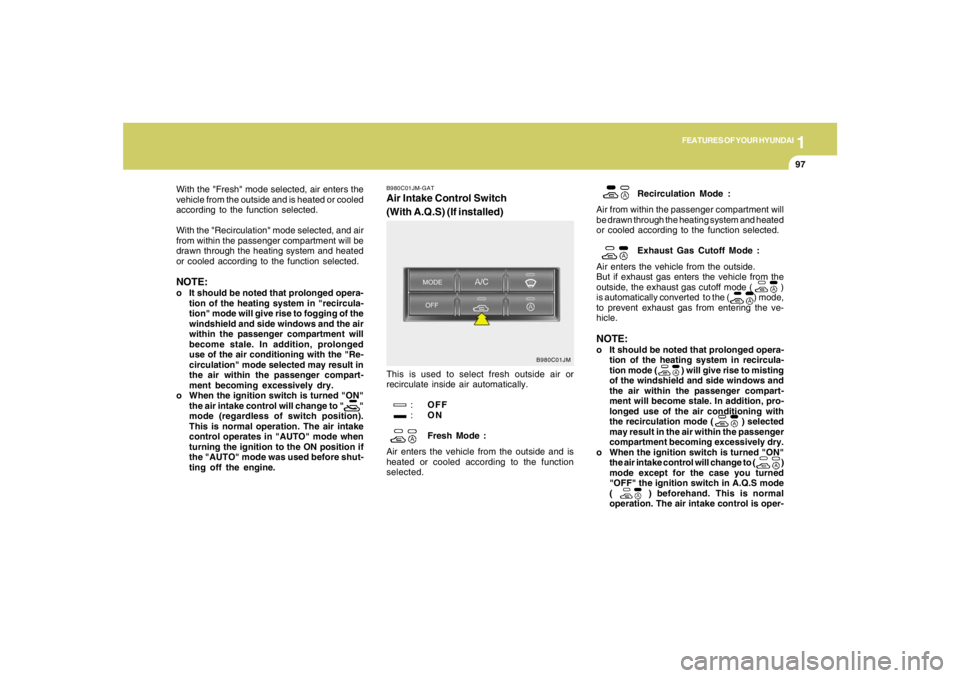
B980C01JM-GATAir Intake Control Switch
(With A.Q.S) (If installed)This is used to select fresh outside air or
recirculate inside air automatically.
:OFF
:ON
Fresh Mode :
Air enters the vehicle from the outside and is
heated or cooled according to the function
selected.Recirculation Mode :
Air from within the passenger compartment will
be drawn through the heating system and heated
or cooled according to the function selected.
Exhaust Gas Cutoff Mode :
Air enters the vehicle from the outside.
But if exhaust gas enters the vehicle from the
outside, the exhaust gas cutoff mode ( )
is automatically converted to the ( ) mode,
to prevent exhaust gas from entering the ve-
hicle.
NOTE:o It should be noted that prolonged opera-
tion of the heating system in recircula-
tion mode ( ) will give rise to misting
of the windshield and side windows and
the air within the passenger compart-
ment will become stale. In addition, pro-
longed use of the air conditioning with
the recirculation mode ( ) selected
may result in the air within the passenger
compartment becoming excessively dry.
o When the ignition switch is turned "ON"
the air intake control will change to ( )
mode except for the case you turned
"OFF" the ignition switch in A.Q.S mode
( ) beforehand. This is normal
operation. The air intake control is oper-
B980C01JM
With the "Fresh" mode selected, air enters the
vehicle from the outside and is heated or cooled
according to the function selected.
With the "Recirculation" mode selected, and air
from within the passenger compartment will be
drawn through the heating system and heated
or cooled according to the function selected.NOTE:o It should be noted that prolonged opera-
tion of the heating system in "recircula-
tion" mode will give rise to fogging of the
windshield and side windows and the air
within the passenger compartment will
become stale. In addition, prolonged
use of the air conditioning with the "Re-
circulation" mode selected may result in
the air within the passenger compart-
ment becoming excessively dry.
o When the ignition switch is turned "ON"
the air intake control will change to " "
mode (regardless of switch position).
This is normal operation. The air intake
control operates in "AUTO" mode when
turning the ignition to the ON position if
the "AUTO" mode was used before shut-
ting off the engine.
Page 115 of 273
1FEATURES OF YOUR HYUNDAI
104
K260B01JM-GAT1. POWER ON-OFF Control KnobThe radio unit may be operated when the ignition
key is in the "ACC" or "ON" position. Press the
knob to switch the power on. The LCD shows
the radio frequency in the radio mode or the CD
track indicator in the CD mode. To switch the
power off, press the knob again.VOLUME ControlRotate the knob clockwise to increase the
volume and turn the knob counterclockwise to
reduce the volume.MODE ControlAfter pressing the MODE select button, rotate
the knob clockwise or counter- clockwise for
the desired tone quality.2. TUNE (Manual) Select ButtonPress the ( ) side or ( ) side to increase or to
decrease the frequency. Press either button
and hold down to continuously scroll. Release
button once the desired station is reached.
SEEK Operation (Automatic Channel
Selection)Press the TUNE select button for 1 sec or more.
Releasing it will automatically tune to the next
available station with a beep sound.
When the ( ) side is pressed longer than 1
second, releasing will automatically tune to the
next higher frequency and when the ( ) side is
pressed longer than 1 second, releasing will
automatically tune to the next lower frequency.3. PRESET STATION SELECT
ButtonSix (6) stations for AM, FM1 or FM2 respec-
tively can be preset in the electronic memory
circuit on this unit.HOW TO PRESET STATIONSSix AM and twelve FM stations may be pro-
grammed into the memory of the radio. Then, by
simply pressing the band select button and/or
one of the six station select buttons, you may
recall any of these stations instantly. To pro-
gram the stations, follow these steps:o Press band selector to set the band for AM,
FM1 or FM2.
o Select the desired station to be stored by
seek, scan or manual tuning.
o Determine the preset station select button
you wish to use to access that station.
o Press the station select button for more than
two seconds. A select button indicator will
show in the display indicating which select
button you have depressed. The frequency
display will flash after it has been stored into
the memory.
You should then release the button, and
proceed to program the next desired station.
A total of 18 stations can be programmed by
selecting one AM and two FM stations per
button.
o When completed, any preset station may be
recalled by selecting AM, FM1 or FM2 band
and the appropriate station button.
4.MODE Select ButtonPressing the MODE button changes the BASS,
TREBLE, FADER, BALANCE mode.
The mode selected is shown on the display.
After selecting the each mode, rotate the vol-
ume control knob clockwise or counterclock-
wise.
Page 121 of 273
1FEATURES OF YOUR HYUNDAI
110
!
HMP280B01TB-GAT1. POWER ON-OFF Controlo The radio unit may be operated when the
ignition key is in the "ACC" or "ON" position.
Press the button to switch the power on. The
display shows the radio frequency in the
radio mode, the tape direction indicator in the
tape mode or CD
ˆMP3 track in either the
CD
ˆMP3 mode or CD AUTO CHANGER
mode. To switch the power off, press the
button again.
o Push the FM
ˆAM, TAPE or CD
ˆMP3 to turn
on that function without pushing Power
ON
ˆOFF control knob.
VOLUME ControlRotate the knob clockwise to increase the
volume and turn the knob counterclockwise to
reduce the volume.2. BAND SelectorPressing the band selector FM
ˆAM changes
the AM, FM1 and FM2 bands. The mode se-
lected is shown on the display.
3. TUNE (Manual) Select KnobPush the TUNE select knob (JOY STICK)
upwards or downwards to increase or de-
crease the frequency. Release the knob when
the station is selected.SEEK Operation
(Automatic Channel Selection)Push the TUNE select knob (JOY STICK) to the
right or left, the frequency will be automatically
tuned to the next higher or lower available
station.
4. SCANWhen the scan button is pressed, the frequency
will increase and the receivable stations will be
tuned in one after another, receiving each sta-
tion for 5 seconds. To stop scanning, press the
scan button again.5. Best Station Memory (BSM)When the BSM button is pressed the six chan-
nels from the highest field intensity are selected
next and stored in memory. The stations se-
lected are stored in the sequence frequency
from the first preset key.6. PRESET STATION Select ButtonsSix (6) stations for AM, FM and FM2 respec-
tively can be preset in the electronic memory
circuit.HOW TO PRESET STATIONSSix AM and twelve FM stations may be pro-
grammed into the memory of the radio. Then, by
simply pressing the band select button and/or
one of the six station select buttons, you may
recall any of these stations instantly. To pro-
gram the stations, follow these steps:
WARNING:
Don't operate the button and joy stick switch
while driving. It can cause death or serious
injury in case of an accident.