inflation pressure HYUNDAI TUCSON 2005 Owners Manual
[x] Cancel search | Manufacturer: HYUNDAI, Model Year: 2005, Model line: TUCSON, Model: HYUNDAI TUCSON 2005Pages: 273, PDF Size: 11.53 MB
Page 165 of 273
2
DRIVING YOUR HYUNDAI
19
o Use caution when parking on a hill. Engage
the parking brake and place the gear selec-
tor lever in "P" (automatic transaxle) or in first
or reverse gear (manual transaxle). If your
car is facing downhill, turn the front wheels
into the curb to help keep the car from rolling.
If your car is facing uphill, turn the front
wheels away from the curb to help keep the
car from rolling. If there is no curb or if it is
required by other conditions to keep the car
from rolling, block the wheels.
o Under some conditions your parking brake
can freeze in the engaged position. This is
most likely to happen when there is an ac-
cumulation of snow or ice around or near the
rear brakes or if the brakes are wet. If there
is a risk that the parking brake may freeze,
apply it only temporarily while you put the
gear selector lever in "P" (automatic) or in
first or reverse gear (manual transaxle) and
block the rear wheels so the car cannot roll.
Then release the parking brake.
o Do not hold the vehicle on the upgrade with
the accelerator pedal. This can cause the
transaxle to overheat. Always use the brake
pedal or parking brake. o Don't coast down hills with the car out of gear.
This is extremely hazardous. Keep the car
in gear at all times, use the brakes to slow
down, then shift to a lower gear so that engine
braking will help you maintain a safe speed.
o Don't "ride" the brake pedal. Resting your
foot on the brake pedal while driving can be
dangerous because it can result in the brakes
overheating and losing their effectiveness. It
also increases the wear of the brake com-
ponents.
o If a tire goes flat while you are driving, apply
the brakes gently and keep the car pointed
straight ahead while you slow down. When
you are moving slowly enough for it to be safe
to do so, pull off the road and stop in a safe
place.
o If your car is equipped with an automatic
transaxle, don't let your car creep forward.
To avoid creeping forward, keep your foot
firmly on the brake pedal when the car is
stopped.
DRIVING FOR ECONOMYC140A01A-AATYou can save fuel and get more miles from your
car if you follow these suggestions:
o Drive smoothly. Accelerate at a moderate
rate. Don't make "jack-rabbit" starts or full-
throttle shifts and maintain a steady cruising
speed. Don't race between stoplights. Try to
adjust your speed to that of the other traffic
so you don't have to change speeds unnec-
essarily. Avoid heavy traffic whenever pos-
sible. Always maintain a safe distance from
other vehicles so you can avoid unneces-
sary braking. This also reduces brake wear.
o Drive at a moderate speed. The faster you
drive, the more fuel your car uses. Driving at
a moderate speed, especially on the high-
way, is one of the most effective ways to
reduce fuel consumption.
o Don't "ride" the brake or clutch pedal. This
can increase fuel consumption and also
increase wear on these components. In
addition, driving with your foot resting on the
brake pedal may cause the brakes to over-
heat, which reduces their effectiveness and
may lead to more serious consequences.
o Take care of your tires. Keep them inflated
to the recommended pressure. Incorrect
inflation, either too much or too little, results
in unnecessary tire wear. Check the tire
pressures at least once a month.
Page 169 of 273
2
DRIVING YOUR HYUNDAI
23
USE OF LIGHTSC180A01A-AATCheck your lights regularly for correct opera-
tion and always keep them clean. When driving
during the day in conditions of poor visibility, it
is helpful to drive with headlights on low beam.
This enables you to be seen as well as to see.
HIGHER SPEED MOTORINGC170A01A-AATPre-Trip Inspections1. Tires:
Adjust the tire inflation pressures to specifica-
tion. Low tire inflation pressures will result in
overheating and possible failure of the tires.
Avoid using worn or damaged tires which may
result in reduced traction or tire failure.NOTE:Never exceed the maximum tire inflation
pressure shown on the tires.
2. Fuel, engine coolant and engine oil:
High speed travel consumes more fuel than
urban motoring. Do not forget to check both
engine coolant and engine oil.
3. Drive belt:
A loose or damaged drive belt may result in
overheating of the engine.
TRAILER OR VEHICLE TOWING!
C190A01S-AATIf you are considering towing with your car, you
should first check with your State's Department
of Motor Vehicles to determine their legal re-
quirements.
Since laws vary from State to State the require-
ments for towing trailers, cars, or other types of
vehicles or apparatus may differ. Ask your
Hyundai dealer for further details before towing.
CAUTION:
Do not do any towing with your car during
its first 1,200 miles (2,000 km) in order to
allow the engine to properly break in. Fail-
ure to heed this caution may result in seri-
ous engine or transaxle damage.
Page 175 of 273
2
DRIVING YOUR HYUNDAI
29
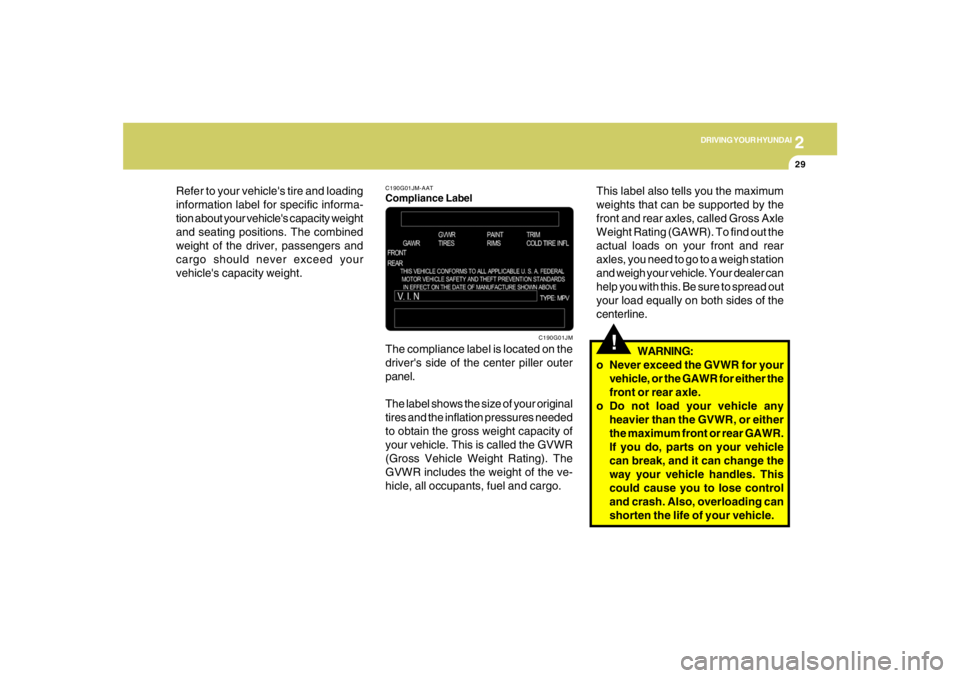
C190G01JM-AATCompliance LabelThe compliance label is located on the
driver's side of the center piller outer
panel.
The label shows the size of your original
tires and the inflation pressures needed
to obtain the gross weight capacity of
your vehicle. This is called the GVWR
(Gross Vehicle Weight Rating). The
GVWR includes the weight of the ve-
hicle, all occupants, fuel and cargo.
C190G01JM
Refer to your vehicle's tire and loading
information label for specific informa-
tion about your vehicle's capacity weight
and seating positions. The combined
weight of the driver, passengers and
cargo should never exceed your
vehicle's capacity weight.
!
This label also tells you the maximum
weights that can be supported by the
front and rear axles, called Gross Axle
Weight Rating (GAWR). To find out the
actual loads on your front and rear
axles, you need to go to a weigh station
and weigh your vehicle. Your dealer can
help you with this. Be sure to spread out
your load equally on both sides of the
centerline.
WARNING:
o Never exceed the GVWR for your
vehicle, or the GAWR for either the
front or rear axle.
o Do not load your vehicle any
heavier than the GVWR, or either
the maximum front or rear GAWR.
If you do, parts on your vehicle
can break, and it can change the
way your vehicle handles. This
could cause you to lose control
and crash. Also, overloading can
shorten the life of your vehicle.
Page 181 of 273
3
WHAT TO DO IN AN EMERGENCY
5
!
4. As the temporary spare tire is spe-
cifically designed for your vehicle, it
should not be used on any other
vehicle.
5. The temporary spare tire should not
be used on any other wheels, nor
should standard tires, snow tires,
wheel covers or trim rings be used
with the temporary spare wheel. If
such use is attempted, damage to
these items or other car components
may occur.
6. The temporary spare tire pressure
should be checked once a month
while the tire is stored.
SPARE TIRE2. The spare tire should only be used
temporarily and should be returned
to the luggage compartment as soon
as the original tire can be repaired or
replaced.
3. Continuous use at speeds of over 50
mph (80 km/h) is not recommended.D040A01JM-AATTEMPORARY SPARE TIRE
The following instructions for the tem-
porary spare tire should be observed:
1. Check inflation pressure as soon as
practical after installing the spare
tire, and adjust to the specified pres-
sure. The tire pressure should be
periodically checked and maintained
at the specified pressure while the
tire is stored.Spare Tire Pressure
CAUTION:
o Do not use snow chains with your
temporary spare tire.
o Do not use more than one tempo-
rary spare tire at a time.
o Do not tow a trailer while the tem-
porary spare tire is installed.
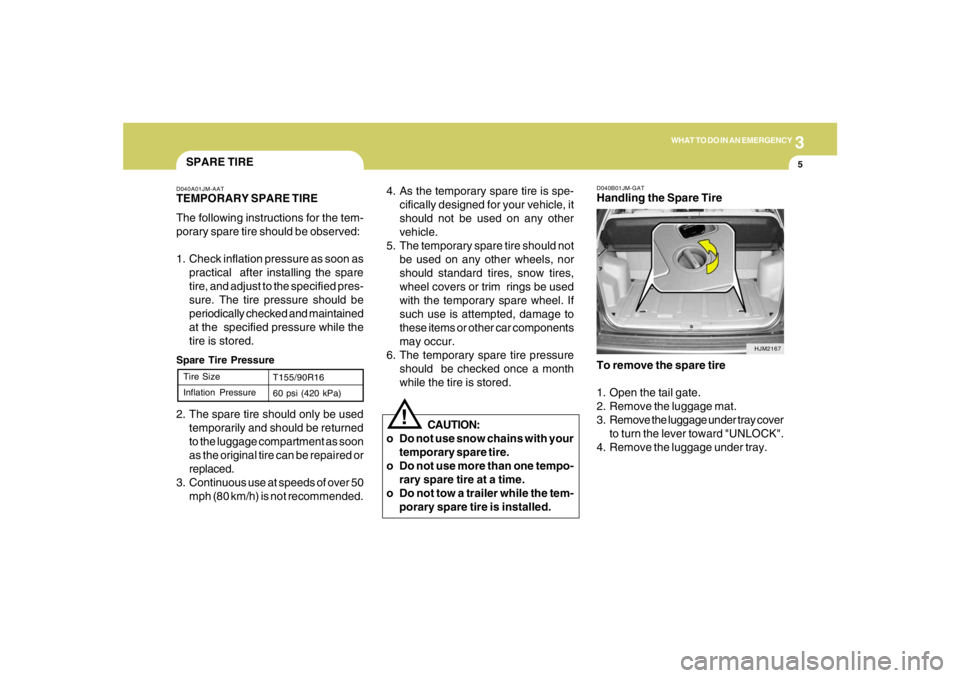
D040B01JM-GATHandling the Spare Tire
To remove the spare tire
1. Open the tail gate.
2. Remove the luggage mat.
3. Remove the luggage under tray cover
to turn the lever toward "UNLOCK".
4. Remove the luggage under tray.
HJM2167
Tire Size
Inflation PressureT155/90R16
60 psi (420 kPa)
Page 248 of 273
Vehicle Identification Number (VIN) .............................. 8-2
Engine Number ............................................................. 8-2
Tire Information ............................................................. 8-2
Recommended Inflation Pressures ............................... 8-3
Tire Sidewall Labeling ................................................... 8-4
Tire Terminology and Definitions ................................... 8-6
Snow Tires .................................................................... 8-8
Tire Chains .................................................................... 8-9
Tire Rotation .................................................................. 8-9
Tire Balancing ............................................................... 8-9
Tire Traction................................................................8-10
When to Replace Tires ...............................................8-10
Tire Maintenance........................................................8-11
Spare Tire and Tools ...................................................8-11
Warranties for Your Hyundai Vehicle..........................8-11
Consumer Information.................................................8-12
Reporting Safety Defects............................................8-14
CONSUMER INFORMATION
8
8
Page 250 of 273
8
CONSUMER INFORMATION & REPORTING SAFETY DEFECTS
3
!
TIRESI030A01JM-AATRECOMMENDED INFLATION PRES-
SURESI020A02A-AATTIRE INFORMATIONThe tires supplied on your new Hyundai
are chosen to provide the best perfor-
mance for normal driving.
If you ever have questions about your
tire warranty and where to obtain ser-
vice, see the tire manufacture's booklet
included with your vehicle's Owner's
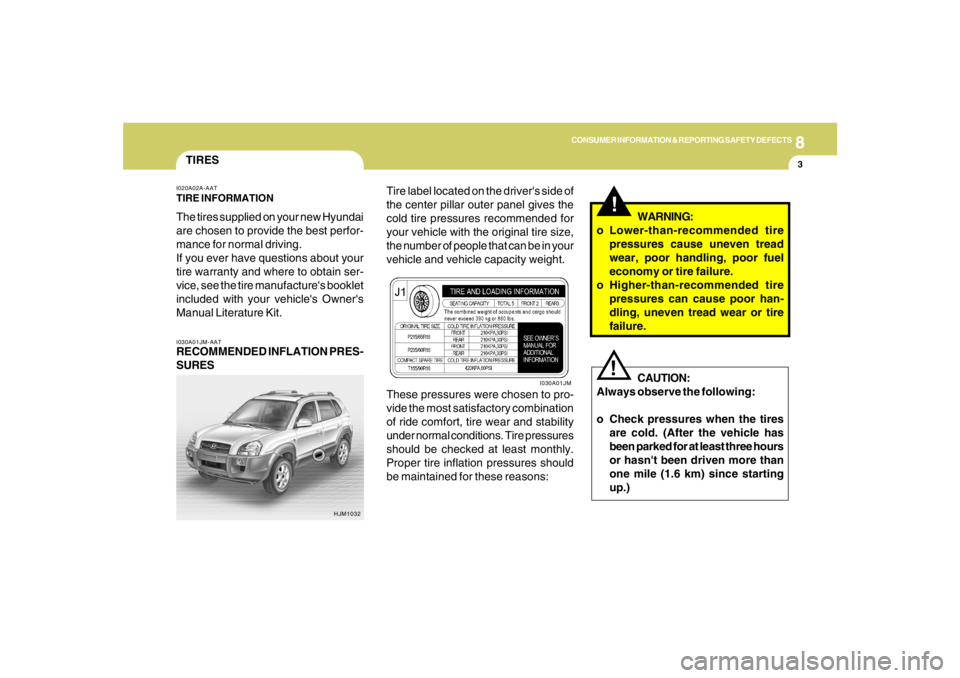
Manual Literature Kit.Tire label located on the driver's side of
the center pillar outer panel gives the
cold tire pressures recommended for
your vehicle with the original tire size,
the number of people that can be in your
vehicle and vehicle capacity weight.
HJM1032
These pressures were chosen to pro-
vide the most satisfactory combination
of ride comfort, tire wear and stability
under normal conditions. Tire pressures
should be checked at least monthly.
Proper tire inflation pressures should
be maintained for these reasons:CAUTION:
Always observe the following:
o Check pressures when the tires
are cold. (After the vehicle has
been parked for at least three hours
or hasn't been driven more than
one mile (1.6 km) since starting
up.)
!
I030A01JM
WARNING:
o Lower-than-recommended tire
pressures cause uneven tread
wear, poor handling, poor fuel
economy or tire failure.
o Higher-than-recommended tire
pressures can cause poor han-
dling, uneven tread wear or tire
failure.
Page 251 of 273
8
CONSUMER INFORMATION & REPORTING SAFETY DEFECTS4
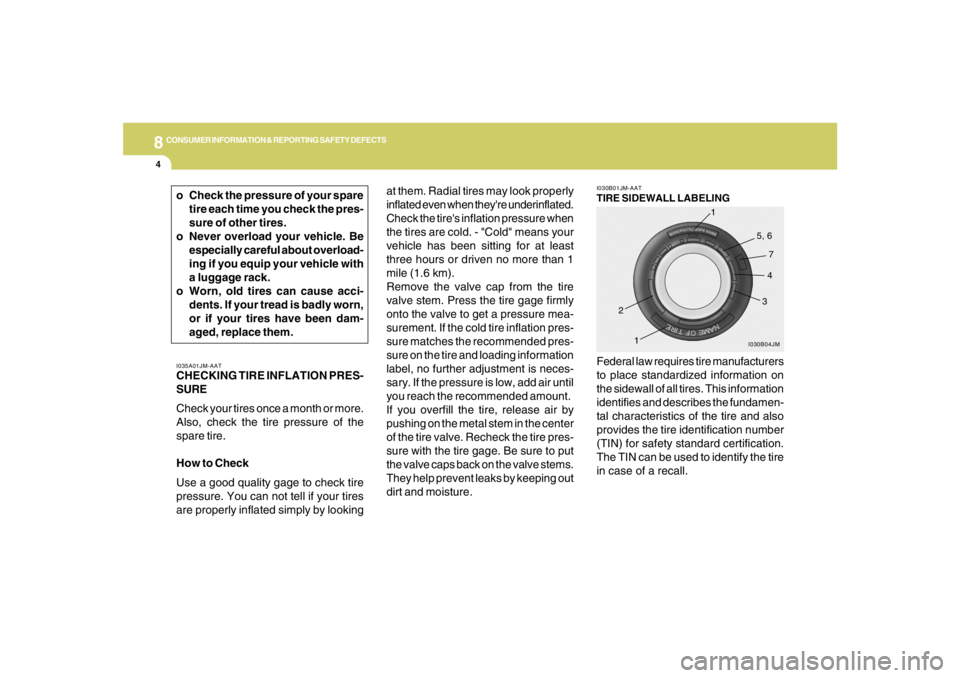
Federal law requires tire manufacturers
to place standardized information on
the sidewall of all tires. This information
identifies and describes the fundamen-
tal characteristics of the tire and also
provides the tire identification number
(TIN) for safety standard certification.
The TIN can be used to identify the tire
in case of a recall. at them. Radial tires may look properly
inflated even when they're underinflated.
Check the tire's inflation pressure when
the tires are cold. - "Cold" means your
vehicle has been sitting for at least
three hours or driven no more than 1
mile (1.6 km).
Remove the valve cap from the tire
valve stem. Press the tire gage firmly
onto the valve to get a pressure mea-
surement. If the cold tire inflation pres-
sure matches the recommended pres-
sure on the tire and loading information
label, no further adjustment is neces-
sary. If the pressure is low, add air until
you reach the recommended amount.
If you overfill the tire, release air by
pushing on the metal stem in the center
of the tire valve. Recheck the tire pres-
sure with the tire gage. Be sure to put
the valve caps back on the valve stems.
They help prevent leaks by keeping out
dirt and moisture.I030B01JM-AATTIRE SIDEWALL LABELING
I030B04JM
1
234 5, 6
7
1
o Check the pressure of your spare
tire each time you check the pres-
sure of other tires.
o Never overload your vehicle. Be
especially careful about overload-
ing if you equip your vehicle with
a luggage rack.
o Worn, old tires can cause acci-
dents. If your tread is badly worn,
or if your tires have been dam-
aged, replace them.I035A01JM-AATCHECKING TIRE INFLATION PRES-
SURE
Check your tires once a month or more.
Also, check the tire pressure of the
spare tire.
How to Check
Use a good quality gage to check tire
pressure. You can not tell if your tires
are properly inflated simply by looking
Page 252 of 273

8
CONSUMER INFORMATION & REPORTING SAFETY DEFECTS
5
1. Manufacturer or Brand name
o Manufacturer or Brand name is
shown.
2. Tire size (example: P235/60R16 99T)
o The "P" indicates the tire is de-
signed for passenger vehicles. A
"T" is the designation for a tempo-
rary spare tire.
o Three-digit number (235): This num-
ber gives the width in millimeters
of the tire from sidewall edge to
sidewall edge.
o Two-digit number (60): This num-
ber, known as the aspect ratio,
gives the tire's ratio of height to
width.
o R: The "R" stands for radial.
o Two-digit number (16): This num-
ber is the wheel or rim diameter in
inches.
o Two (or three) digit number (99):
This number is the tire's load in-
dex. It is a measurement of how
much weight each tire can sup-
port.o T: Speed Rating. The speed rating
denotes the speed at which a tire is
designed to be driven for extended
periods of time. The ratings range
from "A" to "Z" (98 to 186 MPH).
3. TIN (Tire Identification Number) for
new tire (example: DOT XX XX XXX
XXXX)
o DOT: Abbreviation for the "Depart-
ment of Transportation". The sym-
bol can be placed above, below or
to the left or right of the Tire Iden
tification Number. Indicates tire is
in compliance with the U.S. De-
partment of Transportation Motor
Vehicle Safety Standards.
o 1st two-digit code: Manufacturer's
identification mark
o 2nd two-digit code: Tire size
o 3rd three-digit code: Tire type code
(Optional)
o 4th four-digit code: Date of Manu-
factureo Four numbers represent the week
and year the tire was built. For
example, the numbers 3105 means
the 31st week of 2005.
4. Tire ply composition and material
The number of layers or plies of
rubbercoated fabric in the tire. Tire
manufacturers also must indicate
the materials in the tire, which in-
clude steel, nylon, polyester, and
others. The letter "R" means radial
ply construction; the letter "D" means
diagonal or bias ply construction;
and the letter "B" means belted-bias
ply construction.
5. Maximum permissible inflation
pressure
This number is the greatest amount
of air pressure that should be put in
the tire. Do not exceed the maximum
permissible inflation pressure. Refer
to the Tire and Loading Information
label for recommended inflation pres-
sure.
Page 254 of 273

8
CONSUMER INFORMATION & REPORTING SAFETY DEFECTS
7
Intended Outboard Sidewall: The side
of an asymmetrical tire, that must al-
ways face outward when mounted on a
vehicle.
Kilopascal (kPa): The metric unit for
air pressure.
Load Index: An assigned number rang-
ing from 1 to 279 that corresponds to
the load carrying capacity of a tire.
Maximum Inflation Pressure: The
maximum air pressure to which a cold
tire may be inflated. The maximum air
pressure is molded onto the sidewall.
Maximum Load Rating: The load rat-
ing for a tire at the maximum permis-
sible inflation pressure for that tire.
Maximum Loaded Vehicle Weight:
The sum of curb weight; accessory
weight; vehicle capacity weight; and
production options weight.
Normal Occupant Weight: The num-
ber of occupants a vehicle is designed
to seat multiplied by 150 pounds (68
kg).Occupant Distribution: Designated
seating positions.
Outward Facing Sidewall: The side of
a asymmetrical tire that has a particular
side that faces outward when mounted
on a vehicle. The side of the tire that
contains a whitewall, bears white letter-
ing or bears manufacturer, brand and or
model name molding that is higher or
deeper than the same moldings on the
other sidewall of the tire.
Passenger (P-Metric) Tire: A tire used
on passenger cars and some light duty
trucks and multipurpose vehicles.
Recommended Inflation Pressure:
Vehicle manufacturer's recommended
tire inflation pressure and shown on the
tire placard.
Radial Ply tire: A pneumatic tire in
which the ply cords that extend to the
beads are laid at 90 degrees to the
centerline of the tread.
Rim: A metal support for a tire and upon
which the tire beads are seated.Sidewall: The portion of a tire between
the tread and the bead.
Speed Rating: An alphanumeric code
assigned to a tire indicating the maxi-
mum speed at which a tire can operate.
Traction: The friction between the tire
and the road surface. The amount of
grip provided.
Tread: The portion of a tire that comes
into contact with the road.
Treadwear Indicators: Narrow bands,
sometimes called "wear bars," that show
across the tread of a tire when only 2/32
inch of tread remains.
UTQGS: Uniform Tire Quality Grading
Standards, a tire information system
that provides consumers with ratings
for a tire's traction, temperature and
treadwear. Ratings are determined by
tire manufacturers using government
testing procedures. The ratings are
molded into the sidewall of the tire.
Page 255 of 273

8
CONSUMER INFORMATION & REPORTING SAFETY DEFECTS8
Vehicle Capacity Weight: The number
of designated seating positions multi-
plied by 150 lbs. (68 kg) plus the rated
cargo and luggage load
Vehicle Maximum Load on the Tire:
Load on an individual tire due to curb
and accessory weight plus maximum
occupant and cargo weight.
Vehicle Normal Load on the Tire:
That load on an individual tire that is
determined by distributing to each axle
its share of the curb weight, accessory
weight, and normal occupant weight
and driving by 2.
Vehicle Placard: A label permanently
attached to a vehicle showing the origi-
nal equipment tire size and recom-
mended inflation pressure
I040A01O-AATSNOW TIRES
If you equip your car with snow tires,
they should be the same size and have
the same load capacity as the original
tires. Snow tires should be installed on
all four wheels; otherwise, poor han-
dling may result.
Snow tires should carry 4 psi (28 kPa)
more air pressure than the pressure
recommended for the standard tires on
the tire label on the driver's side of the
center pillar , or up to the maximum
pressure shown on the tire sidewall
whichever is less.
Do not drive faster than 75 mph (120
km/h) when your car is equipped with
snow tires.
I040B01JM-AATALL SEASON TIRES
Hyundai specifies all season tires on
some models to provide good perfor-
mance for use all year round, including
snowy and icy road conditions. All sea-
son tires are identified by ALL SEASON
and/or M+S (Mud and Snow) on the tire
sidewall. Snow tires have better snow
traction than all season tires an may be
more appropriate in some areas.I040C01JM-AATSUMMER TIRES
Hyundai specifies summer tires on some
models to provide superior performance
on dry roads. Summer tire performance
is substantrally reduced in snow and ice.
Summer tires do not have the tire trac-
tion rating M+S (Mud and Snow) on the
tire side wall. if you plan to operate your
vehicle in snowy or icy conditions.
Hyundai recommends the use of snow
tires or all season tires on all four wheels.