lights HYUNDAI TUCSON 2009 User Guide
[x] Cancel search | Manufacturer: HYUNDAI, Model Year: 2009, Model line: TUCSON, Model: HYUNDAI TUCSON 2009Pages: 273, PDF Size: 10.29 MB
Page 70 of 273
1
FEATURES OF YOUR HYUNDAI
59
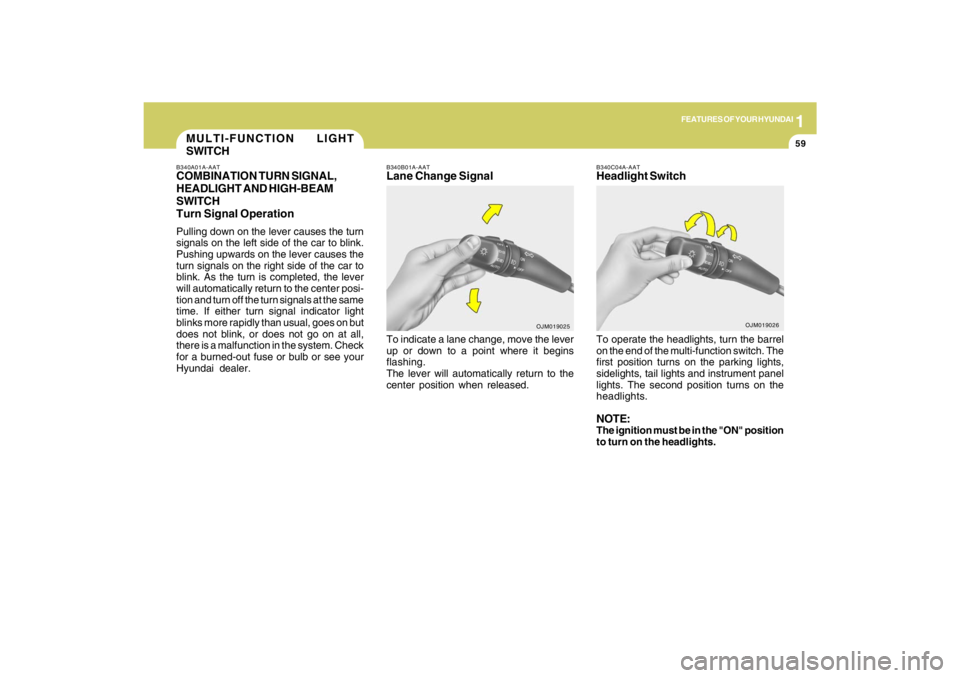
B340C04A-AATHeadlight SwitchTo operate the headlights, turn the barrel
on the end of the multi-function switch. The
first position turns on the parking lights,
sidelights, tail lights and instrument panel
lights. The second position turns on the
headlights.NOTE:The ignition must be in the "ON" position
to turn on the headlights.
OJM019026
MULTI-FUNCTION LIGHT
SWITCHB340A01A-AATCOMBINATION TURN SIGNAL,
HEADLIGHT AND HIGH-BEAM
SWITCH
Turn Signal OperationPulling down on the lever causes the turn
signals on the left side of the car to blink.
Pushing upwards on the lever causes the
turn signals on the right side of the car to
blink. As the turn is completed, the lever
will automatically return to the center posi-
tion and turn off the turn signals at the same
time. If either turn signal indicator light
blinks more rapidly than usual, goes on but
does not blink, or does not go on at all,
there is a malfunction in the system. Check
for a burned-out fuse or bulb or see your
Hyundai dealer.
B340B01A-AATLane Change SignalTo indicate a lane change, move the lever
up or down to a point where it begins
flashing.
The lever will automatically return to the
center position when released.
OJM019025
Page 71 of 273
1FEATURES OF YOUR HYUNDAI60
B340D01A-AATHigh-beam SwitchTo turn on the headlight high beams, push
the lever forward (away from you). The
High Beam Indicator Light will come on at
the same time. For low beams, pull the
lever back toward you.
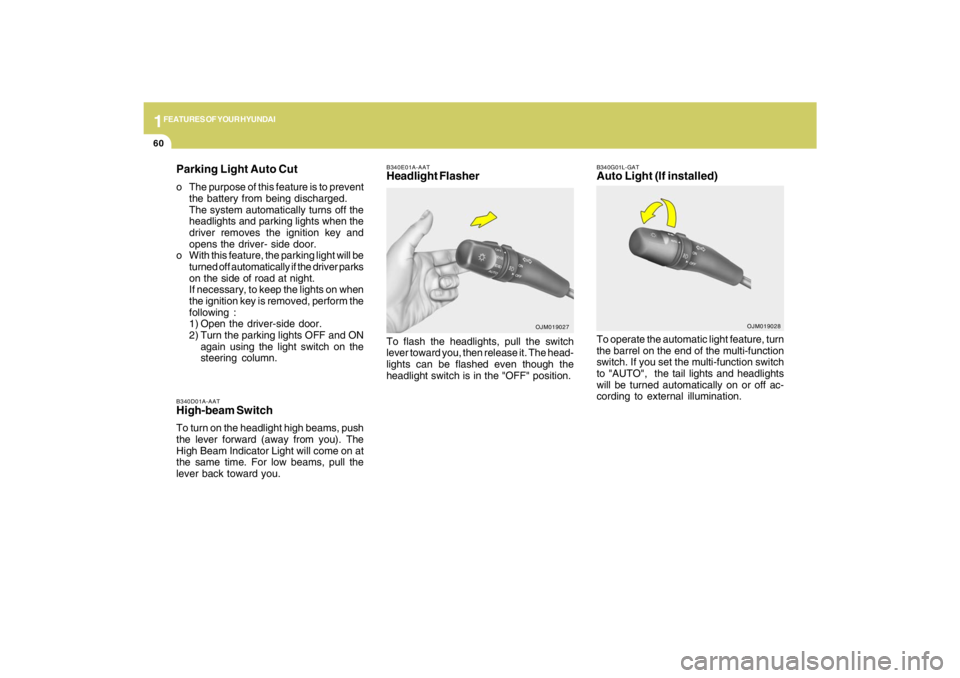
B340E01A-AATHeadlight FlasherTo flash the headlights, pull the switch
lever toward you, then release it. The head-
lights can be flashed even though the
headlight switch is in the "OFF" position.
OJM019027
Parking Light Auto Cuto The purpose of this feature is to prevent
the battery from being discharged.
The system automatically turns off the
headlights and parking lights when the
driver removes the ignition key and
opens the driver- side door.
o With this feature, the parking light will be
turned off automatically if the driver parks
on the side of road at night.
If necessary, to keep the lights on when
the ignition key is removed, perform the
following :
1) Open the driver-side door.
2) Turn the parking lights OFF and ON
again using the light switch on the
steering column.
B340G01L-GATAuto Light (If installed)To operate the automatic light feature, turn
the barrel on the end of the multi-function
switch. If you set the multi-function switch
to "AUTO", the tail lights and headlights
will be turned automatically on or off ac-
cording to external illumination.
OJM019028
Page 75 of 273
1FEATURES OF YOUR HYUNDAI64
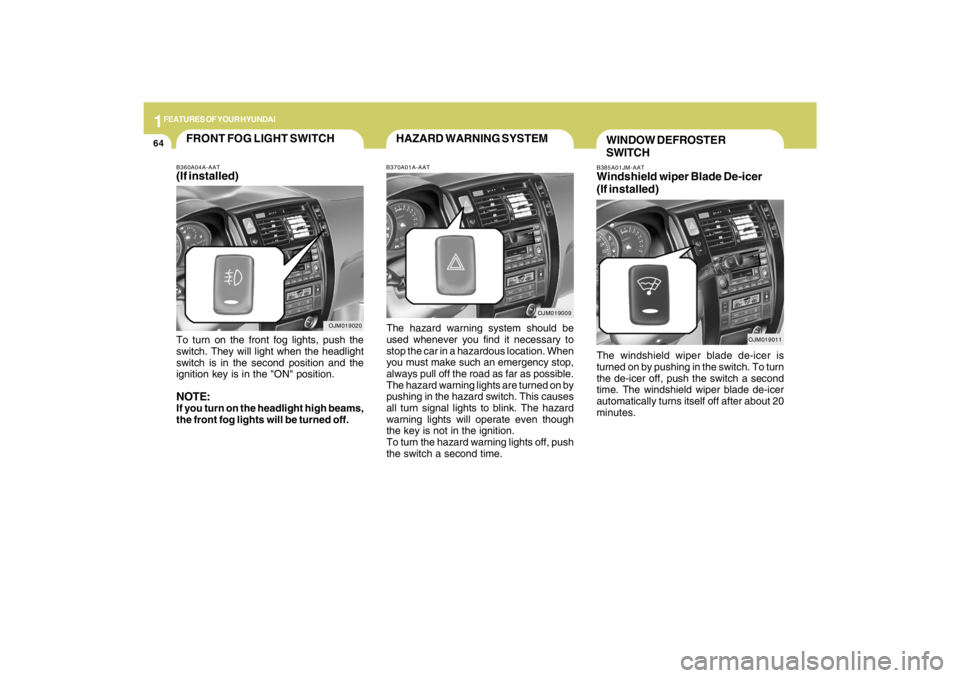
B385A01JM-AATWindshield wiper Blade De-icer
(If installed)The windshield wiper blade de-icer is
turned on by pushing in the switch. To turn
the de-icer off, push the switch a second
time. The windshield wiper blade de-icer
automatically turns itself off after about 20
minutes.
OJM019011
WINDOW DEFROSTER
SWITCH
OJM019009
HAZARD WARNING SYSTEMB370A01A-AATThe hazard warning system should be
used whenever you find it necessary to
stop the car in a hazardous location. When
you must make such an emergency stop,
always pull off the road as far as possible.
The hazard warning lights are turned on by
pushing in the hazard switch. This causes
all turn signal lights to blink. The hazard
warning lights will operate even though
the key is not in the ignition.
To turn the hazard warning lights off, push
the switch a second time.
OJM019020
FRONT FOG LIGHT SWITCHB360A04A-AAT(If installed)To turn on the front fog lights, push the
switch. They will light when the headlight
switch is in the second position and the
ignition key is in the "ON" position.NOTE:If you turn on the headlight high beams,
the front fog lights will be turned off.
Page 77 of 273
1FEATURES OF YOUR HYUNDAI66
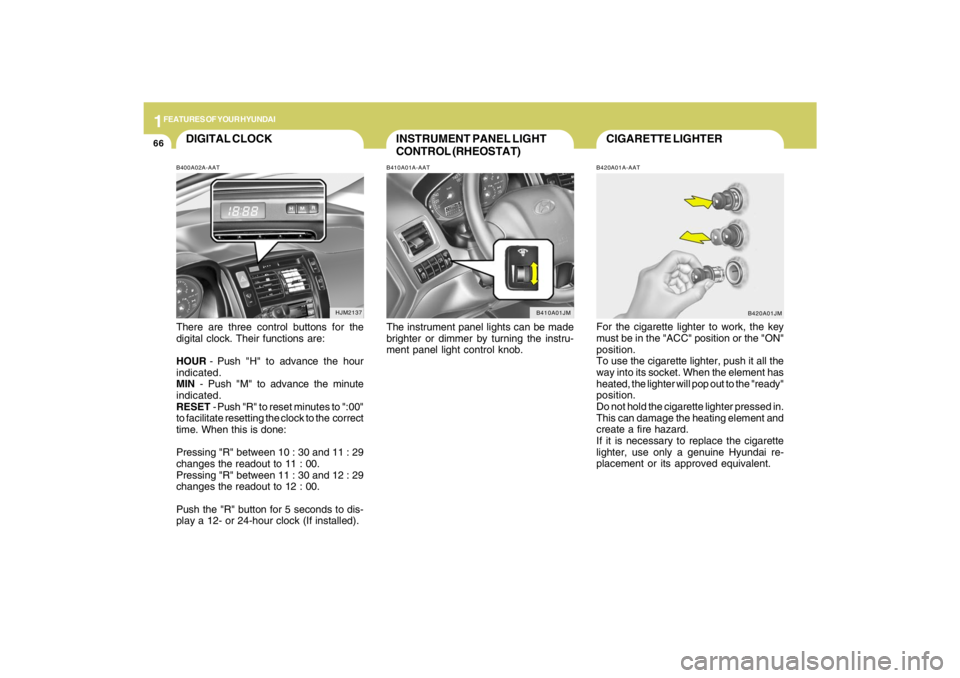
CIGARETTE LIGHTERB420A01A-AATFor the cigarette lighter to work, the key
must be in the "ACC" position or the "ON"
position.
To use the cigarette lighter, push it all the
way into its socket. When the element has
heated, the lighter will pop out to the "ready"
position.
Do not hold the cigarette lighter pressed in.
This can damage the heating element and
create a fire hazard.
If it is necessary to replace the cigarette
lighter, use only a genuine Hyundai re-
placement or its approved equivalent.
B420A01JM
INSTRUMENT PANEL LIGHT
CONTROL (RHEOSTAT)B410A01A-AATThe instrument panel lights can be made
brighter or dimmer by turning the instru-
ment panel light control knob.
B410A01JM
DIGITAL CLOCKB400A02A-AATThere are three control buttons for the
digital clock. Their functions are:
HOUR - Push "H" to advance the hour
indicated.
MIN - Push "M" to advance the minute
indicated.
RESET - Push "R" to reset minutes to ":00"
to facilitate resetting the clock to the correct
time. When this is done:
Pressing "R" between 10 : 30 and 11 : 29
changes the readout to 11 : 00.
Pressing "R" between 11 : 30 and 12 : 29
changes the readout to 12 : 00.
Push the "R" button for 5 seconds to dis-
play a 12- or 24-hour clock (If installed).
HJM2137
Page 78 of 273
1
FEATURES OF YOUR HYUNDAI
67
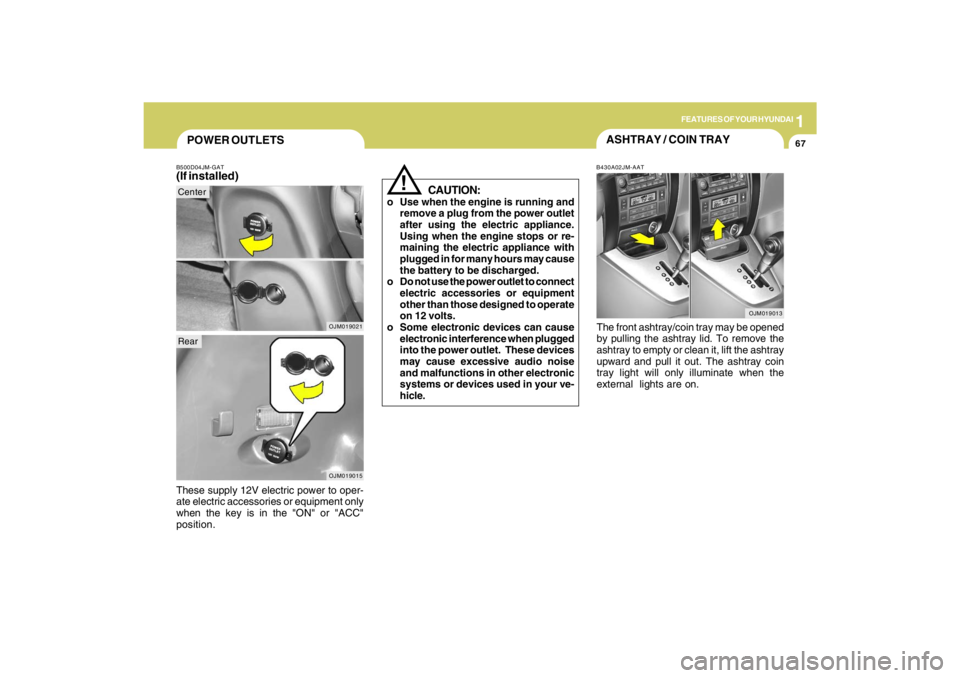
POWER OUTLETSB500D04JM-GAT(If installed)These supply 12V electric power to oper-
ate electric accessories or equipment only
when the key is in the "ON" or "ACC"
position.
OJM019021
!
CAUTION:
o Use when the engine is running and
remove a plug from the power outlet
after using the electric appliance.
Using when the engine stops or re-
maining the electric appliance with
plugged in for many hours may cause
the battery to be discharged.
o Do not use the power outlet to connect
electric accessories or equipment
other than those designed to operate
on 12 volts.
o Some electronic devices can cause
electronic interference when plugged
into the power outlet. These devices
may cause excessive audio noise
and malfunctions in other electronic
systems or devices used in your ve-
hicle.
ASHTRAY / COIN TRAYB430A02JM-AATThe front ashtray/coin tray may be opened
by pulling the ashtray lid. To remove the
ashtray to empty or clean it, lift the ashtray
upward and pull it out. The ashtray coin
tray light will only illuminate when the
external lights are on.
OJM019013
OJM019015
CenterRear
Page 87 of 273
1FEATURES OF YOUR HYUNDAI76
1. To operate Compass featurePress and release the button, then the
vehicle's directional heading will be dis-
played. Pressing and releasing the button
again will turn off the display.
Heading display
- E : East
- W : West
- S : South
- N : North
ex) NE : North East2. Calibration procedurePress and hold the button for more than 9
but less than 12 seconds. When the com-
pass memory is cleared a "C" will appear
in the display.
- Driving the vehicle in a circle at less
than 5mph 2 times or until the compass
heading appears.
- Driving in a circle in right-handed direc-
tion and opposite direction are pos-
sible, and if the calibration is completed,
the compass heading will appear.
- Keep driving in a circle until a compass
heading appears.
DAY/NIGHT INSIDE REARVIEW
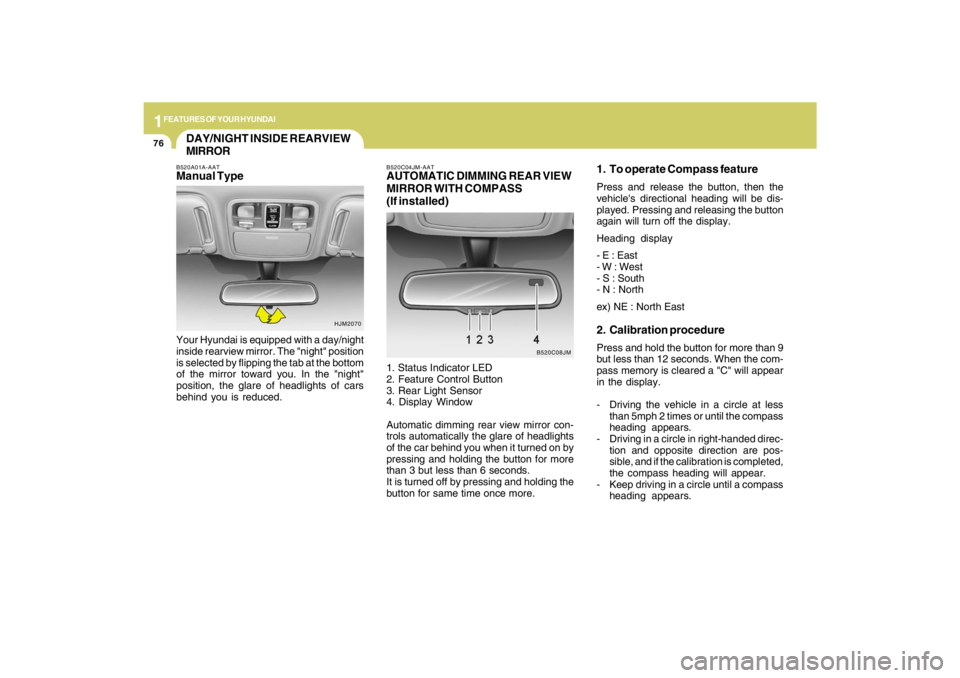
MIRRORB520A01A-AATManual TypeYour Hyundai is equipped with a day/night
inside rearview mirror. The "night" position
is selected by flipping the tab at the bottom
of the mirror toward you. In the "night"
position, the glare of headlights of cars
behind you is reduced.
HJM2070B520C04JM-AAT
AUTOMATIC DIMMING REAR VIEW
MIRROR WITH COMPASS
(If installed)1. Status Indicator LED
2. Feature Control Button
3. Rear Light Sensor
4. Display Window
Automatic dimming rear view mirror con-
trols automatically the glare of headlights
of the car behind you when it turned on by
pressing and holding the button for more
than 3 but less than 6 seconds.
It is turned off by pressing and holding the
button for same time once more.
B520C08JM
Page 94 of 273
1
FEATURES OF YOUR HYUNDAI
83
!
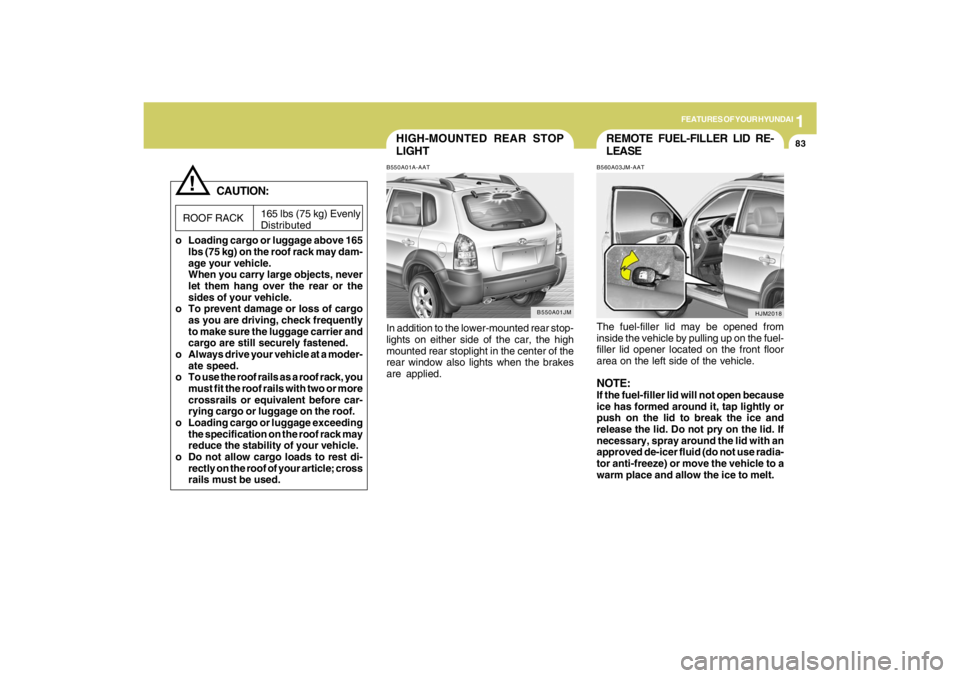
HIGH-MOUNTED REAR STOP
LIGHTB550A01A-AATIn addition to the lower-mounted rear stop-
lights on either side of the car, the high
mounted rear stoplight in the center of the
rear window also lights when the brakes
are applied.
B550A01JM
165 lbs (75 kg) Evenly
Distributed
ROOF RACK
CAUTION:
o Loading cargo or luggage above 165
lbs (75 kg) on the roof rack may dam-
age your vehicle.
When you carry large objects, never
let them hang over the rear or the
sides of your vehicle.
o To prevent damage or loss of cargo
as you are driving, check frequently
to make sure the luggage carrier and
cargo are still securely fastened.
o Always drive your vehicle at a moder-
ate speed.
o To use the roof rails as a roof rack, you
must fit the roof rails with two or more
crossrails or equivalent before car-
rying cargo or luggage on the roof.
o Loading cargo or luggage exceeding
the specification on the roof rack may
reduce the stability of your vehicle.
o Do not allow cargo loads to rest di-
rectly on the roof of your article; cross
rails must be used.
HJM2018
REMOTE FUEL-FILLER LID RE-
LEASEB560A03JM-AATThe fuel-filler lid may be opened from
inside the vehicle by pulling up on the fuel-
filler lid opener located on the front floor
area on the left side of the vehicle.NOTE:If the fuel-filler lid will not open because
ice has formed around it, tap lightly or
push on the lid to break the ice and
release the lid. Do not pry on the lid. If
necessary, spray around the lid with an
approved de-icer fluid (do not use radia-
tor anti-freeze) or move the vehicle to a
warm place and allow the ice to melt.
Page 139 of 273
2
DRIVING YOUR HYUNDAI
4
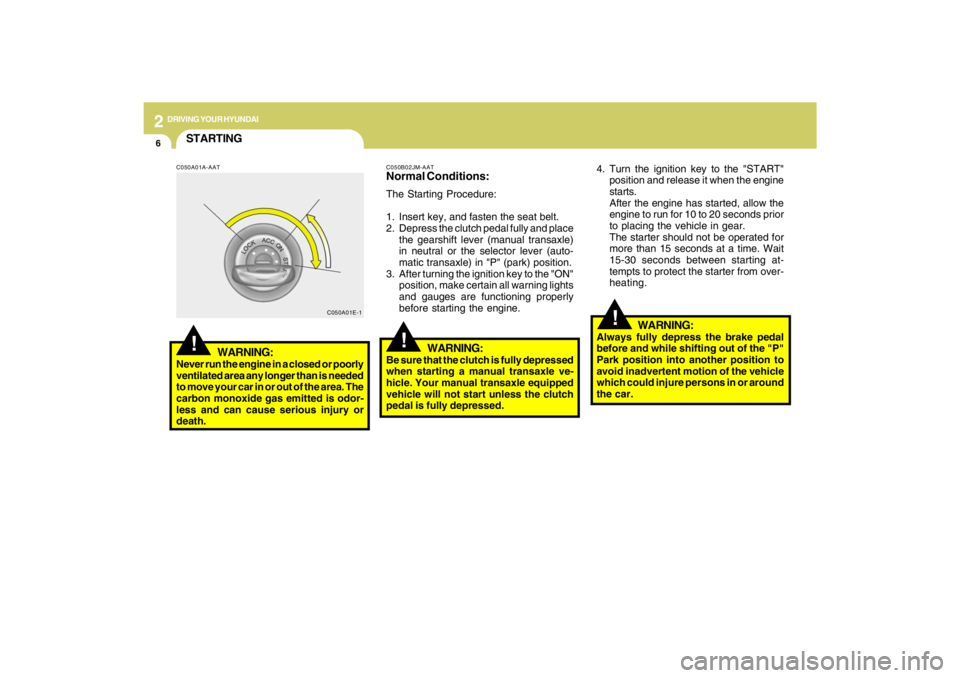
TO START THE ENGINEC030A01E-AATCOMBINATION IGNITION SWITCHo If your Hyundai is equipped with a
manual transaxle, place the shift lever
in neutral and depress the clutch pedal
fully.
o If your Hyundai has an automatic
transaxle, place the shift lever in "P"
(park).
o To start the engine, insert the ignition
key and turn it to the "START" position.
Release it as soon as the engine starts.
Do not hold the key in the "START"
position for more that 15 seconds.NOTE:o For safety, the engine will not start if
the clutch pedal is not depressed fully
(Manual Transaxle) or the shift lever
is not in "P" or "N" Position (Auto-
matic Transaxle).
o The ignition key cannot be turned from
"ACC" position to "LOCK" position
unless the shift lever is in the "P"
(Park) position or the negative bat-
tery terminal is disconnected from
the battery. To remove the key, al-
ways confirm that the shift lever is
securely positioned in "P" (Park) (For
Automatic Transaxle).
o For additional information about start-
ing, see page 2-6.
BEFORE STARTING THE EN-
GINEC020A04A-AATBefore you start the engine, you should
always:
1. Look around the vehicle to be sure
there are no flat tires, puddles of oil,
water or other indications of possible
trouble.
2. After entering the car, check to be sure
the parking brake is engaged.
3. Check that all windows, and lights are
clean.
4. Check that the interior and exterior mir-
rors are clean and in position.
5. Check your seat, seatback and head-
rest to be sure they are in their proper
positions.
6. Lock all the doors.
7. Fasten your seat belt and be sure that all
other occupants have fastened theirs.
8. Turn off all lights and accessories that
are not needed.
9. When you turn the ignition switch to
"ON", check that all appropriate warn-
ing lights are operating and that you
have sufficient fuel.
10. Check the operation of warning lights
and all bulbs when key is in the "ON"
position.
!
WARNING:
o All passengers must be properly
belted whenever the vehicle is mov-
ing. Refer to pages: 1-19 through 1-
25 for more information on their proper
use.
o Always check the surrounding areas
near your vehicle for people, espe-
cially children, before putting a car
into 'drive.'
!
WARNING:
Always wear appropriate shoes when
operating your vehicle.
Unsuitable shoes (high heels, ski boots,
etc.) may interfere with your ability to
use the brake and accelerator pedal,
and the clutch (if installed).
!
WARNING:
When you intend to park or stop the
vehicle with the engine on, be careful not
to depress the accelerator pedal for a
long period of time. It may overheat the
engine or exhaust system and cause
fire.
Page 141 of 273
2
DRIVING YOUR HYUNDAI
6
!
4. Turn the ignition key to the "START"
position and release it when the engine
starts.
After the engine has started, allow the
engine to run for 10 to 20 seconds prior
to placing the vehicle in gear.
The starter should not be operated for
more than 15 seconds at a time. Wait
15-30 seconds between starting at-
tempts to protect the starter from over-
heating.
C050B02JM-AATNormal Conditions:The Starting Procedure:
1. Insert key, and fasten the seat belt.
2. Depress the clutch pedal fully and place
the gearshift lever (manual transaxle)
in neutral or the selector lever (auto-
matic transaxle) in "P" (park) position.
3. After turning the ignition key to the "ON"
position, make certain all warning lights
and gauges are functioning properly
before starting the engine.
WARNING:
Be sure that the clutch is fully depressed
when starting a manual transaxle ve-
hicle. Your manual transaxle equipped
vehicle will not start unless the clutch
pedal is fully depressed.
!
C050A01E-1
STARTING!
C050A01A-AAT
WARNING:
Never run the engine in a closed or poorly
ventilated area any longer than is needed
to move your car in or out of the area. The
carbon monoxide gas emitted is odor-
less and can cause serious injury or
death.
WARNING:
Always fully depress the brake pedal
before and while shifting out of the "P"
Park position into another position to
avoid inadvertent motion of the vehicle
which could injure persons in or around
the car.
Page 144 of 273
2
DRIVING YOUR HYUNDAI
9
HJM3018
OPERATING THE AUTOMATIC
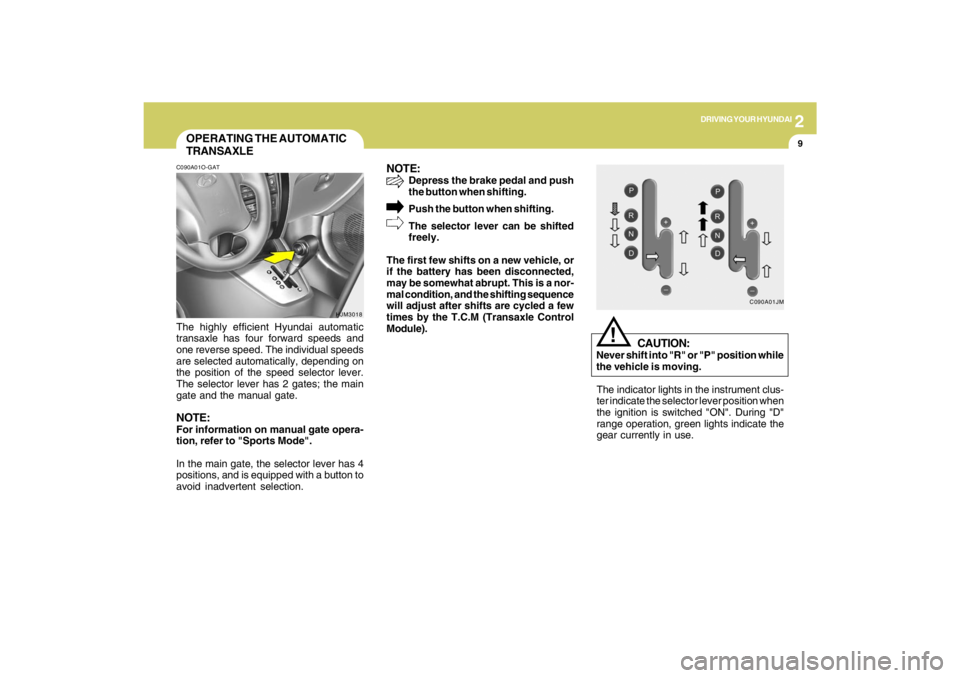
TRANSAXLEC090A01O-GATThe highly efficient Hyundai automatic
transaxle has four forward speeds and
one reverse speed. The individual speeds
are selected automatically, depending on
the position of the speed selector lever.
The selector lever has 2 gates; the main
gate and the manual gate.NOTE:For information on manual gate opera-
tion, refer to "Sports Mode".
In the main gate, the selector lever has 4
positions, and is equipped with a button to
avoid inadvertent selection.
NOTE:
Depress the brake pedal and push
the button when shifting.
Push the button when shifting.
The selector lever can be shifted
freely.
The first few shifts on a new vehicle, or
if the battery has been disconnected,
may be somewhat abrupt. This is a nor-
mal condition, and the shifting sequence
will adjust after shifts are cycled a few
times by the T.C.M (Transaxle Control
Module).
C090A01JM
The indicator lights in the instrument clus-
ter indicate the selector lever position when
the ignition is switched "ON". During "D"
range operation, green lights indicate the
gear currently in use.
CAUTION:
Never shift into "R" or "P" position while
the vehicle is moving.
!