window HYUNDAI TUCSON 2011 Owners Manual
[x] Cancel search | Manufacturer: HYUNDAI, Model Year: 2011, Model line: TUCSON, Model: HYUNDAI TUCSON 2011Pages: 382, PDF Size: 5.43 MB
Page 16 of 382
Your vehicle at a glance
2
2
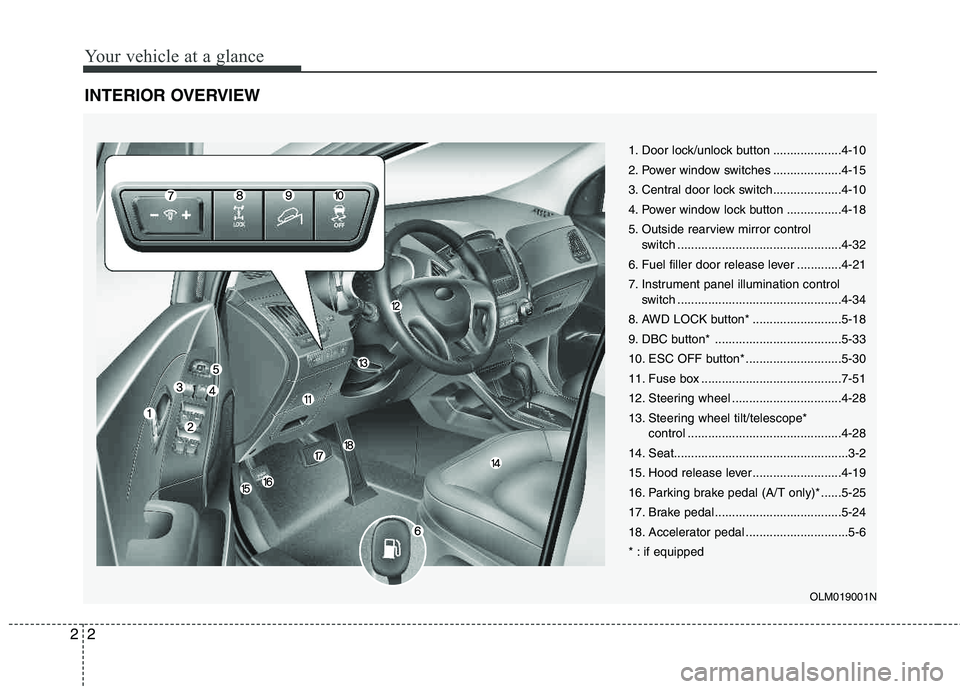
INTERIOR OVERVIEW
1. Door lock/unlock button ....................4-10
2. Power window switches ....................4-15
3. Central door lock switch....................4-10
4. Power window lock button ................4-18
5. Outside rearview mirror control
switch ................................................4-32
6. Fuel filler door release lever .............4-21
7. Instrument panel illumination control switch ................................................4-34
8. AWD LOCK button* ..........................5-18
9. DBC button* .....................................5-33
10. ESC OFF button* ............................5-30
11. Fuse box .........................................7-51
12. Steering wheel ................................4-28
13. Steering wheel tilt/telescope* control .............................................4-28
14. Seat...................................................3-2
15. Hood release lever ..........................4-19
16. Parking brake pedal (A/T only)* ......5-25
17. Brake pedal .....................................5-24
18. Accelerator pedal ..............................5-6
* : if equipped
OLM019001N
Page 58 of 382
Safety features of your vehicle
40
3
Noise and smoke
When the air bags inflate, they make a
loud noise and they leave smoke and
powder in the air inside of the vehicle.
This is normal and is a result of the igni-
tion of the air bag inflator. After the air
bag inflates, you may feel substantial dis-
comfort in breathing due to the contact of
your chest with both the seat belt and the
air bag, as well as from breathing the
smoke and powder. Open your doors
and/or windows as soon as possible
after impact in order to reduce dis-
comfort and prevent prolonged expo-
sure to the smoke and powder.
Though the smoke and powder are non-
toxic, they may cause irritation to the skin
(eyes, nose and throat, etc). If this is the
case, wash and rinse with cold waterimmediately and consult a doctor if the
symptom persists.
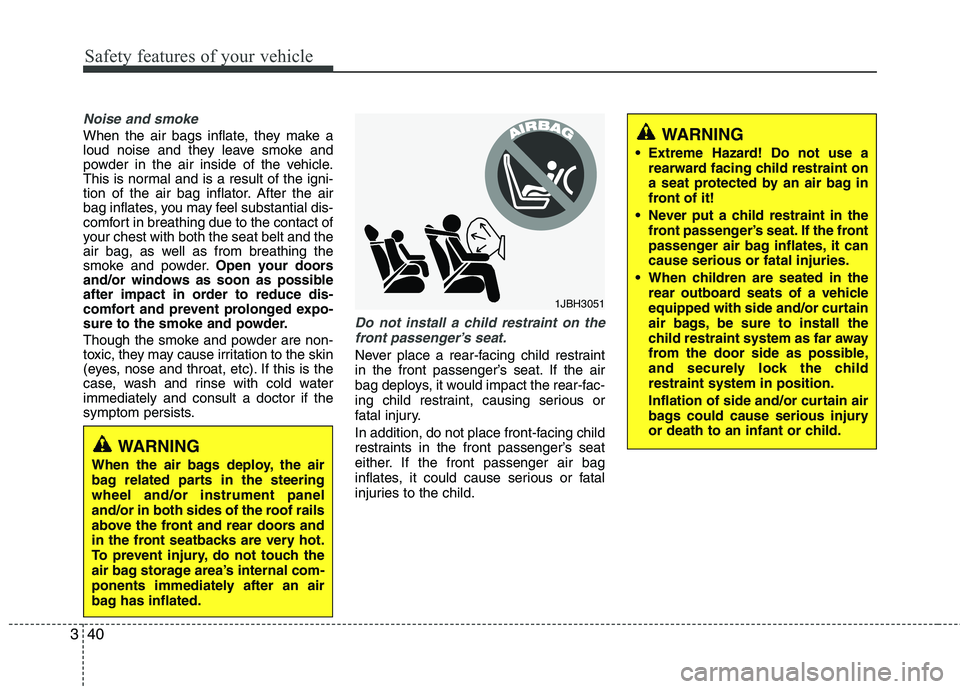
Do not install a child restraint on the
front passenger’s seat.
Never place a rear-facing child restraint
in the front passenger’s seat. If the air
bag deploys, it would impact the rear-fac-
ing child restraint, causing serious or
fatal injury.
In addition, do not place front-facing child
restraints in the front passenger’s seat
either. If the front passenger air bag
inflates, it could cause serious or fatal
injuries to the child.
1JBH3051
WARNING
When the air bags deploy, the air
bag related parts in the steeringwheel and/or instrument panel
and/or in both sides of the roof rails
above the front and rear doors and
in the front seatbacks are very hot.
To prevent injury, do not touch the
air bag storage area’s internal com-
ponents immediately after an air
bag has inflated.
WARNING
Extreme Hazard! Do not use a rearward facing child restraint on
a seat protected by an air bag in
front of it!
Never put a child restraint in the front passenger’s seat. If the front
passenger air bag inflates, it can cause serious or fatal injuries.
When children are seated in the rear outboard seats of a vehicle
equipped with side and/or curtain
air bags, be sure to install the
child restraint system as far away
from the door side as possible,
and securely lock the child restraint system in position.
Inflation of side and/or curtain air
bags could cause serious injury
or death to an infant or child.
Page 73 of 382
355
Safety features of your vehicle
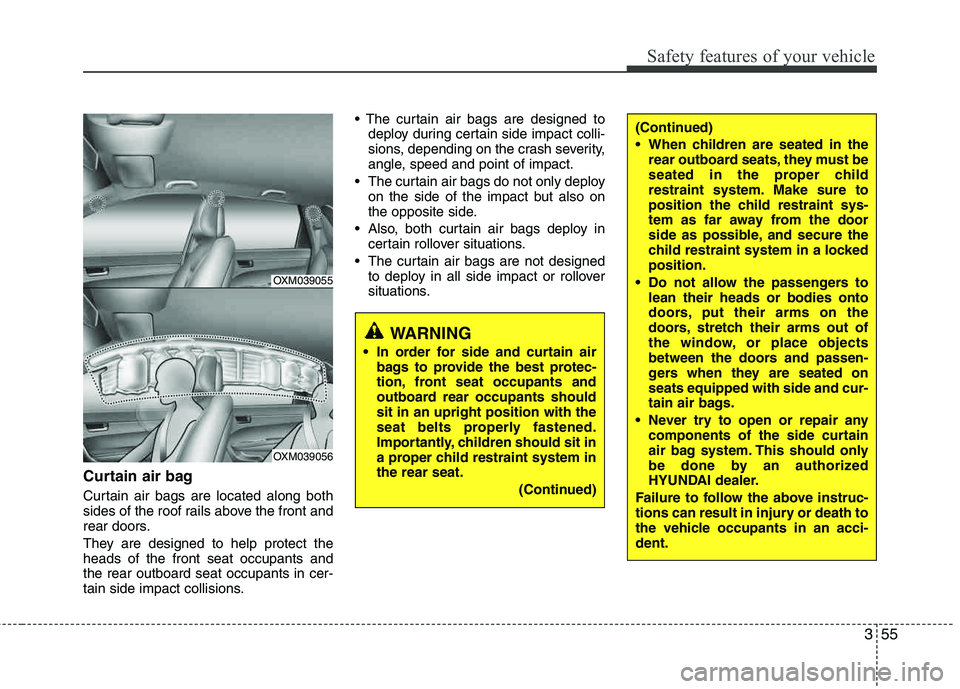
Curtain air bag
Curtain air bags are located along both
sides of the roof rails above the front and
rear doors.
They are designed to help protect the heads of the front seat occupants and the rear outboard seat occupants in cer-
tain side impact collisions.
deploy during certain side impact colli-
sions, depending on the crash severity,
angle, speed and point of impact.
The curtain air bags do not only deploy on the side of the impact but also on
the opposite side.
Also, both curtain air bags deploy in certain rollover situations.
The curtain air bags are not designed to deploy in all side impact or rollover
situations.
WARNING
In order for side and curtain air bags to provide the best protec-
tion, front seat occupants and
outboard rear occupants shouldsit in an upright position with the
seat belts properly fastened.
Importantly, children should sit in
a proper child restraint system inthe rear seat.
(Continued)
(Continued)
When children are seated in therear outboard seats, they must be
seated in the proper child
restraint system. Make sure to
position the child restraint sys-
tem as far away from the door
side as possible, and secure the
child restraint system in a locked position.
Do not allow the passengers to lean their heads or bodies onto
doors, put their arms on the
doors, stretch their arms out of
the window, or place objects
between the doors and passen-
gers when they are seated on seats equipped with side and cur-
tain air bags.
Never try to open or repair any components of the side curtain
air bag system. This should only
be done by an authorized
HYUNDAI dealer.
Failure to follow the above instruc-
tions can result in injury or death to
the vehicle occupants in an acci- dent.
OXM039055
OXM039056
Page 82 of 382
4
Keys / 4-3
Remote keyless entry / 4-4
Theft-alarm system / 4-7
Door locks / 4-9
Tailgate / 4-13
Windows / 4-15
Hood / 4-19
Fuel filler door / 4-21
Panoramic sunroof / 4-24
Steering wheel / 4-28
Mirrors / 4-30
Instrument cluster / 4-33
Rearview camera / 4-49
Hazard warning flasher / 4-49
Lighting / 4-50
Wipers and washers / 4-54
Interior light / 4-57
Defroster / 4-59
Manual climate control system / 4-61
Automatic climate control system / 4-70
Windshield defrosting and defogging / 4-77
Storage compartment / 4-80
Features of your vehicle
Page 84 of 382
43
Features of your vehicle
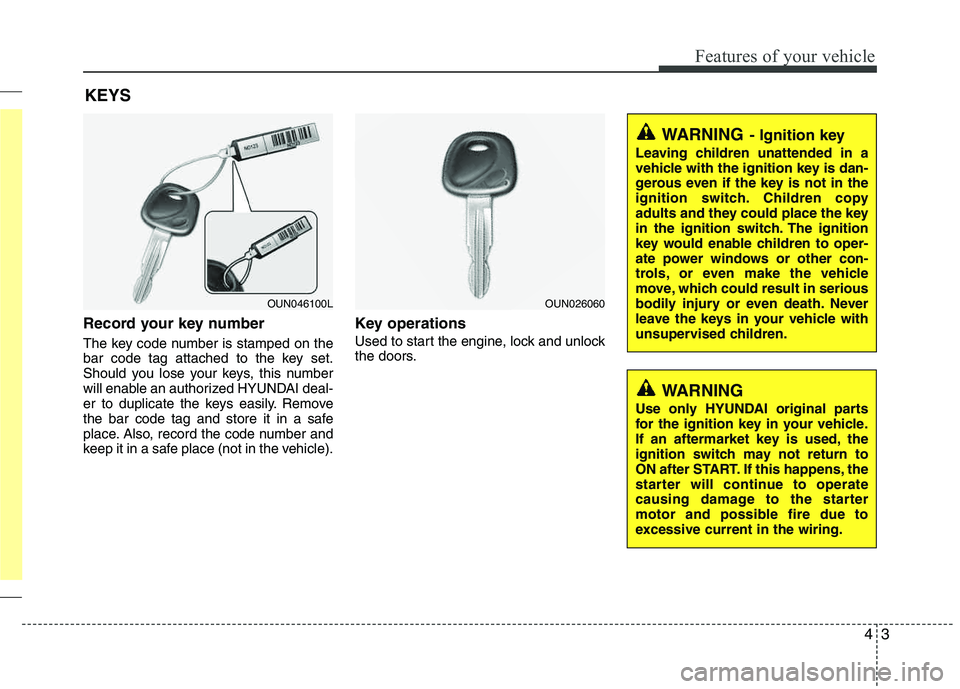
Record your key number
The key code number is stamped on the
bar code tag attached to the key set.
Should you lose your keys, this number
will enable an authorized HYUNDAI deal-
er to duplicate the keys easily. Remove
the bar code tag and store it in a safe
place. Also, record the code number and
keep it in a safe place (not in the vehicle).
Key operations
Used to start the engine, lock and unlock
the doors.
KEYS
OUN046100L
WARNING- Ignition key
Leaving children unattended in a
vehicle with the ignition key is dan-
gerous even if the key is not in the
ignition switch. Children copy
adults and they could place the key
in the ignition switch. The ignition
key would enable children to oper-
ate power windows or other con-
trols, or even make the vehicle
move, which could result in serious
bodily injury or even death. Never
leave the keys in your vehicle with
unsupervised children.
OUN026060
WARNING
Use only HYUNDAI original parts
for the ignition key in your vehicle.
If an aftermarket key is used, the
ignition switch may not return to
ON after START. If this happens, the
starter will continue to operate
causing damage to the starter
motor and possible fire due to
excessive current in the wiring.
Page 91 of 382
Features of your vehicle
10
4
Operating door locks from inside
the vehicle
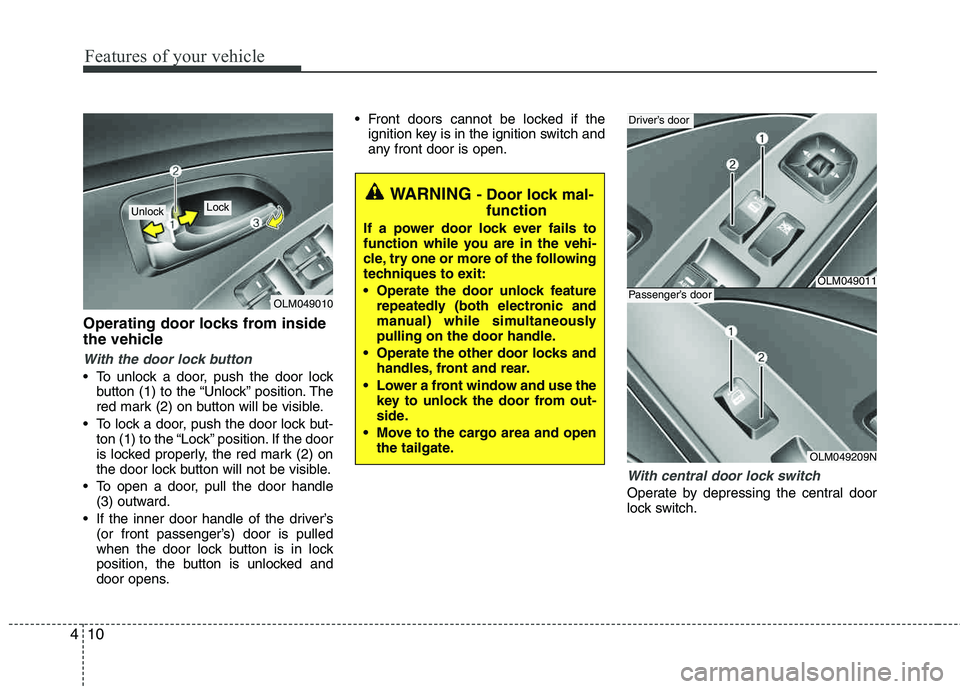
With the door lock button
To unlock a door, push the door lock
button (1) to the “Unlock” position. The
red mark (2) on button will be visible.
To lock a door, push the door lock but- ton (1) to the “Lock” position. If the door
is locked properly, the red mark (2) on
the door lock button will not be visible.
To open a door, pull the door handle (3) outward.
If the inner door handle of the driver’s (or front passenger’s) door is pulled
when the door lock button is in lock
position, the button is unlocked and
door opens. Front doors cannot be locked if the
ignition key is in the ignition switch and
any front door is open.
With central door lock switch
Operate by depressing the central door
lock switch.
OLM049010
Lock Unlock
WARNING - Door lock mal-
function
If a power door lock ever fails to
function while you are in the vehi-
cle, try one or more of the following
techniques to exit:
Operate the door unlock feature repeatedly (both electronic and
manual) while simultaneously
pulling on the door handle.
Operate the other door locks and handles, front and rear.
Lower a front window and use the key to unlock the door from out-
side.
Move to the cargo area and open the tailgate.
OLM049011
Driver’s door
OLM049209N
Passenger’s door
Page 92 of 382
411
Features of your vehicle
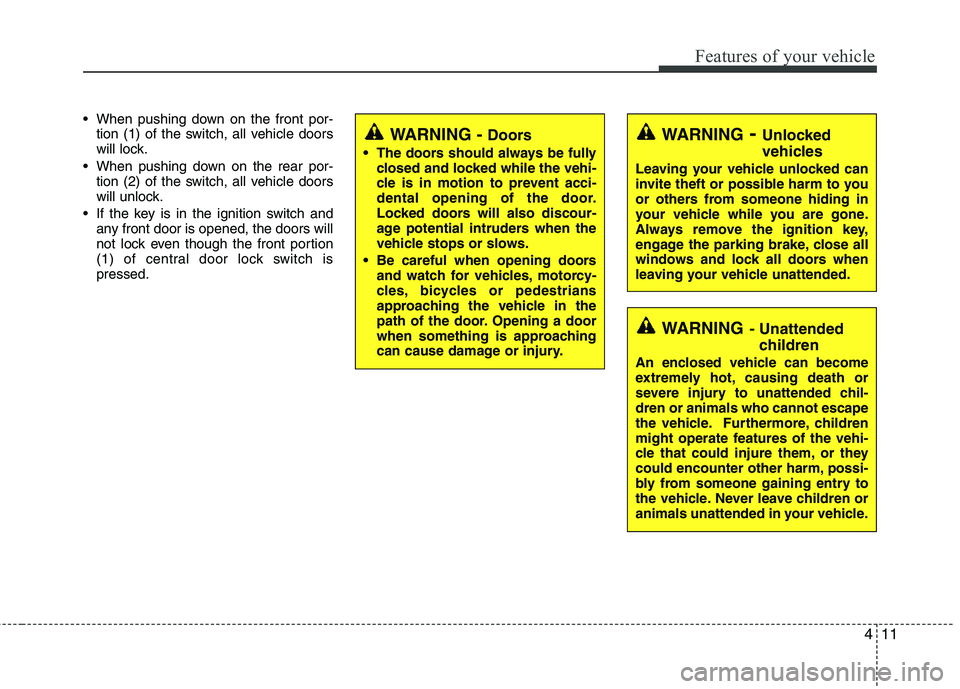
When pushing down on the front por-tion (1) of the switch, all vehicle doors
will lock.
When pushing down on the rear por- tion (2) of the switch, all vehicle doors
will unlock.
If the key is in the ignition switch and any front door is opened, the doors will
not lock even though the front portion
(1) of central door lock switch ispressed.
WARNING- Unlocked
vehicles
Leaving your vehicle unlocked can
invite theft or possible harm to you
or others from someone hiding in
your vehicle while you are gone.
Always remove the ignition key,
engage the parking brake, close all
windows and lock all doors when
leaving your vehicle unattended.
WARNING- Unattended
children
An enclosed vehicle can become
extremely hot, causing death or
severe injury to unattended chil- dren or animals who cannot escape
the vehicle. Furthermore, children
might operate features of the vehi-
cle that could injure them, or they
could encounter other harm, possi-
bly from someone gaining entry to
the vehicle. Never leave children or
animals unattended in your vehicle.
WARNING - Doors
The doors should always be fully closed and locked while the vehi-
cle is in motion to prevent acci-
dental opening of the door.
Locked doors will also discour-
age potential intruders when the
vehicle stops or slows.
Be careful when opening doors and watch for vehicles, motorcy-
cles, bicycles or pedestrians
approaching the vehicle in the
path of the door. Opening a door
when something is approaching
can cause damage or injury.
Page 96 of 382
415
Features of your vehicle
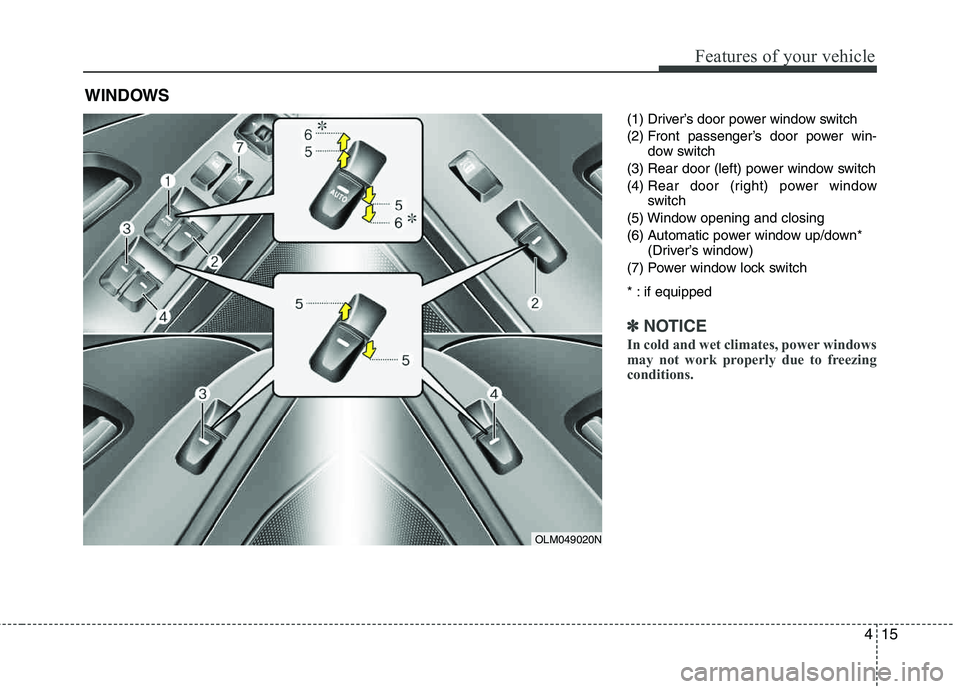
(1) Driver’s door power window switch
(2) Front passenger’s door power win-dow switch
(3) Rear door (left) power window switch (4) Rear door (right) power window
switch
(5) Window opening and closing
(6) Automatic power window up/down* (Driver’s window)
(7) Power window lock switch
* : if equipped
✽✽ NOTICE
In cold and wet climates, power windows
may not work properly due to freezing
conditions.
WINDOWS
OLM049020N
Page 97 of 382
Features of your vehicle
16
4
Power windows
The ignition switch must be in the ON
position for power windows to operate.
Each door has a power window switch
that controls the door's window. The driv-
er has a power window lock switch which
can block the operation of passenger
windows. The power windows can be
operated for approximately 30 seconds
after the ignition key is removed or turned
to the ACC or LOCK position. However, if
the front doors are opened, the power
windows cannot be operated within the
30 second period after the ignition key
removal.
✽✽
NOTICE
While driving with the rear windows
down or with the sunroof (if equipped)
in an open (or partially open) position,
your vehicle may demonstrate a wind
buffeting or pulsation noise. This noise
is a normal occurrence and can be
reduced or eliminated by taking the fol-
lowing actions. If the noise occurs with
one or both of the rear windows down,
partially lower both front windows
approximately one inch. If you experi-
ence the noise with the sunroof open,
slightly reduce the size of the sunroof
opening.
Window opening and closing
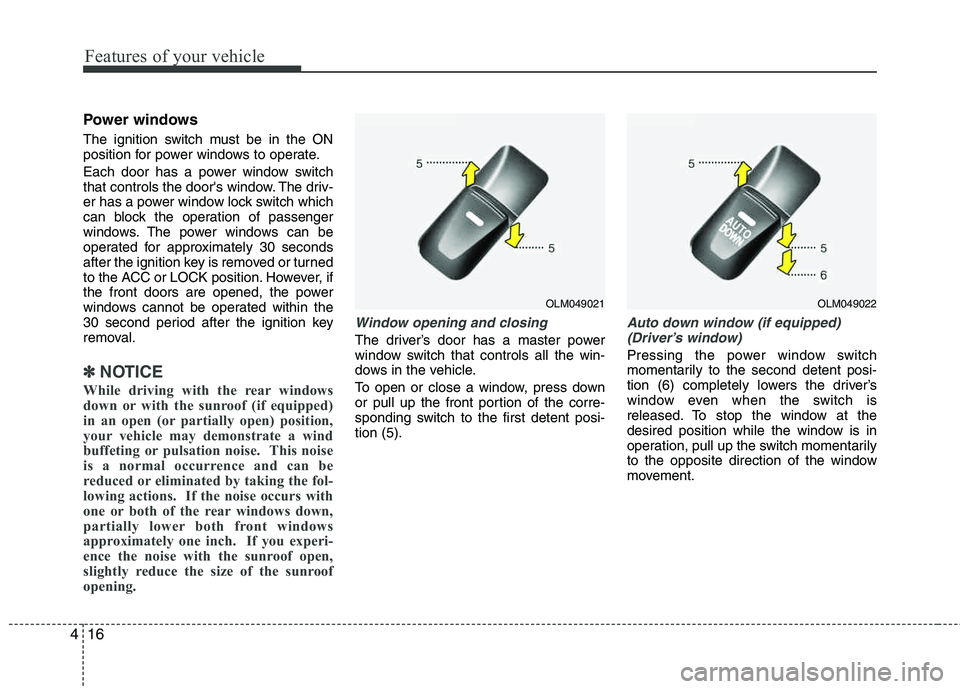
The driver’s door has a master power
window switch that controls all the win-
dows in the vehicle.
To open or close a window, press down
or pull up the front portion of the corre-
sponding switch to the first detent posi-tion (5).
Auto down window (if equipped) (Driver’s window)
Pressing the power window switch
momentarily to the second detent posi-
tion (6) completely lowers the driver’s
window even when the switch is
released. To stop the window at the
desired position while the window is in
operation, pull up the switch momentarily
to the opposite direction of the window
movement.
OLM049021OLM049022
Page 98 of 382
417
Features of your vehicle
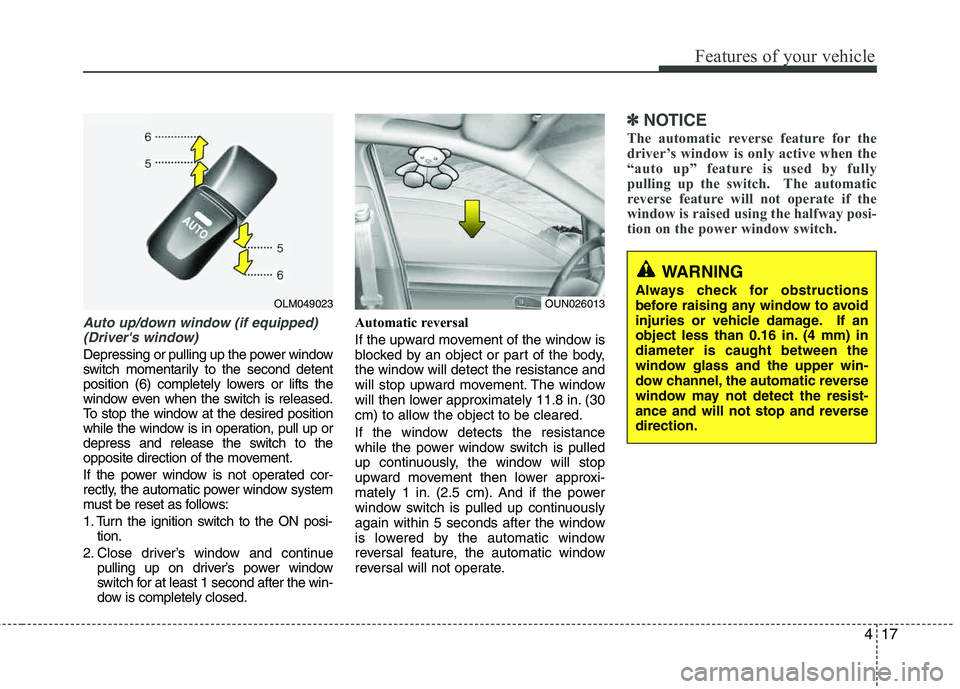
Auto up/down window (if equipped) (Driver's window)
Depressing or pulling up the power window
switch momentarily to the second detent
position (6) completely lowers or lifts the
window even when the switch is released.
To stop the window at the desired position
while the window is in operation, pull up or
depress and release the switch to the
opposite direction of the movement.
If the power window is not operated cor-
rectly, the automatic power window system
must be reset as follows:
1. Turn the ignition switch to the ON posi- tion.
2. Close driver’s window and continue pulling up on driver’s power window
switch for at least 1 second after the win-
dow is completely closed. Automatic reversal
If the upward movement of the window is
blocked by an object or part of the body,
the window will detect the resistance and
will stop upward movement. The window
will then lower approximately 11.8 in. (30
cm) to allow the object to be cleared.
If the window detects the resistance
while the power window switch is pulled
up continuously, the window will stop
upward movement then lower approxi-
mately 1 in. (2.5 cm). And if the power
window switch is pulled up continuously
again within 5 seconds after the window
is lowered by the automatic window
reversal feature, the automatic window
reversal will not operate.
✽✽
NOTICE
The automatic reverse feature for the
driver’s window is only active when the
“auto up” feature is used by fully
pulling up the switch. The automatic
reverse feature will not operate if the
window is raised using the halfway posi-
tion on the power window switch.
WARNING
Always check for obstructions
before raising any window to avoid
injuries or vehicle damage. If an
object less than 0.16 in. (4 mm) indiameter is caught between the
window glass and the upper win-
dow channel, the automatic reverse
window may not detect the resist-
ance and will not stop and reverse direction.
OUN026013OLM049023