child lock HYUNDAI TUCSON 2015 Owners Manual
[x] Cancel search | Manufacturer: HYUNDAI, Model Year: 2015, Model line: TUCSON, Model: HYUNDAI TUCSON 2015Pages: 653, PDF Size: 8.45 MB
Page 22 of 653
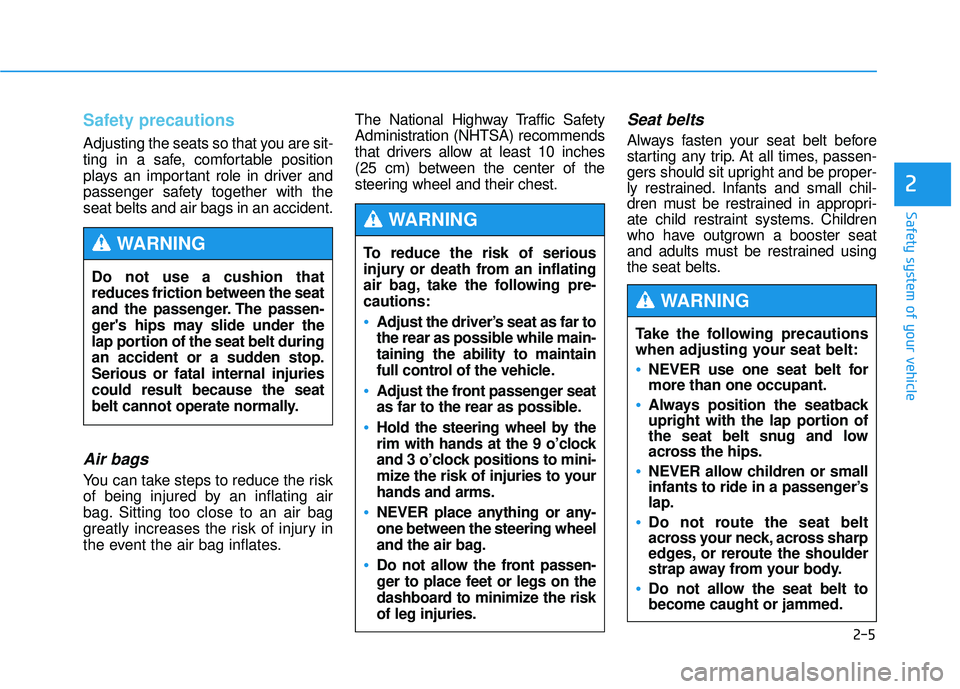
Safety precautions
Adjusting the seats so that you are sit-
ting in a safe, comfortable position
plays an important role in driver and
passenger safety together with theseat belts and air bags in an accident.
Air bags
You can take steps to reduce the risk
of being injured by an inflating air
bag. Sitting too close to an air bag
greatly increases the risk of injury in
the event the air bag inflates.The National Highway Traffic Safety
Administration (NHTSA) recommends
that drivers allow at least 10 inches
(25 cm) between the center of the
steering wheel and their chest.
Seat belts
Always fasten your seat belt before
starting any trip. At all times, passen-
gers should sit upright and be proper-
ly restrained. Infants and small chil-
dren must be restrained in appropri-
ate child restraint systems. Children
who have outgrown a booster seat
and adults must be restrained using
the seat belts.
Do not use a cushion that reduces friction between the seat
and the passenger. The passen-
ger's hips may slide under the
lap portion of the seat belt during
an accident or a sudden stop.Serious or fatal internal injuriescould result because the seat
belt cannot operate normally.
WARNING To reduce the risk of serious
injury or death from an inflating
air bag, take the following pre-cautions:
•Adjust the driver’s seat as far to
the rear as possible while main-taining the ability to maintain
full control of the vehicle.
Adjust the front passenger seat
as far to the rear as possible.
Hold the steering wheel by the
rim with hands at the 9 o’clock
and 3 o’clock positions to mini-
mize the risk of injuries to yourhands and arms.
NEVER place anything or any- one between the steering wheel
and the air bag.
Do not allow the front passen-
ger to place feet or legs on the
dashboard to minimize the riskof leg injuries.
WARNING
2-5
Safety system of your vehicle
2
Take the following precautions
when adjusting your seat belt:
NEVER use one seat belt for more than one occupant.
Always position the seatback
upright with the lap portion of
the seat belt snug and low
across the hips.
NEVER allow children or small
infants to ride in a passenger’s lap.
Do not route the seat belt
across your neck, across sharp
edges, or reroute the shoulder
strap away from your body.
Do not allow the seat belt to become caught or jammed.
WARNING
Page 36 of 653
2-19
Safety system of your vehicle
2
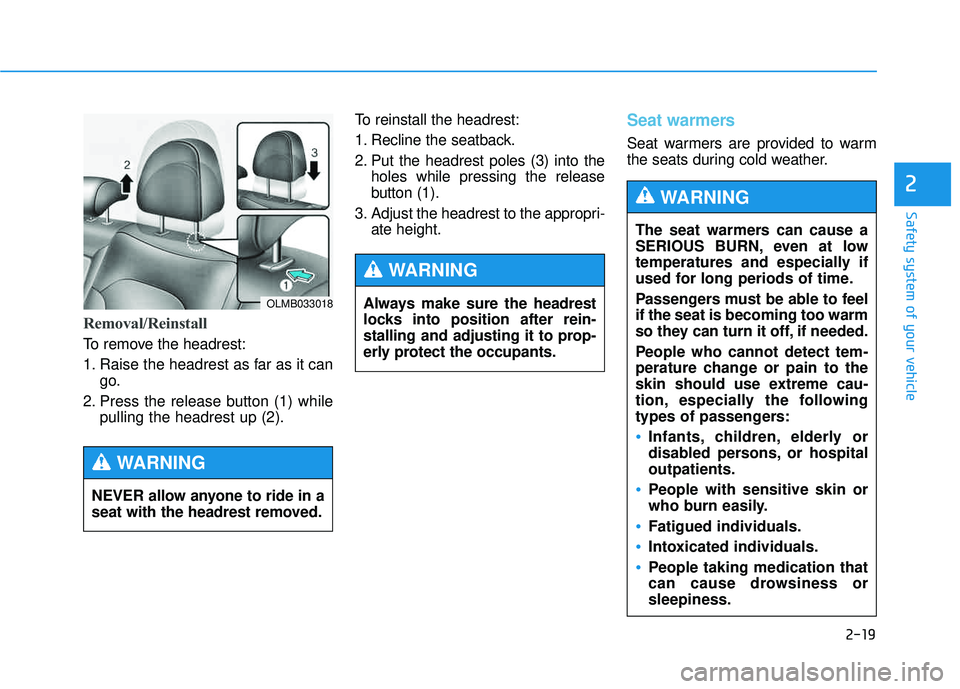
Removal/Reinstall
To remove the headrest:
1. Raise the headrest as far as it cango.
2. Press the release button (1) while pulling the headrest up (2). To reinstall the headrest:
1. Recline the seatback.
2. Put the headrest poles (3) into the
holes while pressing the release
button (1).
3. Adjust the headrest to the appropri- ate height.
Seat warmers
Seat warmers are provided to warm
the seats during cold weather.
Always make sure the headrest
locks into position after rein-
stalling and adjusting it to prop-
erly protect the occupants.
WARNING
The seat warmers can cause a
SERIOUS BURN, even at low
temperatures and especially if
used for long periods of time.
Passengers must be able to feel if the seat is becoming too warm
so they can turn it off, if needed.
People who cannot detect tem-
perature change or pain to the
skin should use extreme cau-
tion, especially the following
types of passengers:
Infants, children, elderly or
disabled persons, or hospitaloutpatients.
People with sensitive skin or
who burn easily.
Fatigued individuals.
Intoxicated individuals.
People taking medication that
can cause drowsiness orsleepiness.
WARNING
OLMB033018
NEVER allow anyone to ride in a
seat with the headrest removed.
WARNING
Page 42 of 653
2-25
Safety system of your vehicle
Seat Belt – Passenger’s 3-pointsystem with combination lockingretractor
This type of seat belt combines the
features of both an emergency lock-
ing retractor seat belt and an auto-
matic locking retractor seat belt.
Combination retractor type seat beltsare installed in the rear seat positionsto help accommodate the installation
of child restraint systems. Although a
combination retractor is also installedin the front passenger seat position,
NEVER place any infant restraint sys-
tem in the front seat of the vehicle.
To fasten your seat belt:
Pull the seat belt out of the retractor
and insert the metal tab into the buck-
le. There will be an audible "click"
when the tab locks into the buckle.
When not securing a child restraint,
the seat belt operates in the same way
as the driver's seat belt (Emergency
Locking Retractor Type). It automati-cally adjusts to the proper length only
after the lap belt portion of the seat
belt is adjusted manually so that it fits
snugly across your hips. When the seat belt is fully extended
from the retractor to allow the installa-
tion of a child restraint system, the
seat belt operation changes to allow
the belt to retract, but not to extend
(Automatic Locking Retractor Type).
Refer to “Using a Child Restraint
System” in this chapter.
✽✽
NOTICE
Although the seat belt retractor pro-
vides the same level of protection for
seated passengers in either emer-
gency or automatic locking modes,
the emergency locking mode allows
seated passengers to move freely in
their seat while keeping some tension
on the belt. During a collision or sud-
den stop, the retractor automatically
locks the belt to help restrain your
body. To deactivate the automatic
locking mode, allow the unbuckled
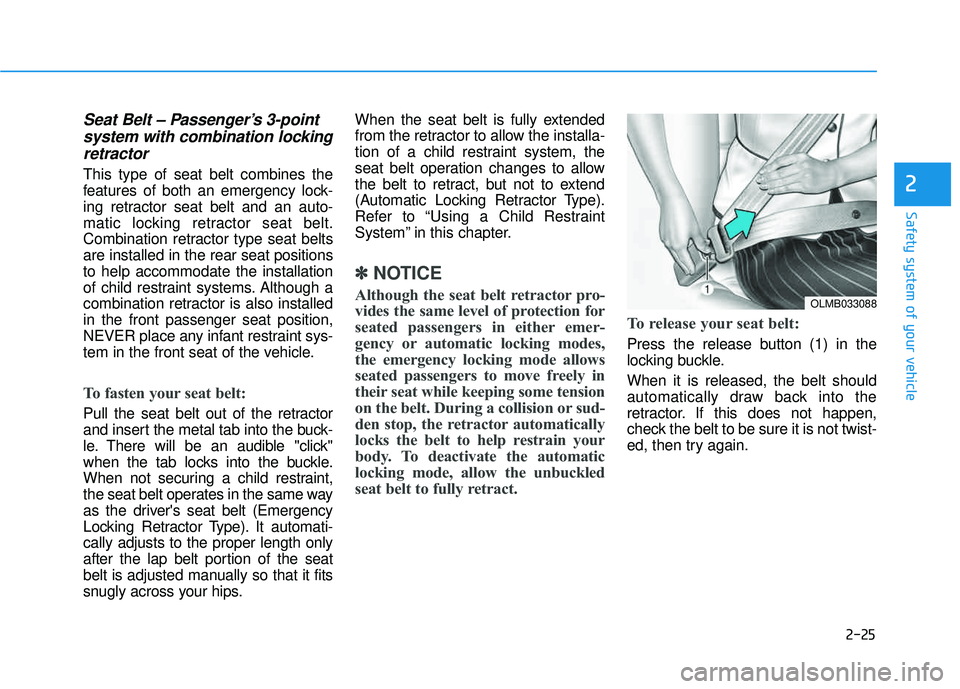
seat belt to fully retract. To release your seat belt:
Press the release button (1) in the
locking buckle. When it is released, the belt should
automatically draw back into the
retractor. If this does not happen,
check the belt to be sure it is not twist-
ed, then try again.
2
OLMB033088
Page 61 of 653
ALWAYS place a rear-facing
child restraint in the rear seat of
the vehicle.
Placing a rear-facing child
restraint in the front seat can
result in serious injury or death
if the child restraint is struck by
an inflating air bag.
WARNING
2-44
Safety system of your vehicle
3. Check that the child restraint issecurely attached to the seat by
pushing and pulling the seat for-
ward and from side-to-side.Securing a child restraint with
a lap belt or lap/shoulder belt
When not using the LATCH system,
all child restraints must be secured to
a vehicle rear seat with the lap partof a lap/shoulder belt.
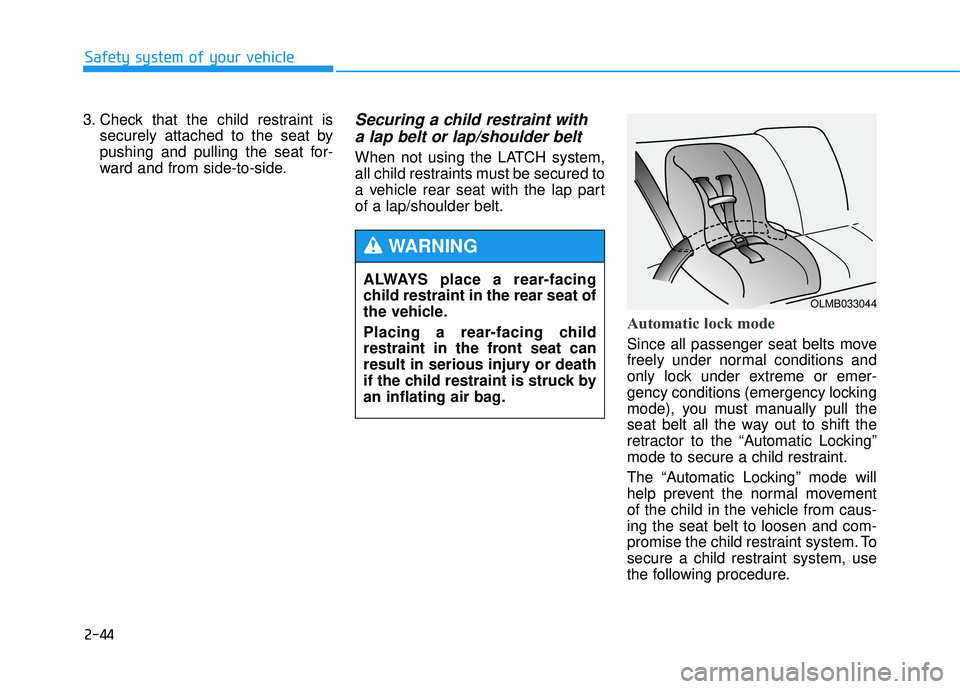
Automatic lock mode
Since all passenger seat belts move
freely under normal conditions and
only lock under extreme or emer-
gency conditions (emergency locking
mode), you must manually pull the
seat belt all the way out to shift the
retractor to the “Automatic Locking”
mode to secure a child restraint.
The “Automatic Locking” mode will
help prevent the normal movement
of the child in the vehicle from caus-ing the seat belt to loosen and com-
promise the child restraint system. To
secure a child restraint system, use
the following procedure.
OLMB033044
Page 62 of 653
2-45
Safety system of your vehicle
2
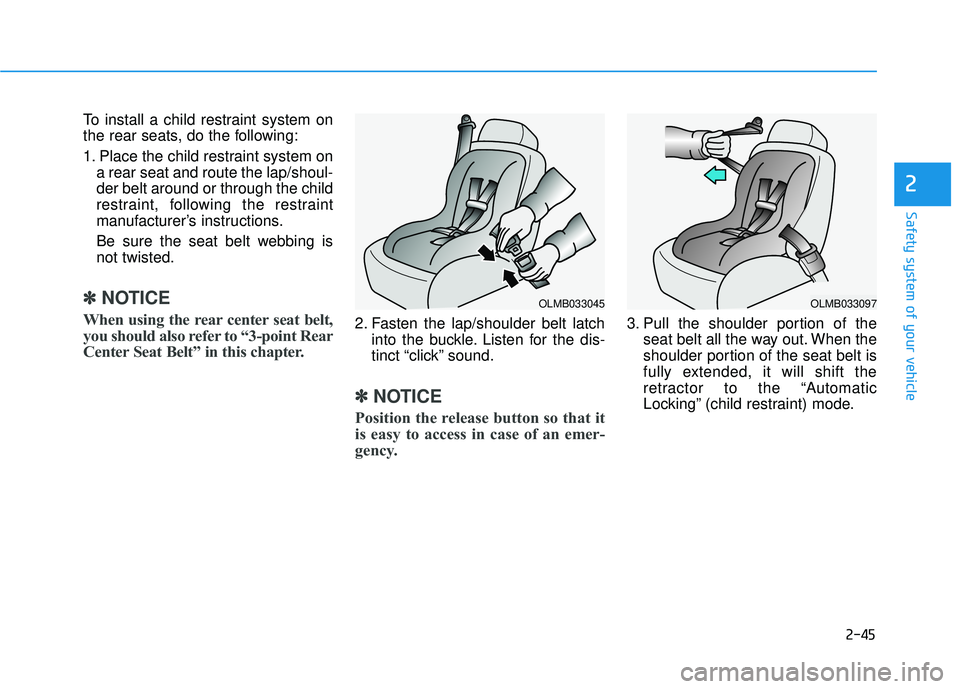
To install a child restraint system on
the rear seats, do the following:
1. Place the child restraint system ona rear seat and route the lap/shoul- der belt around or through the child
restraint, following the restraint
manufacturer’s instructions.
Be sure the seat belt webbing is not twisted.
✽✽ NOTICE
When using the rear center seat belt,
you should also refer to “3-point Rear
Center Seat Belt” in this chapter.
2. Fasten the lap/shoulder belt latch into the buckle. Listen for the dis-
tinct “click” sound.
✽✽ NOTICE
Position the release button so that it
is easy to access in case of an emer-
gency.
3. Pull the shoulder portion of the seat belt all the way out. When the
shoulder portion of the seat belt is
fully extended, it will shift the
retractor to the “Automatic
Locking” (child restraint) mode.
OLMB033045OLMB033097
Page 63 of 653
2-46
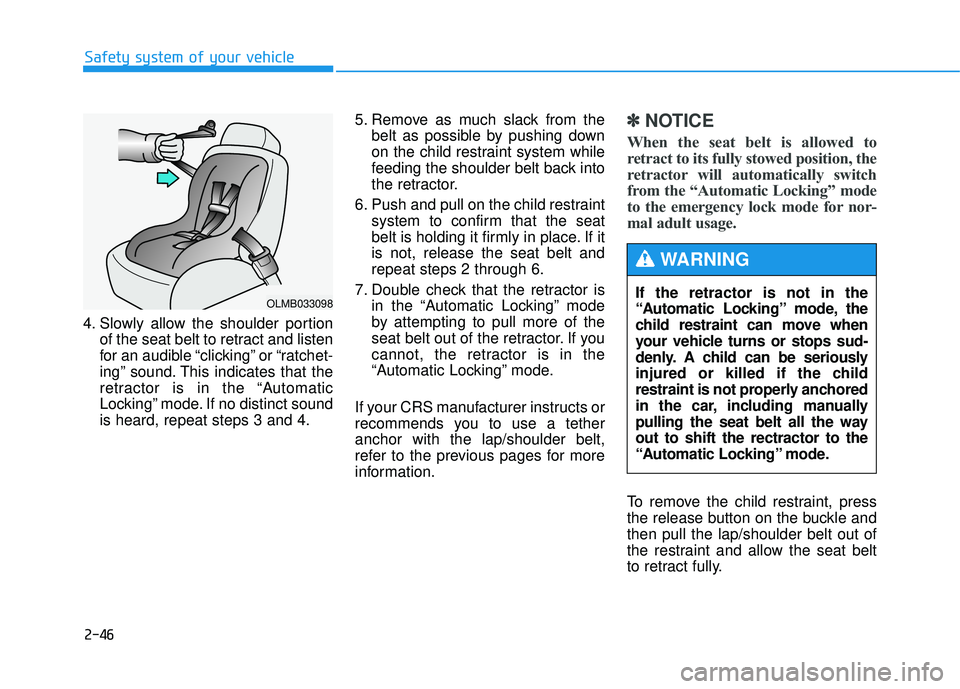
4. Slowly allow the shoulder portionof the seat belt to retract and listen
for an audible “clicking” or “ratchet-
ing” sound. This indicates that the
retractor is in the “Automatic
Locking” mode. If no distinct soundis heard, repeat steps 3 and 4. 5. Remove as much slack from the
belt as possible by pushing down
on the child restraint system while
feeding the shoulder belt back into
the retractor.
6. Push and pull on the child restraint system to confirm that the seat
belt is holding it firmly in place. If itis not, release the seat belt andrepeat steps 2 through 6.
7. Double check that the retractor is in the “Automatic Locking” mode
by attempting to pull more of the
seat belt out of the retractor. If you
cannot, the retractor is in the
“Automatic Locking” mode.
If your CRS manufacturer instructs or
recommends you to use a tetheranchor with the lap/shoulder belt,
refer to the previous pages for more
information.
✽✽ NOTICE
When the seat belt is allowed to
retract to its fully stowed position, the
retractor will automatically switch
from the “Automatic Locking” mode
to the emergency lock mode for nor-
mal adult usage.
To remove the child restraint, press
the release button on the buckle andthen pull the lap/shoulder belt out of
the restraint and allow the seat belt
to retract fully.
Safety system of your vehicle
OLMB033098If the retractor is not in the
“Automatic Locking” mode, the
child restraint can move when
your vehicle turns or stops sud-
denly. A child can be seriously
injured or killed if the child
restraint is not properly anchored
in the car, including manually
pulling the seat belt all the wayout to shift the rectractor to the
“Automatic Locking” mode.
WARNING
Page 72 of 653
2-55
Safety system of your vehicle
2
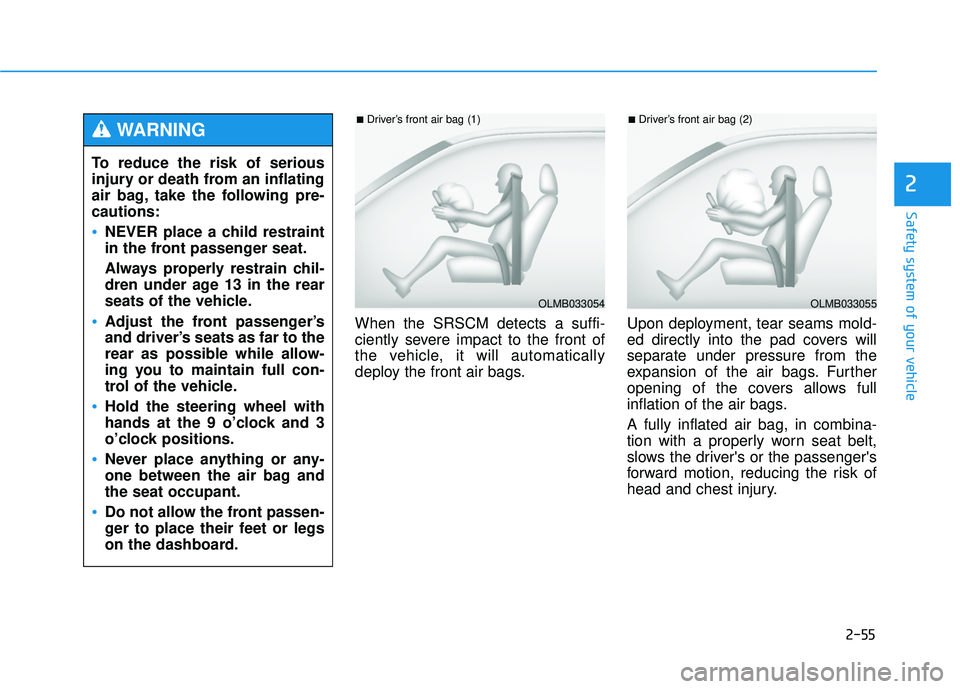
When the SRSCM detects a suffi-
ciently severe impact to the front of
the vehicle, it will automatically
deploy the front air bags.Upon deployment, tear seams mold-
ed directly into the pad covers will
separate under pressure from the
expansion of the air bags. Further
opening of the covers allows full
inflation of the air bags. A fully inflated air bag, in combina-
tion with a properly worn seat belt,
slows the driver's or the passenger's
forward motion, reducing the risk of
head and chest injury.
OLMB033054
■
Driver’s front air bag (1)
To reduce the risk of serious
injury or death from an inflating
air bag, take the following pre-cautions:
NEVER place a child restraint
in the front passenger seat.
Always properly restrain chil-
dren under age 13 in the rear
seats of the vehicle.
Adjust the front passenger’s
and driver’s seats as far to the
rear as possible while allow-
ing you to maintain full con-
trol of the vehicle.
Hold the steering wheel with
hands at the 9 o’clock and 3
o’clock positions.
Never place anything or any-
one between the air bag andthe seat occupant.
Do not allow the front passen-
ger to place their feet or legs
on the dashboard.
WARNING
OLMB033055
■Driver’s front air bag (2)
Page 87 of 653
Convenient features of your vehicle
ACCESSING YOUR VEHICLE ..................................3-3
Remote key .......................................................................3-3
Remote key precautions..................................................3-5
Smart key ...........................................................................3-6
Smart key precautions...................................................3-10 Immobilizer System ........................................................3-11
DOOR LOCKS .......................................................3-13
Operating door locks from outside the vehicle .....3-13
Operating door locks from inside the vehicle ........3-16
Auto door lock/unlock features ................................3-18
Child-protector rear door locks .................................3-18
THEFT-ALARM SYSTEM ...................................3-19
INSTRUMENT CLUSTER ......................................3-20
Instrument Cluster Control............................................3-21
Gauges ...............................................................................3-21
Transaxle Shift Indicator ...............................................3-24
TRIP COMPUTER ..................................................3-25
Trip Modes ........................................................................3-25
Warnings and indicators................................................3-28
STEERING WHEEL ................................................3-42
Electric Power Steering (EPS) ....................................3-42
Tilt steering/Telescope steering .................................3-42
Horn ....................................................................................3-43
MIRRORS ...............................................................3-44
Interior rearview mirrors .............................................3-44
Outside rearview mirrors .............................................3-61
WINDOWS..............................................................3-63
Power windows ..............................................................3-64
PANORAMIC SUNROOF .......................................3-67
Sunroof opening and closing ......................................3-67
Sliding the sunroof ........................................................3-68
Tilting the Sunroof ........................................................3-68
Sunroof open warming ..................................................3-70
Roller blind .......................................................................3-70
HOOD .....................................................................3-71
TAILGATE ...............................................................3-73
Emergency tailgate safety release ...........................3-74
FUEL FILLER DOOR .............................................3-76
LIGHTS ...................................................................3-79
Exterior lights .................................................................3-79
Hazard warning flasher .................................................3-84
Interior lights ....................................................................3-84
Vanity mirror lamp ..........................................................3-86
Glove box lamp ................................................................3-86
Luggage room lamp ........................................................3-86
3
Page 89 of 653
3-3
Convenient features of your vehicle
3
Remote key
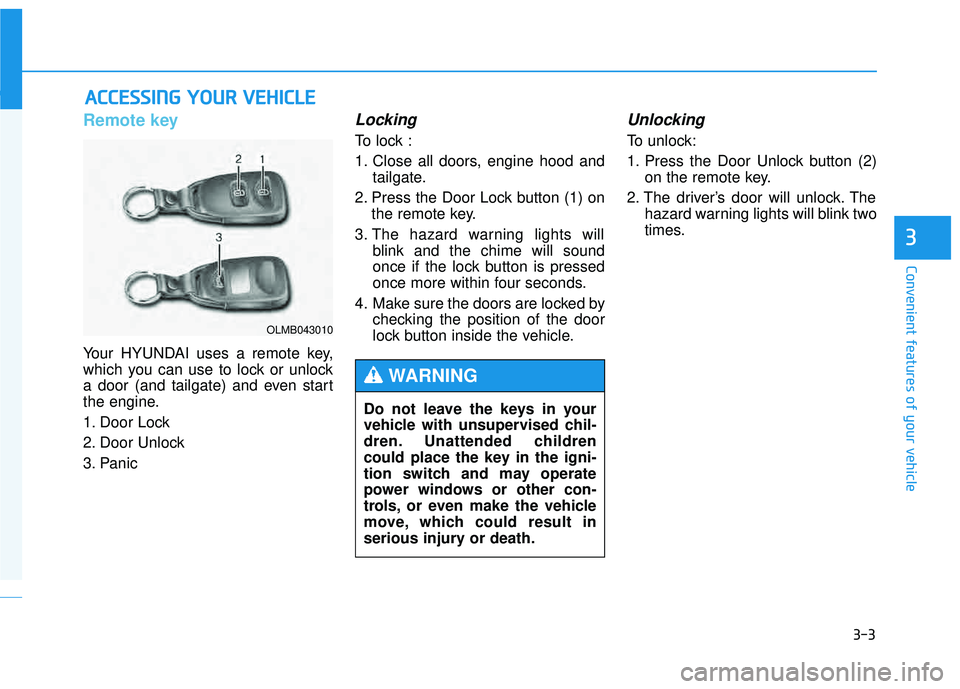
Your HYUNDAI uses a remote key,
which you can use to lock or unlock
a door (and tailgate) and even start
the engine.
1. Door Lock
2. Door Unlock
3. Panic
Locking
To lock :
1. Close all doors, engine hood andtailgate.
2. Press the Door Lock button (1) on the remote key.
3. The hazard warning lights will blink and the chime will sound
once if the lock button is pressed
once more within four seconds.
4. Make sure the doors are locked by checking the position of the door
lock button inside the vehicle.
Unlocking
To unlock:
1. Press the Door Unlock button (2)on the remote key.
2. The driver’s door will unlock. The hazard warning lights will blink two
times.
AACCCC EE SSSS IINN GG YY OO UURR VV EEHH IICC LLEE
Do not leave the keys in your
vehicle with unsupervised chil-
dren. Unattended children
could place the key in the igni-
tion switch and may operate
power windows or other con-
trols, or even make the vehicle
move, which could result in
serious injury or death.
WARNING
OLMB043010
Page 93 of 653
3-7
Convenient features of your vehicle
3
Locking
To lock :
1. Close all doors, engine hood andtailgate.
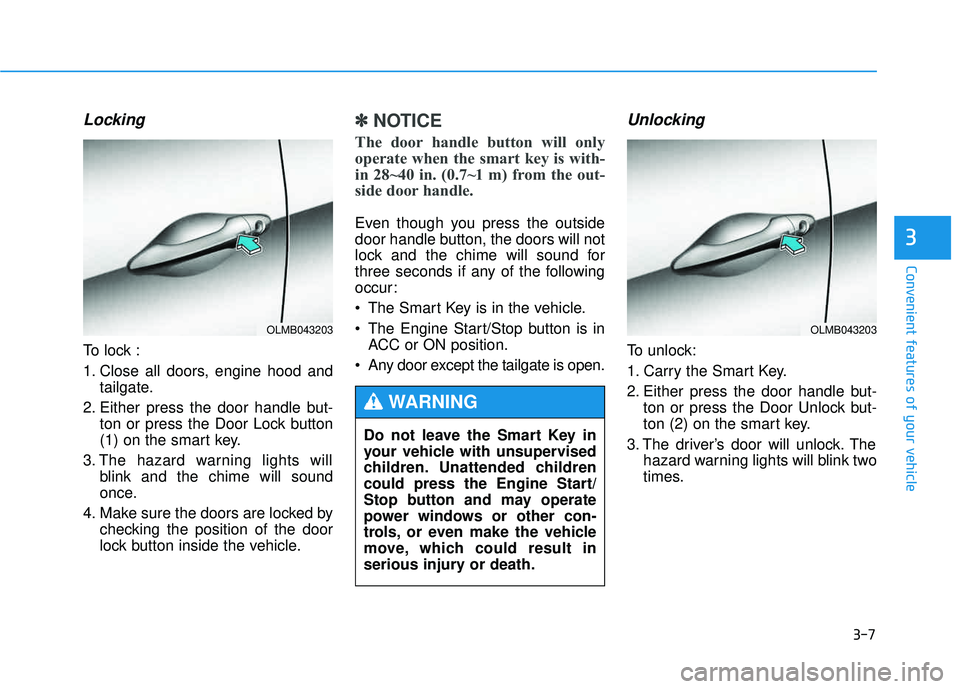
2. Either press the door handle but- ton or press the Door Lock button
(1) on the smart key.
3. The hazard warning lights will blink and the chime will sound
once.
4. Make sure the doors are locked by checking the position of the door
lock button inside the vehicle.
✽✽ NOTICE
The door handle button will only
operate when the smart key is with-
in 28~40 in. (0.7~1 m) from the out-
side door handle.
Even though you press the outside
door handle button, the doors will not
lock and the chime will sound for
three seconds if any of the following
occur:
The Smart Key is in the vehicle.
The Engine Start/Stop button is in ACC or ON position.
Any door except the tailgate is open.
Unlocking
To unlock:
1. Carry the Smart Key.
2. Either press the door handle but- ton or press the Door Unlock but-
ton (2) on the smart key.
3. The driver’s door will unlock. The hazard warning lights will blink two
times.
OLMB043203
Do not leave the Smart Key in
your vehicle with unsupervised
children. Unattended children
could press the Engine Start/
Stop button and may operate
power windows or other con-
trols, or even make the vehicle
move, which could result in
serious injury or death.
WARNING
OLMB043203