Hyundai Tucson 2019 Owner's Manual - RHD (UK, Australia)
Manufacturer: HYUNDAI, Model Year: 2019, Model line: Tucson, Model: Hyundai Tucson 2019Pages: 685, PDF Size: 17.76 MB
Page 561 of 685
7-12
Maintenance
EXPLANATION OF SCHEDULED MAINTENANCE ITEMS
Engine oil and filter
The engine oil and filter should be
changed at the intervals specified in
the maintenance schedule. If the car
is being driven in severe conditions,
more frequent oil and filter changes
are required.
Drive belts
Inspect all drive belts for evidence of
cuts, cracks, excessive wear or oil
saturation and replace if necessary.
Drive belts should be checked peri-
odically for proper tension and
adjusted as necessary.
Fuel filter (cartridge)
A clogged-up fuel filter may limit the
vehicle driving speed, damage the
emission system, and cause the
hard starting. When a considerable
amount of foreign substances are
accumulated in the fuel tank, the fuel
filter should be replaced.
Upon installing a new fuel filter, oper-
ate the diesel engine for several min-
utes, and check the connections for
any leakages. We recommend you to
have the fuel filter replaced by a
HYUNDAI authorised repairer.
Fuel lines, fuel hoses and con-
nections
Check the fuel lines, fuel hoses and
connections for leakage and dam-
age. We recommend that the fuel
lines, fuel hoses and connections be
replaced by a HYUNDAI authorised
repairer.
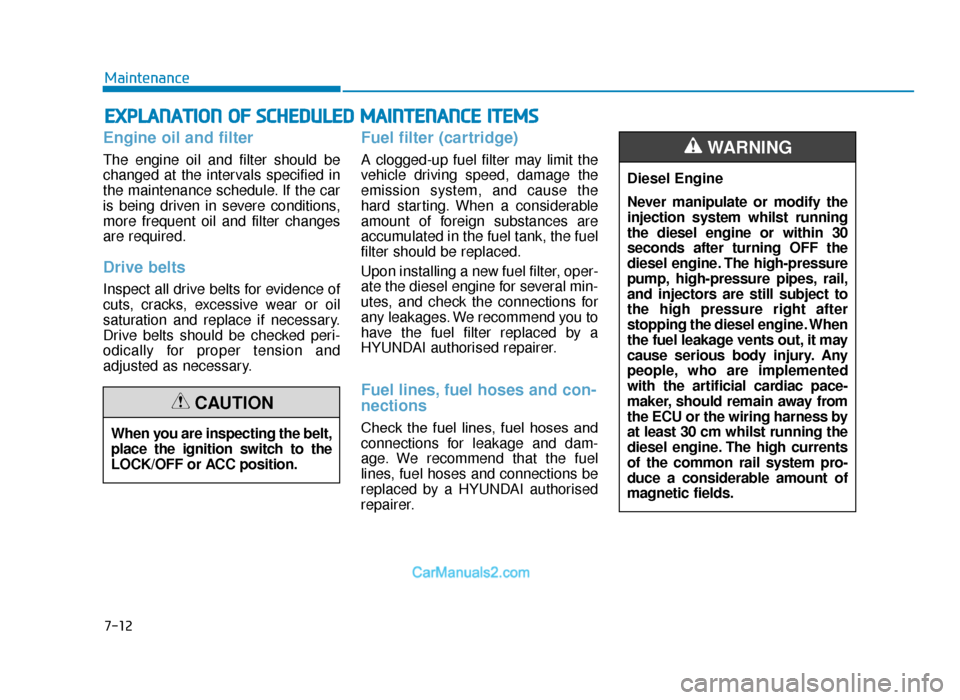
When you are inspecting the belt,
place the ignition switch to the
LOCK/OFF or ACC position.
CAUTION
Diesel Engine
Never manipulate or modify the
injection system whilst running
the diesel engine or within 30
seconds after turning OFF the
diesel engine. The high-pressure
pump, high-pressure pipes, rail,
and injectors are still subject to
the high pressure right after
stopping the diesel engine. When
the fuel leakage vents out, it may
cause serious body injury. Any
people, who are implemented
with the artificial cardiac pace-
maker, should remain away from
the ECU or the wiring harness by
at least 30 cm whilst running the
diesel engine. The high currents
of the common rail system pro-
duce a considerable amount of
magnetic fields.
WARNING
TLe UK 7.qxp 5/10/2018 1:32 PM Page 12
Page 562 of 685
7-13
7
Maintenance
Vapour hose and fuel filler cap
The vapour hose and fuel filler cap
should be inspected at those inter-
vals specified in the maintenance
schedule. Make sure that a new
vapour hose or fuel filler cap is cor-
rectly replaced.
Vacuum crankcase ventilation
hoses (if equipped)
Inspect the surface of hoses for evi-
dence of heat and/or mechanical
damage. Hard and brittle rubber,
cracking, tears, cuts, abrasions, and
excessive swelling indicate deterio-
ration. Particular attention should be
paid to examine those hose surfaces
nearest to high heat sources, such
as the exhaust manifold.
Inspect the hose routing to assure
that the hoses do not come in con-
tact with any heat source, sharp
edges or moving component which
might cause heat damage or
mechanical wear. Inspect all hose
connections, such as clamps and
couplings, to make sure they are
secure, and that no leaks are pres-
ent. Hoses should be replaced
immediately if there is any evidence
of deterioration or damage.
Air cleaner filter
We recommend that the air cleaner
filter be replaced by a HYUNDAI
authorised repairer.
Spark plugs
(For Petrol Engine)
Make sure to install new spark plugs
of the correct heat range.
Valve clearance
(For Petrol Engine)
Inspect excessive valve noise and/or
engine vibration and adjust if neces-
sary. We recommend that the system
be serviced by a HYUNDAI authorised
repairer.
Cooling system
Check the cooling system parts, such
as radiator, coolant reservoir, hoses
and connections for leakage and dam-
age. Replace any damaged parts.
Engine coolant
The coolant should be changed at
the intervals specified in the mainte-
nance schedule.
Automatic transaxle fluid
Automatic transaxle fluid should not
be checked under normal usage
conditions. We recommend that the
automatic transaxle fluid changed by
a HYUNDAI authorised repairer
according to the maintenance sched-
ule.
Information
Automatic transaxle fluid colour is
basically red. As the vehicle is driven,
the automatic transaxle fluid will begin
to look darker. It is normal condition
and you should not judge the need to
replace the fluid based upon the
changed colour.
i
Do not disconnect and inspect
spark plugs when the engine is
hot. You may burn yourself.
WARNING
TLe UK 7.qxp 5/10/2018 1:32 PM Page 13
Page 563 of 685
7-14
Maintenance
The use of a non-specified fluid
could result in transaxle malfunc-
tion and failure.
Use only specified automatic
transaxle fluid.
(Refer to “Recommended lubri-
cants and capacities” in chapter 8.)
Manual transaxle fluid
(if equipped)
Inspect the manual transaxle fluid
according to the maintenance sched-
ule.
Dual clutch transmission fluid
(if equipped)
Inspect the dual clutch transmission
fluid according to the maintenance
schedule.
Brake hoses and lines
Visually check for proper installation,
chafing, cracks, deterioration and
any leakage. Replace any deteriorat-
ed or damaged parts immediately.
Brake/Clutch fluid (if equipped)
Check brake fluid level in the brake
fluid reservoir. The level should be
between “MIN” and “MAX” marks on
the side of the reservoir. Use only
hydraulic brake fluid conforming to
DOT 3 or DOT 4 specification.
Parking brake
Inspect the parking brake system
including the parking brake lever and
cables.
Brake pads, calipers and
rotors
Check the pads for excessive wear,
discs for run out and wear, and
calipers for fluid leakage.
For more information on checking
the pads or lining wear limit, refer to
the HYUNDAI web site.
( http://ser
vice.hyundai-motor.com)
Suspension mounting bolts
Check the suspension connections
for looseness or damage. Retighten
to the specified torque.
Steering gear box, linkage &
boots/lower arm ball joint
With the vehicle stopped and engine
off, check for excessive free-play in
the steering wheel.
Check the linkage for bends or dam-
age. Check the dust boots and ball
joints for deterioration, cracks, or
damage. Replace any damaged
parts.
Drive shafts and boots
Check the drive shafts, boots and
clamps for cracks, deterioration, or
damage. Replace any damaged
parts and, if necessary, repack the
grease.
Air conditioning refrigerant/
compressor
Check the air conditioning lines and
connections for leakage and dam-
age.
NOTICE
TLe UK 7.qxp 5/10/2018 1:32 PM Page 14
Page 564 of 685
7-15
7
Maintenance
ENGINE OIL
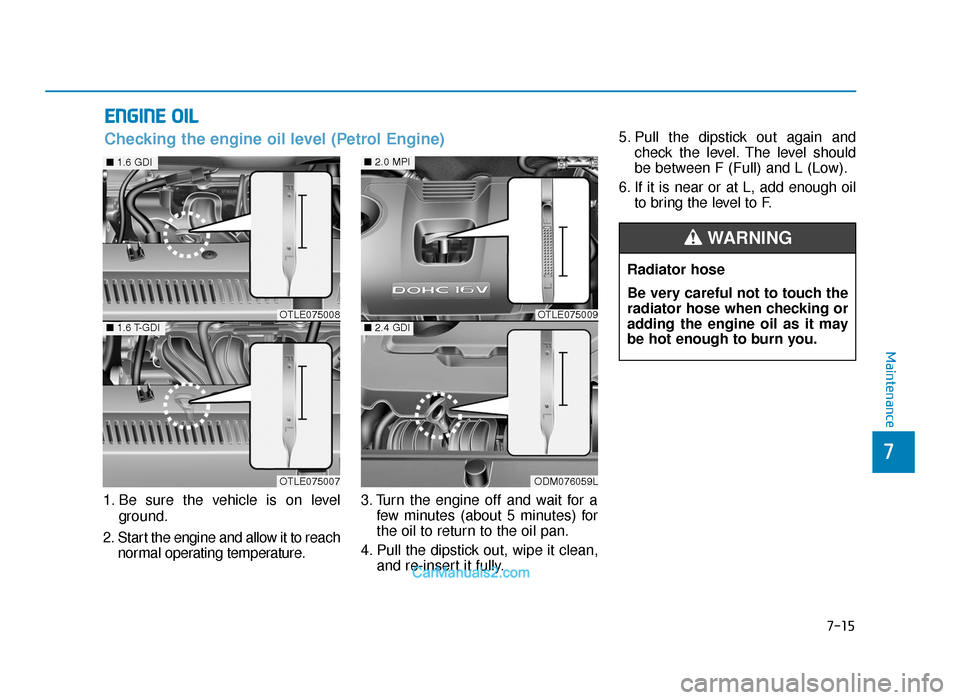
1. Be sure the vehicle is on levelground.
2. Start the engine and allow it to reach normal operating temperature. 3. Turn the engine off and wait for a
few minutes (about 5 minutes) for
the oil to return to the oil pan.
4. Pull the dipstick out, wipe it clean, and re-insert it fully. 5. Pull the dipstick out again and
check the level. The level should
be between F (Full) and L (Low).
6. If it is near or at L, add enough oil to bring the level to F.
OTLE075008
OTLE075007
■ 1.6 GDI
■1.6 T-GDI
Checking the engine oil level (Petrol Engine)
Radiator hose
Be very careful not to touch the
radiator hose when checking or
adding the engine oil as it may
be hot enough to burn you.
WARNING
OTLE075009
ODM076059L
■2.0 MPI
■2.4 GDI
TLe UK 7.qxp 5/10/2018 1:32 PM Page 15
Page 565 of 685
7-16
Maintenance
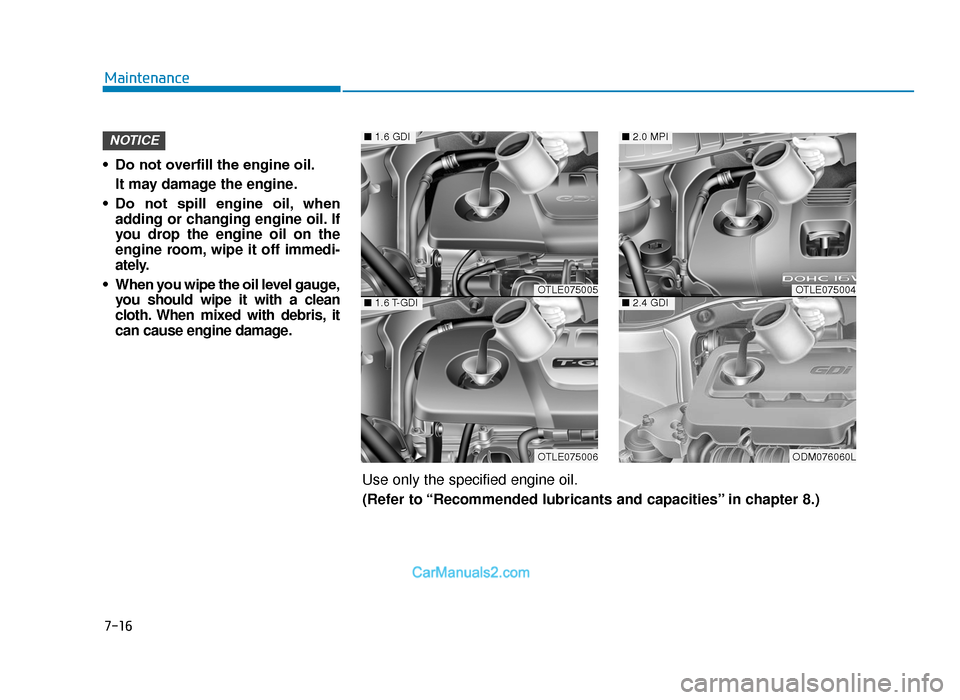
• Do not overfill the engine oil. It may damage the engine.
• Do not spill engine oil, when adding or changing engine oil. If
you drop the engine oil on the
engine room, wipe it off immedi-
ately.
• When you wipe the oil level gauge, you should wipe it with a clean
cloth. When mixed with debris, it
can cause engine damage.
NOTICE
OTLE075005
OTLE075006
■ 1.6 GDI
■1.6 T-GDIOTLE075004
ODM076060L
■2.0 MPI
■2.4 GDI
Use only the specified engine oil.
(Refer to “Recommended lubricants and capacities” in chapter 8.)
TLe UK 7.qxp 5/10/2018 1:32 PM Page 16
Page 566 of 685
7-17
7
Maintenance
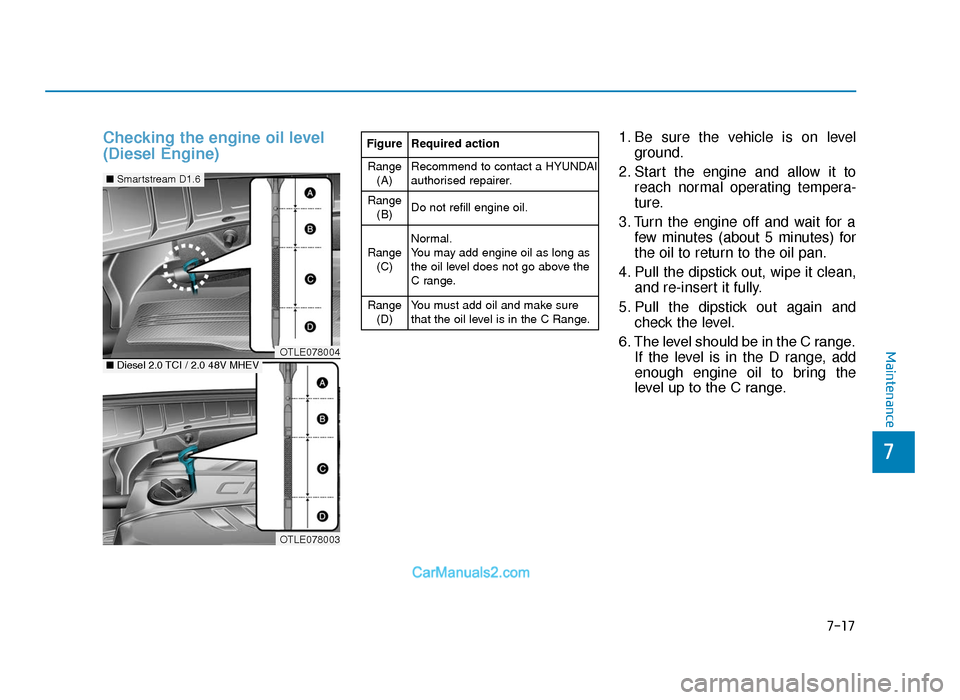
Checking the engine oil level
(Diesel Engine)1. Be sure the vehicle is on levelground.
2. Start the engine and allow it to reach normal operating tempera-
ture.
3. Turn the engine off and wait for a few minutes (about 5 minutes) for
the oil to return to the oil pan.
4. Pull the dipstick out, wipe it clean, and re-insert it fully.
5. Pull the dipstick out again and check the level.
6. The level should be in the C range. If the level is in the D range, add
enough engine oil to bring the
level up to the C range.FigureRequired action
Range
(A)Recommend to contact a HYUNDAI
authorised repairer.
Range(B)Do not refill engine oil.
Range(C)Normal.
You may add engine oil as long as
the oil level does not go above the
C range.
Range(D)You must add oil and make sure
that the oil level is in the C Range.
OTLE078004
■ Smartstream D1.6
OTLE078003
■Diesel 2.0 TCI / 2.0 48V MHEV
TLe UK 7.qxp 5/10/2018 1:33 PM Page 17
Page 567 of 685
7-18
Maintenance
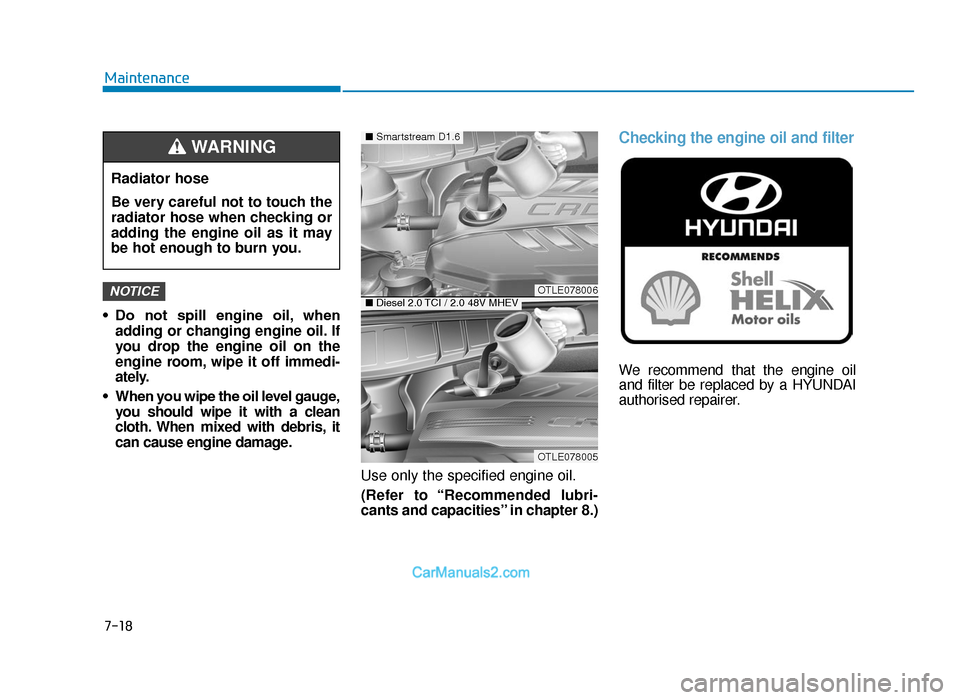
• Do not spill engine oil, when adding or changing engine oil. If
you drop the engine oil on the
engine room, wipe it off immedi-
ately.
• When you wipe the oil level gauge, you should wipe it with a clean
cloth. When mixed with debris, it
can cause engine damage.
Use only the specified engine oil.
(Refer to “Recommended lubri-
cants and capacities” in chapter 8.)
Checking the engine oil and filter
We recommend that the engine oil
and filter be replaced by a HYUNDAI
authorised repairer.
NOTICEOTLE078006
OTLE078005
■Smartstream D1.6
■Diesel 2.0 TCI / 2.0 48V MHEV
Radiator hose
Be very careful not to touch the
radiator hose when checking or
adding the engine oil as it may
be hot enough to burn you.
WARNING
TLe UK 7.qxp 5/10/2018 1:33 PM Page 18
Page 568 of 685
7-19
7
Maintenance
Used engine oil may cause irri-
tation or cancer of the skin if
left in contact with the skin for
prolonged periods of time. Used
engine oil contains chemicals
that have caused cancer in lab-
oratory animals. Always protect
your skin by washing your
hands thoroughly with soap
and warm water as soon as pos-
sible after handling used oil.
WARNING
TLe UK 7.qxp 5/10/2018 1:33 PM Page 19
Page 569 of 685
7-20
Maintenance
ENGINE COOLANT
The high-pressure cooling system
has a reservoir filled with year-round
antifreeze coolant. The reservoir is
filled at the factory.
Check the antifreeze protection and
coolant concentration level at least
once a year, at the beginning of the
winter season, and before travelling
to a colder climate.
• When the engine overheats fromlow engine coolant, suddenly
adding engine coolant may cause
cracks in the engine. To prevent
damage, add engine coolant
slowly in small quantities.
• Do not drive with no engine coolant. It may cause water pump
failure and engine seizure, etc.Checking the engine coolant
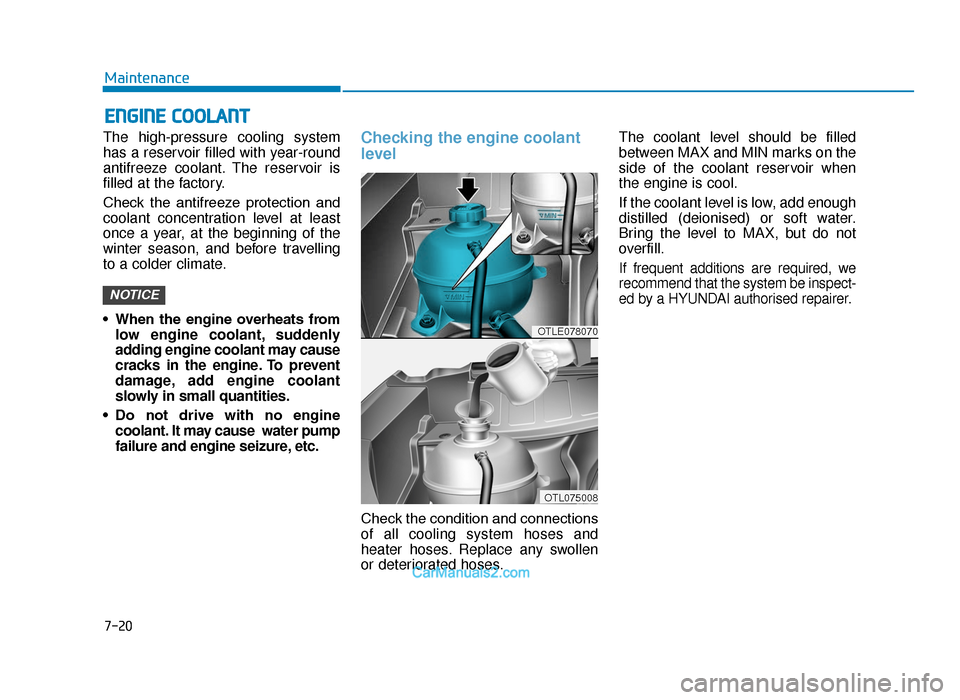
level
Check the condition and connections
of all cooling system hoses and
heater hoses. Replace any swollen
or deteriorated hoses. The coolant level should be filled
between MAX and MIN marks on the
side of the coolant reservoir when
the engine is cool.
If the coolant level is low, add enough
distilled (deionised) or soft water.
Bring the level to MAX, but do not
overfill.
If frequent additions are required, we
recommend that the system be inspect-
ed by a HYUNDAI authorised repairer.
NOTICE
OTLE078070
OTL075008
TLe UK 7.qxp 5/10/2018 1:33 PM Page 20
Page 570 of 685
7-21
7
Maintenance
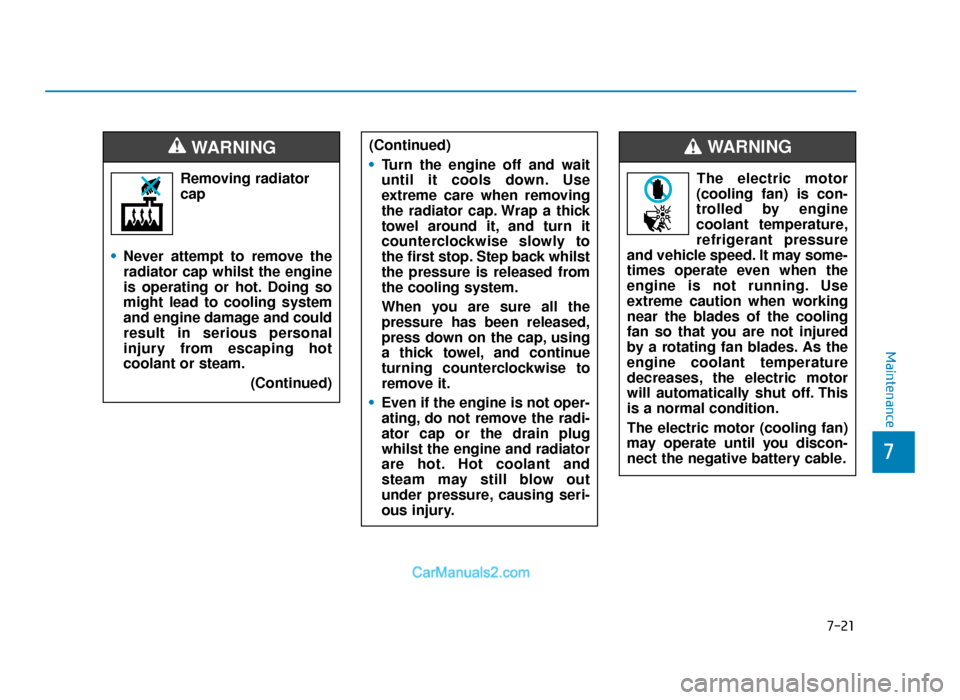
Removing radiatorcap
• Never attempt to remove the
radiator cap whilst the engine
is operating or hot. Doing so
might lead to cooling system
and engine damage and could
result in serious personal
injury from escaping hot
coolant or steam.
(Continued)
WARNING (Continued)
•Turn the engine off and wait
until it cools down. Use
extreme care when removing
the radiator cap. Wrap a thick
towel around it, and turn it
counterclockwise slowly to
the first stop. Step back whilst
the pressure is released from
the cooling system.
When you are sure all the
pressure has been released,
press down on the cap, using
a thick towel, and continue
turning counterclockwise to
remove it.
• Even if the engine is not oper-
ating, do not remove the radi-
ator cap or the drain plug
whilst the engine and radiator
are hot. Hot coolant and
steam may still blow out
under pressure, causing seri-
ous injury.
The electric motor
(cooling fan) is con-
trolled by engine
coolant temperature,
refrigerant pressure
and vehicle speed. It may some-
times operate even when the
engine is not running. Use
extreme caution when working
near the blades of the cooling
fan so that you are not injured
by a rotating fan blades. As the
engine coolant temperature
decreases, the electric motor
will automatically shut off. This
is a normal condition.
The electric motor (cooling fan)
may operate until you discon-
nect the negative battery cable.
WARNING
TLe UK 7.qxp 5/10/2018 1:33 PM Page 21