climate Hyundai Tucson 2019 Owner's Manual
[x] Cancel search | Manufacturer: HYUNDAI, Model Year: 2019, Model line: Tucson, Model: Hyundai Tucson 2019Pages: 546, PDF Size: 61.38 MB
Page 16 of 546
I IN
NS
ST
TR
RU
UM
ME
EN
NT
T
P
PA
AN
NE
EL
L
O
OV
VE
ER
RV
VI
IE
EW
W
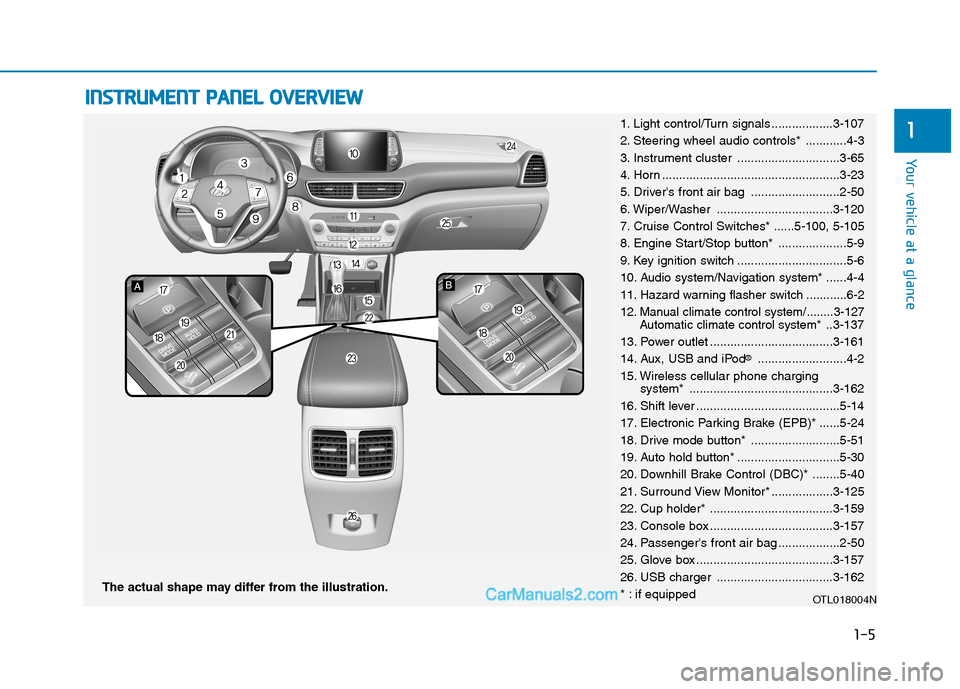
The actual shape may differ from the illustration.
1-5
Your vehicle at a glance
11. Light control/Turn signals ..................3-107
2. Steering wheel audio controls* ............4-3
3. Instrument cluster ..............................3-65
4. Horn ....................................................3-23
5. Driver's front air bag ..........................2-50
6. Wiper/Washer ..................................3-120
7. Cruise Control Switches* ......5-100, 5-105
8. Engine Start/Stop button* ....................5-9
9. Key ignition switch ................................5-6
10. Audio system/Navigation system* ......4-4
11. Hazard warning flasher switch ............6-2
12. Manual climate control system/........3-127
Automatic climate control system*..3-137
13. Power outlet ....................................3-161
14. Aux, USB and iPod
®..........................4-2
15. Wireless cellular phone charging
system* ..........................................3-162
16. Shift lever ..........................................5-14
17. Electronic Parking Brake (EPB)* ......5-24
18. Drive mode button* ..........................5-51
19. Auto hold button* ..............................5-30
20. Downhill Brake Control (DBC)* ........5-40
21. Surround View Monitor* ..................3-125
22. Cup holder* ....................................3-159
23. Console box ....................................3-157
24. Passenger's front air bag ..................2-50
25. Glove box ........................................3-157
26. USB charger ..................................3-162
* : if equipped
OTL018004N
Page 40 of 546
2-22
Safety system of your vehicle
The ventilated seats are provided to
cool the front seats by blowing air
through small vent holes on the sur-
face of the seat cushions and seat-
backs.
When the operation of the ventilated
seat is not needed, keep the switch-
es in the OFF position.
When the engine is running, the ven-
tilated seats may be operated. Press
the driver's side button to cool the
driver seat or press the passenger
side button to cool the passenger
seat.
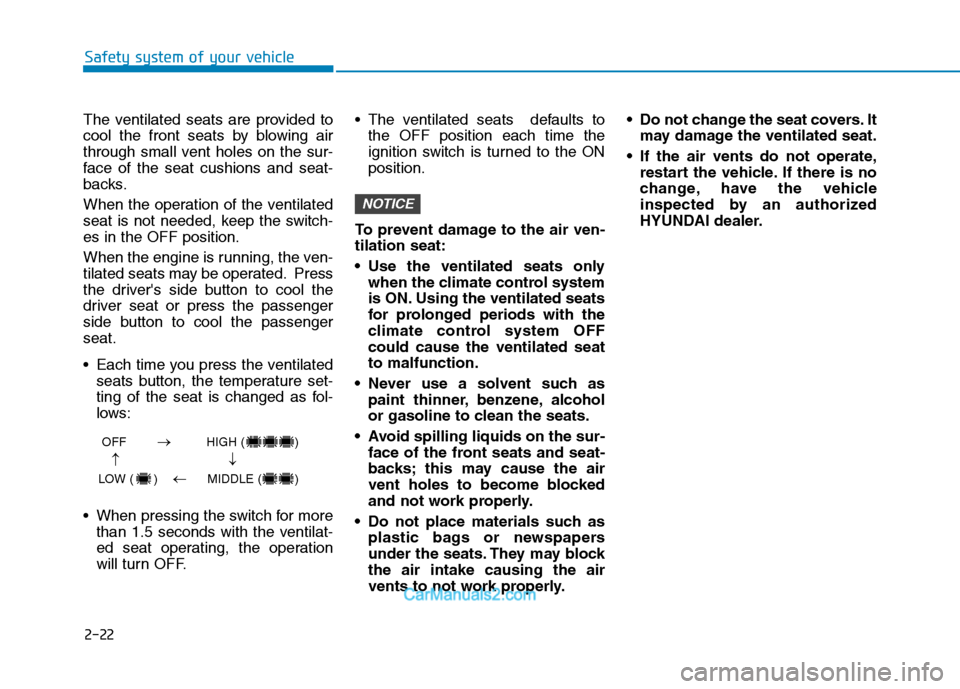
Each time you press the ventilated
seats button, the temperature set-
ting of the seat is changed as fol-
lows:
When pressing the switch for more
than 1.5 seconds with the ventilat-
ed seat operating, the operation
will turn OFF. The ventilated seats defaults to
the OFF position each time the
ignition switch is turned to the ON
position.
To prevent damage to the air ven-
tilation seat:
Use the ventilated seats only
when the climate control system
is ON. Using the ventilated seats
for prolonged periods with the
climate control system OFF
could cause the ventilated seat
to malfunction.
Never use a solvent such as
paint thinner, benzene, alcohol
or gasoline to clean the seats.
Avoid spilling liquids on the sur-
face of the front seats and seat-
backs; this may cause the air
vent holes to become blocked
and not work properly.
Do not place materials such as
plastic bags or newspapers
under the seats. They may block
the air intake causing the air
vents to not work properly. Do not change the seat covers. It
may damage the ventilated seat.
If the air vents do not operate,
restart the vehicle. If there is no
change, have the vehicle
inspected by an authorized
HYUNDAI dealer.
NOTICE
OFF HIGH ( )
LOW ( ) MIDDLE ( )
→→
→
→
Page 93 of 546
Light .....................................................................3-107
Exterior Lights ...............................................................3-107
Welcome System ...........................................................3-115
Interior Lights ................................................................3-116
Wipers and Washers..........................................3-120
Windshield Wipers ........................................................3-120
Front Windshield Washers ..........................................3-122
Rear Window Wiper and Washer Switch ................3-123
Driver Assist System .........................................3-124
Rear View Monitor .......................................................3-124
Surround View Monitor ...............................................3-125
Manual Climate Control System.......................3-127
Heating and Air Conditioning .....................................3-128
System Operation .........................................................3-133
System Maintenance....................................................3-135
Automatic Climate Control System ..................3-137
Automatic Heating and Air Conditioning.................3-138
Manual Heating and Air Conditioning......................3-139
System Operation .........................................................3-146
System Maintenance....................................................3-148
Windshield Defrosting And Defogging ...........3-150
Manual Climate Control System ................................3-150
Automatic Climate Control System ...........................3-151
Defogging logic..............................................................3-152
Auto Defogging System ..............................................3-153
Rear Window Defroster ..............................................3-154
Climate Control Additional Features ...............3-156
Cluster ionizer ................................................................3-156
Automatic Ventilation ...................................................3-156
Sunroof Inside Air Recirculation ...............................3-156
Storage Compartment .......................................3-157
Center Console Storage ..............................................3-157
Glove Box ........................................................................3-157
Sunglass Holder.............................................................3-158
3
Page 107 of 546
3-16
Convenient features of your vehicle
Press the button on the driver's out-
side door handle while carrying the
Smart Key with you or press the
Door Unlock button on the Smart
Key, the driver's door will unlock. If
you press the button on the front
passenger's outside door, all doors
will unlock.
Once the doors are unlocked, they
may be opened by pulling the door
handle.
When closing the door, push the
door by hand. Make sure that doors
are closed securely.
Information
• In cold and wet climates, door lock
and door mechanisms may not work
properly due to freezing conditions.
• If the door is locked/unlocked multi-
ple times in rapid succession with
either the vehicle key or door lock
switch, the system may stop operat-
ing temporarily in order to protect
the circuit and prevent damage to
system components.
• Two press unlock setting can be
changed in the User Settings mode
on the cluster.
Operating Door Locks from
Inside the Vehicle
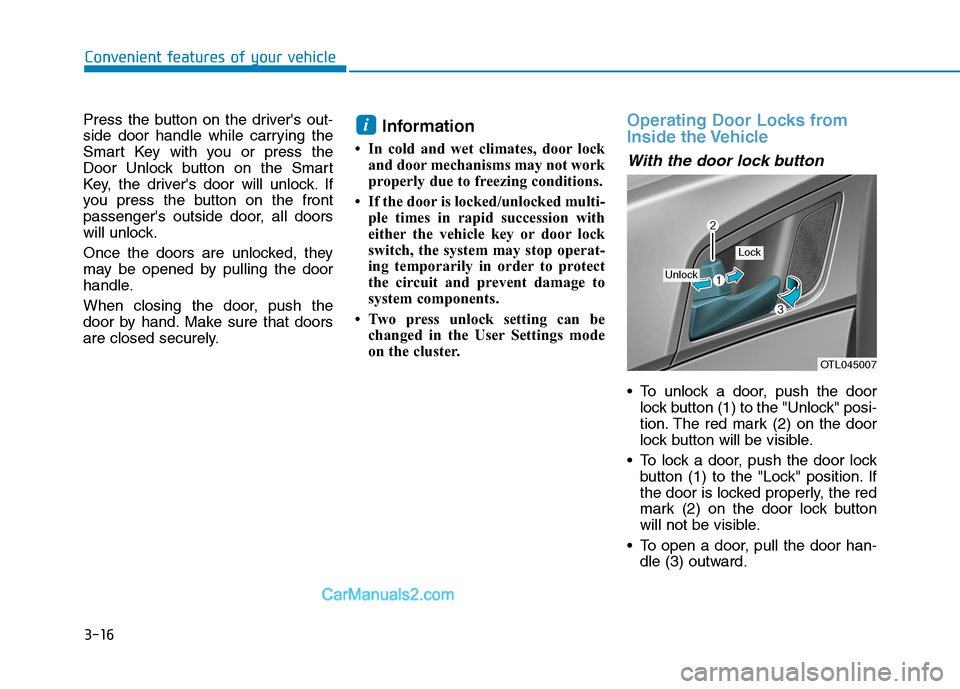
With the door lock button
To unlock a door, push the door
lock button (1) to the "Unlock" posi-
tion. The red mark (2) on the door
lock button will be visible.
To lock a door, push the door lock
button (1) to the "Lock" position. If
the door is locked properly, the red
mark (2) on the door lock button
will not be visible.
To open a door, pull the door han-
dle (3) outward.
i
OTL045007
Unlock
Lock
Page 131 of 546
3-40
Convenient features of your vehicle
Power Windows
The ignition switch must be in the ON
position to be able to raise or lower
the windows. Each door has a Power
Window switch to control that door’s
window. The driver has a Power
Window Lock switch which can block
the operation of passenger windows.
The power windows will operate for
approximately 30 seconds after the
ignition switch is placed in the ACC
or LOCK/OFF position. However, if
the front doors are opened, the
Power Windows cannot be operated
even within the 30 second period.
Information
• In cold and wet climates, power win-
dows may not work properly due to
freezing conditions.
• While driving with the rear win-
dows down or with the sunroof (if
equipped) opened (or partially
opened), your vehicle may demon-
strate a wind buffeting or pulsation
noise. This noise is normal and can
be reduced or eliminated by taking
the following actions. If the noise
occurs with one or both of the rear
windows down, partially lower both
front windows approximately 1 inch
(2.5 cm). If you experience the noise
with the sunroof open, slightly close
the sunroof.
Window opening and closing
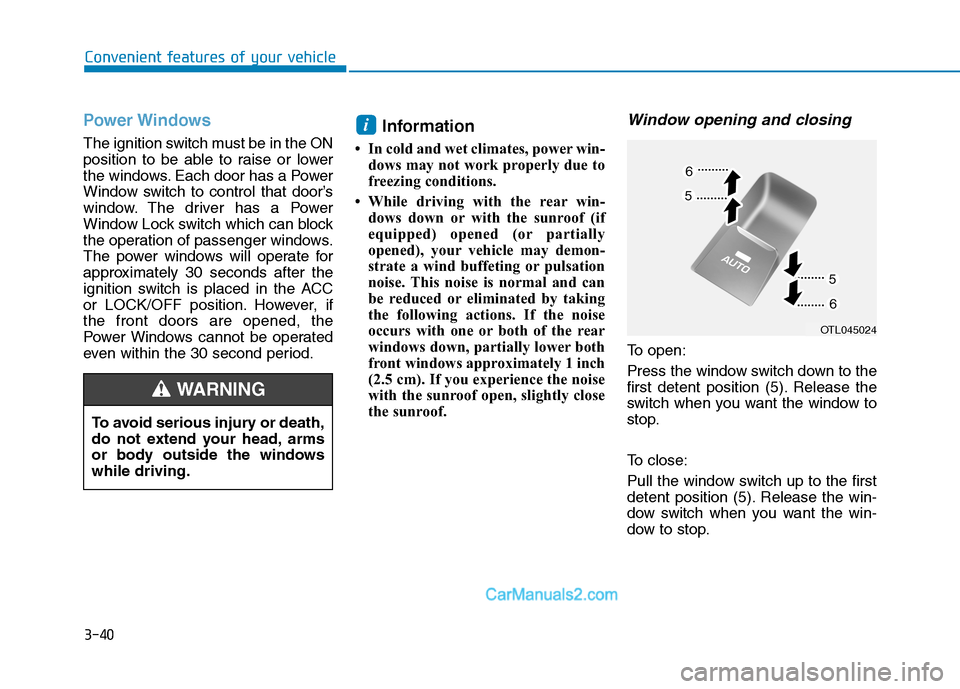
To open:
Press the window switch down to the
first detent position (5). Release the
switch when you want the window to
stop.
To close:
Pull the window switch up to the first
detent position (5). Release the win-
dow switch when you want the win-
dow to stop.
i
To avoid serious injury or death,
do not extend your head, arms
or body outside the windows
while driving.
WARNING
OTL045024
Page 134 of 546
3-43
Convenient features of your vehicle
3
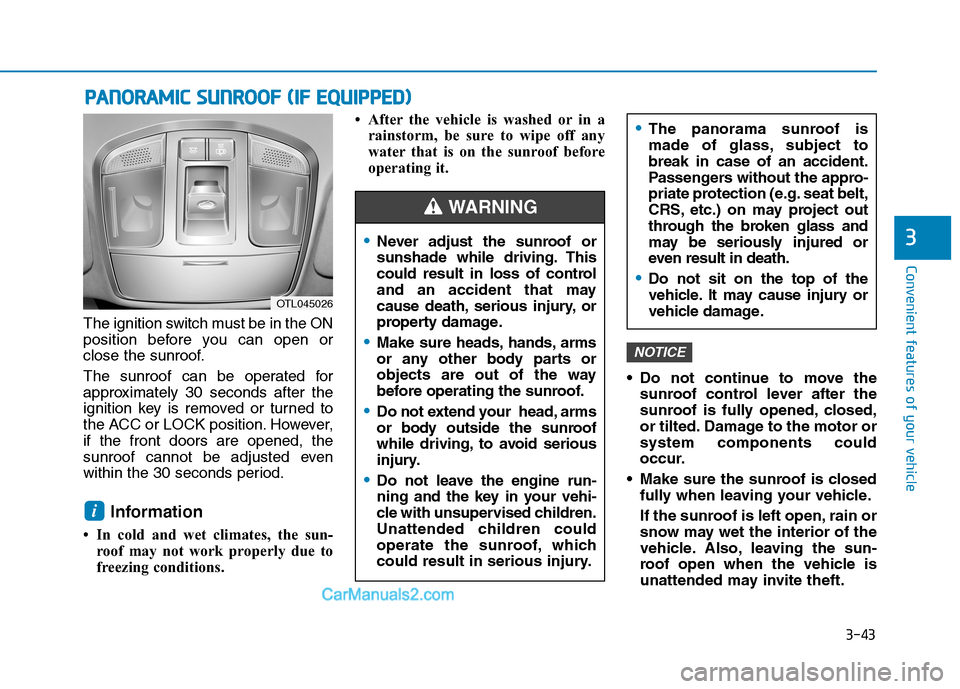
The ignition switch must be in the ON
position before you can open or
close the sunroof.
The sunroof can be operated for
approximately 30 seconds after the
ignition key is removed or turned to
the ACC or LOCK position. However,
if the front doors are opened, the
sunroof cannot be adjusted even
within the 30 seconds period.
Information
• In cold and wet climates, the sun-
roof may not work properly due to
freezing conditions.• After the vehicle is washed or in a
rainstorm, be sure to wipe off any
water that is on the sunroof before
operating it.
Do not continue to move the
sunroof control lever after the
sunroof is fully opened, closed,
or tilted. Damage to the motor or
system components could
occur.
Make sure the sunroof is closed
fully when leaving your vehicle.
If the sunroof is left open, rain or
snow may wet the interior of the
vehicle. Also, leaving the sun-
roof open when the vehicle is
unattended may invite theft.
NOTICE
i
P PA
AN
NO
OR
RA
AM
MI
IC
C
S
SU
UN
NR
RO
OO
OF
F
(
(I
IF
F
E
EQ
QU
UI
IP
PP
PE
ED
D)
)
OTL045026
Never adjust the sunroof or
sunshade while driving. This
could result in loss of control
and an accident that may
cause death, serious injury, or
property damage.
Make sure heads, hands, arms
or any other body parts or
objects are out of the way
before operating the sunroof.
Do not extend your head, arms
or body outside the sunroof
while driving, to avoid serious
injury.
Do not leave the engine run-
ning and the key in your vehi-
cle with unsupervised children.
Unattended children could
operate the sunroof, which
could result in serious injury.
The panorama sunroof is
made of glass, subject to
break in case of an accident.
Passengers without the appro-
priate protection (e.g. seat belt,
CRS, etc.) on may project out
through the broken glass and
may be seriously injured or
even result in death.
Do not sit on the top of the
vehicle. It may cause injury or
vehicle damage.
WARNING
Page 137 of 546
3-46
Convenient features of your vehicle
Periodically remove any dirt that
may accumulate on the sunroof
guide rail or between the sun-
roof and roof panel which can
make a noise.
Do not try to open the sunroof
when the temperature is below
freezing or when the sunroof is
covered with snow or ice, other-
wise the motor could be dam-
aged. In cold and wet climates,
the sunroof may not work prop-
erly.
To Reset the Sunroof
The sunroof may need to be reset if
the following conditions occur:
- The battery is discharged or dis-
connected or the sunroof fuse has
been replaced or disconnected
- The sunroof control lever is not
operating correctly
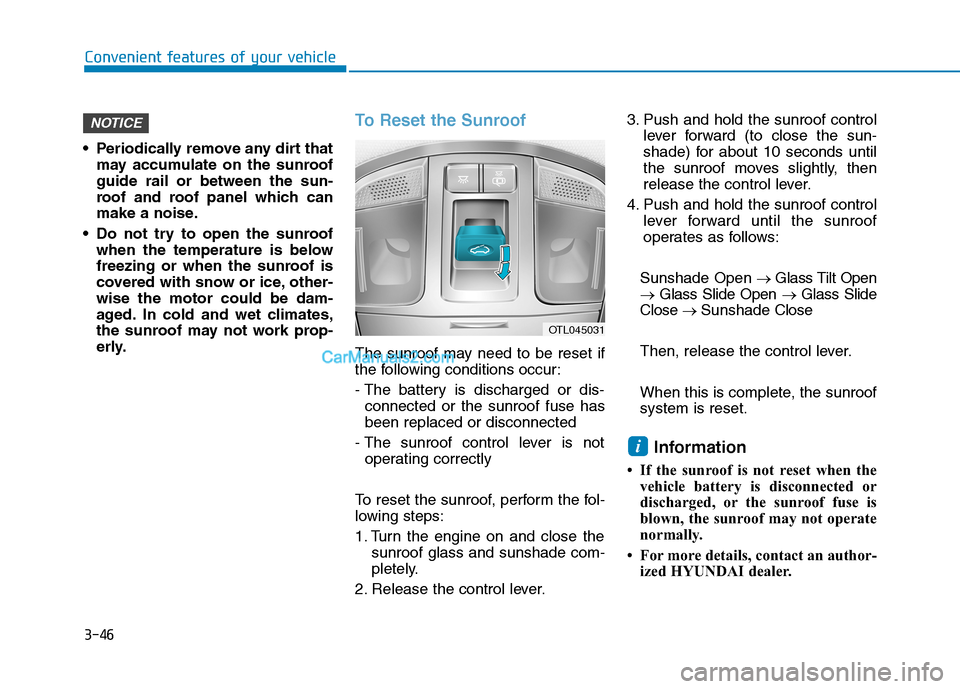
To reset the sunroof, perform the fol-
lowing steps:
1. Turn the engine on and close the
sunroof glass and sunshade com-
pletely.
2. Release the control lever.3. Push and hold the sunroof control
lever forward (to close the sun-
shade) for about 10 seconds until
the sunroof moves slightly, then
release the control lever.
4. Push and hold the sunroof control
lever forward until the sunroof
operates as follows:
Sunshade Open→ Glass Tilt Open
→ Glass Slide Open → Glass Slide
Close → Sunshade Close
Then, release the control lever.
When this is complete, the sunroof
system is reset.
Information
• If the sunroof is not reset when the
vehicle battery is disconnected or
discharged, or the sunroof fuse is
blown, the sunroof may not operate
normally.
• For more details, contact an author-
ized HYUNDAI dealer.
i
NOTICE
OTL045031
Page 143 of 546
3-52
Convenient features of your vehicle
Non-Powered liftgate
Opening the liftgate
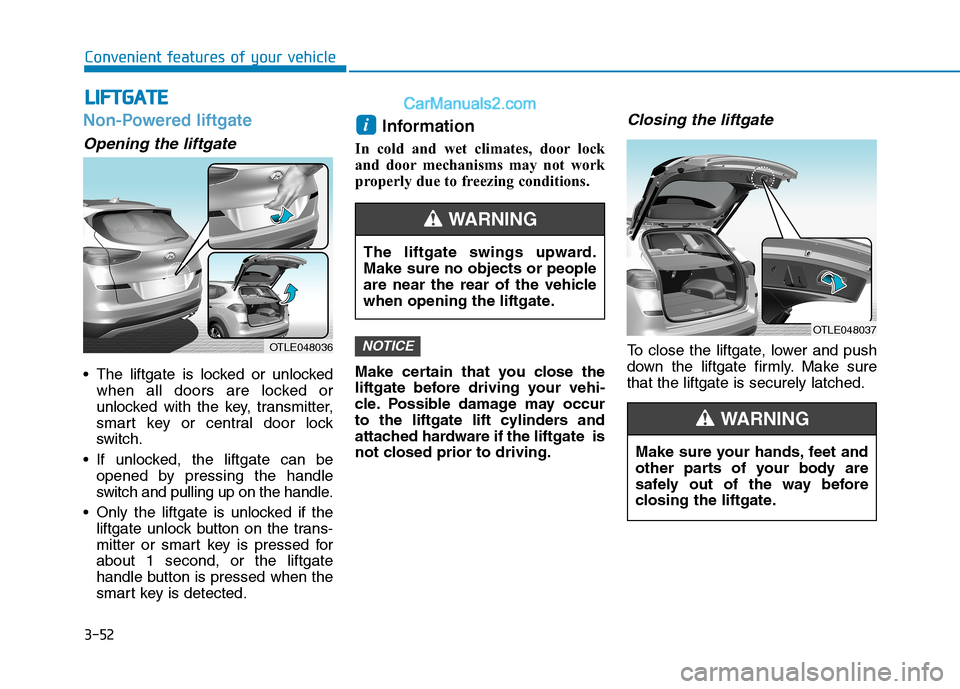
The liftgate is locked or unlocked
when all doors are locked or
unlocked with the key, transmitter,
smart key or central door lock
switch.
If unlocked, the liftgate can be
opened by pressing the handle
switch and pulling up on the handle.
Only the liftgate is unlocked if the
liftgate unlock button on the trans-
mitter or smart key is pressed for
about 1 second, or the liftgate
handle button is pressed when the
smart key is detected.
Information
In cold and wet climates, door lock
and door mechanisms may not work
properly due to freezing conditions.
Make certain that you close the
liftgate before driving your vehi-
cle. Possible damage may occur
to the liftgate lift cylinders and
attached hardware if the liftgate is
not closed prior to driving.
Closing the liftgate
To close the liftgate, lower and push
down the liftgate firmly. Make sure
that the liftgate is securely latched.NOTICE
i
L LI
IF
FT
TG
GA
AT
TE
E
OTLE048036
The liftgate swings upward.
Make sure no objects or people
are near the rear of the vehicle
when opening the liftgate.
WARNING
OTLE048037
Make sure your hands, feet and
other parts of your body are
safely out of the way before
closing the liftgate.
WARNING
Page 149 of 546
3-58
Convenient features of your vehicle
Never intentionally place any
object or part of your body in
the path of the power liftgate to
make sure the automatic rever-
sal operates.
WARNING
The power liftgate can be oper-
ated when the engine is not run-
ning. However, the power liftgate
operation consumes a large
amount of electic power.
To prevent the battery from
being discharged, do not oper-
ate it excessively (e.g. more than
5 times repeatedly).
To prevent the battery from
being discharged, do not leave
the power liftgate in the open
position for a long time.
Do not modify or repair any part
of the power liftgate by yourself.
This must be done by an author-
ized HYUNDAI dealer.
When jacking up the vehicle to
change a tire or repair the vehi-
cle, do not operate the power
liftgate. This could cause the
power liftgate to operate
improperly.
In cold and wet climates, the
power liftgate may not work
properly due to freezing condi-
tions.
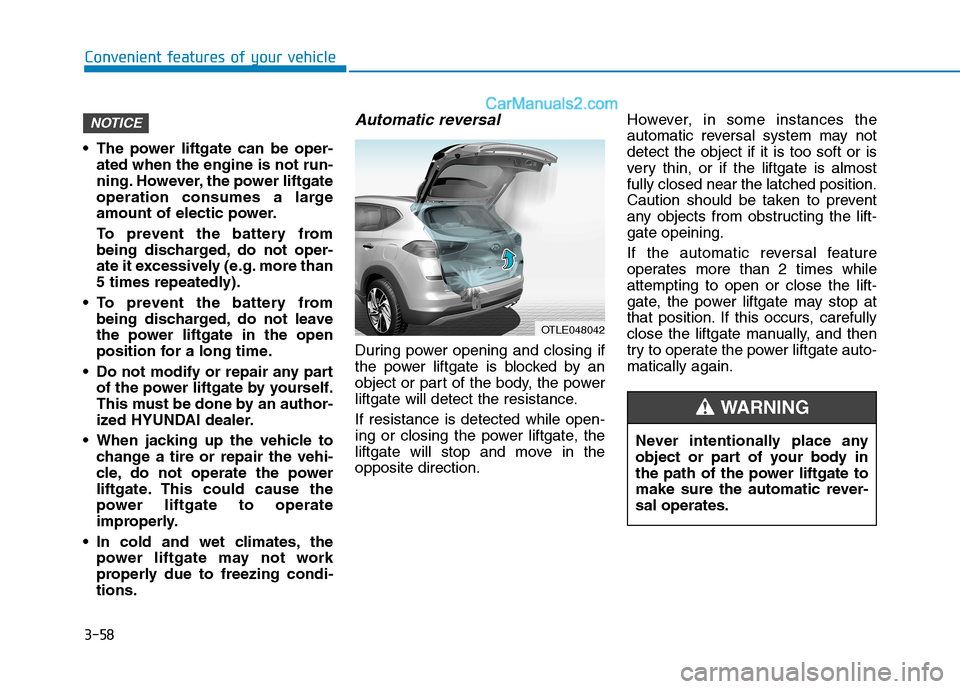
Automatic reversal
During power opening and closing if
the power liftgate is blocked by an
object or part of the body, the power
liftgate will detect the resistance.
If resistance is detected while open-
ing or closing the power liftgate, the
liftgate will stop and move in the
opposite direction.However, in some instances the
automatic reversal system may not
detect the object if it is too soft or is
very thin, or if the liftgate is almost
fully closed near the latched position.
Caution should be taken to prevent
any objects from obstructing the lift-
gate opeining.
If the automatic reversal feature
operates more than 2 times while
attempting to open or close the lift-
gate, the power liftgate may stop at
that position. If this occurs, carefully
close the liftgate manually, and then
try to operate the power liftgate auto-
matically again.
NOTICE
OTLE048042
Page 161 of 546
3-70
Convenient features of your vehicle
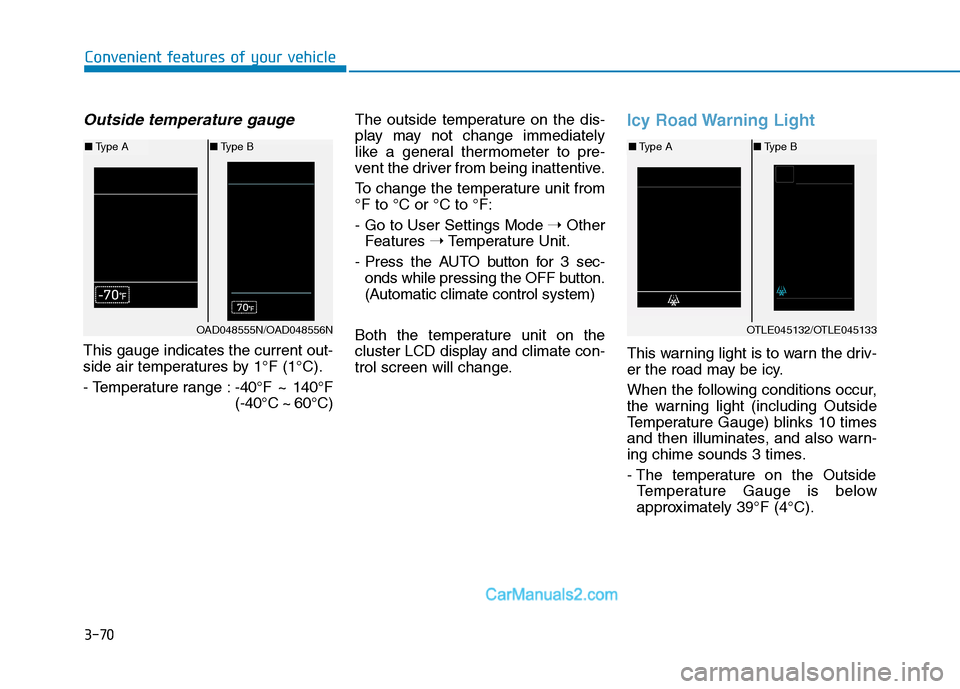
Outside temperature gauge
This gauge indicates the current out-
side air temperatures by 1°F (1°C).
- Temperature range :-40°F ~ 140°F
(-40°C ~ 60°C)The outside temperature on the dis-
play may not change immediately
like a general thermometer to pre-
vent the driver from being inattentive.
To change the temperature unit from
°F to °C or °C to °F:
- Go to User Settings Mode ➝Other
Features ➝Temperature Unit.
- Press the AUTO button for 3 sec-
onds while pressing the OFF button.
(Automatic climate control system)
Both the temperature unit on the
cluster LCD display and climate con-
trol screen will change.
Icy Road Warning Light
This warning light is to warn the driv-
er the road may be icy.
When the following conditions occur,
the warning light (including Outside
Temperature Gauge) blinks 10 times
and then illuminates, and also warn-
ing chime sounds 3 times.
- The temperature on the Outside
Temperature Gauge is below
approximately 39°F (4°C).
OTLE045132/OTLE045133
■Type A■Type B
OAD048555N/OAD048556N
■Type A■Type B