check oil HYUNDAI TUCSON LIMITED 2017 User Guide
[x] Cancel search | Manufacturer: HYUNDAI, Model Year: 2017, Model line: TUCSON LIMITED, Model: HYUNDAI TUCSON LIMITED 2017Pages: 642, PDF Size: 9.78 MB
Page 536 of 642
7-23
7
Maintenance
No check, No service required
❑Automatic transmission fluid
After 120 months or 150,000 miles (240,000 km) con-
tinue to follow the prescribed maintenance intervals.
NOTICE
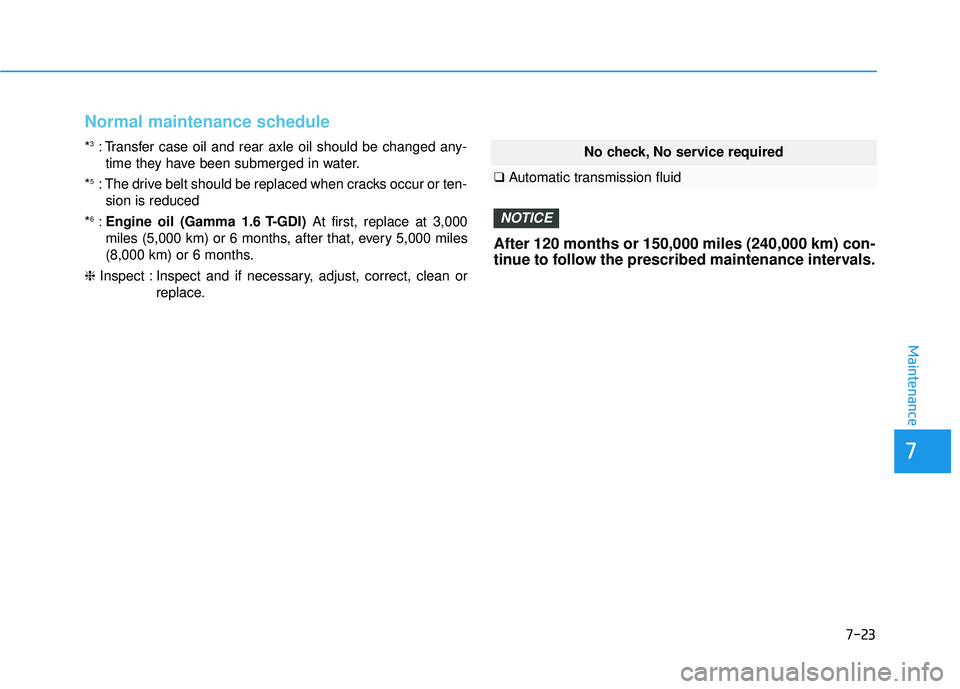
Normal maintenance schedule
*3
: Transfer case oil and rear axle oil should be changed any-
time they have been submerged in water.
* 5
: The drive belt should be replaced when cracks occur or ten-
sion is reduced
* 6
:Engine oil (Gamma 1.6 T-GDI) At first, replace at 3,000
miles (5,000 km) or 6 months, after that, every 5,000 miles
(8,000 km) or 6 months.
❈ Inspect : Inspect and if necessary, adjust, correct, clean or
replace.
Page 539 of 642
7-26
Maintenance
EEXX PPLLAA NN AATTIIOO NN OO FF SS CC HH EEDD UU LLEE DD MM AAIINN TTEENN AANN CCEE IITT EEMM SS
Engine Oil and Filter
The engine oil and filter should be
changed at the intervals specified in
the maintenance schedule. If the car
is being driven in severe conditions,more frequent oil and filter changesare required.
Drive Belts
Inspect all drive belts for evidence of
cuts, cracks, excessive wear or oil
saturation and replace if necessary.
Drive belts should be checked peri-
odically for proper tension and
adjusted as necessary.
Fuel Filter
A clogged-up fuel filter may limit the
vehicle driving speed, damage theemission system, and cause the
hard starting. When a considerable
amount of foreign substances are
accumulated in the fuel tank, the fuelfilter should be replaced.
Upon installing a new fuel filter, oper-
ate the diesel engine for several min-
utes, and check the connections for
any leakages. Fuel filters should be
installed by an authorized HYUNDAI
dealer.
Fuel Lines, Fuel Hoses and Connections
Check the fuel lines, fuel hoses and
connections for leakage and dam-
age. Have an authorized HYUNDAI
dealer replace any damaged or leak-
ing parts immediately.
Vapor Hose and Fuel Filler Cap
The vapor hose and fuel filler cap should be inspected at those inter-
vals specified in the maintenance
schedule. Make sure a new vaporhose or fuel filler cap is correctlyreplaced.
Page 543 of 642
7-30
Maintenance
EENN GGIINN EE OO IILL
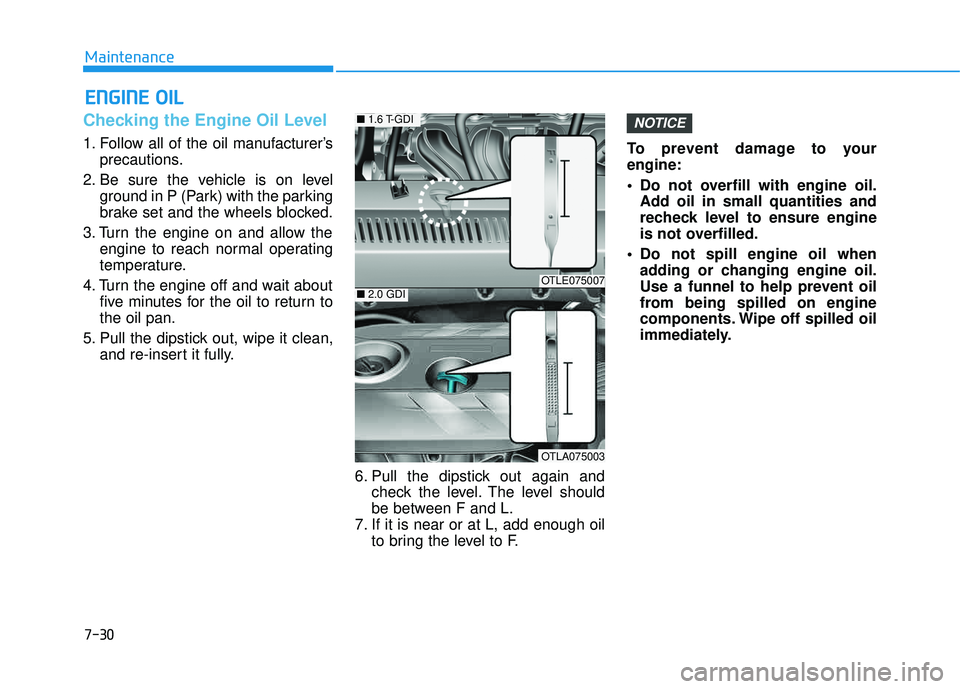
Checking the Engine Oil Level
1. Follow all of the oil manufacturer’s
precautions.
2. Be sure the vehicle is on level ground in P (Park) with the parking
brake set and the wheels blocked.
3. Turn the engine on and allow the engine to reach normal operating
temperature.
4. Turn the engine off and wait about five minutes for the oil to return tothe oil pan.
5. Pull the dipstick out, wipe it clean, and re-insert it fully.
6. Pull the dipstick out again andcheck the level. The level should
be between F and L.
7. If it is near or at L, add enough oil to bring the level to F. To prevent damage to yourengine:
Do not overfill with engine oil.
Add oil in small quantities and
recheck level to ensure engine
is not overfilled.
Do not spill engine oil when adding or changing engine oil.
Use a funnel to help prevent oil
from being spilled on engine
components. Wipe off spilled oil
immediately.
NOTICE
OTLE075007
OTLA075003
■1.6 T-GDI
■2.0 GDI
Page 544 of 642
7-31
7
Maintenance
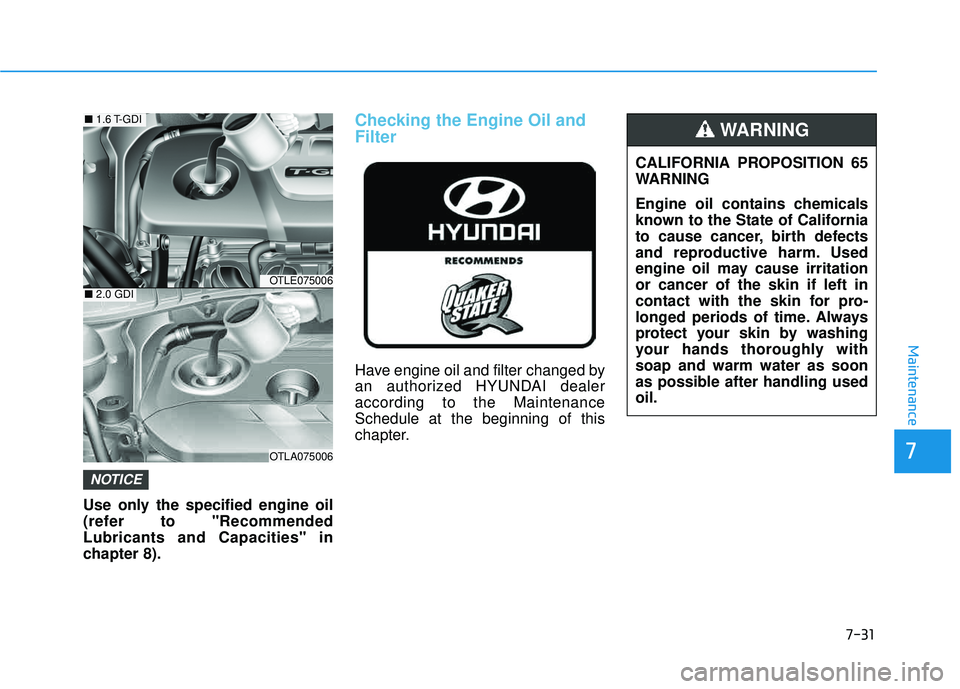
Use only the specified engine oil
(refer to "RecommendedLubricants and Capacities" in
chapter 8).
Checking the Engine Oil and Filter
Have engine oil and filter changed by
an authorized HYUNDAI dealeraccording to the MaintenanceSchedule at the beginning of this
chapter.
NOTICE
OTLE075006
OTLA075006
■1.6 T-GDI
■2.0 GDI
CALIFORNIA PROPOSITION 65
WARNING
Engine oil contains chemicals
known to the State of California
to cause cancer, birth defects
and reproductive harm. Used
engine oil may cause irritationor cancer of the skin if left in
contact with the skin for pro-
longed periods of time. Always
protect your skin by washing
your hands thoroughly withsoap and warm water as soon
as possible after handling usedoil.
WARNING
Page 549 of 642
7-36
Maintenance
BBRRAA KKEE FF LLUU IIDD
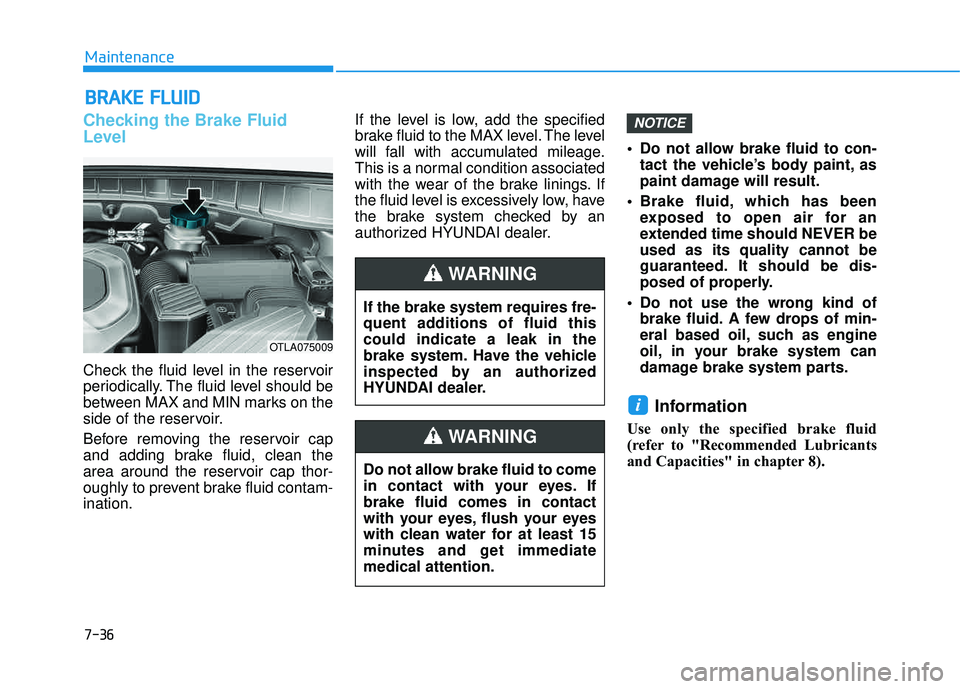
Checking the Brake Fluid
Level
Check the fluid level in the reservoir
periodically. The fluid level should be
between MAX and MIN marks on the
side of the reservoir.
Before removing the reservoir cap
and adding brake fluid, clean the
area around the reservoir cap thor-
oughly to prevent brake fluid contam-ination. If the level is low, add the specified
brake fluid to the MAX level. The level
will fall with accumulated mileage.
This is a normal condition associated
with the wear of the brake linings. If
the fluid level is excessively low, have
the brake system checked by an
authorized HYUNDAI dealer.
Do not allow brake fluid to con-
tact the vehicle’s body paint, as
paint damage will result.
Brake fluid, which has been exposed to open air for an
extended time should NEVER beused as its quality cannot be
guaranteed. It should be dis-
posed of properly.
Do not use the wrong kind of brake fluid. A few drops of min-
eral based oil, such as engine
oil, in your brake system can
damage brake system parts.
Information
Use only the specified brake fluid
(refer to "Recommended Lubricants
and Capacities" in chapter 8).
i
NOTICE
If the brake system requires fre-
quent additions of fluid thiscould indicate a leak in the
brake system. Have the vehicle
inspected by an authorized
HYUNDAI dealer.
WARNING
Do not allow brake fluid to come
in contact with your eyes. Ifbrake fluid comes in contact
with your eyes, flush your eyes
with clean water for at least 15
minutes and get immediatemedical attention.
WARNING
OTLA075009
Page 577 of 642
7-64
Maintenance
FFUU SSEE SS
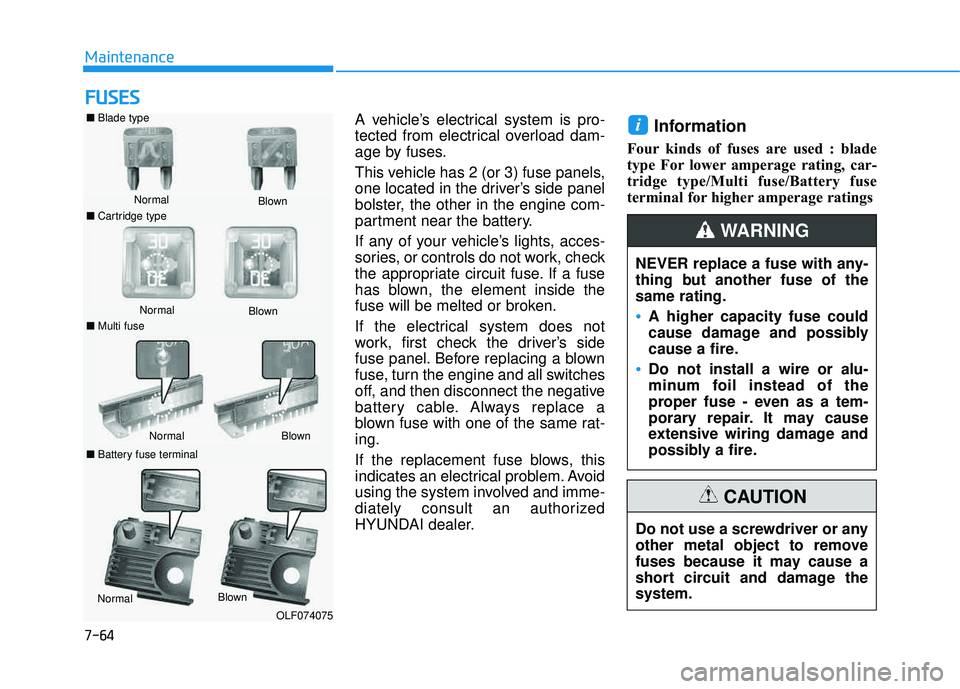
A vehicle’s electrical system is pro-
tected from electrical overload dam-
age by fuses.
This vehicle has 2 (or 3) fuse panels,
one located in the driver’s side panel
bolster, the other in the engine com-
partment near the battery.
If any of your vehicle’s lights, acces-
sories, or controls do not work, check
the appropriate circuit fuse. If a fuse
has blown, the element inside the
fuse will be melted or broken.
If the electrical system does not
work, first check the driver’s side
fuse panel. Before replacing a blown
fuse, turn the engine and all switches
off, and then disconnect the negative
battery cable. Always replace a
blown fuse with one of the same rat-ing.
If the replacement fuse blows, this
indicates an electrical problem. Avoid
using the system involved and imme-
diately consult an authorized
HYUNDAI dealer.Information
Four kinds of fuses are used : blade
type For lower amperage rating, car-
tridge type/Multi fuse/Battery fuse
terminal for higher amperage ratings
i
Do not use a screwdriver or any
other metal object to remove
fuses because it may cause a
short circuit and damage thesystem.
CAUTION
NEVER replace a fuse with any-
thing but another fuse of thesame rating.
A higher capacity fuse could
cause damage and possibly
cause a fire.
Do not install a wire or alu-
minum foil instead of the
proper fuse - even as a tem-
porary repair. It may cause
extensive wiring damage and
possibly a fire.
WARNING
■ Blade type
Normal
■ Cartridge type Blown
Normal
Blown
■ Multi fuse
Normal Blown
■
Battery fuse terminal
Normal Blown
OLF074075
Page 604 of 642
7-91
7
Maintenance
Stop and tail lamp (LED type)
If the LED lamp does not operate,
have the vehicle checked by an
authorized HYUNDAI dealer.
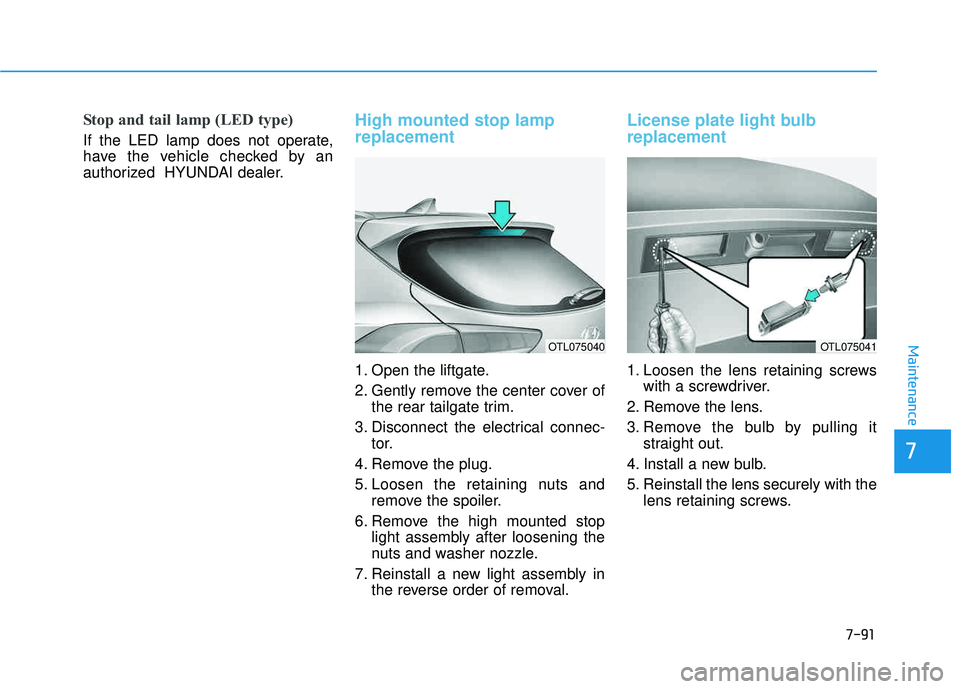
High mounted stop lamp replacement
1. Open the liftgate.
2. Gently remove the center cover ofthe rear tailgate trim.
3. Disconnect the electrical connec- tor.
4. Remove the plug.
5. Loosen the retaining nuts and remove the spoiler.
6. Remove the high mounted stop light assembly after loosening the
nuts and washer nozzle.
7. Reinstall a new light assembly in the reverse order of removal.
License plate light bulb replacement
1. Loosen the lens retaining screwswith a screwdriver.
2. Remove the lens.
3. Remove the bulb by pulling it straight out.
4. Install a new bulb.
5. Reinstall the lens securely with the lens retaining screws.
OTL075040OTL075041
Page 627 of 642
8-9
88
Specifications, Consumer information and Reporting safety defects
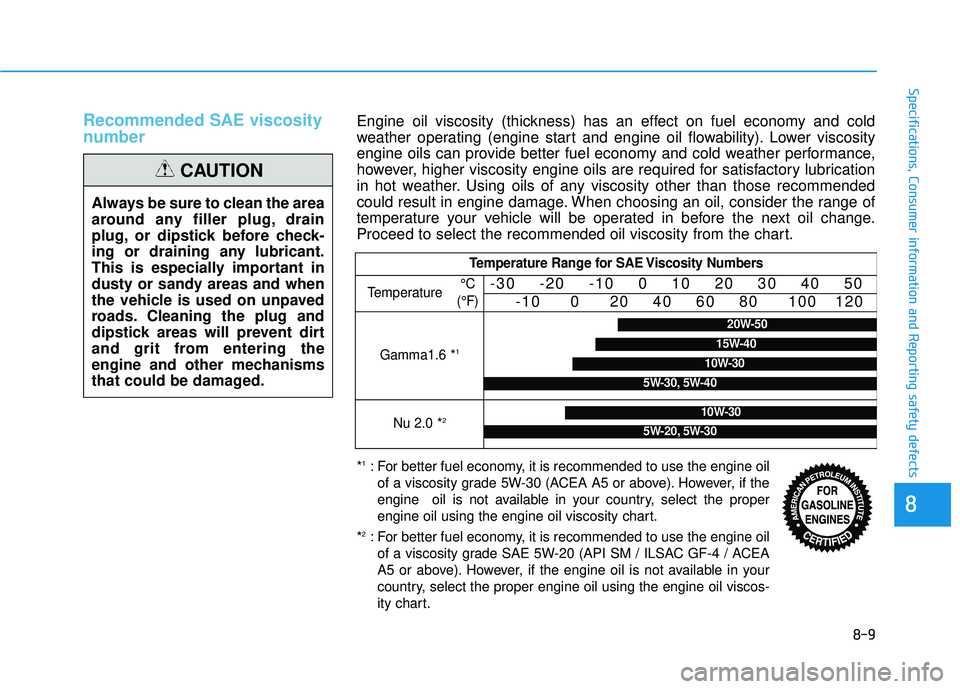
Recommended SAE viscosity
number
Always be sure to clean the area
around any filler plug, drain
plug, or dipstick before check-
ing or draining any lubricant.
This is especially important in
dusty or sandy areas and when
the vehicle is used on unpaved
roads. Cleaning the plug and
dipstick areas will prevent dirt
and grit from entering the
engine and other mechanisms
that could be damaged.
CAUTION
Engine oil viscosity (thickness) has an effect on fuel economy and cold
weather operating (engine start and engine oil flowability). Lower viscosity
engine oils can provide better fuel economy and cold weather performance,
however, higher viscosity engine oils are required for satisfactory lubrication
in hot weather. Using oils of any viscosity other than those recommended
could result in engine damage. When choosing an oil, consider the range of
temperature your vehicle will be operated in before the next oil change.
Proceed to select the recommended oil viscosity from the chart.
Temperature Range for SAE Viscosity Numbers
Temperature -30 -20 -10 0 10 20 30 40 50
-10 0 20 40 60 80 100 120
Gamma1.6 *1
Nu 2.0 *210W-30
5W-20, 5W-30
°C
(°F)
5W-30, 5W-40
10W-30
15W-40
20W-50
* 1
: For better fuel economy, it is recommended to use the engine oil
of a viscosity grade 5W-30 (ACEA A5 or above). However, if the
engine oil is not available in your country, select the proper
engine oil using the engine oil viscosity chart.
* 2
: For better fuel economy, it is recommended to use the engine oil
of a viscosity grade SAE 5W-20 (API SM / ILSAC GF-4 / ACEA
A5 or above). However, if the engine oil is not available in your
country, select the proper engine oil using the engine oil viscos-
ity chart.