HYUNDAI TUCSON LIMITED 2017 Owners Manual
Manufacturer: HYUNDAI, Model Year: 2017, Model line: TUCSON LIMITED, Model: HYUNDAI TUCSON LIMITED 2017Pages: 642, PDF Size: 9.78 MB
Page 251 of 642
3-153
Convenient features of your vehicle
3
SSTT OO RRAA GG EE CC OO MM PPAA RRTTMM EENN TT
To avoid possible theft, do not
leave valuables in the storage
compartments.
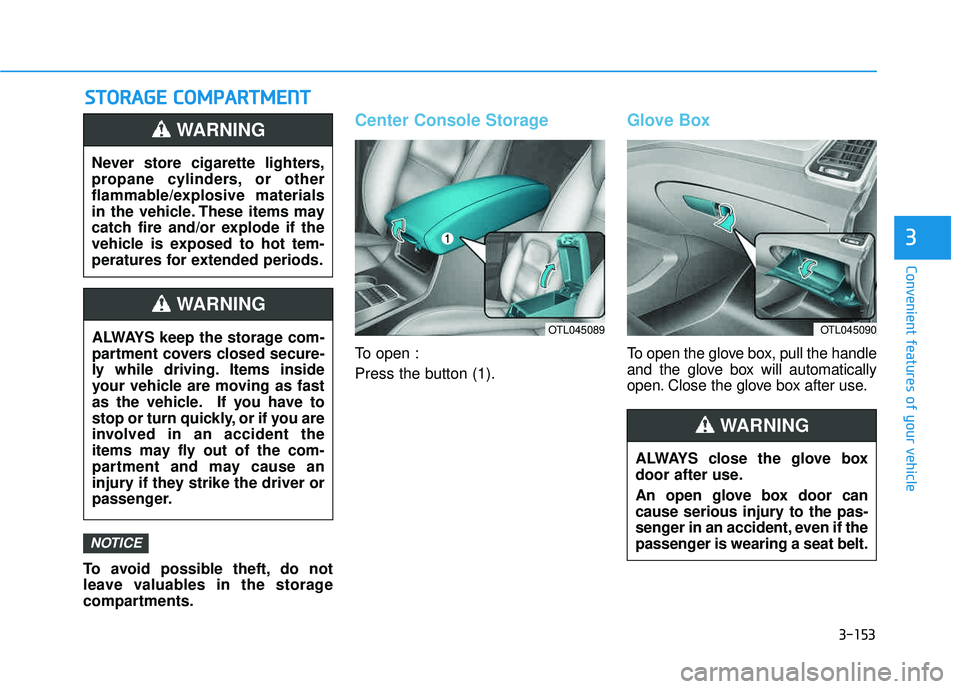
Center Console Storage
To open :
Press the button (1).
Glove Box
To open the glove box, pull the handle
and the glove box will automatically
open. Close the glove box after use.
NOTICE
Never store cigarette lighters,
propane cylinders, or other
flammable/explosive materials
in the vehicle. These items may
catch fire and/or explode if the
vehicle is exposed to hot tem-
peratures for extended periods.
WARNING
ALWAYS keep the storage com-
partment covers closed secure-
ly while driving. Items inside
your vehicle are moving as fast
as the vehicle. If you have to
stop or turn quickly, or if you are
involved in an accident the
items may fly out of the com-
partment and may cause an
injury if they strike the driver or
passenger.
WARNING
OTL045090
ALWAYS close the glove box
door after use.
An open glove box door can
cause serious injury to the pas-
senger in an accident, even if the
passenger is wearing a seat belt.
WARNING
OTL045089
Page 252 of 642
3-154
Convenient features of your vehicle
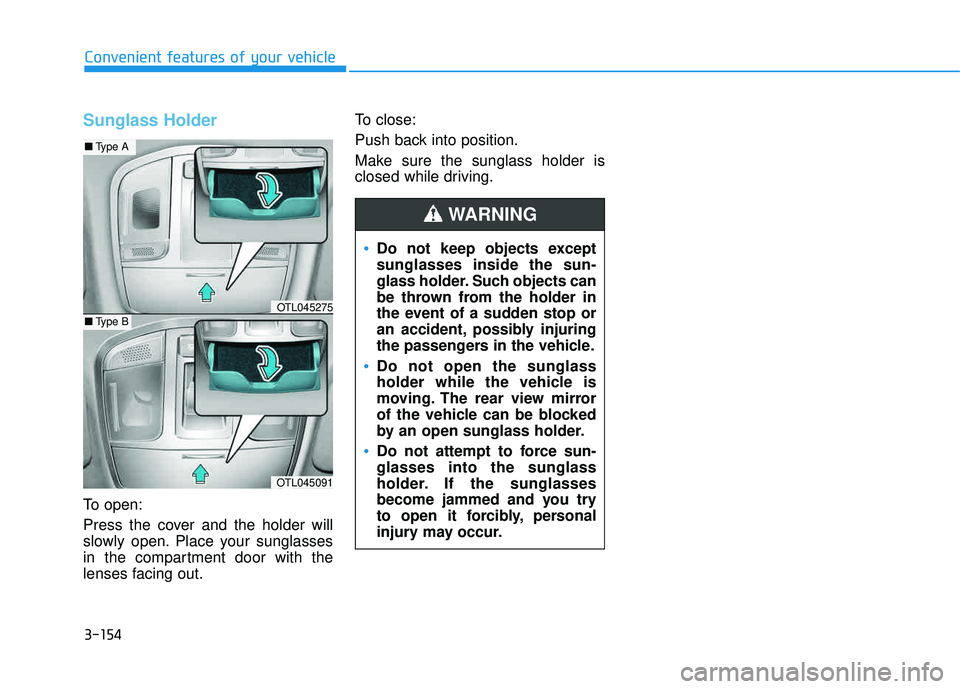
Sunglass Holder
To open:
Press the cover and the holder will
slowly open. Place your sunglasses
in the compartment door with the
lenses facing out.To close:
Push back into position.
Make sure the sunglass holder is
closed while driving.
Do not keep objects except sunglasses inside the sun-
glass holder. Such objects can
be thrown from the holder in
the event of a sudden stop or
an accident, possibly injuring
the passengers in the vehicle.
Do not open the sunglass
holder while the vehicle is
moving. The rear view mirror
of the vehicle can be blocked
by an open sunglass holder.
Do not attempt to force sun- glasses into the sunglass
holder. If the sunglasses
become jammed and you try
to open it forcibly, personal
injury may occur.
WARNING
OTL045091
■
Type A
■Type BOTL045275
Page 253 of 642
3-155
Convenient features of your vehicle
3
IINN TTEERR IIOO RR FF EE AA TTUU RREESS
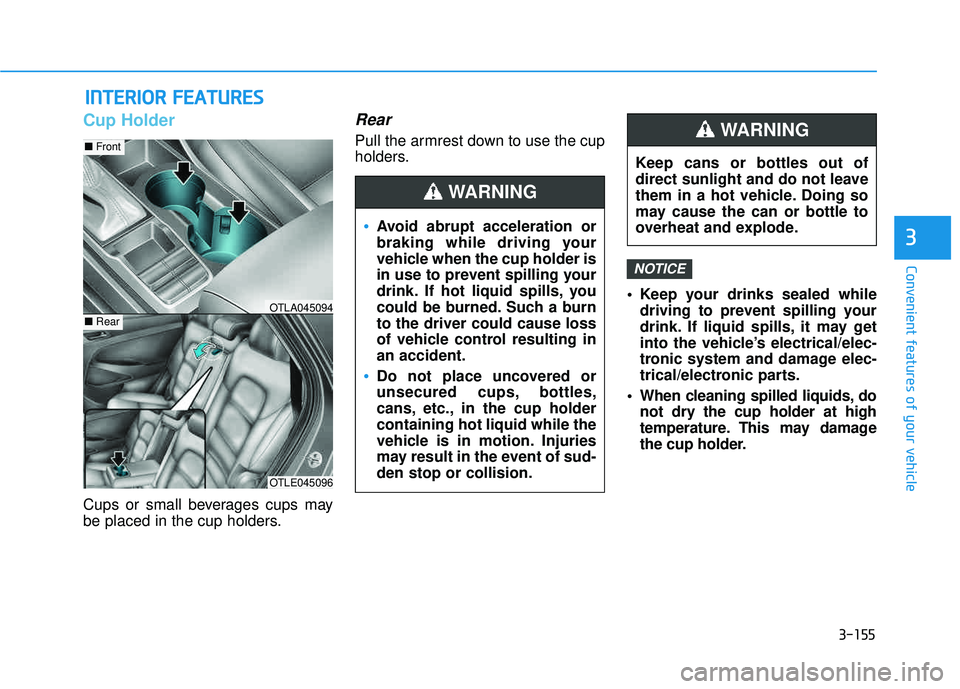
Cup Holder
Cups or small beverages cups may
be placed in the cup holders.
Rear
Pull the armrest down to use the cup
holders.
Keep your drinks sealed whiledriving to prevent spilling your
drink. If liquid spills, it may get
into the vehicle’s electrical/elec-
tronic system and damage elec-
trical/electronic parts.
When cleaning spilled liquids, do not dry the cup holder at high
temperature. This may damage
the cup holder.
NOTICE
OTLE045096
■Front
■RearOTLA045094
Avoid abrupt acceleration or
braking while driving your
vehicle when the cup holder is
in use to prevent spilling your
drink. If hot liquid spills, you
could be burned. Such a burnto the driver could cause loss
of vehicle control resulting inan accident.
Do not place uncovered or
unsecured cups, bottles,
cans, etc., in the cup holdercontaining hot liquid while the
vehicle is in motion. Injuries
may result in the event of sud-den stop or collision.
WARNING
Keep cans or bottles out of
direct sunlight and do not leave
them in a hot vehicle. Doing so
may cause the can or bottle to
overheat and explode.
WARNING
Page 254 of 642
3-156
Convenient features of your vehicle
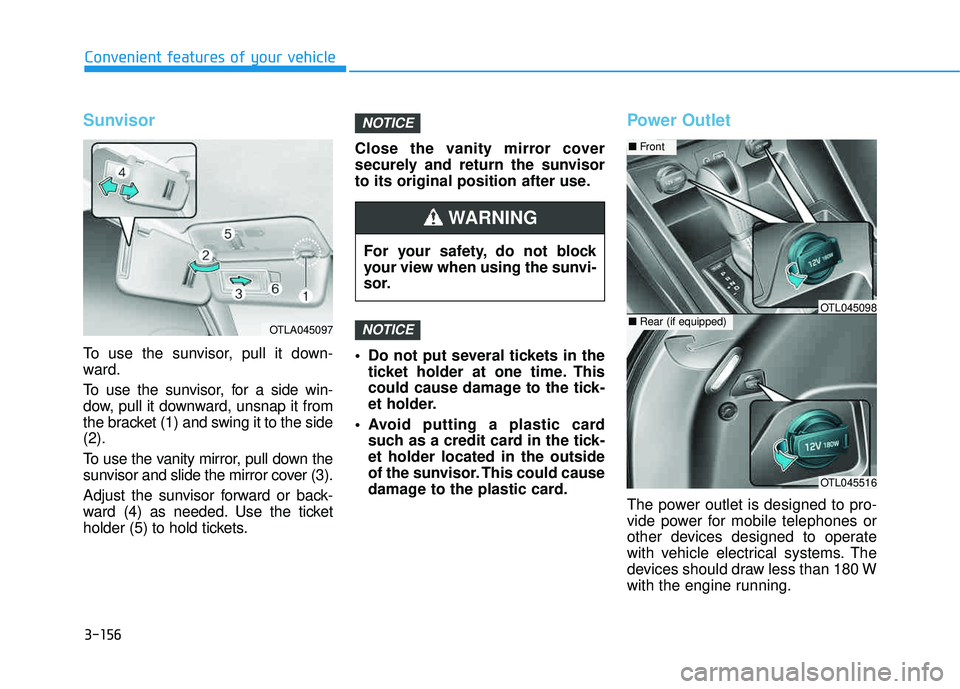
Sunvisor
To use the sunvisor, pull it down-
ward.
To use the sunvisor, for a side win-
dow, pull it downward, unsnap it from
the bracket (1) and swing it to the side(2).
To use the vanity mirror, pull down the
sunvisor and slide the mirror cover (3).
Adjust the sunvisor forward or back-
ward (4) as needed. Use the ticket
holder (5) to hold tickets.Close the vanity mirror cover
securely and return the sunvisor
to its original position after use.
Do not put several tickets in the
ticket holder at one time. This
could cause damage to the tick-
et holder.
Avoid putting a plastic card such as a credit card in the tick-et holder located in the outside
of the sunvisor. This could cause
damage to the plastic card.
Power Outlet
The power outlet is designed to pro-
vide power for mobile telephones or
other devices designed to operate
with vehicle electrical systems. The
devices should draw less than 180 W
with the engine running.
NOTICE
NOTICE
OTLA045097
For your safety, do not block
your view when using the sunvi-
sor.
WARNING
OTL045516
■Front
■Rear (if equipped)OTL045098
Page 255 of 642
3-157
Convenient features of your vehicle
3
To prevent damage to the Power Outlets :
Use the power outlet only whenthe engine is running and
remove the accessory plug after
use. Using the accessory plug
for prolonged periods of timewith the engine off could cause
the battery to discharge.
Only use 12V electric acces- sories which are less than 180 W
in electric capacity.
Adjust the air-conditioner or heater to the lowest operating
level when using the power outlet.
(Continued)(Continued)
Close the cover when not in use.
Some electronic devices can
cause electronic interference
when plugged into a vehicle’s
power outlet. These devices may
cause excessive audio staticand malfunctions in other elec-
tronic systems or devices used
in your vehicle.
Push the plug in as far as it will go. If good contact is not made,
the plug may overheat and the
fuse may blow.
Plug in battery equipped electri- cal/electronic devices with
reverse current protection. The
current from the battery may
flow into the vehicle’s electri-
cal/electronic system and causesystem malfunction.
Clock
NOTICE
Avoid electrical shocks. Do not
place your fingers or foreign
objects (pin, etc.) into a power
outlet or touch the power outletwith a wet hand.
WARNING
Do not adjust the clock while
driving, you may lose your
steering control and cause an
accident that results in severe
personal injury or death.
WARNING
Page 256 of 642
3-158
Convenient features of your vehicle
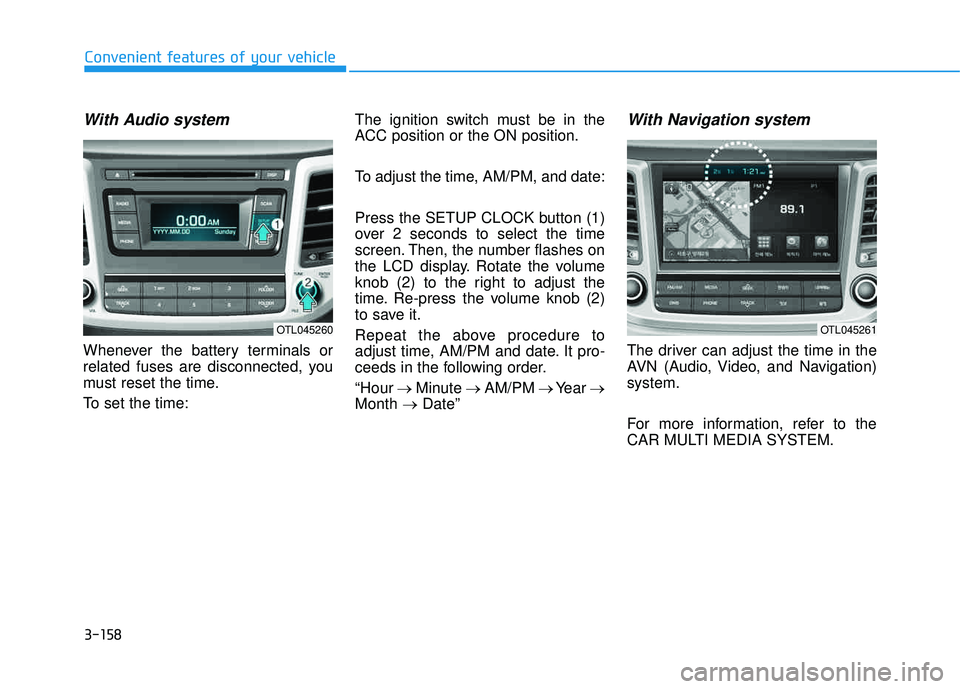
With Audio system
Whenever the battery terminals or
related fuses are disconnected, you
must reset the time.
To set the time:The ignition switch must be in the
ACC position or the ON position.
To adjust the time, AM/PM, and date:
Press the SETUP CLOCK button (1)
over 2 seconds to select the time
screen. Then, the number flashes on
the LCD display. Rotate the volume
knob (2) to the right to adjust the
time. Re-press the volume knob (2)
to save it.
Repeat the above procedure to
adjust time, AM/PM and date. It pro-
ceeds in the following order. “Hour
�Minute �AM/PM �Year �
Month �Date”
With Navigation system
The driver can adjust the time in the
AVN (Audio, Video, and Navigation)system.
For more information, refer to the
CAR MULTI MEDIA SYSTEM.
OTL045260OTL045261
Page 257 of 642
3-159
Convenient features of your vehicle
3
GPS Time check
The clock is automatically updated
through the navigation system.
GPS Time non-check
The clock can be manually adjusted.
1. Select the "System Settings" onthe "INFO/Setup" screen.
2. Select the "Clock Settings".
3. Select "Time Settings" on the screen
4. Select the "Time Format" to the 12 hour or 24 hour format.
For more information, please refer to
the manual that was separately sup-
plied with your vehicle.
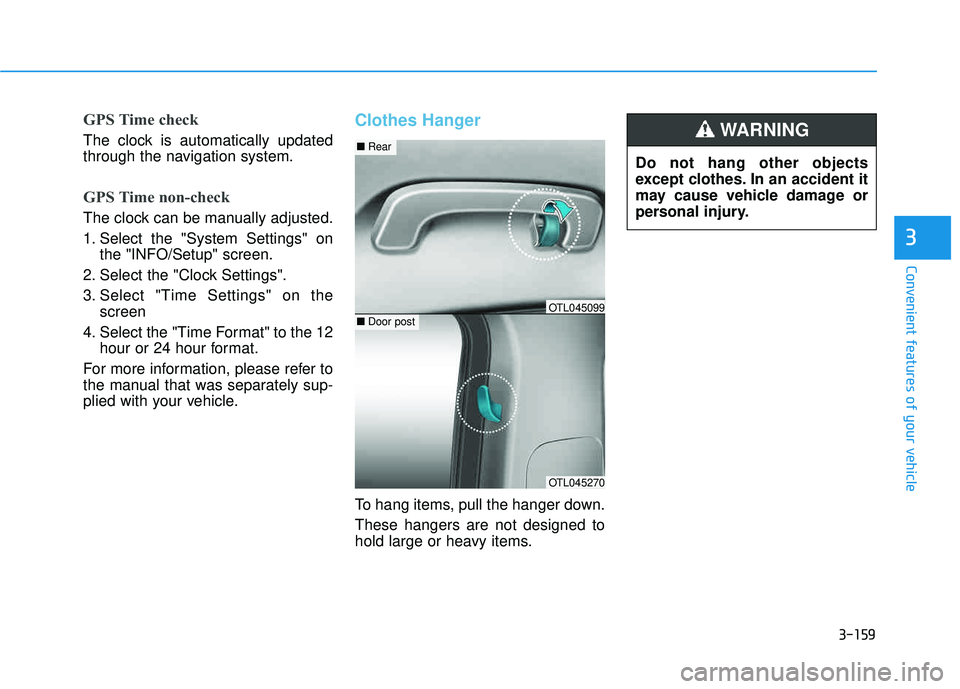
Clothes Hanger
To hang items, pull the hanger down. These hangers are not designed to
hold large or heavy items. Do not hang other objects
except clothes. In an accident it
may cause vehicle damage or
personal injury.
WARNING
OTL045270
■
Rear
■Door postOTL045099
Page 258 of 642
3-160
Convenient features of your vehicle
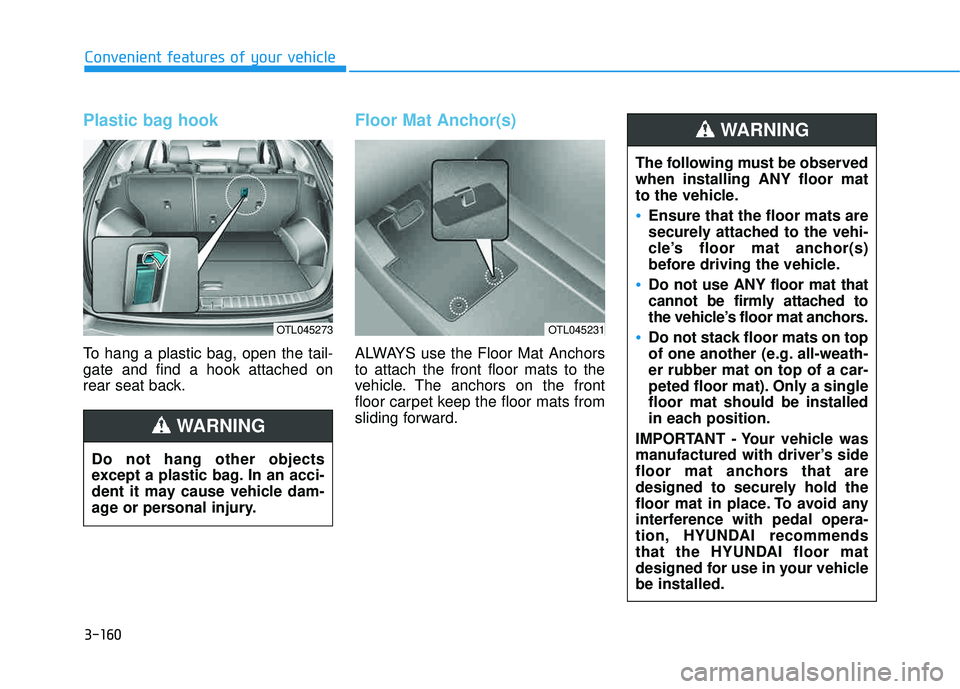
Plastic bag hook
To hang a plastic bag, open the tail- gate and find a hook attached on
rear seat back.
Floor Mat Anchor(s)
ALWAYS use the Floor Mat Anchors to attach the front floor mats to the
vehicle. The anchors on the front
floor carpet keep the floor mats from
sliding forward.
OTL045273
Do not hang other objects
except a plastic bag. In an acci-
dent it may cause vehicle dam-
age or personal injury.
WARNING
OTL045231
The following must be observed when installing ANY floor mat
to the vehicle.
Ensure that the floor mats are
securely attached to the vehi-
cle’s floor mat anchor(s)
before driving the vehicle.
Do not use ANY floor mat that
cannot be firmly attached to
the vehicle’s floor mat anchors.
Do not stack floor mats on top
of one another (e.g. all-weath-er rubber mat on top of a car-
peted floor mat). Only a singlefloor mat should be installed
in each position.
IMPORTANT - Your vehicle was
manufactured with driver’s side
floor mat anchors that are
designed to securely hold the
floor mat in place. To avoid any
interference with pedal opera-
tion, HYUNDAI recommends
that the HYUNDAI floor mat
designed for use in your vehiclebe installed.
WARNING
Page 259 of 642
3-161
Convenient features of your vehicle
3
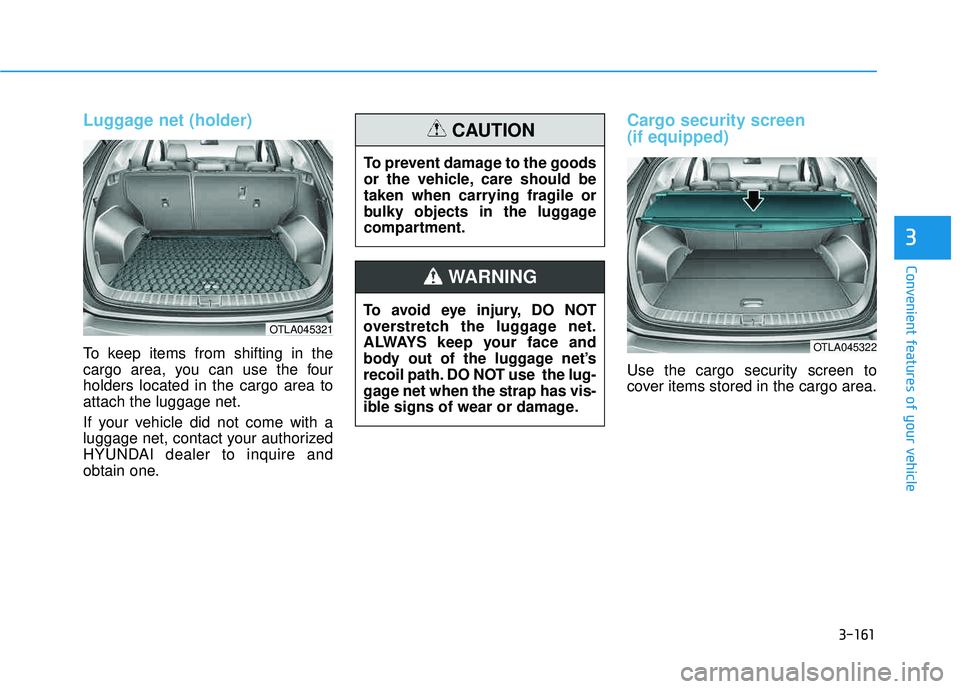
Luggage net (holder)
To keep items from shifting in the
cargo area, you can use the fourholders located in the cargo area toattach the luggage net.
If your vehicle did not come with a
luggage net, contact your authorized
HYUNDAI dealer to inquire and
obtain one.
Cargo security screen (if equipped)
Use the cargo security screen to
cover items stored in the cargo area.
OTLA045321
To avoid eye injury, DO NOT
overstretch the luggage net.
ALWAYS keep your face and
body out of the luggage net’s
recoil path. DO NOT use the lug-
gage net when the strap has vis-
ible signs of wear or damage.
WARNING
To prevent damage to the goods
or the vehicle, care should be
taken when carrying fragile or
bulky objects in the luggage
compartment.
CAUTION
OTLA045322
Page 260 of 642
3-162
Convenient features of your vehicle
To use the cargo security screen
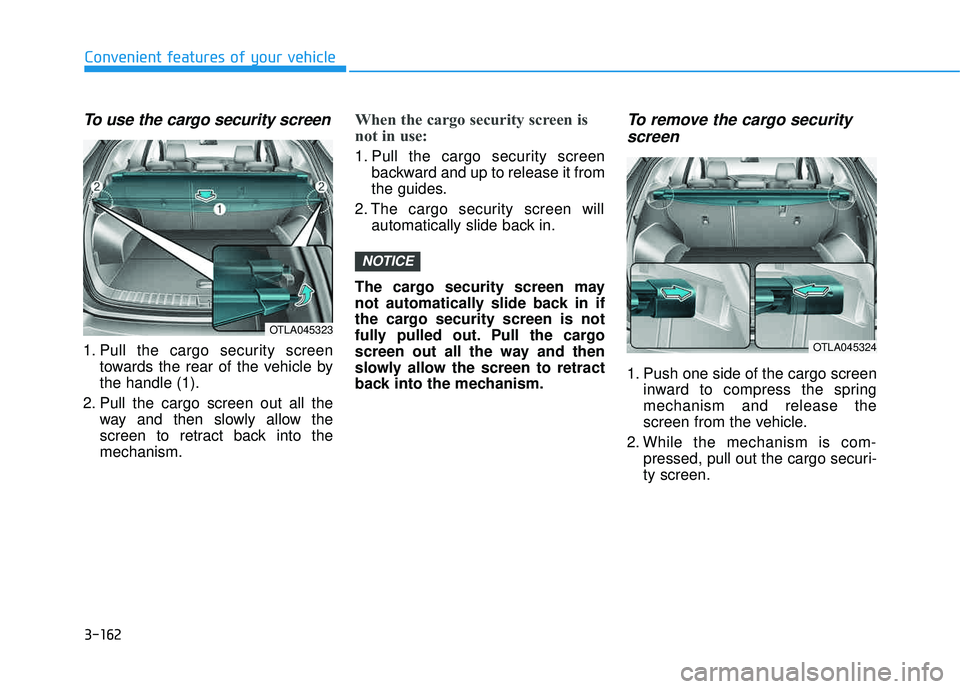
1. Pull the cargo security screentowards the rear of the vehicle by the handle (1).
2. Pull the cargo screen out all the way and then slowly allow the
screen to retract back into themechanism.
When the cargo security screen is
not in use:
1. Pull the cargo security screenbackward and up to release it from
the guides.
2. The cargo security screen will automatically slide back in.
The cargo security screen may
not automatically slide back in if
the cargo security screen is not
fully pulled out. Pull the cargo
screen out all the way and then
slowly allow the screen to retract
back into the mechanism.
To remove the cargo security screen
1. Push one side of the cargo screen inward to compress the springmechanism and release the
screen from the vehicle.
2. While the mechanism is com- pressed, pull out the cargo securi-ty screen.
NOTICE
OTLA045323
OTLA045324