oil level HYUNDAI VELOSTER 2011 User Guide
[x] Cancel search | Manufacturer: HYUNDAI, Model Year: 2011, Model line: VELOSTER, Model: HYUNDAI VELOSTER 2011Pages: 386, PDF Size: 7.79 MB
Page 328 of 386
Maintenance
36 7
BRAKE/CLUTCH FLUID (IF EQUIPPED)
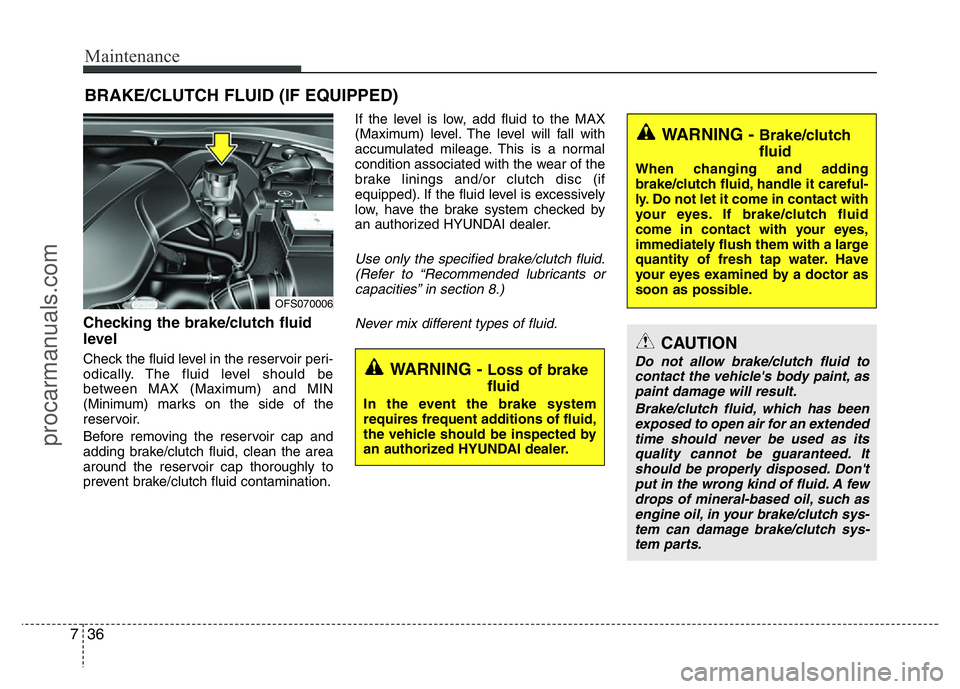
Checking the brake/clutch fluid
level
Check the fluid level in the reservoir peri-
odically. The fluid level should be
between MAX (Maximum) and MIN
(Minimum) marks on the side of the
reservoir.
Before removing the reservoir cap and
adding brake/clutch fluid, clean the area
around the reservoir cap thoroughly to
prevent brake/clutch fluid contamination.If the level is low, add fluid to the MAX
(Maximum) level. The level will fall with
accumulated mileage. This is a normal
condition associated with the wear of the
brake linings and/or clutch disc (if
equipped). If the fluid level is excessively
low, have the brake system checked by
an authorized HYUNDAI dealer.
Use only the specified brake/clutch fluid.
(Refer to “Recommended lubricants or
capacities” in section 8.)
Never mix different types of fluid.
WARNING - Loss of brake
fluid
In the event the brake system
requires frequent additions of fluid,
the vehicle should be inspected by
an authorized HYUNDAI dealer.
WARNING - Brake/clutch
fluid
When changing and adding
brake/clutch fluid, handle it careful-
ly. Do not let it come in contact with
your eyes. If brake/clutch fluid
come in contact with your eyes,
immediately flush them with a large
quantity of fresh tap water. Have
your eyes examined by a doctor as
soon as possible.
CAUTION
Do not allow brake/clutch fluid to
contact the vehicle's body paint, as
paint damage will result.
Brake/clutch fluid, which has been
exposed to open air for an extended
time should never be used as its
quality cannot be guaranteed. It
should be properly disposed. Don't
put in the wrong kind of fluid. A few
drops of mineral-based oil, such as
engine oil, in your brake/clutch sys-
tem can damage brake/clutch sys-
tem parts.
OFS070006
procarmanuals.com
Page 359 of 386
767
Maintenance
Headlight bulb
✽NOTICE
If the headlight aiming adjustment is
necessary after the headlight assembly is
reinstalled, consult an authorized
HYUNDAI dealer.
❈Traffic Change (For Europe)
The low beam light distribution is asym-
metric. If you go abroad to a country with
opposite traffic direction, this asymmetric
part will dazzle oncoming car driver. To
prevent dazzle, ECE regulation demand
several technical solutions (ex. automatic
change system, adhesive tape, down
aiming). This headlamps are designed to
be achieved by rotating 2~3 revolutions
the leveling device gear counterclock-
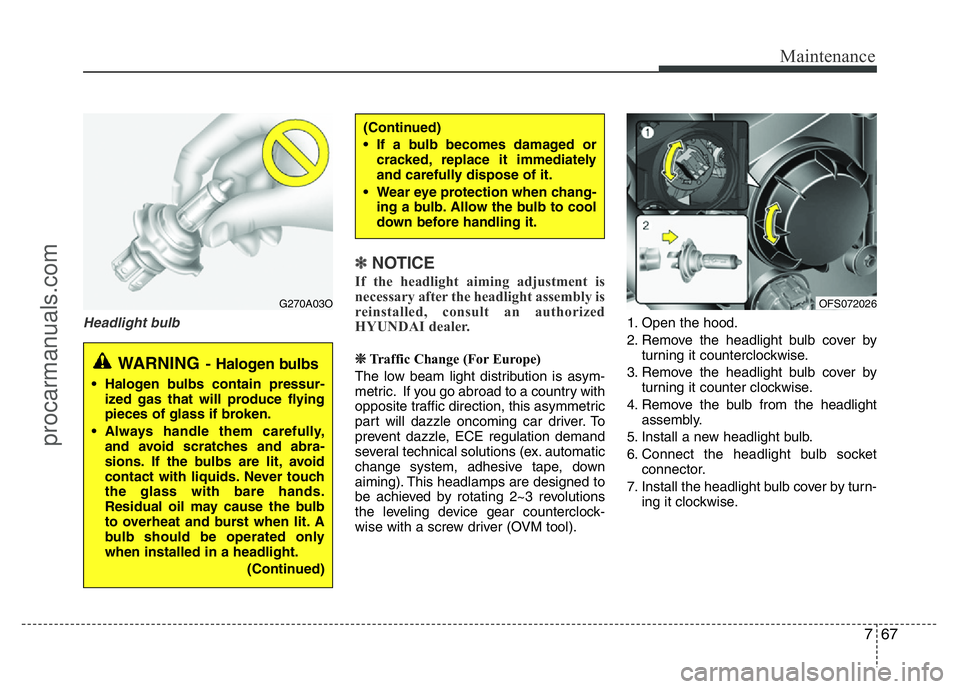
wise with a screw driver (OVM tool).1. Open the hood.
2. Remove the headlight bulb cover by
turning it counterclockwise.
3. Remove the headlight bulb cover by
turning it counter clockwise.
4. Remove the bulb from the headlight
assembly.
5. Install a new headlight bulb.
6. Connect the headlight bulb socket
connector.
7. Install the headlight bulb cover by turn-
ing it clockwise.
(Continued)
• If a bulb becomes damaged or
cracked, replace it immediately
and carefully dispose of it.
• Wear eye protection when chang-
ing a bulb. Allow the bulb to cool
down before handling it.
G270A03O
WARNING- Halogen bulbs
• Halogen bulbs contain pressur-
ized gas that will produce flying
pieces of glass if broken.
• Always handle them carefully,
and avoid scratches and abra-
sions. If the bulbs are lit, avoid
contact with liquids. Never touch
the glass with bare hands.
Residual oil may cause the bulb
to overheat and burst when lit. A
bulb should be operated only
when installed in a headlight.
(Continued)
OFS072026
procarmanuals.com