ECU HYUNDAI VELOSTER 2022 User Guide
[x] Cancel search | Manufacturer: HYUNDAI, Model Year: 2022, Model line: VELOSTER, Model: HYUNDAI VELOSTER 2022Pages: 446, PDF Size: 7.37 MB
Page 51 of 446
2-34
Safety system of your vehicle
Securing a child restraint seat
with "Tether Anchor" system
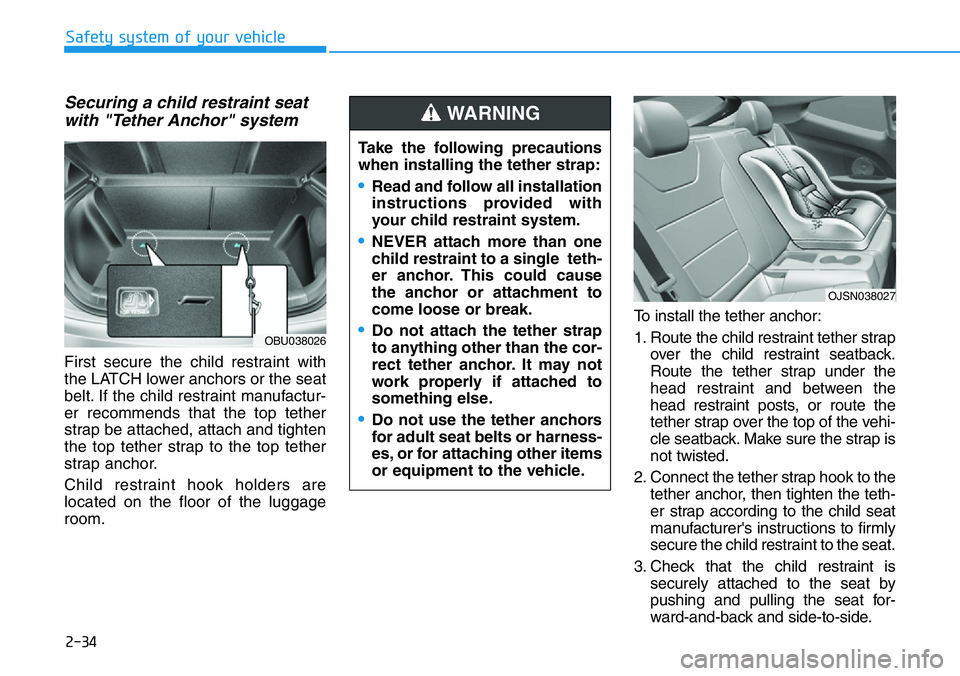
First secure the child restraint with
the LATCH lower anchors or the seat
belt. If the child restraint manufactur-
er recommends that the top tether
strap be attached, attach and tighten
the top tether strap to the top tether
strap anchor.
Child restraint hook holders are
located on the floor of the luggage
room.To install the tether anchor:
1. Route the child restraint tether strap
over the child restraint seatback.
Route the tether strap under the
head restraint and between the
head restraint posts, or route the
tether strap over the top of the vehi-
cle seatback. Make sure the strap is
not twisted.
2. Connect the tether strap hook to the
tether anchor, then tighten the teth-
er strap according to the child seat
manufacturer's instructions to firmly
secure the child restraint to the seat.
3. Check that the child restraint is
securely attached to the seat by
pushing and pulling the seat for-
ward-and-back and side-to-side. Take the following precautions
when installing the tether strap:
•Read and follow all installation
instructions provided with
your child restraint system.
•NEVER attach more than one
child restraint to a single teth-
er anchor. This could cause
the anchor or attachment to
come loose or break.
•Do not attach the tether strap
to anything other than the cor-
rect tether anchor. It may not
work properly if attached to
something else.
•Do not use the tether anchors
for adult seat belts or harness-
es, or for attaching other items
or equipment to the vehicle.
WARNING
OBU038026
OJSN038027
Page 52 of 446
2-35
Safety system of your vehicle
2
Securing a child restraint with
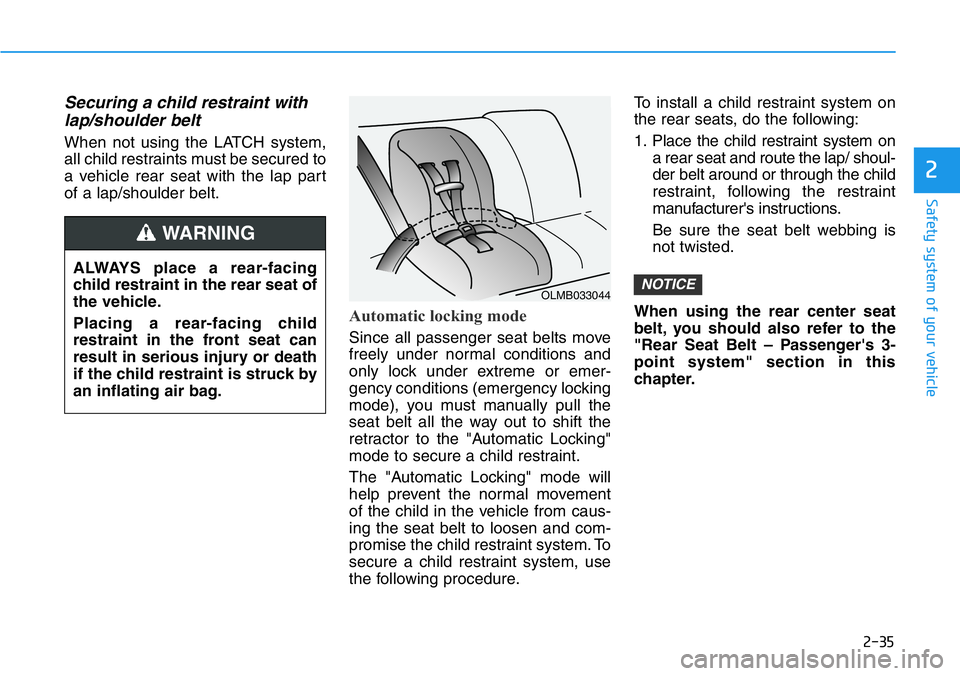
lap/shoulder belt
When not using the LATCH system,
all child restraints must be secured to
a vehicle rear seat with the lap part
of a lap/shoulder belt.
Automatic locking mode
Since all passenger seat belts move
freely under normal conditions and
only lock under extreme or emer-
gency conditions (emergency locking
mode), you must manually pull the
seat belt all the way out to shift the
retractor to the "Automatic Locking"
mode to secure a child restraint.
The "Automatic Locking" mode will
help prevent the normal movement
of the child in the vehicle from caus-
ing the seat belt to loosen and com-
promise the child restraint system. To
secure a child restraint system, use
the following procedure.To install a child restraint system on
the rear seats, do the following:
1. Place the child restraint system on
a rear seat and route the lap/ shoul-
der belt around or through the child
restraint, following the restraint
manufacturer's instructions.
Be sure the seat belt webbing is
not twisted.
When using the rear center seat
belt, you should also refer to the
"Rear Seat Belt – Passenger's 3-
point system" section in this
chapter.
NOTICEALWAYS place a rear-facing
child restraint in the rear seat of
the vehicle.
Placing a rear-facing child
restraint in the front seat can
result in serious injury or death
if the child restraint is struck by
an inflating air bag.
WARNING
OLMB033044
Page 60 of 446
2-43
Safety system of your vehicle
2
They are designed to help protect the
heads of the front seat occupants
and the rear outboard seat occupants
in certain side impact collisions.
The curtain air bags are designed to
deploy during certain side impact
collisions, depending on the crash
severity.
The side and curtain air bags on
both sides of the vehicle may deploy
if a rollover or possible rollover is
detected.
The curtain air bags are not designed
to deploy in all side impact or rollover
situations.How Does the Air Bag System
Operate?
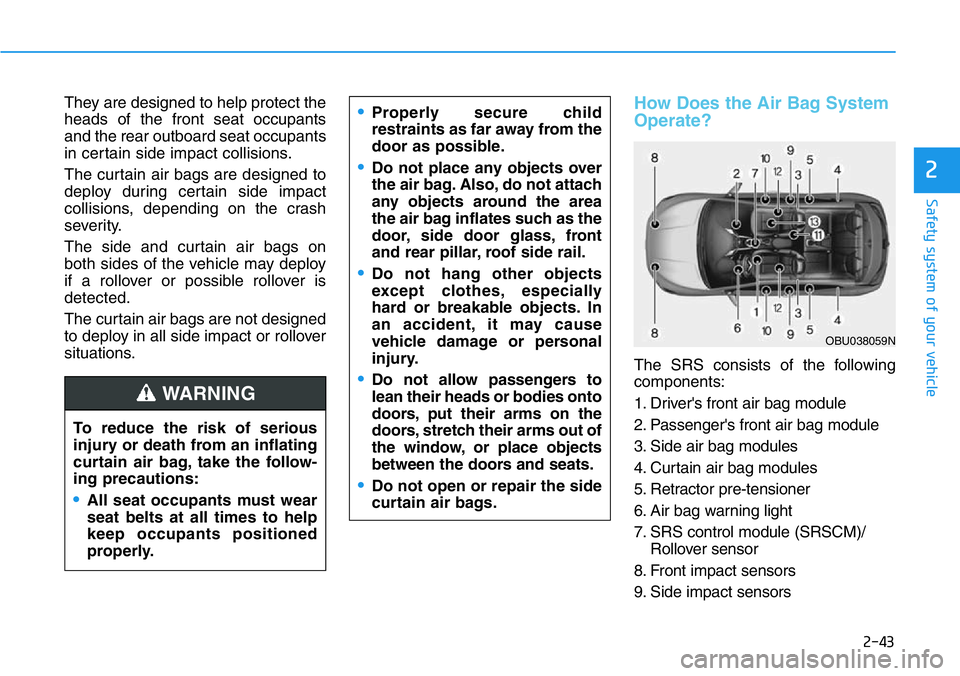
The SRS consists of the following
components:
1. Driver's front air bag module
2. Passenger's front air bag module
3. Side air bag modules
4. Curtain air bag modules
5. Retractor pre-tensioner
6. Air bag warning light
7. SRS control module (SRSCM)/
Rollover sensor
8. Front impact sensors
9. Side impact sensors To reduce the risk of serious
injury or death from an inflating
curtain air bag, take the follow-
ing precautions:
•All seat occupants must wear
seat belts at all times to help
keep occupants positioned
properly.
•Properly secure child
restraints as far away from the
door as possible.
•Do not place any objects over
the air bag. Also, do not attach
any objects around the area
the air bag inflates such as the
door, side door glass, front
and rear pillar, roof side rail.
•Do not hang other objects
except clothes, especially
hard or breakable objects. In
an accident, it may cause
vehicle damage or personal
injury.
•Do not allow passengers to
lean their heads or bodies onto
doors, put their arms on the
doors, stretch their arms out of
the window, or place objects
between the doors and seats.
•Do not open or repair the side
curtain air bags.
WARNING
OBU038059N
Page 88 of 446
3-10
Operating Door Locks from
Outside the Vehicle
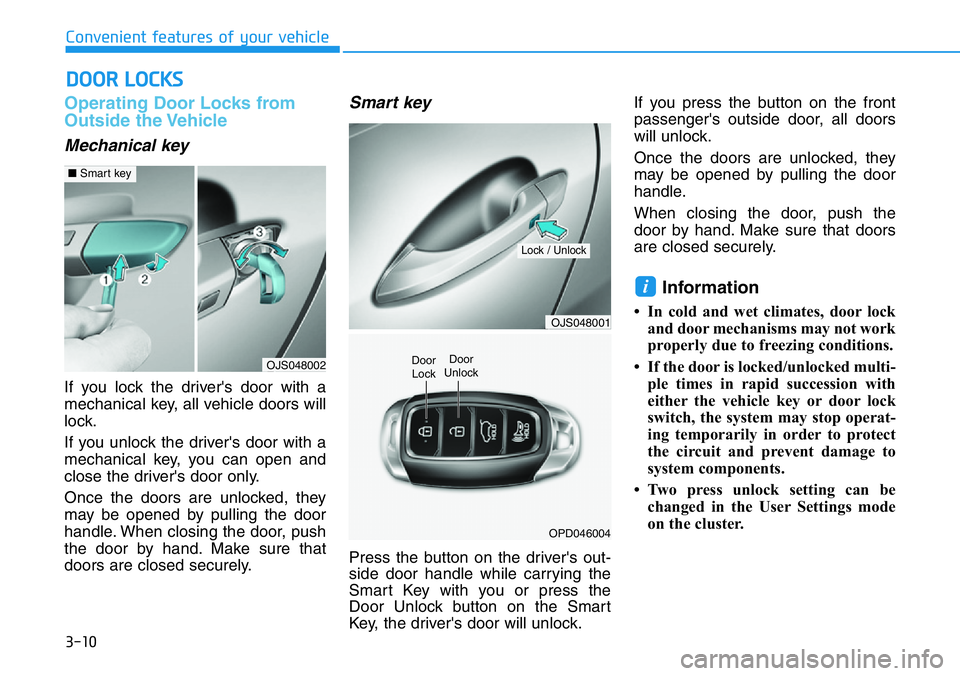
Mechanical key
If you lock the driver's door with a
mechanical key, all vehicle doors will
lock.
If you unlock the driver's door with a
mechanical key, you can open and
close the driver's door only.
Once the doors are unlocked, they
may be opened by pulling the door
handle. When closing the door, push
the door by hand. Make sure that
doors are closed securely.
Smart key
Press the button on the driver's out-
side door handle while carrying the
Smart Key with you or press the
Door Unlock button on the Smart
Key, the driver's door will unlock.If you press the button on the front
passenger's outside door, all doors
will unlock.
Once the doors are unlocked, they
may be opened by pulling the door
handle.
When closing the door, push the
door by hand. Make sure that doors
are closed securely.
Information
• In cold and wet climates, door lock
and door mechanisms may not work
properly due to freezing conditions.
• If the door is locked/unlocked multi-
ple times in rapid succession with
either the vehicle key or door lock
switch, the system may stop operat-
ing temporarily in order to protect
the circuit and prevent damage to
system components.
• Two press unlock setting can be
changed in the User Settings mode
on the cluster.
i
DOOR LOCKS
Convenient features of your vehicle
OJS048002
■Smart key
OJS048001
OPD046004
Door
Unlock
Lock / Unlock
Door
Lock
Page 90 of 446
3-12
Convenient features of your vehicle
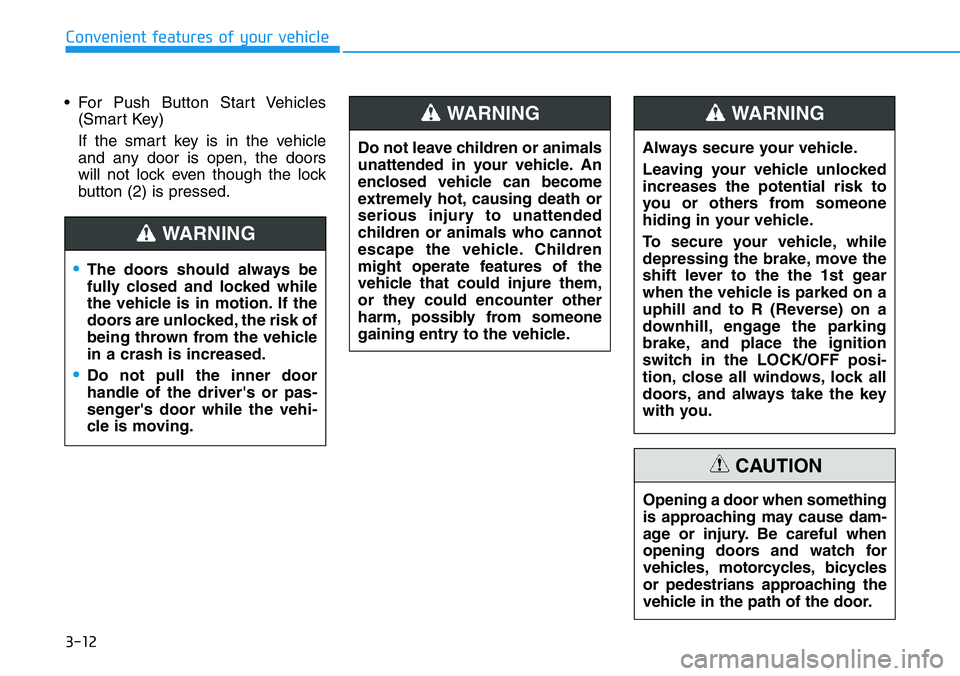
• For Push Button Start Vehicles
(Smart Key)
If the smart key is in the vehicle
and any door is open, the doors
will not lock even though the lock
button (2) is pressed.
Opening a door when something
is approaching may cause dam-
age or injury. Be careful when
opening doors and watch for
vehicles, motorcycles, bicycles
or pedestrians approaching the
vehicle in the path of the door.
CAUTION
Do not leave children or animals
unattended in your vehicle. An
enclosed vehicle can become
extremely hot, causing death or
serious injury to unattended
children or animals who cannot
escape the vehicle. Children
might operate features of the
vehicle that could injure them,
or they could encounter other
harm, possibly from someone
gaining entry to the vehicle.
WARNING
Always secure your vehicle.
Leaving your vehicle unlocked
increases the potential risk to
you or others from someone
hiding in your vehicle.
To secure your vehicle, while
depressing the brake, move the
shift lever to the the 1st gear
when the vehicle is parked on a
uphill and to R (Reverse) on a
downhill, engage the parking
brake, and place the ignition
switch in the LOCK/OFF posi-
tion, close all windows, lock all
doors, and always take the key
with you.
WARNING
•The doors should always be
fully closed and locked while
the vehicle is in motion. If the
doors are unlocked, the risk of
being thrown from the vehicle
in a crash is increased.
•Do not pull the inner door
handle of the driver's or pas-
senger's door while the vehi-
cle is moving.
WARNING
Page 92 of 446
3-14
Convenient features of your vehicle
To allow a rear door to be opened
from inside the vehicle, unlock the
child safety lock.This system helps to protect your
vehicle and valuables. The horn will
sound and the hazard warning lights
will blink continuously if any of the
following occur:
- A door is opened without using the
smart key.
- The liftgate is opened without
using the smart key.
- The engine hood is opened.
The alarm continues for 30 seconds,
then the system resets. To turn off
the alarm, unlock the doors with the
smart key.
The Theft Alarm System automati-
cally sets 30 seconds after you lock
the doors and the liftgate. For the
system to activate, you must lock the
doors and the liftgate from outside
the vehicle with the smart key or by
pressing the button on the outside of
the door handle with the smart key in
your possession.
The hazard warning lights will blink
and the chime will sound once to
indicate the system is armed.Once the security system is set,
opening any door, the liftgate, or the
hood without using the smart key will
cause the alarm to activate.
The Theft Alarm System will not set if
the hood, the liftgate, or any door is
not fully closed. If the system will not
set, check the hood, the liftgate, or
the doors are fully closed.
Do not attempt to alter this system or
add other devices to it.
Information
• Do not lock the doors until all pas-
sengers have left the vehicle. If the
remaining passenger leaves the
vehicle when the system is armed,
the alarm will be activated.
• If the vehicle is not disarmed with the
smart key, open the doors by using
the mechanical key and start the
engine by directly pressing the igni-
tion switch with the smart key.
• If the system is disarmed by unlock-
ing the vehicle, but neither a door or
the liftgate is opened within 30 sec-
onds, the doors will relock and the
system will rearm automatically.
i
THEFT-ALARM SYSTEM
If children accidently open the
rear doors while the vehicle is
in motion, they could fall out of
the vehicle. The rear door safety
locks should always be used
whenever children are in the
vehicle.
WARNING
Page 104 of 446
3-26
Convenient features of your vehicle
Closing the hood
1. Before closing the hood, check in
and around the engine compart-
ment to ensure the following:
- Any tools or other loose objects
are removed from the engine
room area or hood opening area
- All glove, rags, or other com-
bustible material is removed
from the engine compartment
- All filler caps are tightly and cor-
rectly installed
2. Lower the hood halfway (lifted
approximately 12 inches (30 cm)
from the closed position) and push
down to securely lock in place.
Then double check to be sure the
hood is secure. If the hood can be
raised slightly, it is not securely
locked. Open it again and close it
with more force.
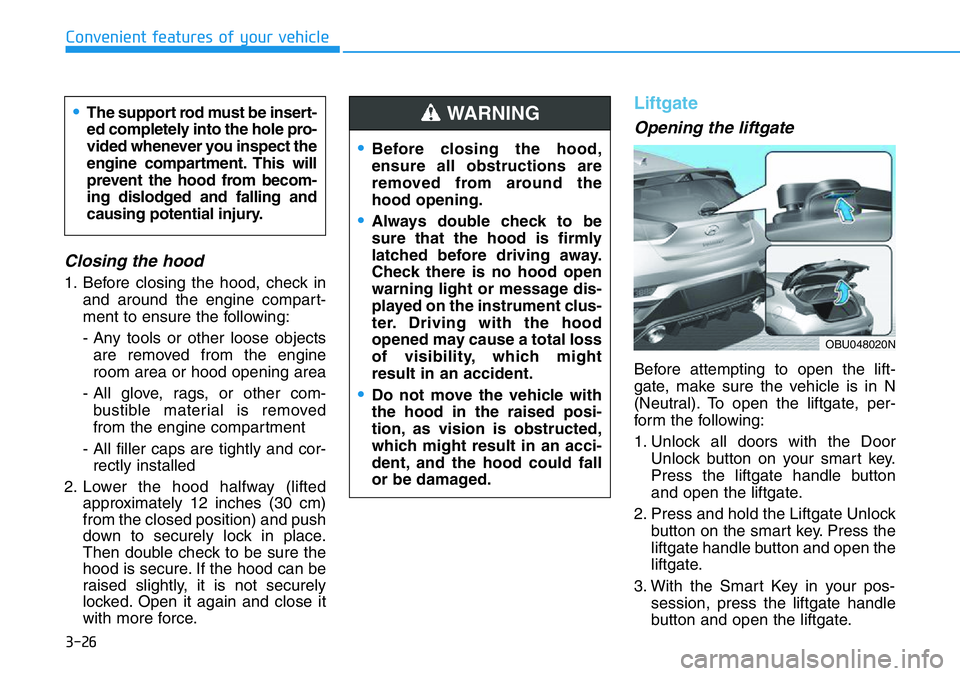
Liftgate
Opening the liftgate
Before attempting to open the lift-
gate, make sure the vehicle is in N
(Neutral). To open the liftgate, per-
form the following:
1. Unlock all doors with the Door
Unlock button on your smart key.
Press the liftgate handle button
and open the liftgate.
2. Press and hold the Liftgate Unlock
button on the smart key. Press the
liftgate handle button and open the
liftgate.
3. With the Smart Key in your pos-
session, press the liftgate handle
button and open the liftgate.
•Before closing the hood,
ensure all obstructions are
removed from around the
hood opening.
•Always double check to be
sure that the hood is firmly
latched before driving away.
Check there is no hood open
warning light or message dis-
played on the instrument clus-
ter. Driving with the hood
opened may cause a total loss
of visibility, which might
result in an accident.
•Do not move the vehicle with
the hood in the raised posi-
tion, as vision is obstructed,
which might result in an acci-
dent, and the hood could fall
or be damaged.
WARNING •The support rod must be insert-
ed completely into the hole pro-
vided whenever you inspect the
engine compartment. This will
prevent the hood from becom-
ing dislodged and falling and
causing potential injury.
OBU048020N
Page 105 of 446
3-27
Convenient features of your vehicle
3
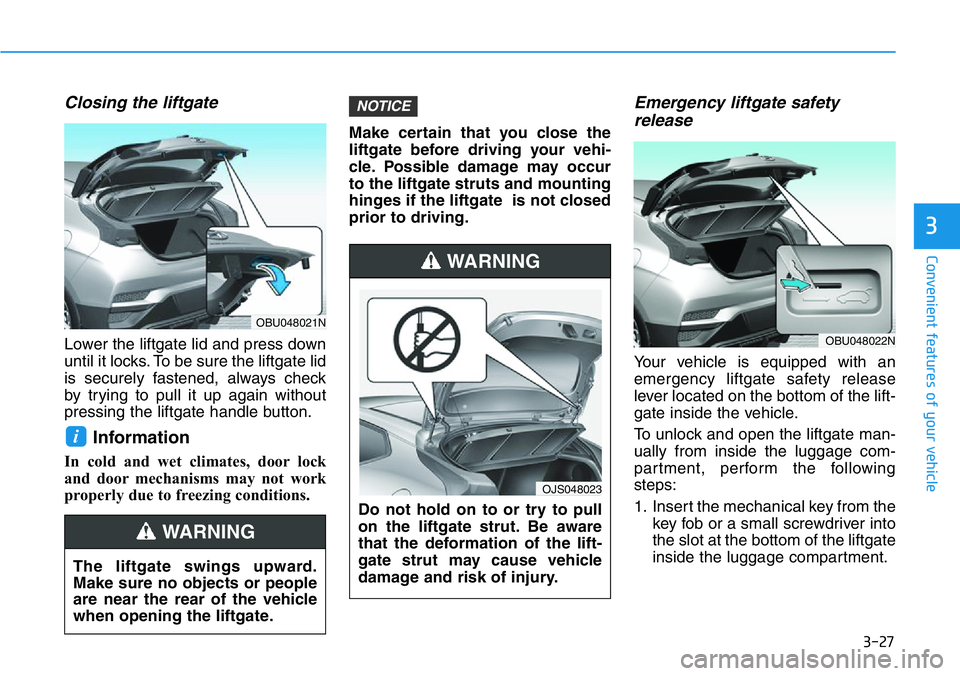
Closing the liftgate
Lower the liftgate lid and press down
until it locks. To be sure the liftgate lid
is securely fastened, always check
by trying to pull it up again without
pressing the liftgate handle button.
Information
In cold and wet climates, door lock
and door mechanisms may not work
properly due to freezing conditions.Make certain that you close the
liftgate before driving your vehi-
cle. Possible damage may occur
to the liftgate struts and mounting
hinges if the liftgate is not closed
prior to driving.
Emergency liftgate safety
release
Your vehicle is equipped with an
emergency liftgate safety release
lever located on the bottom of the lift-
gate inside the vehicle.
To unlock and open the liftgate man-
ually from inside the luggage com-
partment, perform the following
steps:
1. Insert the mechanical key from the
key fob or a small screwdriver into
the slot at the bottom of the liftgate
inside the luggage compartment.
NOTICE
i
The liftgate swings upward.
Make sure no objects or people
are near the rear of the vehicle
when opening the liftgate.
WARNING
Do not hold on to or try to pull
on the liftgate strut. Be aware
that the deformation of the lift-
gate strut may cause vehicle
damage and risk of injury.
WARNING
OJS048023
OBU048021N
OBU048022N
Page 107 of 446
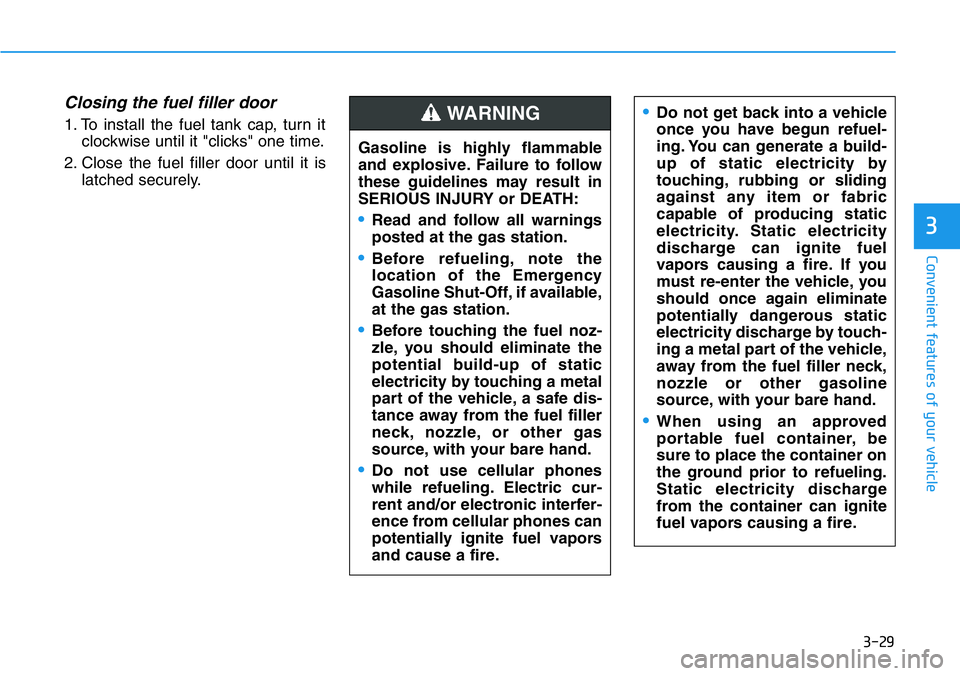
3-29
Convenient features of your vehicle
3
Closing the fuel filler door
1. To install the fuel tank cap, turn it
clockwise until it "clicks" one time.
2. Close the fuel filler door until it is
latched securely.•Do not get back into a vehicle
once you have begun refuel-
ing. You can generate a build-
up of static electricity by
touching, rubbing or sliding
against any item or fabric
capable of producing static
electricity. Static electricity
discharge can ignite fuel
vapors causing a fire. If you
must re-enter the vehicle, you
should once again eliminate
potentially dangerous static
electricity discharge by touch-
ing a metal part of the vehicle,
away from the fuel filler neck,
nozzle or other gasoline
source, with your bare hand.
•When using an approved
portable fuel container, be
sure to place the container on
the ground prior to refueling.
Static electricity discharge
from the container can ignite
fuel vapors causing a fire.
Gasoline is highly flammable
and explosive. Failure to follow
these guidelines may result in
SERIOUS INJURY or DEATH:
•Read and follow all warnings
posted at the gas station.
•Before refueling, note the
location of the Emergency
Gasoline Shut-Off, if available,
at the gas station.
•Before touching the fuel noz-
zle, you should eliminate the
potential build-up of static
electricity by touching a metal
part of the vehicle, a safe dis-
tance away from the fuel filler
neck, nozzle, or other gas
source, with your bare hand.
•Do not use cellular phones
while refueling. Electric cur-
rent and/or electronic interfer-
ence from cellular phones can
potentially ignite fuel vapors
and cause a fire.
WARNING
Page 108 of 446
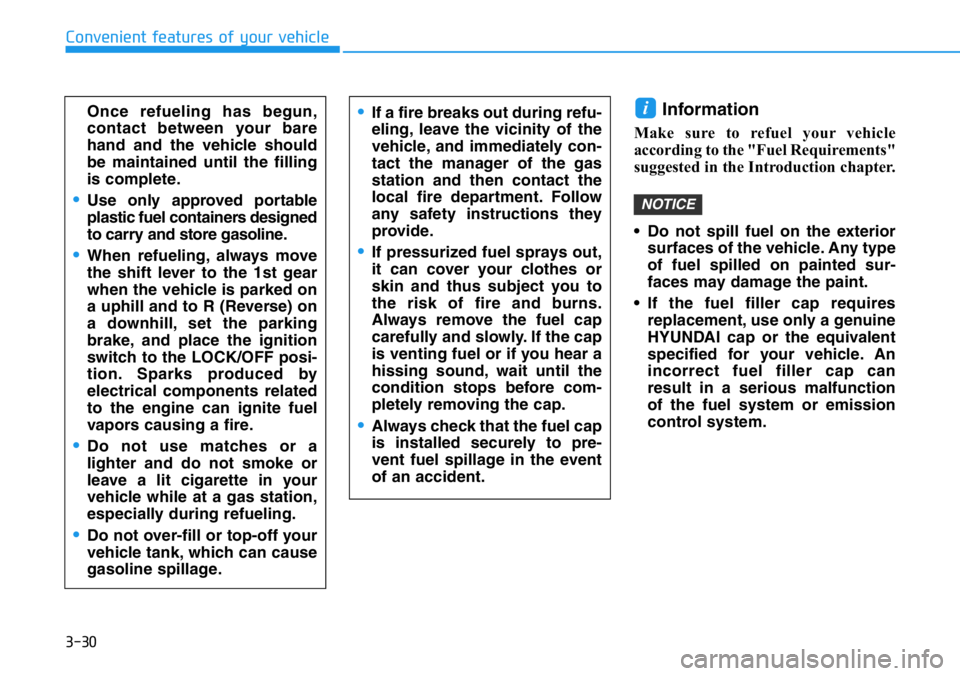
3-30
Convenient features of your vehicle
Information
Make sure to refuel your vehicle
according to the "Fuel Requirements"
suggested in the Introduction chapter.
• Do not spill fuel on the exterior
surfaces of the vehicle. Any type
of fuel spilled on painted sur-
faces may damage the paint.
• If the fuel filler cap requires
replacement, use only a genuine
HYUNDAI cap or the equivalent
specified for your vehicle. An
incorrect fuel filler cap can
result in a serious malfunction
of the fuel system or emission
control system.
NOTICE
i•If a fire breaks out during refu-
eling, leave the vicinity of the
vehicle, and immediately con-
tact the manager of the gas
station and then contact the
local fire department. Follow
any safety instructions they
provide.
•If pressurized fuel sprays out,
it can cover your clothes or
skin and thus subject you to
the risk of fire and burns.
Always remove the fuel cap
carefully and slowly. If the cap
is venting fuel or if you hear a
hissing sound, wait until the
condition stops before com-
pletely removing the cap.
•Always check that the fuel cap
is installed securely to pre-
vent fuel spillage in the event
of an accident.
Once refueling has begun,
contact between your bare
hand and the vehicle should
be maintained until the filling
is complete.
•Use only approved portable
plastic fuel containers designed
to carry and store gasoline.
•When refueling, always move
the shift lever to the 1st gear
when the vehicle is parked on
a uphill and to R (Reverse) on
a downhill, set the parking
brake, and place the ignition
switch to the LOCK/OFF posi-
tion. Sparks produced by
electrical components related
to the engine can ignite fuel
vapors causing a fire.
•Do not use matches or a
lighter and do not smoke or
leave a lit cigarette in your
vehicle while at a gas station,
especially during refueling.
•Do not over-fill or top-off your
vehicle tank, which can cause
gasoline spillage.