window HYUNDAI VERACRUZ 2008 User Guide
[x] Cancel search | Manufacturer: HYUNDAI, Model Year: 2008, Model line: VERACRUZ, Model: HYUNDAI VERACRUZ 2008Pages: 440, PDF Size: 7.67 MB
Page 108 of 440
Features of your vehicle26 4D080100AUNPower windowsThe ignition switch must be in the ON
position for power windows to operate.
Each door has a power window switch
that controls the door's window. The driv-
er has a power window lock switch which
can block the operation of passenger
windows. The power windows can be
operated for approximately 30 seconds
after the ignition key is removed or turned
to the ACC or LOCK position. However, if
the front doors are opened, the power
windows cannot be operated within the
30 second period after the ignition key
removal.✽ ✽
NOTICEWhile driving, if you notice buffeting
and pulsation (wind shock) with either
side window open, you should open the
opposite window slightly to reduce the
condition.
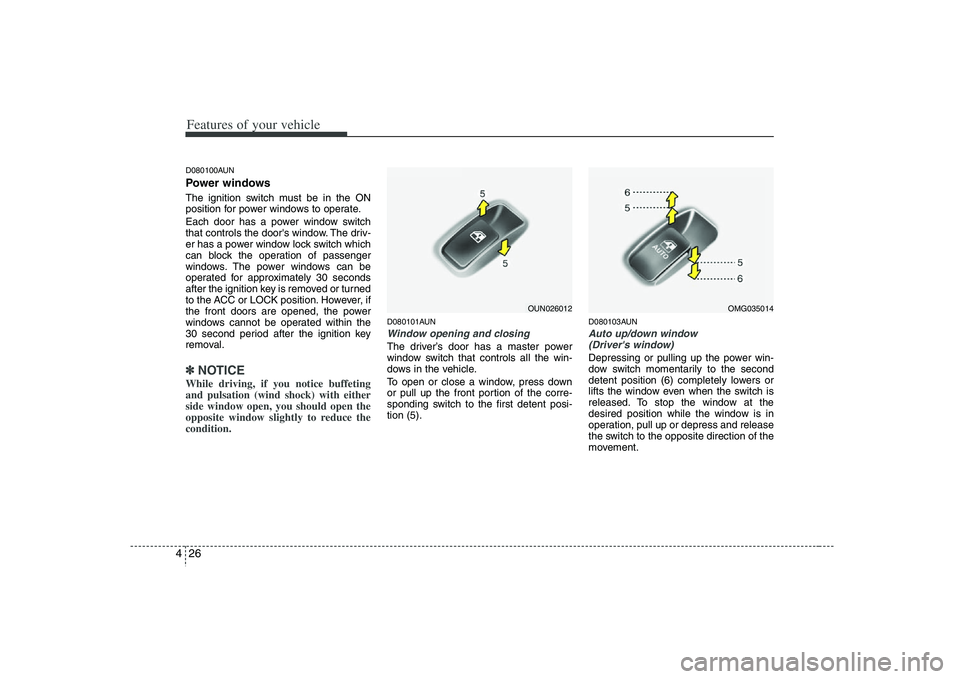
D080101AUNWindow opening and closingThe driver’s door has a master power
window switch that controls all the win-
dows in the vehicle.
To open or close a window, press down
or pull up the front portion of the corre-
sponding switch to the first detent posi-
tion (5).
D080103AUNAuto up/down window
(Driver's window)Depressing or pulling up the power win-
dow switch momentarily to the second
detent position (6) completely lowers or
lifts the window even when the switch is
released. To stop the window at the
desired position while the window is in
operation, pull up or depress and release
the switch to the opposite direction of the
movement.
OUN026012
OMG035014
Page 109 of 440
427
Features of your vehicle
If the power window is not operated cor-
rectly, the automatic power window sys-
tem must be reset as follows:
1. Turn the ignition switch to the ON posi-
tion.
2. Close driver’s window and continue
pulling up on driver’s power window
switch for at least 1 second after the
window is completely closed.
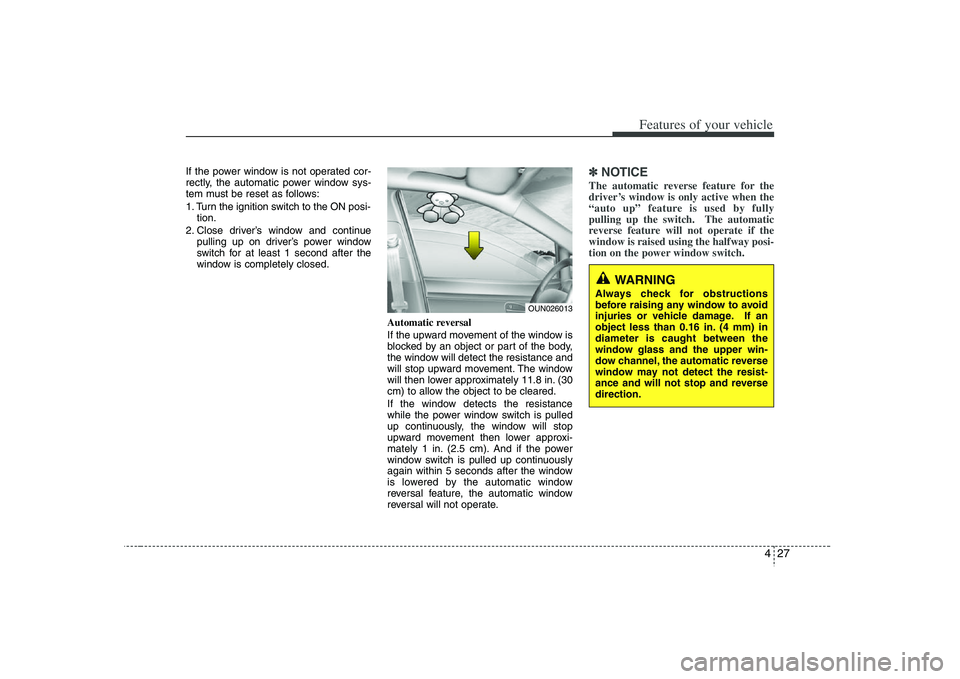
Automatic reversal
If the upward movement of the window is
blocked by an object or part of the body,
the window will detect the resistance and
will stop upward movement. The window
will then lower approximately 11.8 in. (30
cm) to allow the object to be cleared.
If the window detects the resistance
while the power window switch is pulled
up continuously, the window will stop
upward movement then lower approxi-
mately 1 in. (2.5 cm). And if the power
window switch is pulled up continuously
again within 5 seconds after the window
is lowered by the automatic window
reversal feature, the automatic window
reversal will not operate.
✽ ✽
NOTICEThe automatic reverse feature for the
driver’s window is only active when the
“auto up” feature is used by fully
pulling up the switch. The automatic
reverse feature will not operate if the
window is raised using the halfway posi-
tion on the power window switch.
WARNING
Always check for obstructions
before raising any window to avoid
injuries or vehicle damage. If an
object less than 0.16 in. (4 mm) in
diameter is caught between the
window glass and the upper win-
dow channel, the automatic reverse
window may not detect the resist-
ance and will not stop and reverse
direction.
OUN026013
Page 110 of 440
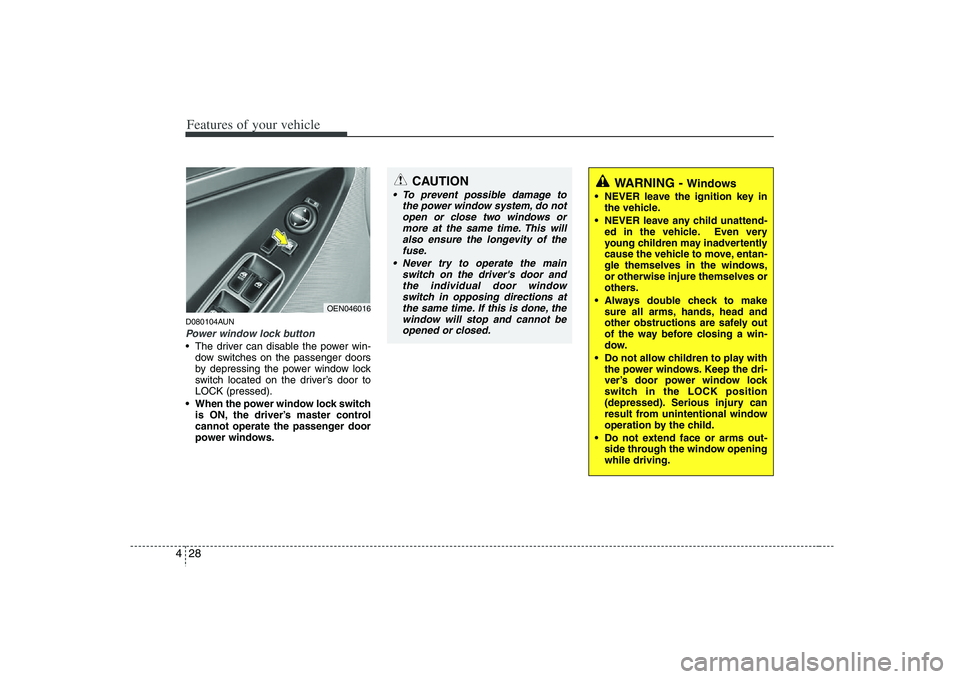
Features of your vehicle28 4D080104AUNPower window lock button The driver can disable the power win-
dow switches on the passenger doors
by depressing the power window lock
switch located on the driver’s door to
LOCK (pressed).
When the power window lock switch
is ON, the driver’s master control
cannot operate the passenger door
power windows.
OEN046016
CAUTION
To prevent possible damage to
the power window system, do not
open or close two windows or
more at the same time. This will
also ensure the longevity of the
fuse.
Never try to operate the main
switch on the driver's door and
the individual door window
switch in opposing directions at
the same time. If this is done, the
window will stop and cannot be
opened or closed.
WARNING -
Windows
NEVER leave the ignition key in
the vehicle.
NEVER leave any child unattend-
ed in the vehicle. Even very
young children may inadvertently
cause the vehicle to move, entan-
gle themselves in the windows,
or otherwise injure themselves or
others.
Always double check to make
sure all arms, hands, head and
other obstructions are safely out
of the way before closing a win-
dow.
Do not allow children to play with
the power windows. Keep the dri-
ver’s door power window lock
switch in the LOCK position
(depressed). Serious injury can
result from unintentional window
operation by the child.
Do not extend face or arms out-
side through the window opening
while driving.
Page 123 of 440
441
Features of your vehicle
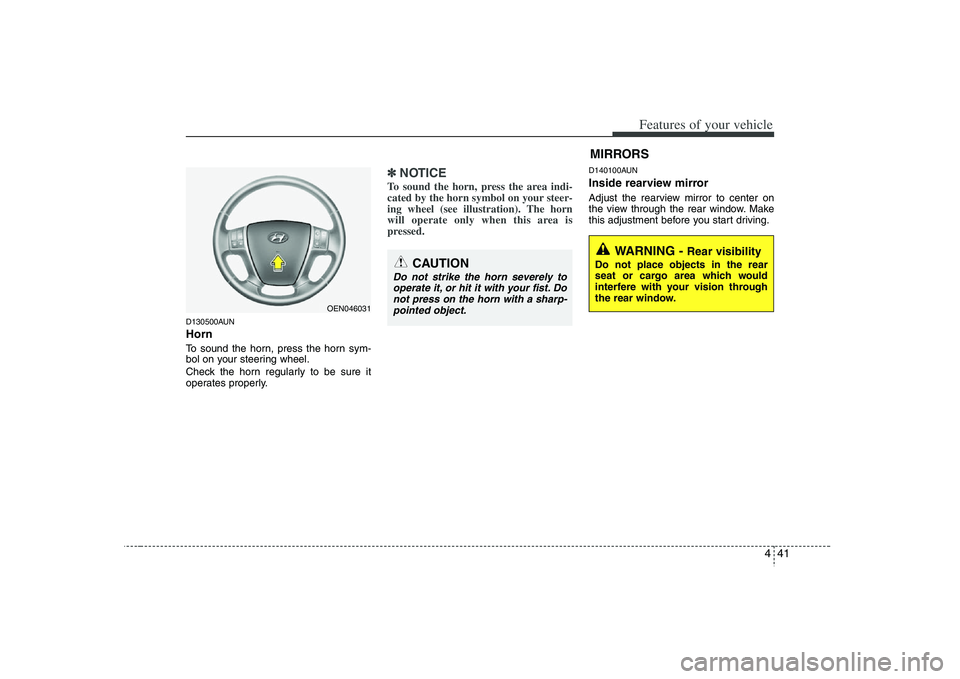
D130500AUNHornTo sound the horn, press the horn sym-
bol on your steering wheel.
Check the horn regularly to be sure it
operates properly.
✽ ✽
NOTICETo sound the horn, press the area indi-
cated by the horn symbol on your steer-
ing wheel (see illustration). The horn
will operate only when this area is
pressed.
D140100AUNInside rearview mirrorAdjust the rearview mirror to center on
the view through the rear window. Make
this adjustment before you start driving.
CAUTION
Do not strike the horn severely to
operate it, or hit it with your fist. Do
not press on the horn with a sharp-
pointed object.
MIRRORS
WARNING -
Rear visibility
Do not place objects in the rear
seat or cargo area which would
interfere with your vision through
the rear window.
OEN046031
Page 125 of 440
443
Features of your vehicle
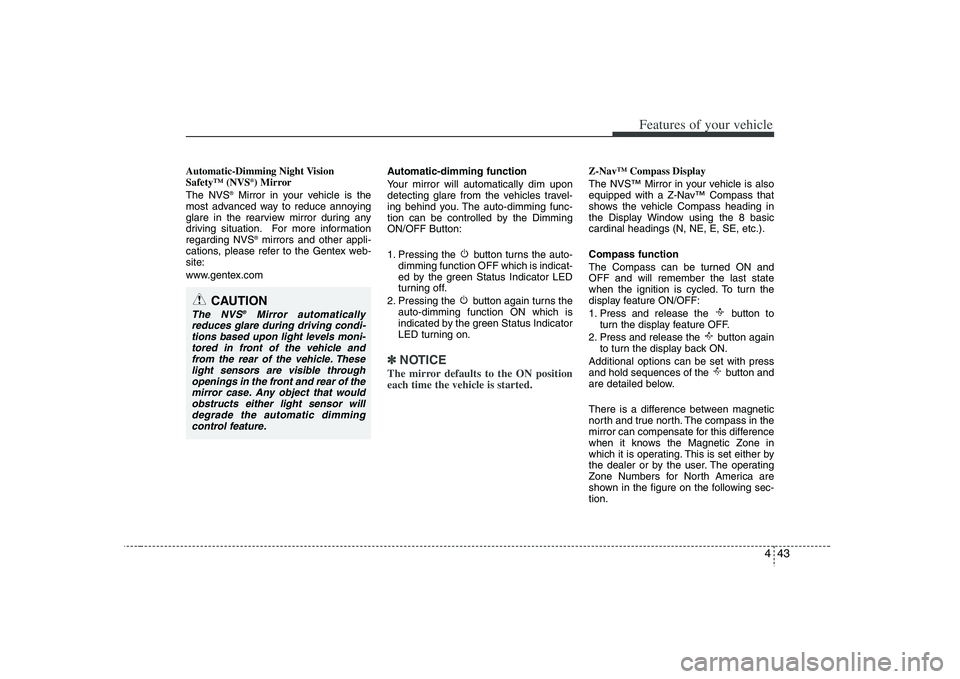
Automatic-Dimming Night Vision
Safety™ (NVS
®) Mirror
The NVS
®Mirror in your vehicle is the
most advanced way to reduce annoying
glare in the rearview mirror during any
driving situation. For more information
regarding NVS
®mirrors and other appli-
cations, please refer to the Gentex web-
site:
www.gentex.comAutomatic-dimming function
Your mirror will automatically dim upon
detecting glare from the vehicles travel-
ing behind you. The auto-dimming func-
tion can be controlled by the Dimming
ON/OFF Button:
1. Pressing the button turns the auto-
dimming function OFF which is indicat-
ed by the green Status Indicator LED
turning off.
2. Pressing the button again turns the
auto-dimming function ON which is
indicated by the green Status Indicator
LED turning on.
✽ ✽
NOTICEThe mirror defaults to the ON position
each time the vehicle is started.
Z-Nav™ Compass Display
The NVS™ Mirror in your vehicle is also
equipped with a Z-Nav™ Compass that
shows the vehicle Compass heading in
the Display Window using the 8 basic
cardinal headings (N, NE, E, SE, etc.).
Compass function
The Compass can be turned ON and
OFF and will remember the last state
when the ignition is cycled. To turn the
display feature ON/OFF:
1. Press and release the button to
turn the display feature OFF.
2. Press and release the button again
to turn the display back ON.
Additional options can be set with press
and hold sequences of the button and
are detailed below.
There is a difference between magnetic
north and true north. The compass in the
mirror can compensate for this difference
when it knows the Magnetic Zone in
which it is operating. This is set either by
the dealer or by the user. The operating
Zone Numbers for North America are
shown in the figure on the following sec-
tion.
CAUTION
The NVS
®
Mirror automatically
reduces glare during driving condi-
tions based upon light levels moni-
tored in front of the vehicle and
from the rear of the vehicle. These
light sensors are visible through
openings in the front and rear of the
mirror case. Any object that would
obstructs either light sensor will
degrade the automatic dimming
control feature.
Page 154 of 440
Features of your vehicle72 4
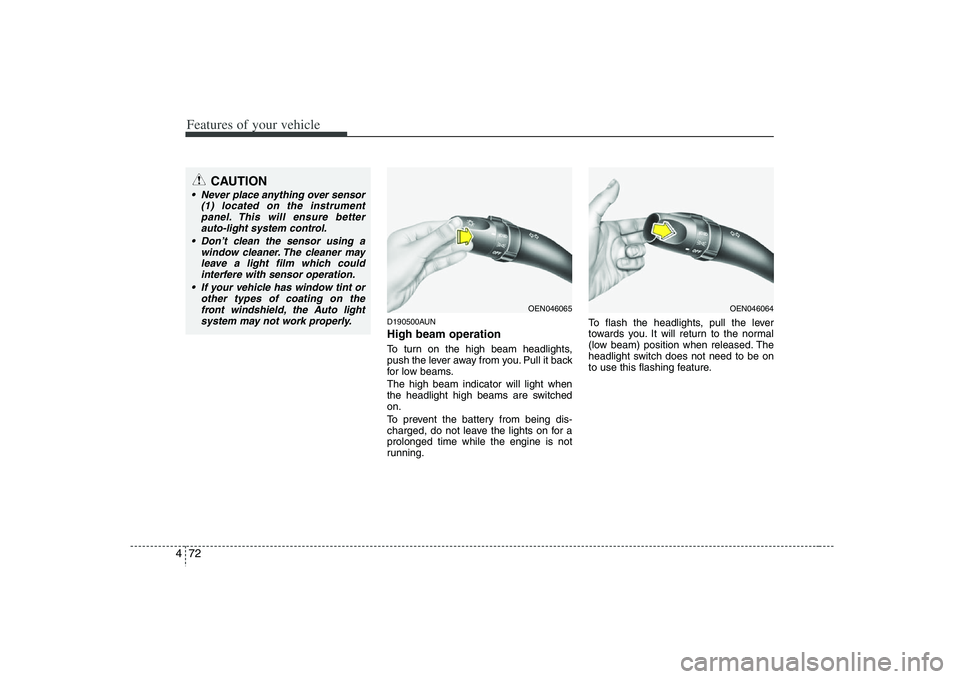
D190500AUNHigh beam operation To turn on the high beam headlights,
push the lever away from you. Pull it back
for low beams.
The high beam indicator will light when
the headlight high beams are switched
on.
To prevent the battery from being dis-
charged, do not leave the lights on for a
prolonged time while the engine is not
running.To flash the headlights, pull the lever
towards you. It will return to the normal
(low beam) position when released. The
headlight switch does not need to be on
to use this flashing feature.
CAUTION
Never place anything over sensor
(1) located on the instrument
panel. This will ensure better
auto-light system control.
Don’t clean the sensor using a
window cleaner. The cleaner may
leave a light film which could
interfere with sensor operation.
If your vehicle has window tint or
other types of coating on the
front windshield, the Auto light
system may not work properly.
OEN046065
OEN046064
Page 156 of 440
Features of your vehicle74 4
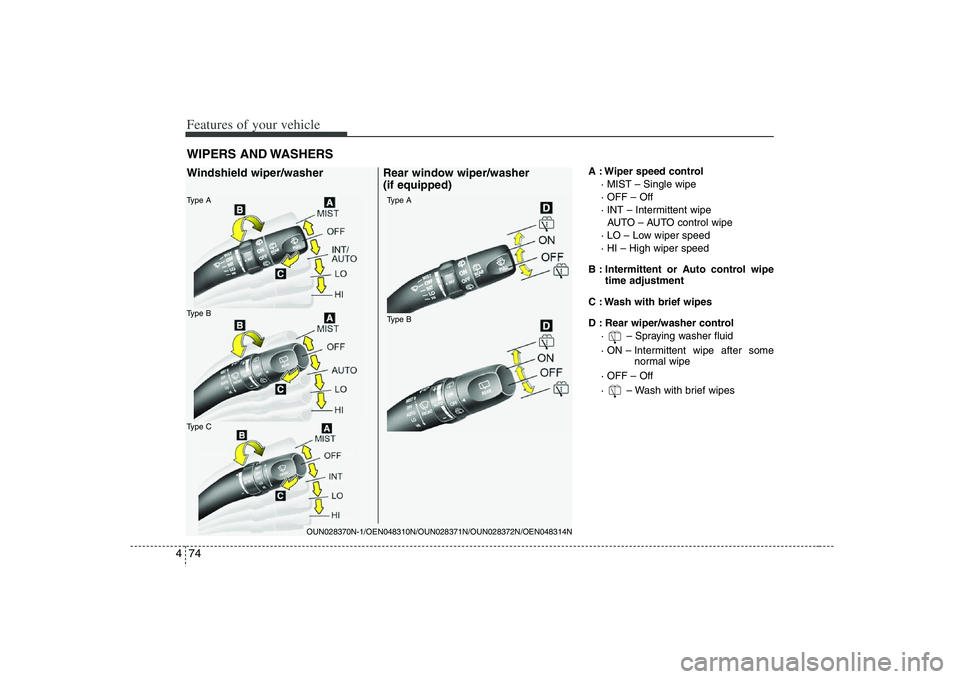
A : Wiper speed control
· MIST – Single wipe
· OFF – Off
· INT – Intermittent wipe
AUTO – AUTO control wipe
· LO – Low wiper speed
· HI – High wiper speed
B : Intermittent or Auto control wipe
time adjustment
C : Wash with brief wipes
D : Rear wiper/washer control
· – Spraying washer fluid
· ON – Intermittent wipe after some
normal wipe
· OFF – Off
· – Wash with brief wipes
WIPERS AND WASHERSType AType BType C
Type BType A
OUN028370N-1/OEN048310N/OUN028371N/OUN028372N/OEN048314N
Windshield wiper/washer Rear window wiper/washer
(if equipped)
Page 160 of 440
Features of your vehicle78 4D200300AEN-EERear window wiper and washer
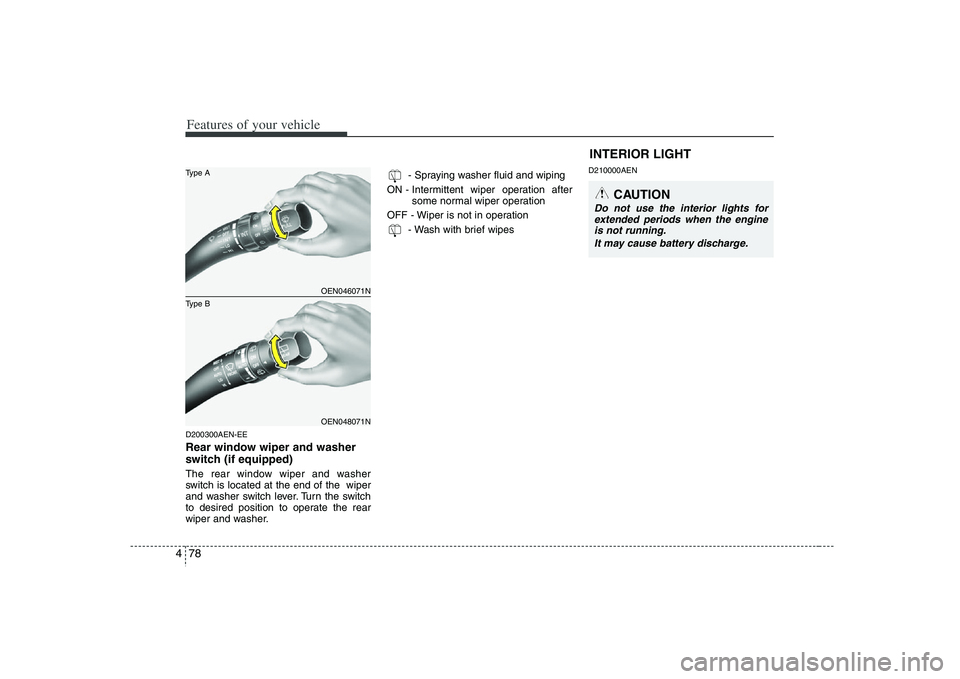
switch (if equipped)The rear window wiper and washer
switch is located at the end of the wiper
and washer switch lever. Turn the switch
to desired position to operate the rear
wiper and washer.- Spraying washer fluid and wiping
ON - Intermittent wiper operation after
some normal wiper operation
OFF - Wiper is not in operation
- Wash with brief wipes
D210000AENINTERIOR LIGHT
CAUTION
Do not use the interior lights for
extended periods when the engine
is not running.
It may cause battery discharge.
OEN046071NOEN048071N
Type BType A
Page 165 of 440
483
Features of your vehicle
D220000AUN✽ ✽
NOTICEIf you want to defrost and defog the
front windshield, refer to “Windshield
defrosting and defogging” in this sec-
tion.
D220100AENRear window defrosterThe defroster heats the window to
remove frost, fog and thin ice from the
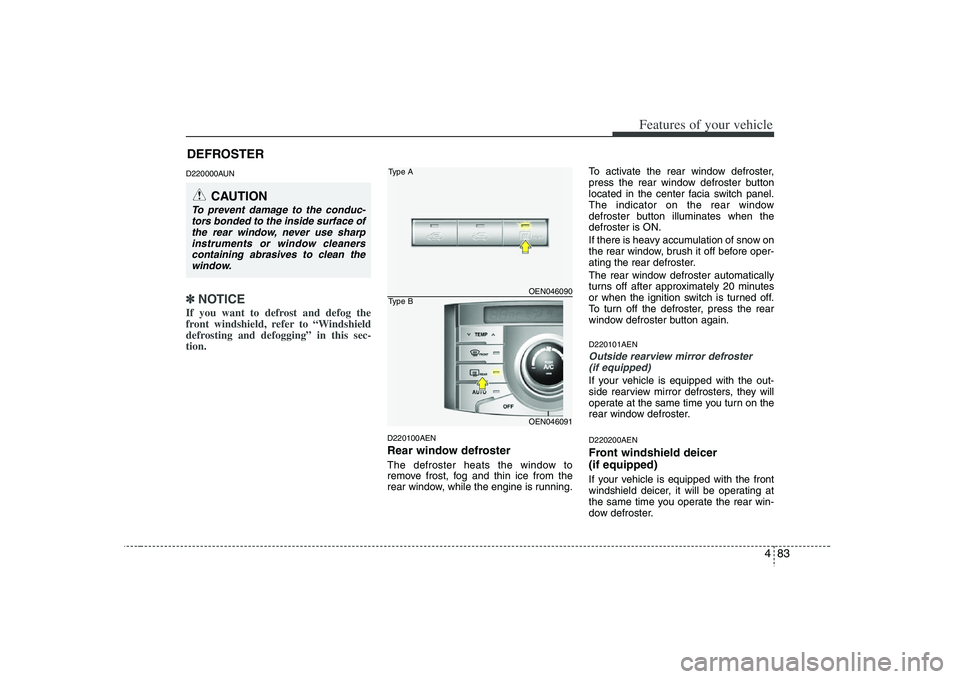
rear window, while the engine is running.To activate the rear window defroster,
press the rear window defroster button
located in the center facia switch panel.
The indicator on the rear window
defroster button illuminates when the
defroster is ON.
If there is heavy accumulation of snow on
the rear window, brush it off before oper-
ating the rear defroster.
The rear window defroster automatically
turns off after approximately 20 minutes
or when the ignition switch is turned off.
To turn off the defroster, press the rear
window defroster button again.
D220101AENOutside rearview mirror defroster
(if equipped)If your vehicle is equipped with the out-
side rearview mirror defrosters, they will
operate at the same time you turn on the
rear window defroster.D220200AENFront windshield deicer
(if equipped)If your vehicle is equipped with the front
windshield deicer, it will be operating at
the same time you operate the rear win-
dow defroster.
CAUTION
To prevent damage to the conduc-
tors bonded to the inside surface of
the rear window, never use sharp
instruments or window cleaners
containing abrasives to clean the
window.
OEN046090OEN046091
Type AType B
DEFROSTER
Page 166 of 440
Features of your vehicle84 4MANUAL CLIMATE CONTROL SYSTEM (IF EQUIPPED)
OEN046093N/OEN046095
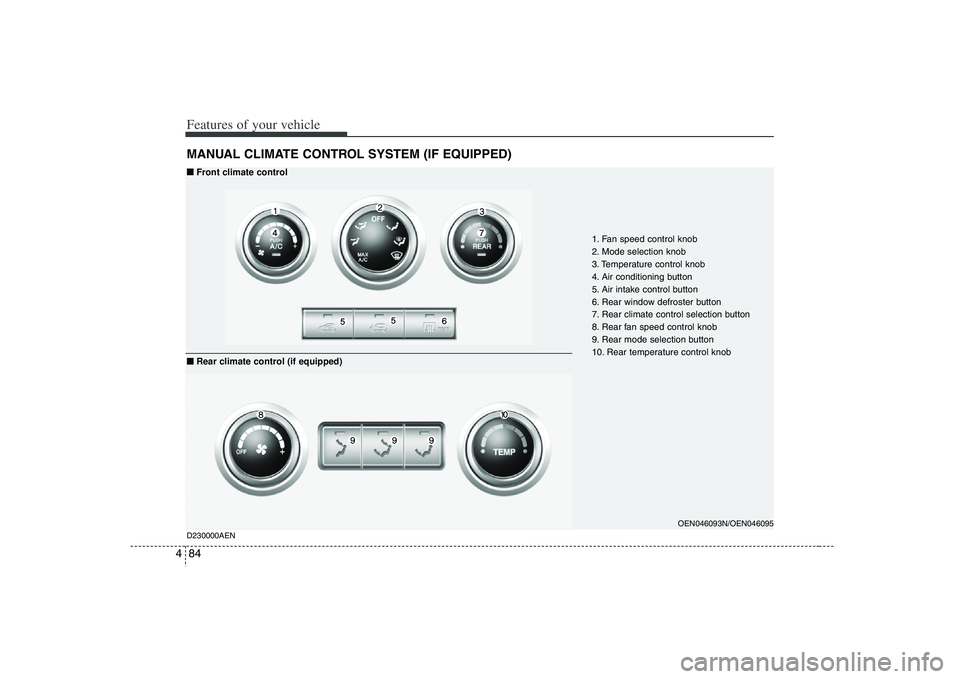
1. Fan speed control knob
2. Mode selection knob
3. Temperature control knob
4. Air conditioning button
5. Air intake control button
6. Rear window defroster button
7. Rear climate control selection button
8. Rear fan speed control knob
9. Rear mode selection button
10. Rear temperature control knob
D230000AEN■ ■
Front climate control
■ ■
Rear climate control (if equipped)