door lock HYUNDAI VERACRUZ 2009 Owner's Manual
[x] Cancel search | Manufacturer: HYUNDAI, Model Year: 2009, Model line: VERACRUZ, Model: HYUNDAI VERACRUZ 2009Pages: 425, PDF Size: 7.96 MB
Page 106 of 425
425
Features of your vehicle
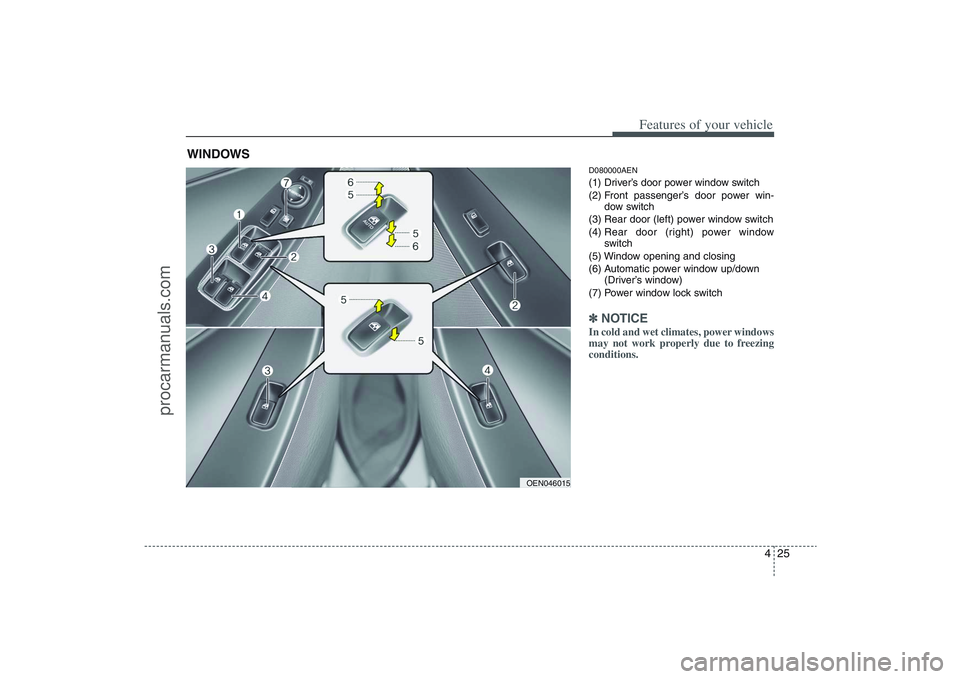
D080000AEN(1) Driver’s door power window switch
(2) Front passenger’s door power win-
dow switch
(3) Rear door (left) power window switch
(4) Rear door (right) power window
switch
(5) Window opening and closing
(6) Automatic power window up/down
(Driver’s window)
(7) Power window lock switch✽ ✽
NOTICEIn cold and wet climates, power windows
may not work properly due to freezing
conditions.
WINDOWS
OEN046015
procarmanuals.com
Page 107 of 425
Features of your vehicle26 4D080100AUNPower windowsThe ignition switch must be in the ON
position for power windows to operate.
Each door has a power window switch
that controls the door's window. The driv-
er has a power window lock switch which
can block the operation of passenger
windows. The power windows can be
operated for approximately 30 seconds
after the ignition key is removed or turned
to the ACC or LOCK position. However, if
the front doors are opened, the power
windows cannot be operated within the
30 second period after the ignition key
removal.✽ ✽
NOTICEWhile driving, if you notice buffeting
and pulsation (wind shock) with either
side window open, you should open the
opposite window slightly to reduce the
condition.
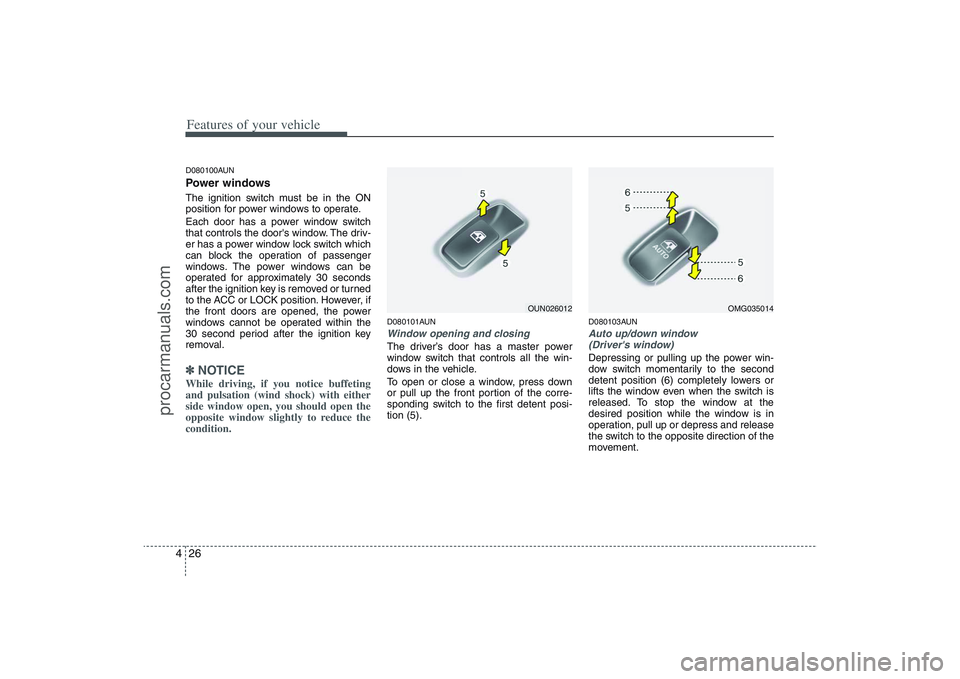
D080101AUNWindow opening and closingThe driver’s door has a master power
window switch that controls all the win-
dows in the vehicle.
To open or close a window, press down
or pull up the front portion of the corre-
sponding switch to the first detent posi-
tion (5).
D080103AUNAuto up/down window
(Driver's window)Depressing or pulling up the power win-
dow switch momentarily to the second
detent position (6) completely lowers or
lifts the window even when the switch is
released. To stop the window at the
desired position while the window is in
operation, pull up or depress and release
the switch to the opposite direction of the
movement.
OUN026012
OMG035014
procarmanuals.com
Page 109 of 425
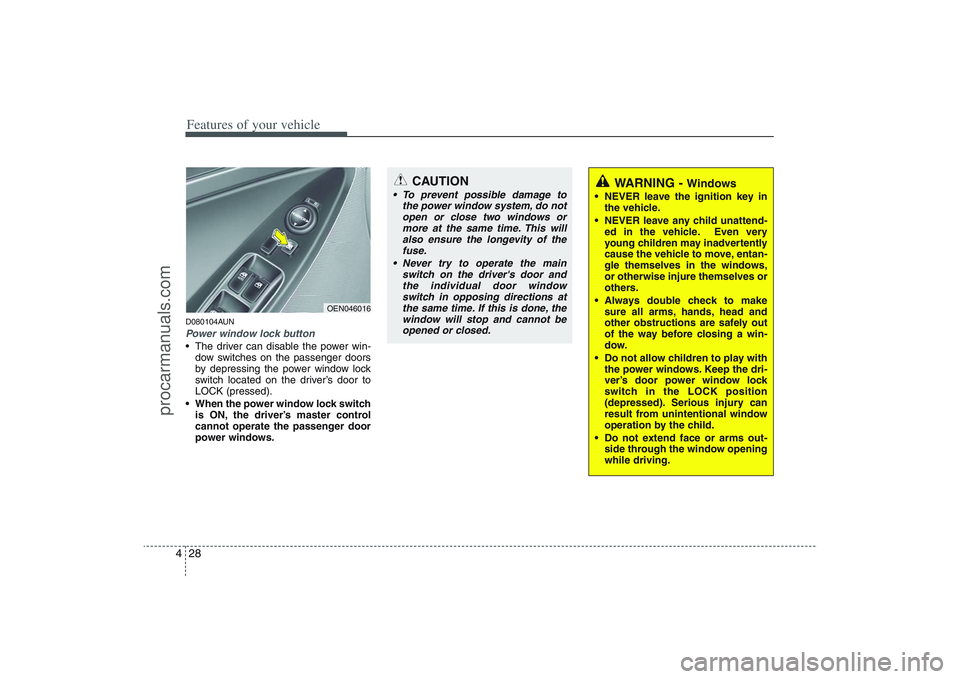
Features of your vehicle28 4D080104AUNPower window lock button The driver can disable the power win-
dow switches on the passenger doors
by depressing the power window lock
switch located on the driver’s door to
LOCK (pressed).
When the power window lock switch
is ON, the driver’s master control
cannot operate the passenger door
power windows.
OEN046016
CAUTION
To prevent possible damage to
the power window system, do not
open or close two windows or
more at the same time. This will
also ensure the longevity of the
fuse.
Never try to operate the main
switch on the driver's door and
the individual door window
switch in opposing directions at
the same time. If this is done, the
window will stop and cannot be
opened or closed.
WARNING -
Windows
NEVER leave the ignition key in
the vehicle.
NEVER leave any child unattend-
ed in the vehicle. Even very
young children may inadvertently
cause the vehicle to move, entan-
gle themselves in the windows,
or otherwise injure themselves or
others.
Always double check to make
sure all arms, hands, head and
other obstructions are safely out
of the way before closing a win-
dow.
Do not allow children to play with
the power windows. Keep the dri-
ver’s door power window lock
switch in the LOCK position
(depressed). Serious injury can
result from unintentional window
operation by the child.
Do not extend face or arms out-
side through the window opening
while driving.
procarmanuals.com
Page 111 of 425

Features of your vehicle30 4D100100AUNOpening the fuel filler lidThe fuel filler lid must be opened from
inside the vehicle by pushing the fuel
filler lid opener button located on the dri-
ver’s door.✽ ✽
NOTICEIf the fuel filler lid will not open because
ice has formed around it, tap lightly or
push on the lid to break the ice and
release the lid. Do not pry on the lid. If
necessary, spray around the lid with an
approved de-icer fluid (do not use radi-
ator anti-freeze) or move the vehicle to a
warm place and allow the ice to melt.
1. Stop the engine.
2. To open the fuel filler lid, push the fuel
filler lid opener button.
3. Pull the fuel filler lid (1) out to fully
open.
4. To remove the cap, turn the fuel tank
cap (2) counterclockwise.
5. Refuel as needed.
D100200AUNClosing the fuel filler lid1. To install the cap, turn it clockwise until
it “clicks”. This indicates that the cap is
securely tightened.
2. Close the fuel filler lid and push it light-
ly and make sure that it is securely
closed.D100300AEN-EU
FUEL FILLER LID
OEN046019
OEN046020
WARNING
- Refueling
If pressurized fuel sprays out, it
can cover your clothes or skin
and thus subject you to the risk
of fire and burns. Always remove
the fuel cap carefully and slowly.
If the cap is venting fuel or if you
hear a hissing sound, wait until
the condition stops before com-
pletely removing the cap.
Do not "top off" after the nozzle
automatically shuts off when
refueling.
Tighten the cap until it clicks, oth-
erwise the Check Engine light
will illuminate.
Always check that the fuel cap is
installed securely to prevent fuel
spillage in the event of an acci-
dent.
procarmanuals.com
Page 118 of 425
437
Features of your vehicle
D120102AHM-EERecalling positions from memory1. Shift the transmisson shift lever into P
(Park) under one of the followings:
The ignition switch is ON.
The driver’s door is opened while the
ignition switch is in the LOCK or ACC
position.
Within 30 seconds after the driver’s
door is closed while the ignition switch
is in the LOCK or ACC position.
2. To recall the position in memory, press
the desired memory button (1 or 2).
The system will beep once, then the
driver seat, outside rearview mirror
and steering wheel will automatically
adjust to the stored positions.
Adjusting one of the control knobs for the
driver seat, outside rearview mirror and
steering wheel while the system is recall-
ing the stored positions will cause the
movement for that component to stop
and move in the direction that the control
knob is moved. Other components will
continue to the recalled position.
D120300AEN-EEEasy access function
(if equipped)With the shift lever in P position, the sys-
tem will move the steering wheel forward
or rearward automatically so you can
comfortably enter and exit the vehicle.
Without smart key system
- It will move the steering wheel away
from the driver when the ignition key
is removed.
- It will move the steering wheel toward
the driver when the ignition key is
inserted.
With smart key system
- It will move the steering wheel away
from the driver when the ignition
switch is turned to the LOCK position.
- It will move the steering wheel toward
the driver when the ignition switch is
turned to the ACC position.✽ ✽
NOTICEAn authorized HYUNDAI dealer can
select the easy access function of the dri-
ver’s power seat.
If you want this feature, consult an
authorized HYUNDAI dealer.
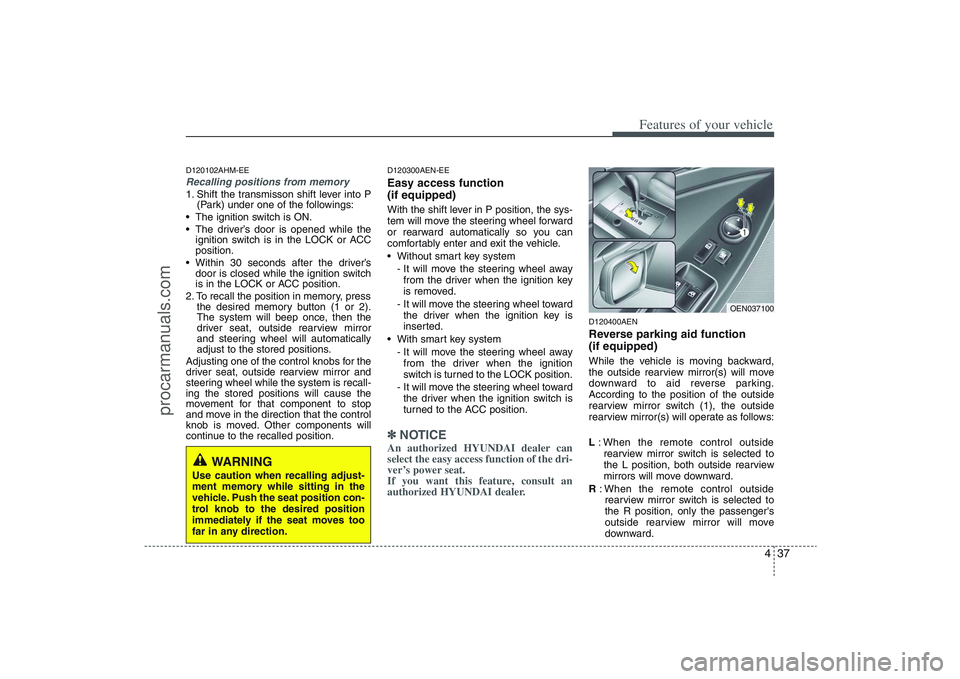
D120400AENReverse parking aid function
(if equipped)While the vehicle is moving backward,
the outside rearview mirror(s) will move
downward to aid reverse parking.
According to the position of the outside
rearview mirror switch (1), the outside
rearview mirror(s) will operate as follows:
L: When the remote control outside
rearview mirror switch is selected to
the L position, both outside rearview
mirrors will move downward.
R: When the remote control outside
rearview mirror switch is selected to
the R position, only the passenger's
outside rearview mirror will move
downward.
WARNING
Use caution when recalling adjust-
ment memory while sitting in the
vehicle. Push the seat position con-
trol knob to the desired position
immediately if the seat moves too
far in any direction.
OEN037100
procarmanuals.com
Page 126 of 425
445
Features of your vehicle
1. Press and hold the button for more
than 6 seconds. When the compass
memory is cleared a "C" will appear in
the display.
2. To calibrate the compass, drive the
vehicle in 2 complete circles at less
than 5 mph (8 km/h).
Integrated HomeLink
®Wireless Control
System
The HomeLink® Wireless Control
System provides a convenient way to
replace up to three hand-held radio-fre-
quency (RF) transmitters with a single
built-in device. This innovative feature will
learn the radio frequency codes of most
current transmitters to operate devices
such as gate operators, garage door
openers, entry door locks, security sys-
tems, even home lighting. Both standard
and rolling code-equipped transmitters
can be programmed by following the out-
lined procedures. Additional HomeLink
®
information can be found at: www.home-
link.com or by calling 1-800-355-3515.Retain the original transmitter of the RF
device you are programming for use in
other vehicles as well as for future
HomeLink
®programming. It is also sug-
gested that upon the sale of the vehicle,
the programmed HomeLink
®buttons be
erased for security purposes.Programming HomeLink
®
✽ ✽
NOTICE• When programming a garage door
opener, it is advised to park the vehi-
cle outside of the garage.
• It is recommended that a new battery
be placed in the hand-held transmit-
ter of the device being programmed to
HomeLink
®for quicker training and
accurate transmission of the radio-
frequency signal.
• Some vehicles may require the igni-
tion switch to be turned to the second
(or "accessories") position for pro-
gramming and/or operation of
HomeLink.
• In the event that there are still pro-
gramming difficulties or questions
after following the programming steps
listed below, contact HomeLink
®at:
www.homelink.com or 1-800-355-
3515.
CAUTION
Before programming HomeLink
®to
a garage door opener or gate oper-
ator, make sure that people and
objects are out of the way of the
device to prevent potential harm or
damage. Do not use HomeLink®
with any garage door opener that
lacks the safety stop and reverse
features required by U.S. federal
safety standards (this includes any
garage door opener model manu-
factured before April 1, 1982). A
garage door that cannot detect an
object - signaling the door to stop
and reverse - does not meet current
U.S. federal safety standards. Using
a garage door opener without these
features increases the risk of seri-
ous injury or death.
procarmanuals.com
Page 128 of 425
447
Features of your vehicle
Gate operator & Canadian program-
ming
During programming, your handheld
transmitter may automatically stop trans-
mitting. Continue to press the Integrated
HomeLink
®Wireless Control System but-
ton (note steps 2 through 4 in the
Standard Programming portion of this
document) while you press and re-press
("cycle") your handheld transmitter every
two seconds until the frequency signal
has been learned. The indicator light will
flash slowly and then rapidly after sever-
al seconds upon successful training.
Operating HomeLink
®
To operate, simply press and release the
programmed HomeLink
®
button.
Activation will now occur for the trained
device (i.e. garage door opener, gate
operator, security system, entry door
lock, home/office lighting, etc.). For con-
venience, the hand-held transmitter of
the device may also be used at any time.Reprogramming a single HomeLink
®
button
To program a new device to a previously
trained HomeLink
®button, follow these
steps:
1. Press and hold the desired HomeLink
®
button. Do NOT release until step 4
has been completed.
2. When the indicator light begins to flash
slowly (after 20 seconds), position the
handheld transmitter 1 to 3 inches
away from the HomeLink
®surface.
3. Press and hold the handheld transmit-
ter button. The HomeLink®indicator
light will flash, first slowly and then rap-
idly.
4. When the indicator light begins to flash
rapidly, release both buttons.
5. Press and hold the just-trained
HomeLink
®button and observe the red
Status Indicator LED. If the indicator
light stays on constantly, programming
is complete and your new device
should activate.Erasing HomeLink
®buttons
Individual buttons cannot be erased.
However, to erase all three programmed
buttons:
1. Press and hold the two outer
HomeLink
®buttons until the indicator
light begins to flash-after 20 seconds.
2. Release both buttons. Do not hold for
longer than 30 seconds.
The Integrated HomeLink
®
Wireless
Control System is now in the training
(learn) mode and can be programmed at
any time following the appropriate steps
in the Programming sections above.
procarmanuals.com
Page 146 of 425
465
Features of your vehicle
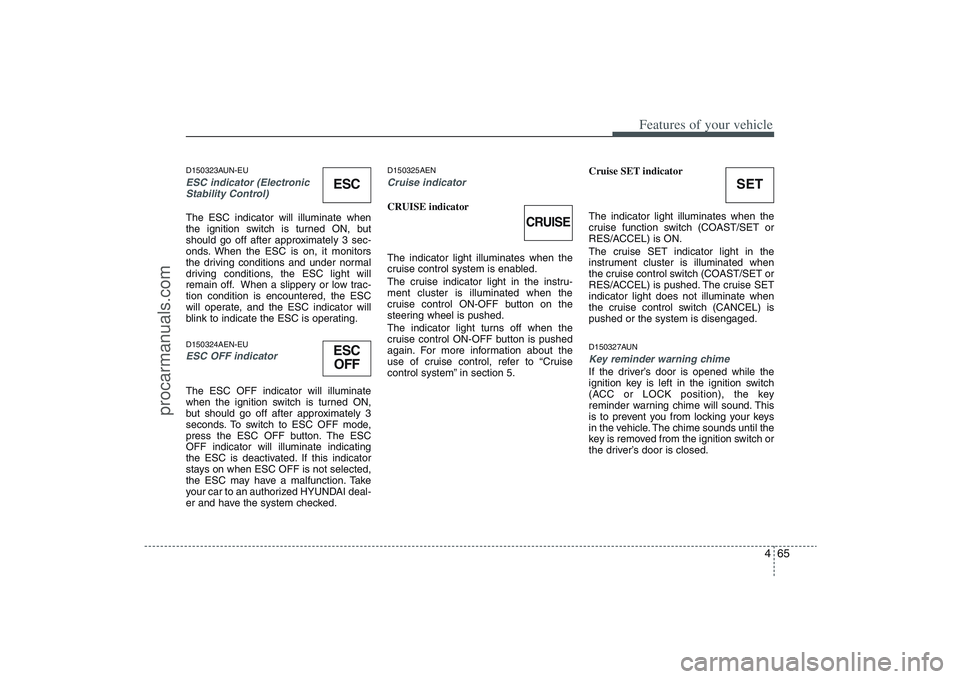
D150323AUN-EUESC indicator (Electronic
Stability Control) The ESC indicator will illuminate when
the ignition switch is turned ON, but
should go off after approximately 3 sec-
onds. When the ESC is on, it monitors
the driving conditions and under normal
driving conditions, the ESC light will
remain off. When a slippery or low trac-
tion condition is encountered, the ESC
will operate, and the ESC indicator will
blink to indicate the ESC is operating.D150324AEN-EUESC OFF indicator The ESC OFF indicator will illuminate
when the ignition switch is turned ON,
but should go off after approximately 3
seconds. To switch to ESC OFF mode,
press the ESC OFF button. The ESC
OFF indicator will illuminate indicating
the ESC is deactivated. If this indicator
stays on when ESC OFF is not selected,
the ESC may have a malfunction. Take
your car to an authorized HYUNDAI deal-
er and have the system checked.
D150325AENCruise indicator CRUISE indicator
The indicator light illuminates when the
cruise control system is enabled.
The cruise indicator light in the instru-
ment cluster is illuminated when the
cruise control ON-OFF button on the
steering wheel is pushed.
The indicator light turns off when the
cruise control ON-OFF button is pushed
again. For more information about the
use of cruise control, refer to “Cruise
control system” in section 5.Cruise SET indicator
The indicator light illuminates when the
cruise function switch (COAST/SET or
RES/ACCEL) is ON.
The cruise SET indicator light in the
instrument cluster is illuminated when
the cruise control switch (COAST/SET or
RES/ACCEL) is pushed. The cruise SET
indicator light does not illuminate when
the cruise control switch (CANCEL) is
pushed or the system is disengaged.
D150327AUNKey reminder warning chime If the driver’s door is opened while the
ignition key is left in the ignition switch
(ACC or LOCK position), the key
reminder warning chime will sound. This
is to prevent you from locking your keys
in the vehicle. The chime sounds until the
key is removed from the ignition switch or
the driver’s door is closed.
ESCESC
OFF
SET
CRUISE
procarmanuals.com
Page 147 of 425
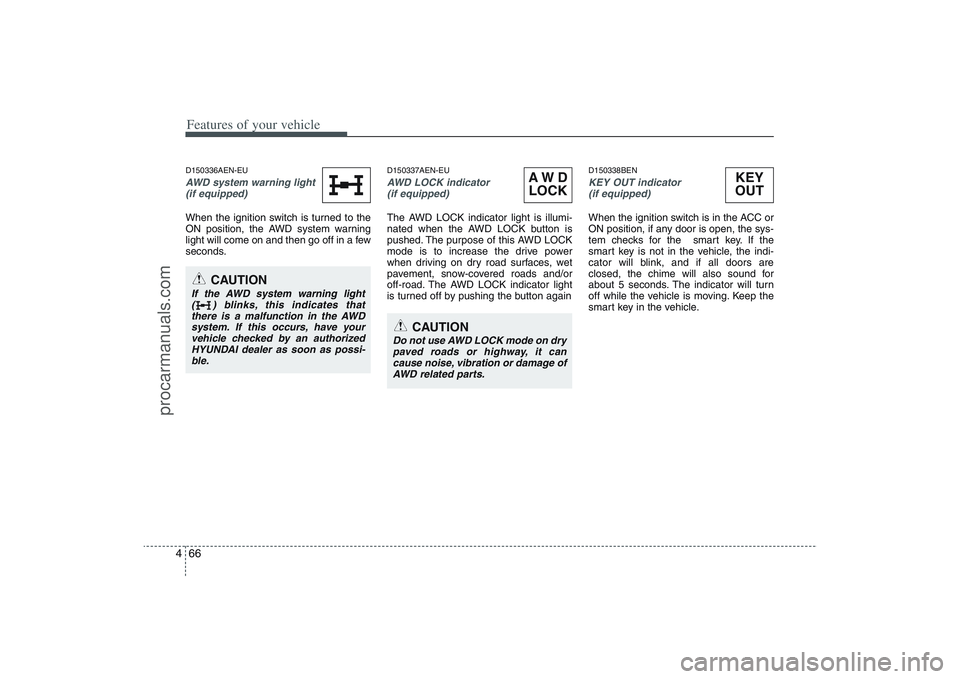
Features of your vehicle66 4D150336AEN-EUAWD system warning light
(if equipped) When the ignition switch is turned to the
ON position, the AWD system warning
light will come on and then go off in a few
seconds.
D150337AEN-EUAWD LOCK indicator
(if equipped) The AWD LOCK indicator light is illumi-
nated when the AWD LOCK button is
pushed. The purpose of this AWD LOCK
mode is to increase the drive power
when driving on dry road surfaces, wet
pavement, snow-covered roads and/or
off-road. The AWD LOCK indicator light
is turned off by pushing the button again
D150338BENKEY OUT indicator
(if equipped)When the ignition switch is in the ACC or
ON position, if any door is open, the sys-
tem checks for the smart key. If the
smart key is not in the vehicle, the indi-
cator will blink, and if all doors are
closed, the chime will also sound for
about 5 seconds. The indicator will turn
off while the vehicle is moving. Keep the
smart key in the vehicle.
CAUTION
If the AWD system warning light
( ) blinks, this indicates that
there is a malfunction in the AWD
system. If this occurs, have your
vehicle checked by an authorized
HYUNDAI dealer as soon as possi-
ble.
KEY
OUT
CAUTION
Do not use AWD LOCK mode on dry
paved roads or highway, it can
cause noise, vibration or damage of
AWD related parts.
AW D
LOCK
procarmanuals.com
Page 151 of 425
Features of your vehicle70 4D190100AUNBattery saver function The purpose of this feature is to pre-
vent the battery from being dis-
charged. The system automatically
turns off the exterior lights when the
driver removes the ignition key and
opens the driver-side door.
With this feature, the parking lights will
be turned off automatically if the driver
parks on the side of road at night.
If necessary, to keep the lights on
when the ignition key is removed, per-
form the following:
1) Open the driver-side door.
2) Turn the parking lights OFF and ON
again using the light switch on the
steering column.D190200AENHeadlight escort function
(if equipped)The headlights (and/or taillights) remain
on for approximately 20 minutes after the
ignition key is removed or turned to the
ACC or LOCK position. However, if the
driver’s door is opened and closed, the
headlights are turned off after 30 sec-
onds.The headlights can be turned off by
pressing the lock button on the transmit-
ter (or smart key) twice or turning off the
light switch from the headlight or Auto
light position.
D190300AENRescue mode function
(if equipped)If your vehicle has any problem on the
vehicle network system, the headlights
(low beam) turn on automatically with the
ignition switch in the ON position even
though the headlight switch is not turned
on. At this time, the emergency lighting is
not turned off when the headlight switch
is turned off.
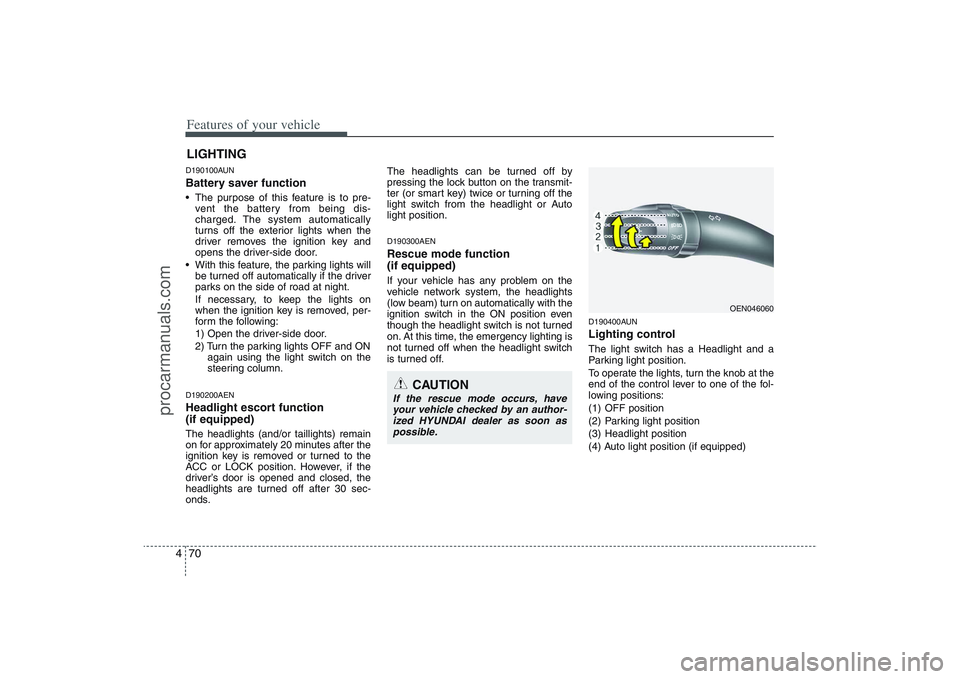
D190400AUNLighting controlThe light switch has a Headlight and a
Parking light position.
To operate the lights, turn the knob at the
end of the control lever to one of the fol-
lowing positions:
(1) OFF position
(2) Parking light position
(3) Headlight position
(4) Auto light position (if equipped)
LIGHTING
CAUTION
If the rescue mode occurs, have
your vehicle checked by an author-
ized HYUNDAI dealer as soon as
possible.
OEN046060
procarmanuals.com