HYUNDAI VERACRUZ 2012 Owners Manual
Manufacturer: HYUNDAI, Model Year: 2012, Model line: VERACRUZ, Model: HYUNDAI VERACRUZ 2012Pages: 429, PDF Size: 7.11 MB
Page 131 of 429
447
Features of your vehicle
Gate operator & Canadian program-
ming
During programming, your handheld
transmitter may automatically stop trans-
mitting. Continue to press the Integrated
HomeLink
®Wireless Control System but-
ton (note steps 2 through 4 in the
Standard Programming portion of this
document) while you press and re-press
("cycle") your handheld transmitter every
two seconds until the frequency signal
has been learned. The indicator light will
flash slowly and then rapidly after sever-
al seconds upon successful training.
Operating HomeLink
®
To operate, simply press and release the
programmed HomeLink®button.
Activation will now occur for the trained
device (i.e. garage door opener, gate
operator, security system, entry door
lock, home/office lighting, etc.). For con-
venience, the hand-held transmitter of
the device may also be used at any time. Reprogramming a single HomeLink
®
button
To program a new device to a previously
trained HomeLink
®button, follow these
steps:
1. Press and hold the desired HomeLink
®
button. Do NOT release until step 4
has been completed.
2. When the indicator light begins to flash slowly (after 20 seconds), position the
handheld transmitter 1 to 3 inches
away from the HomeLink
®surface.
3. Press and hold the handheld transmit- ter button. The HomeLink
®indicator
light will flash, first slowly and then rap-
idly.
4. When the indicator light begins to flash rapidly, release both buttons.
5. Press and hold the just-trained HomeLink
®button and observe the red
Status Indicator LED. If the indicator
light stays on constantly, programming
is complete and your new device
should activate. Erasing HomeLink
®buttons
Individual buttons cannot be erased.
However, to erase all three programmed
buttons:
1. Press and hold the two outer HomeLink
®buttons until the indicator
light begins to flash-after 20 seconds.
2. Release both buttons. Do not hold for longer than 30 seconds.
The Integrated HomeLink
®Wireless
Control System is now in the training
(learn) mode and can be programmed at
any time following the appropriate steps
in the Programming sections above.
procarmanuals.com
Page 132 of 429
Features of your vehicle
48
4
FCC ID: NZLZTVHL3
IC: 4112A-ZTVHL3
This device complies with Part 15 of
the FCC Rules.
Operation is subject to the following two
conditions:
1. this device may not cause harmful
interference, and
2. This device must accept any interfer- ence received, including interference
that may cause undesired operation.
NVS
®is a registered trademark and Z-
Nav™ is a trademark of the Gentex
Corporation, Zeeland, Michigan.
HomeLink
®is a registered trademark
owned by Johnson Controls,
Incorporated, Milwaukee, Wisconsin.
D140300AEN
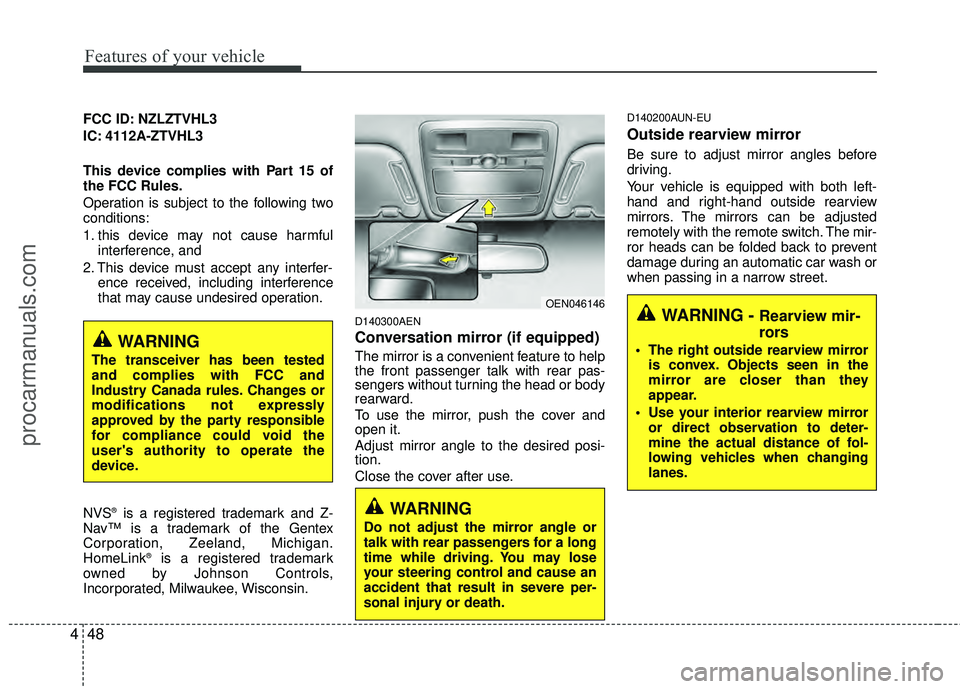
Conversation mirror (if equipped)
The mirror is a convenient feature to help
the front passenger talk with rear pas-
sengers without turning the head or body
rearward.
To use the mirror, push the cover and
open it.
Adjust mirror angle to the desired posi-
tion.
Close the cover after use.
D140200AUN-EU
Outside rearview mirror
Be sure to adjust mirror angles before
driving.
Your vehicle is equipped with both left-
hand and right-hand outside rearview
mirrors. The mirrors can be adjusted
remotely with the remote switch. The mir-
ror heads can be folded back to prevent
damage during an automatic car wash or
when passing in a narrow street.
WARNING
Do not adjust the mirror angle or
talk with rear passengers for a long
time while driving. You may lose
your steering control and cause an
accident that result in severe per-
sonal injury or death.
WARNING
The transceiver has been tested
and complies with FCC and
Industry Canada rules. Changes or
modifications not expressly
approved by the party responsible
for compliance could void the
user's authority to operate the
device.
OEN046146WARNING - Rearview mir-
rors
The right outside rearview mirror is convex. Objects seen in the
mirror are closer than they
appear.
Use your interior rearview mirror or direct observation to deter-
mine the actual distance of fol-
lowing vehicles when changing
lanes.
procarmanuals.com
Page 133 of 429
449
Features of your vehicle
CAUTION
The mirrors stop moving whenthey reach the maximum adjust-ing angles, but the motor contin- ues to operate while the switch isdepressed. Do not depress theswitch longer than necessary, the motor may be damaged.
Do not attempt to adjust the out- side rearview mirror by hand.Doing so may damage the parts.
D140201AEN
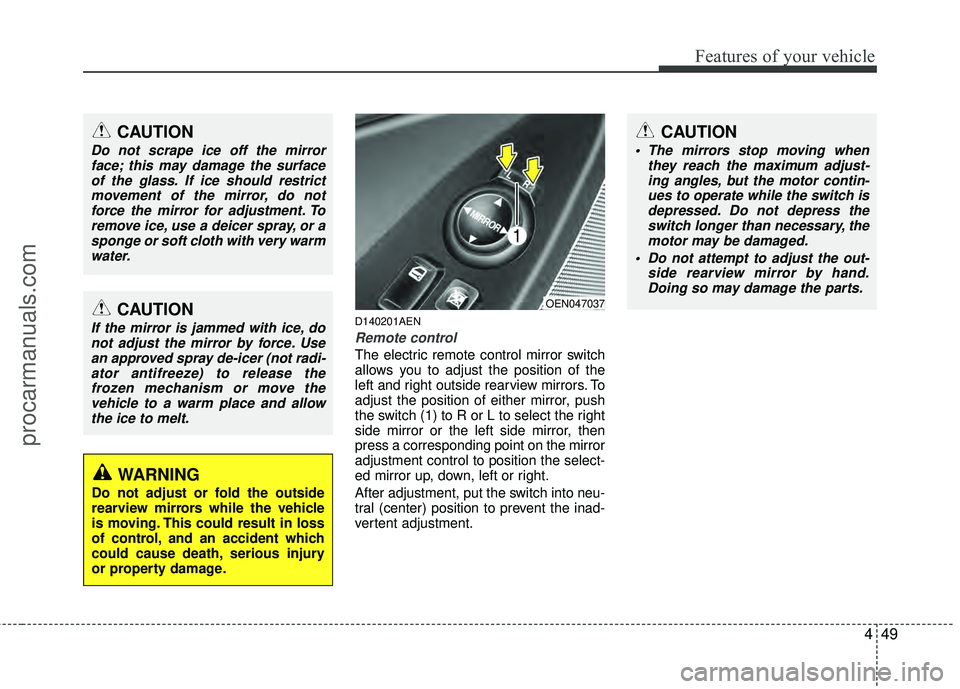
Remote control
The electric remote control mirror switch
allows you to adjust the position of the
left and right outside rearview mirrors. To
adjust the position of either mirror, push
the switch (1) to R or L to select the right
side mirror or the left side mirror, then
press a corresponding point on the mirror
adjustment control to position the select-
ed mirror up, down, left or right.
After adjustment, put the switch into neu-
tral (center) position to prevent the inad-
vertent adjustment.
CAUTION
Do not scrape ice off the mirrorface; this may damage the surfaceof the glass. If ice should restrictmovement of the mirror, do notforce the mirror for adjustment. To remove ice, use a deicer spray, or asponge or soft cloth with very warmwater.
CAUTION
If the mirror is jammed with ice, donot adjust the mirror by force. Usean approved spray de-icer (not radi-ator antifreeze) to release thefrozen mechanism or move thevehicle to a warm place and allowthe ice to melt.
WARNING
Do not adjust or fold the outside
rearview mirrors while the vehicle
is moving. This could result in loss
of control, and an accident which
could cause death, serious injury
or property damage.
OEN047037
procarmanuals.com
Page 134 of 429
Features of your vehicle
50
4
D140202AUN-EU
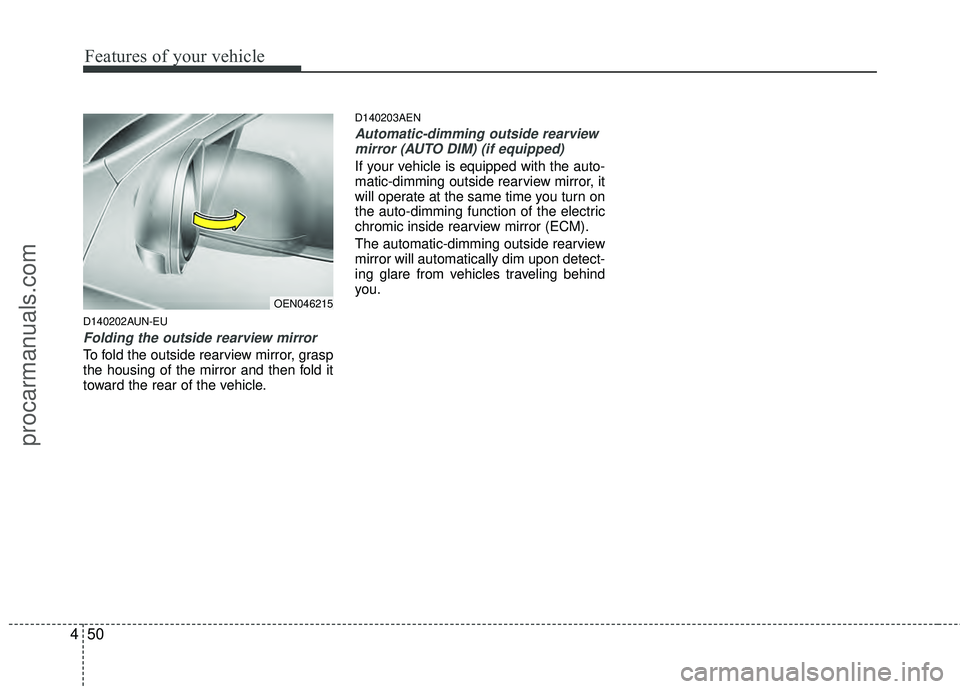
Folding the outside rearview mirror
To fold the outside rearview mirror, grasp
the housing of the mirror and then fold it
toward the rear of the vehicle.
D140203AEN
Automatic-dimming outside rearview
mirror (AUTO DIM) (if equipped)
If your vehicle is equipped with the auto-
matic-dimming outside rearview mirror, it
will operate at the same time you turn on
the auto-dimming function of the electric
chromic inside rearview mirror (ECM).
The automatic-dimming outside rearview
mirror will automatically dim upon detect-
ing glare from vehicles traveling behind
you.
OEN046215
procarmanuals.com
Page 135 of 429
451
Features of your vehicle
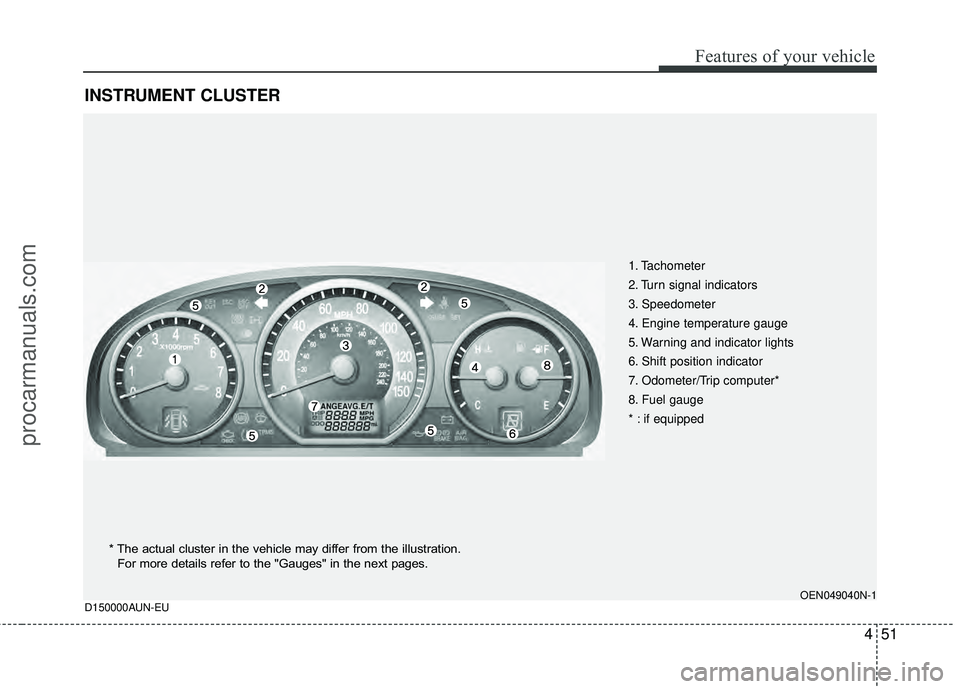
INSTRUMENT CLUSTER
1. Tachometer
2. Turn signal indicators
3. Speedometer
4. Engine temperature gauge
5. Warning and indicator lights
6. Shift position indicator
7. Odometer/Trip computer*
8. Fuel gauge
* : if equipped
OEN049040N-1
D150000AUN-EU
* The actual cluster in the vehicle may differ from the illustration.
For more details refer to the "Gauges" in the next pages.
procarmanuals.com
Page 136 of 429
Features of your vehicle
52
4
D150100AUN
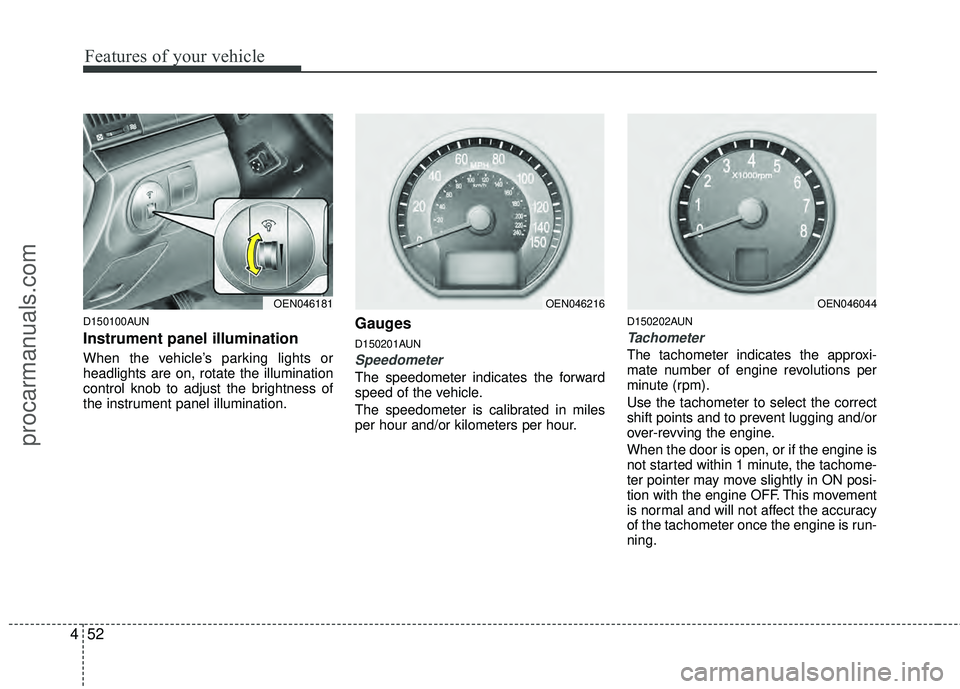
Instrument panel illumination
When the vehicle’s parking lights or
headlights are on, rotate the illumination
control knob to adjust the brightness of
the instrument panel illumination.
Gauges
D150201AUN
Speedometer
The speedometer indicates the forward
speed of the vehicle.
The speedometer is calibrated in miles
per hour and/or kilometers per hour.
D150202AUN
Tachometer
The tachometer indicates the approxi-
mate number of engine revolutions per
minute (rpm).
Use the tachometer to select the correct
shift points and to prevent lugging and/or
over-revving the engine.
When the door is open, or if the engine is
not started within 1 minute, the tachome-
ter pointer may move slightly in ON posi-
tion with the engine OFF. This movement
is normal and will not affect the accuracy
of the tachometer once the engine is run-
ning.
OEN046181OEN046044OEN046216
procarmanuals.com
Page 137 of 429
453
Features of your vehicle
D150203AUN
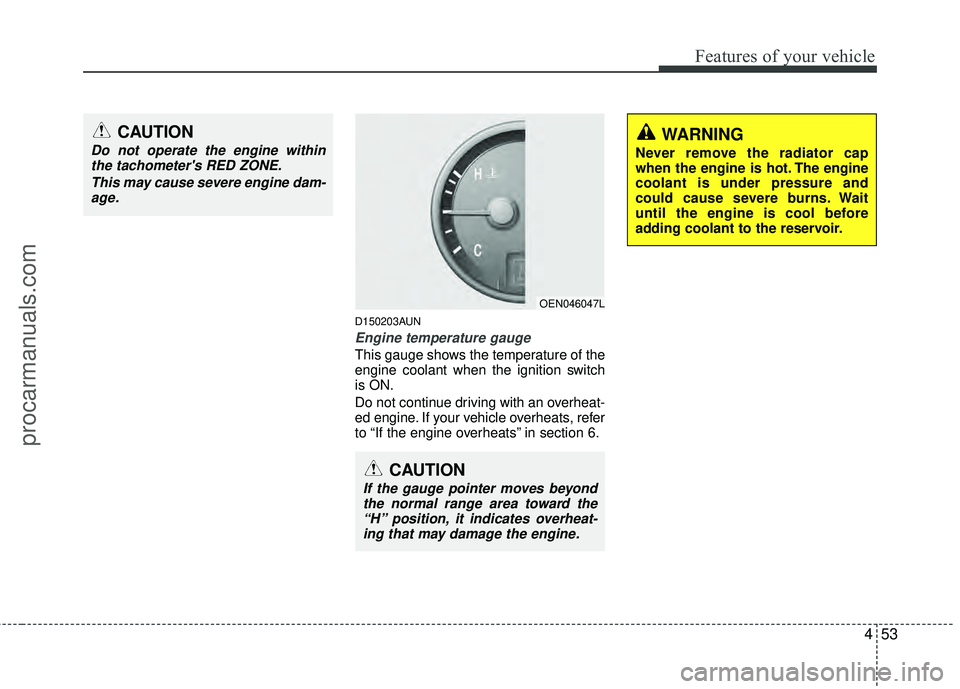
Engine temperature gauge
This gauge shows the temperature of the
engine coolant when the ignition switch
is ON.
Do not continue driving with an overheat-
ed engine. If your vehicle overheats, refer
to “If the engine overheats” in section 6.
OEN046047L
CAUTION
If the gauge pointer moves beyondthe normal range area toward the“H” position, it indicates overheat-ing that may damage the engine.
CAUTION
Do not operate the engine withinthe tachometer's RED ZONE.
This may cause severe engine dam-age.WARNING
Never remove the radiator cap
when the engine is hot. The engine
coolant is under pressure and
could cause severe burns. Wait
until the engine is cool before
adding coolant to the reservoir.
procarmanuals.com
Page 138 of 429
Features of your vehicle
54
4
D150204BUN
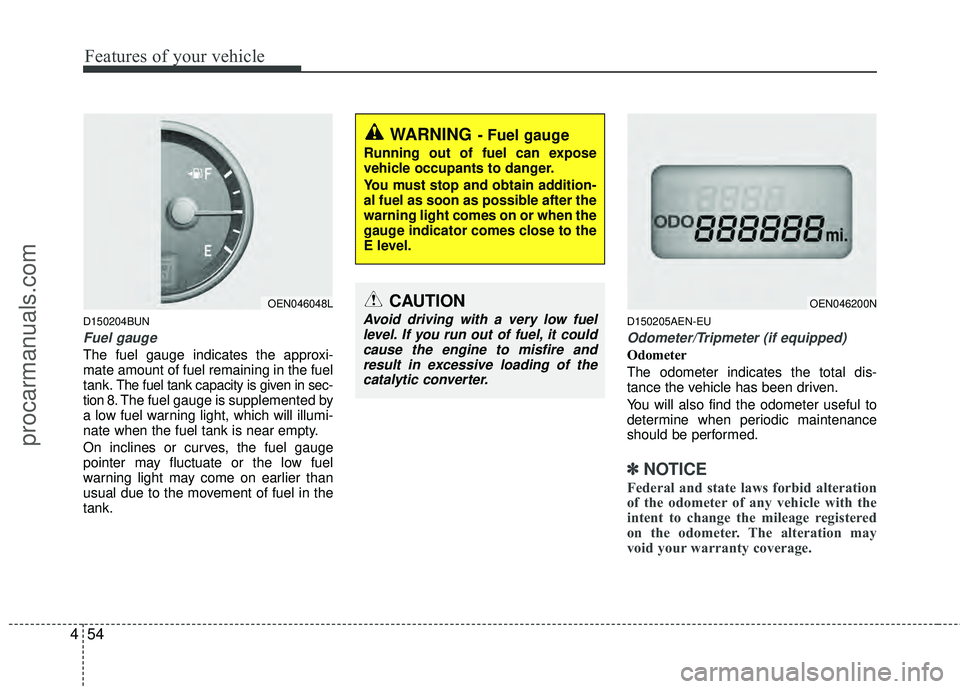
Fuel gauge
The fuel gauge indicates the approxi-
mate amount of fuel remaining in the fuel
tank.
The fuel tank capacity is given in sec-
tion 8.The fuel gauge is supplemented by
a low fuel warning light, which will illumi-
nate when the fuel tank is near empty.
On inclines or curves, the fuel gauge
pointer may fluctuate or the low fuel
warning light may come on earlier than
usual due to the movement of fuel in the
tank.
D150205AEN-EU
Odometer/Tripmeter (if equipped)
Odometer
The odometer indicates the total dis-
tance the vehicle has been driven.
You will also find the odometer useful to
determine when periodic maintenance
should be performed.
✽ ✽ NOTICE
Federal and state laws forbid alteration
of the odometer of any vehicle with the
intent to change the mileage registered
on the odometer. The alteration may
void your warranty coverage.
OEN046048L
WARNING- Fuel gauge
Running out of fuel can expose
vehicle occupants to danger.
You must stop and obtain addition-
al fuel as soon as possible after the
warning light comes on or when the
gauge indicator comes close to the
E level.
OEN046200NCAUTION
Avoid driving with a very low fuel
level. If you run out of fuel, it couldcause the engine to misfire and result in excessive loading of thecatalytic converter.
procarmanuals.com
Page 139 of 429
455
Features of your vehicle
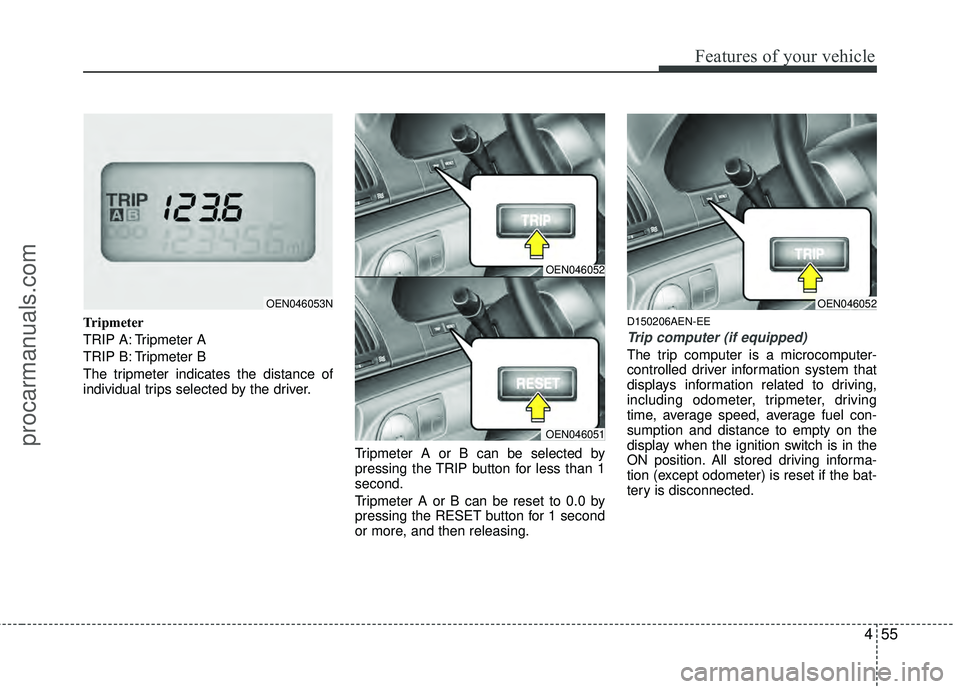
Tripmeter
TRIP A: Tripmeter A
TRIP B: Tripmeter B
The tripmeter indicates the distance of
individual trips selected by the driver.Tripmeter A or B can be selected by
pressing the TRIP button for less than 1
second.
Tripmeter A or B can be reset to 0.0 by
pressing the RESET button for 1 second
or more, and then releasing.D150206AEN-EE
Trip computer (if equipped)
The trip computer is a microcomputer-
controlled driver information system that
displays information related to driving,
including odometer, tripmeter, driving
time, average speed, average fuel con-
sumption and distance to empty on the
display when the ignition switch is in the
ON position. All stored driving informa-
tion (except odometer) is reset if the bat-
tery is disconnected.
OEN046053N
OEN046052
OEN046051
OEN046052
procarmanuals.com
Page 140 of 429
Features of your vehicle
56
4
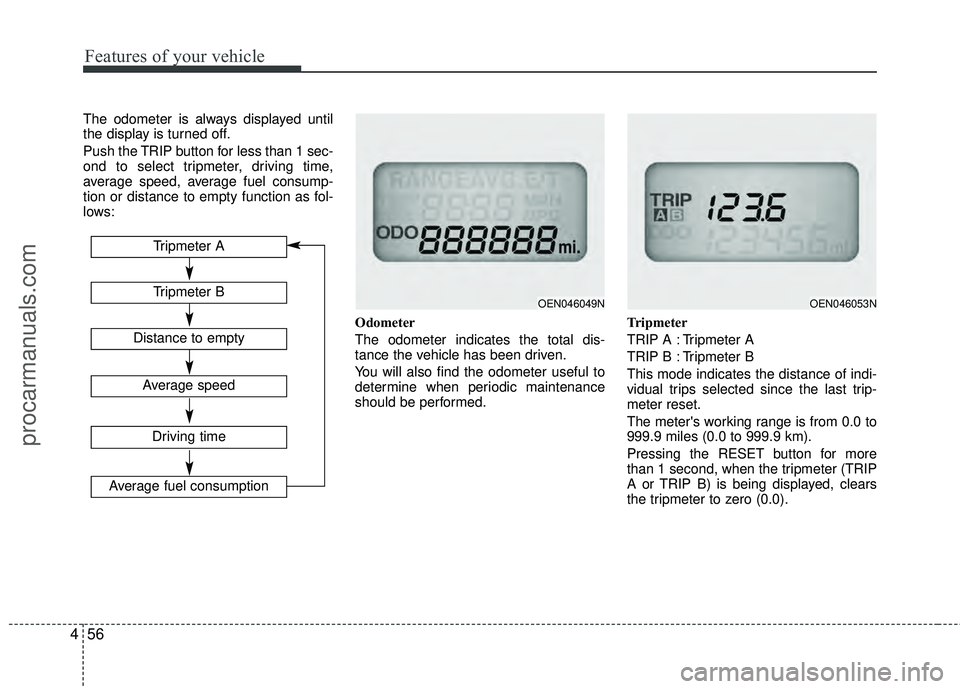
The odometer is always displayed until
the display is turned off.
Push the TRIP button for less than 1 sec-
ond to select tripmeter, driving time,
average speed, average fuel consump-
tion or distance to empty function as fol-
lows:
Odometer
The odometer indicates the total dis-
tance the vehicle has been driven.
You will also find the odometer useful to
determine when periodic maintenance
should be performed.Tripmeter
TRIP A : Tripmeter A
TRIP B : Tripmeter B
This mode indicates the distance of indi-
vidual trips selected since the last trip-
meter reset.
The meter's working range is from 0.0 to
999.9 miles (0.0 to 999.9 km).
Pressing the RESET button for more
than 1 second, when the tripmeter (TRIP
A or TRIP B) is being displayed, clears
the tripmeter to zero (0.0).
OEN046049NTripmeter B
Average speed
Driving time
Average fuel consumption
Tripmeter A
Distance to empty
OEN046053N
procarmanuals.com