climate settings INFINITI FX 2013 Quick Reference Guide
[x] Cancel search | Manufacturer: INFINITI, Model Year: 2013, Model line: FX, Model: INFINITI FX 2013Pages: 30, PDF Size: 2.3 MB
Page 5 of 30

02
03
For information regarding how to access additional viewing cycles, please see your Owner’s Manual.
The colored guide lines on the display screen indicate vehicle width and approximate distances
to objects with reference to the vehicle body line.
• Red 1.5 ft (0.5 m); Yellow 3 ft (1 m); Green 7 ft (2 m) and 10 ft (3 m).
NOTE:
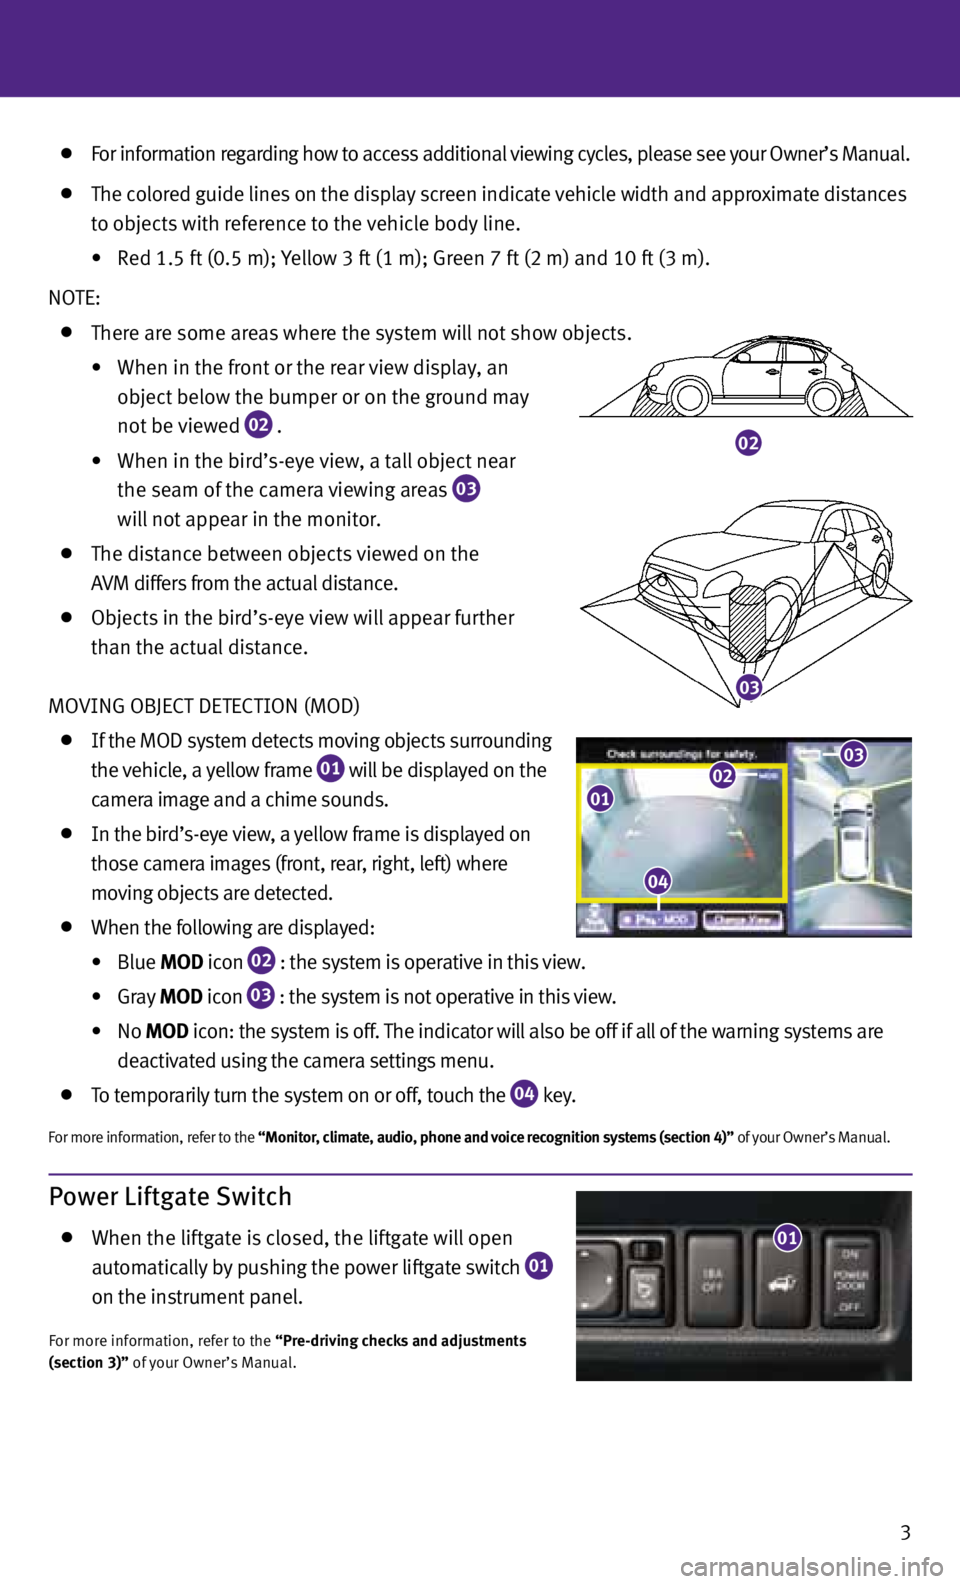
There are some areas where the system will not show objects.
•
When in the front or the rear view display, an
object below the bumper or on the ground may
not be viewed
02 .
•
When in the bird’s-eye view, a tall object near
the seam of the camera viewing areas
03
will not appear in the monitor.
The distance between objects viewed on the
A v M differs from the actual distance.
Objects in the bird’s-eye view will appear further
than the actual distance.
MO vING OBJECT DETECTION (MOD)
If the MOD system detects moving objects surrounding
the vehicle, a yellow frame
01 will be displayed on the
camera image and a chime sounds.
In the bird’s-eye view, a yellow frame is displayed on
those camera images (front, rear, right, left) where
moving objects are detected.
When the following are displayed:
•
Blue MOD icon
02 : the system is operative in this view.
•
Gray MOD icon
03 : the system is not operative in this view.
•
No MOD icon: the system is off. The indicator will also be off if all of the warning systems are
deactivated using the camera settings menu.
To temporarily turn the system on or off, touch the
04 key.
For more information, refer to the “Monitor, climate, audio, phone and voice recognition systems (section 4)” of your Owner’s Manual.
3
04
0102
04
03
Power Liftgate Switch
When the liftgate is closed, the liftgate will open
automatically by pushing the power liftgate switch
01
on the instrument panel.
For more information, refer to the “Pre-driving checks and adjustments
(section 3)” of your Owner’s Manual.
01
Page 16 of 30

12
first drive features
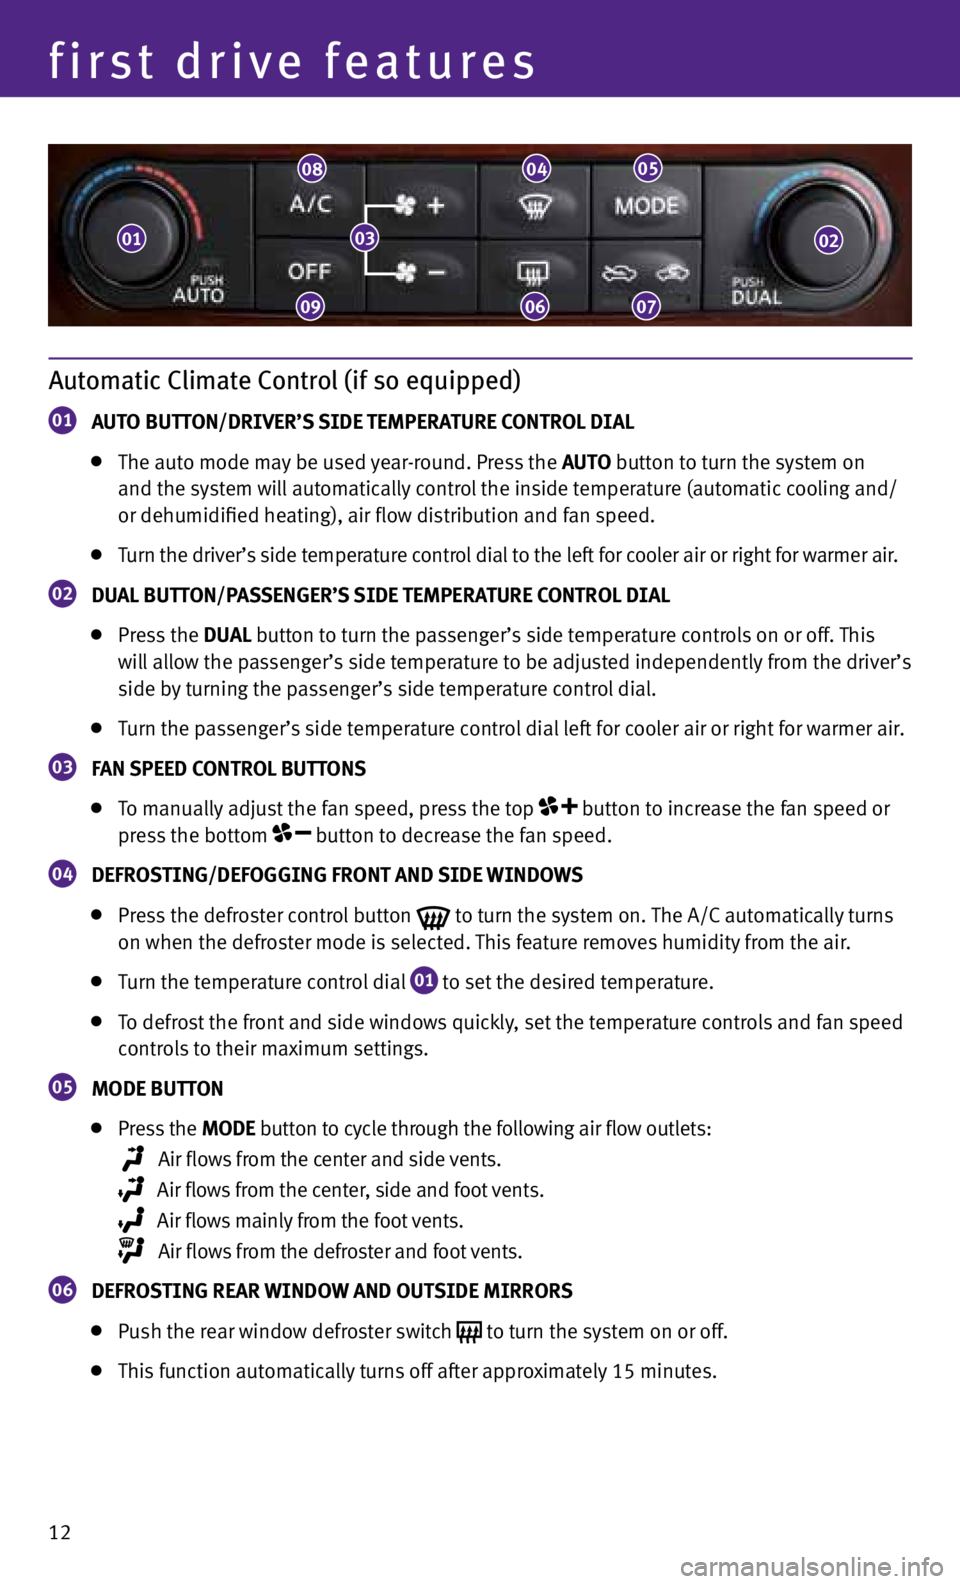
Automatic Climate Control (if so equipped)
01 AUTO BUTTON/DRIVER’S SIDE TEMPERATURE CONTROL DIAL
The auto mode may be used year-round. Press the AUTO button to turn the system on
and the system will automatically control the inside temperature (automatic cooling and/
or dehumidified heating), air flow distribution and fan speed.
Turn the driver’s side temperature control dial to the left for cooler air or right for warmer air.
02 DUAL BUTTON/PASSENGER’S SIDE TEMPERATURE CONTROL DIAL
Press the DUAL button to turn the passenger’s side temperature controls on or off. This
will allow the passenger’s side temperature to be adjusted independently from the driver’s
side by turning the passenger’s side temperature control dial.
Turn the passenger’s side temperature control dial left for cooler air or right for warmer air.
03 f
AN SPEED CONTROL BUTTONS
To manually adjust the fan speed, press the top button to increase the fan speed or
press the bottom button to decrease the fan speed.
04 DEfROSTING/DEfOGGING fRONT AND SIDE WINDOWS
Press the defroster control button
to turn the system on. The A/C automatically turns
on when the defroster mode is selected. This feature removes humidity from the air.
Turn the temperature control dial
01 to set the desired temperature.
To defrost the front and side windows quickly, set the temperature controls and fan speed
controls to their maximum settings.
05 MODE BUTTON
Press the MODE button
to cycle through the following air flow outlets:
Air flows from the center and side vents.
Air flows from the center, side and foot vents.
Air flows mainly from the foot vents.
Air flows from the defroster and foot vents.
06 DEfROSTING REAR WINDOW AND OUTSIDE MIRRORS
Push the rear window defroster switch to turn the system on or off.
This function automatically turns off after approximately 15 minutes.
010302
09
08
06
04
07
05
Page 28 of 30

24
system guide
07 INfO button – Press to display the fuel economy, tire pressure, maintenance, location, traffic
information (if so equipped) and weather information (if so equipped).
08 button – Press to switch between the day screen (bright) and the night screen (dark).
Press and hold to turn off the display. Press again to turn on the display.
09 ZOOM IN button – Press to zoom the map in.
10 MAP button – Press to display the map. While following a programmed route, press multiple
times to change the type of route information displayed.
11 SETTING button – Press to access the system settings.
12 BACK
button – Press to return to the previous screen. In a settings screen, this button is also
used to apply the setting. In a character input screen, this button is also used to delete the
characters that have been entered.
13 VOICE button – Press to hear the current guidance for a programmed route.
For more information, please refer to your Navigation System Owner’s Manual.
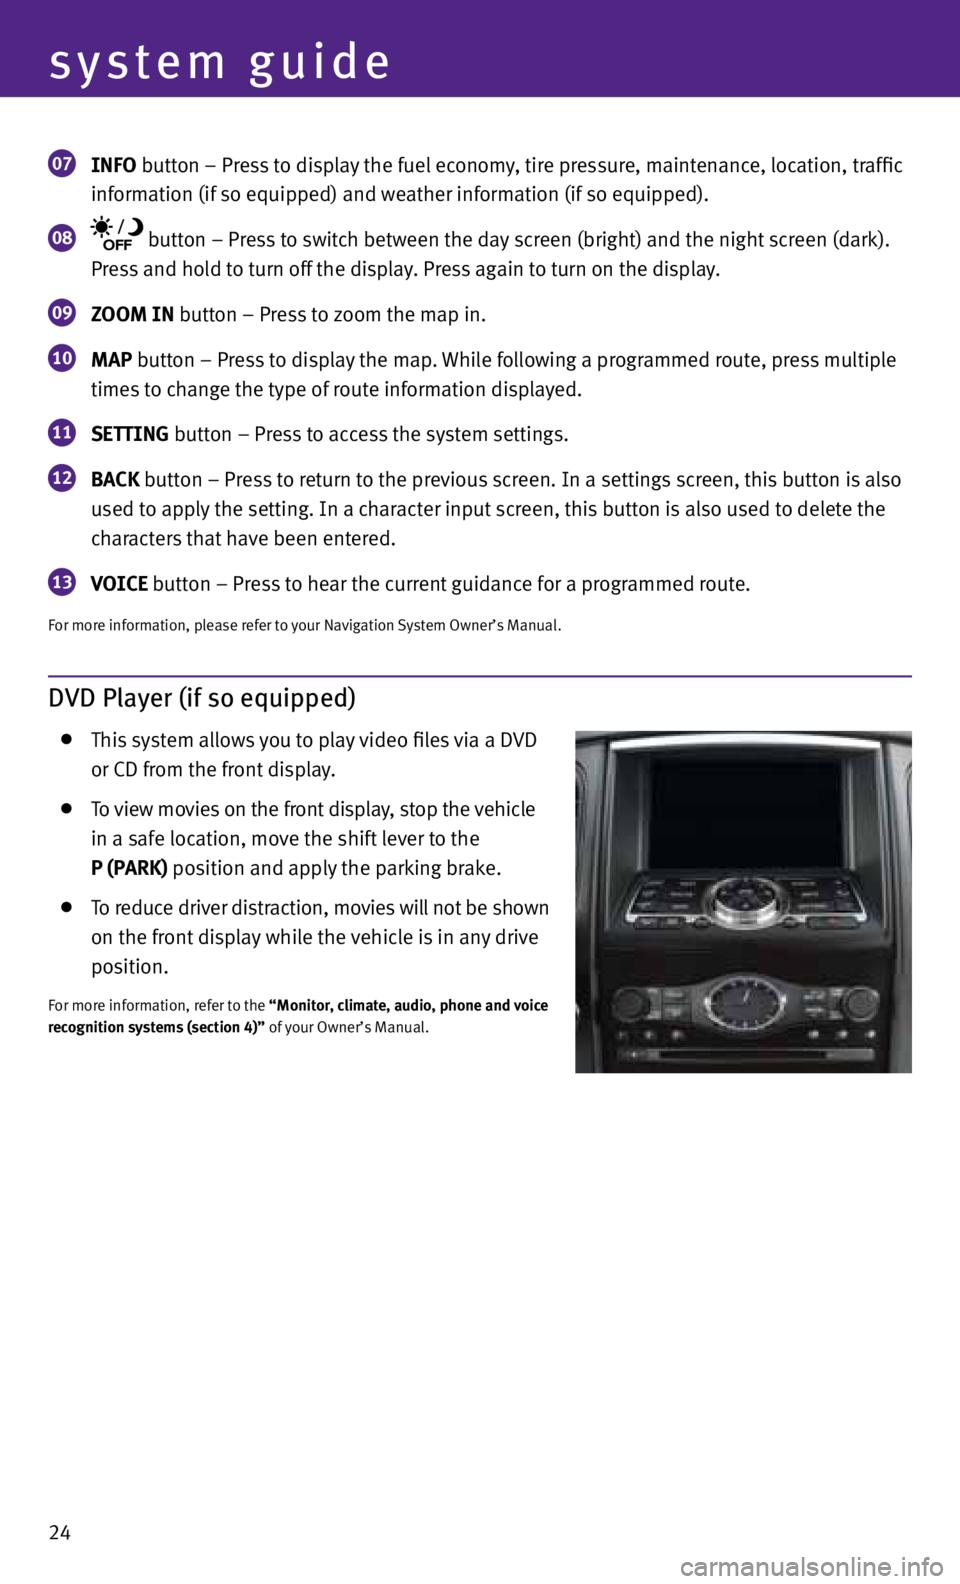
DVD Player (if so equipped)
This system allows you to play video files via a D vD
or CD from the front display.
To view movies on the front display, stop the vehicle
in a safe location, move the shift lever to the
P (PARK) position and apply the parking brake.
To reduce driver distraction, movies will not be shown
on the front display while the vehicle is in any drive
position.
For more information, refer to the “Monitor, climate, audio, phone and voice
recognition systems (section 4)” of your Owner’s Manual.