ECO mode INFINITI G-CONVERTIBLE 2012 User Guide
[x] Cancel search | Manufacturer: INFINITI, Model Year: 2012, Model line: G-CONVERTIBLE, Model: INFINITI G-CONVERTIBLE 2012Pages: 474, PDF Size: 3.63 MB
Page 113 of 474
2-42Instruments and controls
GUID-9DE74F81-9C19-41E3-AB2E-DD3D5F07169F
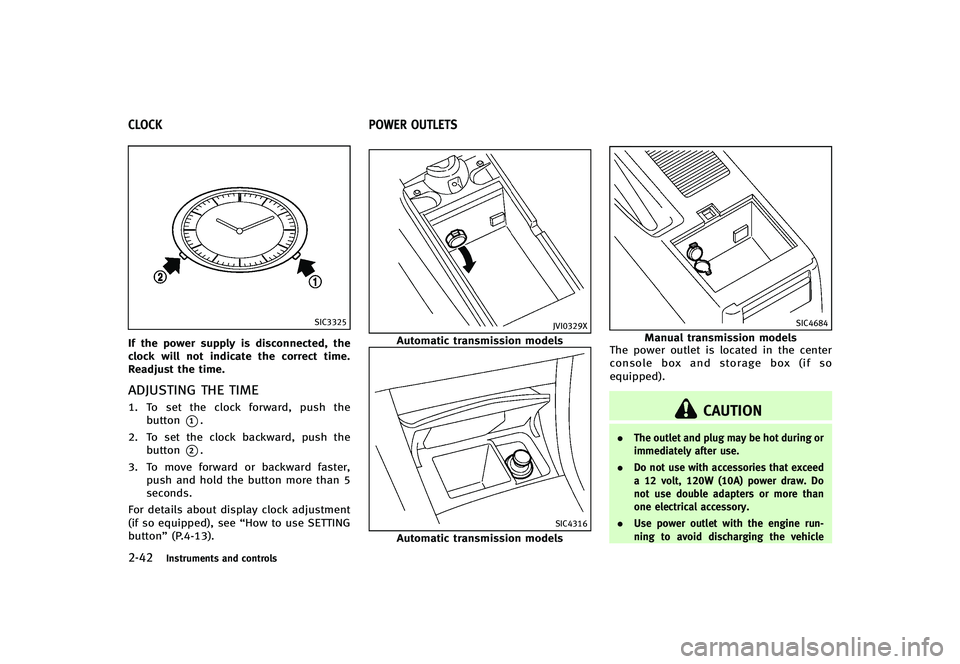
SIC3325
If the power supply is disconnected, the
clock will not indicate the correct time.
Readjust the time.
ADJUSTING THE TIMEGUID-C5B0D922-2F7A-4ABB-BC57-0E7C0351477C1.To set the clock forward, push the
button
*1.
2. To set the clock backward, push the button
*2.
3. To move forward or backward faster, push and hold the button more than 5
seconds.
For details about display clock adjustment
(if so equipped), see “How to use SETTING
button” (P.4-13).
GUID-CFC63CE6-3D5A-4EEA-A57E-D000A5F2D43D
JVI0329X
Automatic transmission models
SIC4316
Automatic transmission models
SIC4684
Manual transmission models
The power outlet is located in the center
console box and storage box (if so
equipped).
CAUTION
. The outlet and plug may be hot during or
immediately after use.
. Do not use with accessories that exceed
a 12 volt, 120W (10A) power draw. Do
not use double adapters or more than
one electrical accessory.
. Use power outlet with the engine run-
ning to avoid discharging the vehicle
CLOCK POWER OUTLETS
Page 125 of 474
2-54Instruments and controls
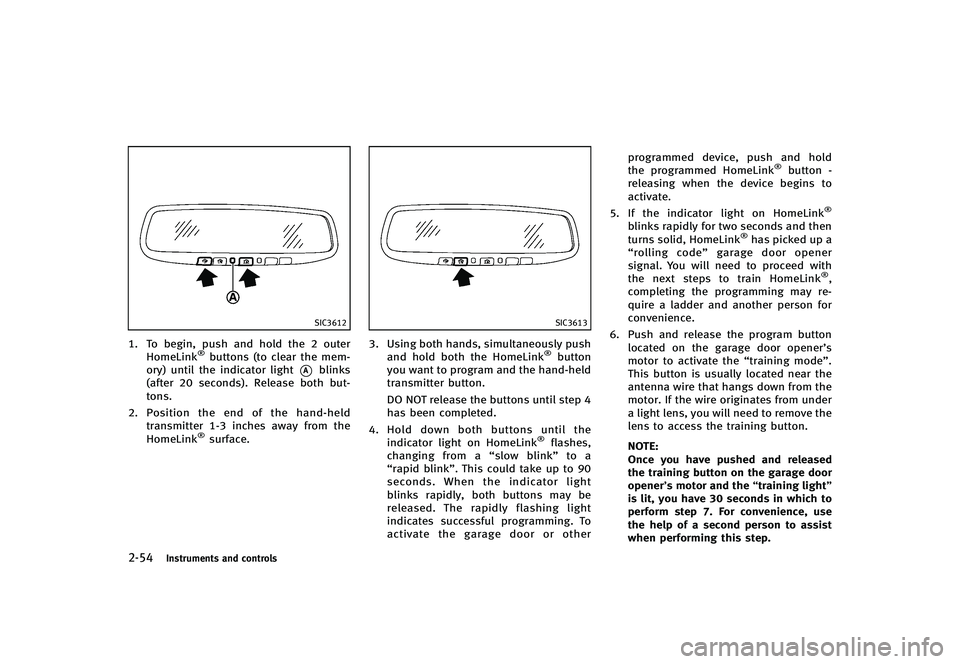
SIC3612
1. To begin, push and hold the 2 outerHomeLink®buttons (to clear the mem-
ory) until the indicator light
*Ablinks
(after 20 seconds). Release both but-
tons.
2. Position the end of the hand-held
transmitter 1-3 inches away from the
HomeLink
®surface.
SIC3613
3. Using both hands, simultaneously push
and hold both the HomeLink®button
you want to program and the hand-held
transmitter button.
DO NOT release the buttons until step 4
has been completed.
4. Hold down both buttons until the
indicator light on HomeLink
®flashes,
changing from a “slow blink”to a
“rapid blink”. This could take up to 90
seconds. When the indicator light
blinks rapidly, both buttons may be
released. The rapidly flashing light
indicates successful programming. To
activate the garage door or other programmed device, push and hold
the programmed HomeLink
®button -
releasing when the device begins to
activate.
5. If the indicator light on HomeLink
®
blinks rapidly for two seconds and then
turns solid, HomeLink®has picked up a
“rolling code” garage door opener
signal. You will need to proceed with
the next steps to train HomeLink
®,
completing the programming may re-
quire a ladder and another person for
convenience.
6. Push and release the program button located on the garage door opener’s
motor to activate the “training mode”.
This button is usually located near the
antenna wire that hangs down from the
motor. If the wire originates from under
a light lens, you will need to remove the
lens to access the training button.
NOTE:
Once you have pushed and released
the training button on the garage door
opener’s motor and the “training light”
is lit, you have 30 seconds in which to
perform step 7. For convenience, use
the help of a second person to assist
when performing this step.
Page 134 of 474
GUID-D1700013-773E-4812-BA0D-7B828402E838
WARNING
.Always have the doors locked while
driving. Along with the use of seat belts,
this provides greater safety in the event
of an accident by helping to prevent
persons from being thrown from the
vehicle. This also helps keep children
and others from unintentionally opening
the doors, and will help keep out
intruders.
. Before opening any door, always look for
and avoid oncoming traffic.
. Do not leave children unattended inside
the vehicle. They could unknowingly
activate switches or controls. Unat-
tended children could become involved
in serious accidents.
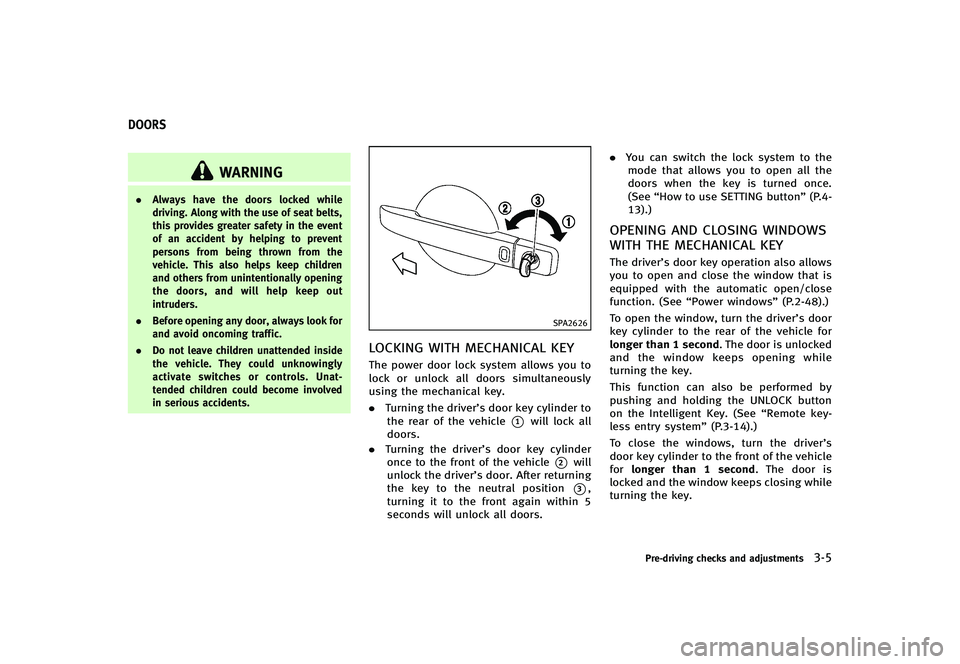
SPA2626
LOCKING WITH MECHANICAL KEYGUID-0664C43A-E4B3-44F4-8486-FA160F98A5F6The power door lock system allows you to
lock or unlock all doors simultaneously
using the mechanical key.
.Turning the driver’s door key cylinder to
the rear of the vehicle
*1will lock all
doors.
. Turning the driver’s door key cylinder
once to the front of the vehicle
*2will
unlock the driver’s door. After returning
the key to the neutral position
*3,
turning it to the front again within 5
seconds will unlock all doors. .
You can switch the lock system to the
mode that allows you to open all the
doors when the key is turned once.
(See “How to use SETTING button” (P.4-
13).)
OPENING AND CLOSING WINDOWS
WITH THE MECHANICAL KEY
GUID-611D6011-59D5-49AF-8BBF-7973BCE9D47FThe driver’s door key operation also allows
you to open and close the window that is
equipped with the automatic open/close
function. (See “Power windows” (P.2-48).)
To open the window, turn the driver’s door
key cylinder to the rear of the vehicle for
longer than 1 second. The door is unlocked
and the window keeps opening while
turning the key.
This function can also be performed by
pushing and holding the UNLOCK button
on the Intelligent Key. (See “Remote key-
less entry system” (P.3-14).)
To close the windows, turn the driver’s
door key cylinder to the front of the vehicle
for longer than 1 second. The door is
locked and the window keeps closing while
turning the key.
Pre-driving checks and adjustments3-5
DOORS
Page 142 of 474

TROUBLESHOOTING GUIDEGUID-29A7D79F-A173-46A6-B8DB-EC3F296650B3
SymptomPossible causeAction to take
When pushing the ignition switch
to stop the engine The SHIFT P warning appears on the display
and the inside warning chime sounds con-
tinuously (Automatic Transmission models).
The selector lever is not in the P (Park)
position.
Shift the selector lever to the P (Park)
position.
When shifting the selector lever
to the P (Park) position. The inside warning chime sounds continu-
ously. The ignition switch is in the ACC or ON
position.
Push the ignition switch to the OFF position.
When opening the driver’s door to
get out of the vehicle The inside warning chime sounds continu-
ously. The ignition switch is in the ACC
position.
Push the ignition switch to the OFF position.
The Intelligent Key is in the Intelligent
Key port. Remove the Intelligent Key from the Intel-
ligent Key port.
When closing the door after get-
ting out of the vehicle The NO KEY warning appears on the display,
the outside chime sounds 3 times and the
inside warning chime sounds for a few
seconds.
The ignition switch is in the ACC or ON
position.
Push the ignition switch to the OFF position.
The SHIFT P warning appears on the display
and the outside chime sounds continuously
(Automatic Transmission models). The ignition switch is in the ACC or OFF
position and the selector lever is not in
the P (Park) position.Move the selector lever to the P (Park)
position and push the ignition switch to the
OFF position.
When closing the door with the
inside lock knob turned to LOCK The outside chime sounds for a few seconds
and all the doors unlock. The Intelligent Key is inside the vehicle
or trunk.
Carry the Intelligent Key with you.
When pushing the request switch
or LOCK
button on the
Intelligent key to lock the door The outside chime sounds for a few seconds. The Intelligent Key is inside the vehicle
or trunk.
Carry the Intelligent Key with you.
A door is not closed securely. Close the door securely.
When closing the trunk lid The outside chime sounds for approximately
10 seconds and the trunk lid opens.
The Intelligent Key is inside the trunk.
Carry the Intelligent Key with you.
Pre-driving checks and adjustments3-13
Page 145 of 474
3-16Pre-driving checks and adjustments
.Any of the buttons on the IntelligentKey is pushed. (Note: Panic button
should be pushed for more than 1
second.)
Setting hazard indicator and horn
mode
GUID-0CFF9053-692A-4ACD-A1D7-5A51BAC082A9This vehicle is set in hazard indicator and
horn mode when you first receive the
vehicle.
In hazard indicator and horn mode, when
the LOCK
button*1is pushed, the
hazard indicator flashes twice and the horn
chirps once. When the UNLOCK
button
*2is pushed, the hazard indicator flashes
once.
If horns are not necessary, the system can
be switched to the hazard indicator mode.
In hazard indicator mode, when the LOCK
button is pushed, the hazard indicator
flashes twice. When the UNLOCK
button is pushed, neither the hazard
indicator nor the horn operates.
Page 146 of 474
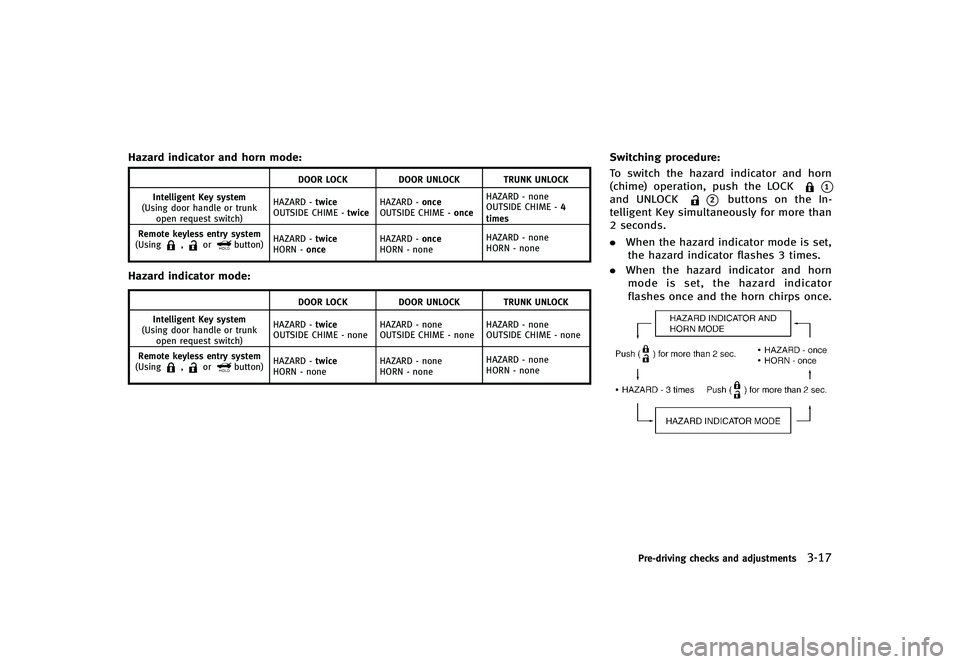
Hazard indicator and horn mode:GUID-D73A39BF-43C8-459F-9C24-47B7F579C407
DOOR LOCKDOOR UNLOCK TRUNK UNLOCK
Intelligent Key system
(Using door handle or trunk open request switch) HAZARD -
twice
OUTSIDE CHIME - twiceHAZARD -
once
OUTSIDE CHIME - onceHAZARD - none
OUTSIDE CHIME -
4
times
Remote keyless entry system
(Using
,orbutton) HAZARD -
twice
HORN - once HAZARD -
once
HORN - none HAZARD - none
HORN - none
Hazard indicator mode:GUID-D73A39BF-43C8-459F-9C24-47B7F579C407
DOOR LOCK
DOOR UNLOCK TRUNK UNLOCK
Intelligent Key system
(Using door handle or trunk open request switch) HAZARD -
twice
OUTSIDE CHIME - none HAZARD - none
OUTSIDE CHIME - noneHAZARD - none
OUTSIDE CHIME - none
Remote keyless entry system
(Using
,orbutton) HAZARD -
twice
HORN - none HAZARD - none
HORN - noneHAZARD - none
HORN - none
Switching procedure:GUID-D73A39BF-43C8-459F-9C24-47B7F579C407To switch the hazard indicator and horn
(chime) operation, push the LOCK
*1and UNLOCK*2buttons on the In-
telligent Key simultaneously for more than
2 seconds.
. When the hazard indicator mode is set,
the hazard indicator flashes 3 times.
. When the hazard indicator and horn
mode is set, the hazard indicator
flashes once and the horn chirps once.
NOS1695
Pre-driving checks and adjustments3-17
Page 155 of 474

3-26Pre-driving checks and adjustments
SPA2585
OPERATING THE RETRACTABLE
HARD TOP USING THE INTELLIGENT
KEY
GUID-A0DE8899-3DF3-45B2-A6C5-9519F49D38D6The retractable hard top can be opened
using the request switch. This operation
cannot close the retractable hard top.
Opening the retractable hard topGUID-BC7D5D2B-676D-4BAD-8CFA-28F6309B1782Carry the Intelligent Key with you. Push the
door handle request switch (driver’s or
passenger’s)
*Aand hold it until the
retractable hard top is fully open.
INITIALIZING OF THE RETRACTABLE
HARD TOP
GUID-119B8CC0-225F-4511-9D87-766E112DE7AFAfter replacing the battery or when repeat-
ing open and close operations without fully
opening or closing the retractable hard
top, the retractable hard top may not
operate normally.
If this situation occurs, perform initializa-
tion of the retractable hard top according
to the following procedures.
1. Start the engine.
2. Push the OPEN side of the retractable hard top operating switch and hold it.
3. Release the OPEN side of the retract- able hard top operating switch when
the beep sounds once. The initialization
of the retractable hard top is complete.
If the beep sounds twice when releasing
the OPEN side of the retractable hard top
operating switch during the initialization,
repeat the procedures from step 2.
CAUTION
After the initialization, if the retractable
hard top does not operate normally, im-
mediately contact INFINITI retailer for an inspection.
NOTE:
The following functions do not operate
normally when the initialization of the
retractable hard top is not complete.
.
The retractable hard top does not open
or close when pushing the OPEN side
of the retractable hard top operating
switch. (Only the rear parcel shelf
operates.)
. The retractable hard top indicator does
not appear on the dot matrix liquid
crystal display.
. The air conditioner airflow is fixed at
the level when the retractable hard top
is being closed.
. The audio volume is fixed at the level
when the retractable hard top is being
closed.
. For the models with the navigation
system, the Voice Recognition function
(VR) is not operative.
Page 168 of 474
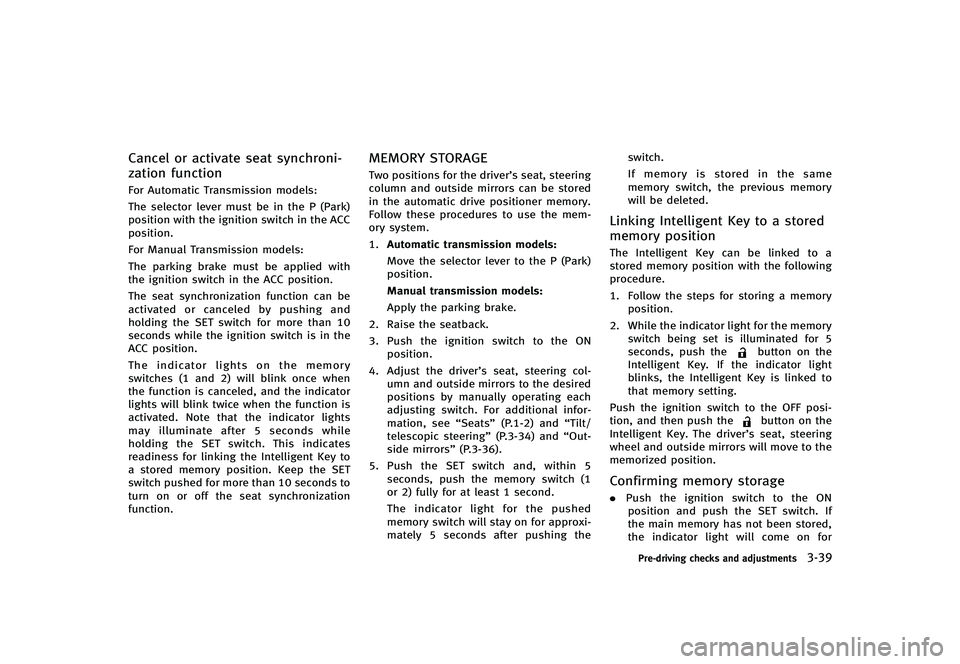
Cancel or activate seat synchroni-
zation function
GUID-8DECD39E-AC7D-4729-ACFB-A937B6048CF2For Automatic Transmission models:
The selector lever must be in the P (Park)
position with the ignition switch in the ACC
position.
For Manual Transmission models:
The parking brake must be applied with
the ignition switch in the ACC position.
The seat synchronization function can be
activated or canceled by pushing and
holding the SET switch for more than 10
seconds while the ignition switch is in the
ACC position.
The indicator lights on the memory
switches (1 and 2) will blink once when
the function is canceled, and the indicator
lights will blink twice when the function is
activated. Note that the indicator lights
may illuminate after 5 seconds while
holding the SET switch. This indicates
readiness for linking the Intelligent Key to
a stored memory position. Keep the SET
switch pushed for more than 10 seconds to
turn on or off the seat synchronization
function.
MEMORY STORAGEGUID-476C2856-A4A1-4174-8516-4637D097B016Two positions for the driver’s seat, steering
column and outside mirrors can be stored
in the automatic drive positioner memory.
Follow these procedures to use the mem-
ory system.
1.Automatic transmission models:
Move the selector lever to the P (Park)
position.
Manual transmission models:
Apply the parking brake.
2. Raise the seatback.
3. Push the ignition switch to the ON position.
4. Adjust the driver’s seat, steering col- umn and outside mirrors to the desired
positions by manually operating each
adjusting switch. For additional infor-
mation, see “Seats”(P.1-2) and “Tilt/
telescopic steering” (P.3-34) and“Out-
side mirrors” (P.3-36).
5. Push the SET switch and, within 5
seconds, push the memory switch (1
or 2) fully for at least 1 second.
The indicator light for the pushed
memory switch will stay on for approxi-
mately 5 seconds after pushing the switch.
If memory is stored in the same
memory switch, the previous memory
will be deleted.
Linking Intelligent Key to a stored
memory position
GUID-B42750B2-32B8-4F63-911A-31754F14E4C8The Intelligent Key can be linked to a
stored memory position with the following
procedure.
1. Follow the steps for storing a memory
position.
2. While the indicator light for the memory switch being set is illuminated for 5
seconds, push the
button on the
Intelligent Key. If the indicator light
blinks, the Intelligent Key is linked to
that memory setting.
Push the ignition switch to the OFF posi-
tion, and then push the
button on the
Intelligent Key. The driver’s seat, steering
wheel and outside mirrors will move to the
memorized position.
Confirming memory storageGUID-6E1221EC-C865-4145-BB90-6DE497A8E201. Push the ignition switch to the ON
position and push the SET switch. If
the main memory has not been stored,
the indicator light will come on for
Pre-driving checks and adjustments3-39
Page 169 of 474
3-40Pre-driving checks and adjustments
approximately 0.5 second. When the
memory has stored in position, the
indicator light will stay on for approxi-
mately 5 seconds.
. If the battery cable is disconnected, or if
the fuse opens, the memory will be
canceled. In this case, reset the desired
position using the previous procedure.
. If optional Intelligent Keys are added to
your vehicle, the memory storage pro-
cedure to switch 1 or 2 and linking
Intelligent Key procedure to a stored
memory position should be performed
again for each Intelligent Key. For
additional Intelligent Key information,
see “Keys” (P.3-3).
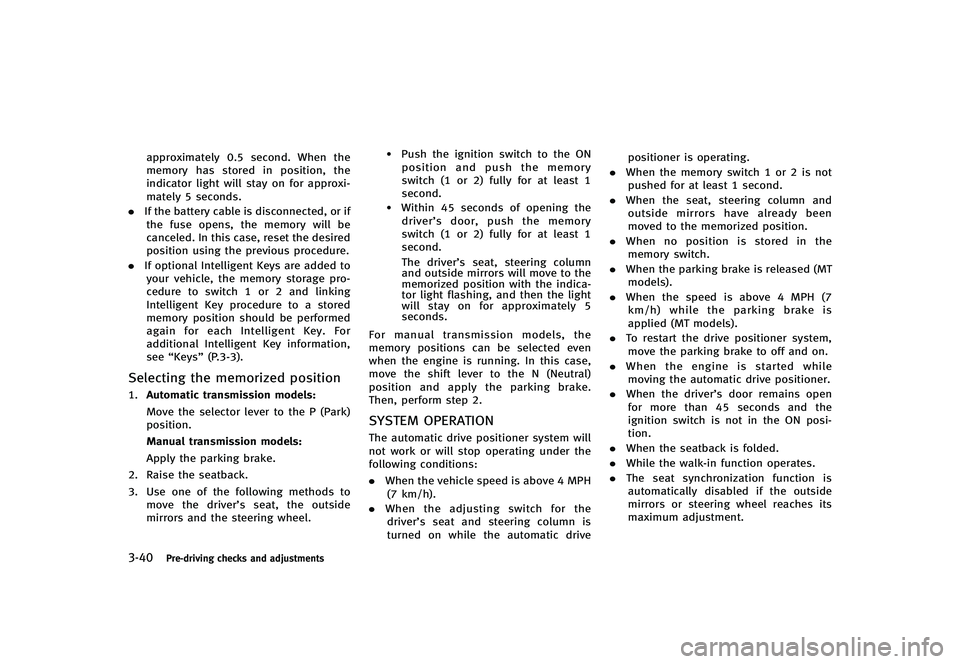
Selecting the memorized positionGUID-B4225C04-5594-4362-9498-D7E86BCA5C7E1.Automatic transmission models:
Move the selector lever to the P (Park)
position.
Manual transmission models:
Apply the parking brake.
2. Raise the seatback.
3. Use one of the following methods to move the driver’s seat, the outside
mirrors and the steering wheel.
.Push the ignition switch to the ONposition and push the memory
switch (1 or 2) fully for at least 1
second.
.Within 45 seconds of opening the
driver’s door, push the memory
switch (1 or 2) fully for at least 1
second.
The driver’s seat, steering column
and outside mirrors will move to the
memorized position with the indica-
tor light flashing, and then the light
will stay on for approximately 5
seconds.
For manual transmission models, the
memory positions can be selected even
when the engine is running. In this case,
move the shift lever to the N (Neutral)
position and apply the parking brake.
Then, perform step 2.
SYSTEM OPERATIONGUID-3F1DB0D1-D958-41C0-A873-328B8F9FBECBThe automatic drive positioner system will
not work or will stop operating under the
following conditions:
. When the vehicle speed is above 4 MPH
(7 km/h).
. When the adjusting switch for the
driver’s seat and steering column is
turned on while the automatic drive positioner is operating.
. When the memory switch 1 or 2 is not
pushed for at least 1 second.
. When the seat, steering column and
outside mirrors have already been
moved to the memorized position.
. When no position is stored in the
memory switch.
. When the parking brake is released (MT
models).
. When the speed is above 4 MPH (7
km/h) while the parking brake is
applied (MT models).
. To restart the drive positioner system,
move the parking brake to off and on.
. When the engine is started while
moving the automatic drive positioner.
. When the driver’s door remains open
for more than 45 seconds and the
ignition switch is not in the ON posi-
tion.
. When the seatback is folded.
. While the walk-in function operates.
. The seat synchronization function is
automatically disabled if the outside
mirrors or steering wheel reaches its
maximum adjustment.
Page 172 of 474
4 Monitor, climate, audio, phone and voice recogni-tion systems
Safety note ...
.......................................................... 4-3
Center multi-function control panel ...
...................... 4-3
How to use INFINITI controller ...
.......................... 4-5
How to use touch screen (models with
navigation system) ...
.......................................... 4-5
Menu options (models with
navigation system) ...
.......................................... 4-7
How to select menus on the screen ...
................. 4-8
Vehicle information and settings ...
.......................... 4-9
How to use STATUS button ...
.............................. 4-9
How to use brightness control and display
on/off button ...
.................................................. 4-9
How to use INFO button ...
.................................. 4-9
How to use SETTING button ...
........................... 4-13
Rearview monitor ...
............................................... 4-23
How to read displayed lines ...
.......................... 4-23
How to park with predicted course lines ...
........ 4-24
Difference between predicted and
actual distances ...
............................................ 4-25
Predictive course line settings ...
....................... 4-28
How to adjust screen ...
.................................... 4-28
Operating tips ...
............................................... 4-29
Ventilators ...
......................................................... 4-29
Automatic climate control ...
.................................. 4-30
Automatic climate control (Type A) ...
................. 4-31 Automatic climate control (Type B)
...
............... 4-34
Operating tips ...
.............................................. 4-38
In-cabin microfilter ...
....................................... 4-38
Servicing climate control ...
.............................. 4-39
Audio system ...
.................................................... 4-39
Audio operation precautions ...
........................ 4-39
FM-AM-SAT radio with Compact Disc
(CD) player ...
................................................... 4-53
DVD (Digital Versatile Disc) player operation
(models with navigation system) ...
.................. 4-58
USB input operation ...
.................................... 4-61
Bluetooth
®streaming audio (models with
navigation system) ...
....................................... 4-66
iPod
®player operation ...
................................ 4-71
Music Box®(if so equipped) ...
........................ 4-73
CD/DVD/USB memory care and cleaning ...
...... 4-80
Steering-wheel-mounted controls
for audio ...
..................................................... 4-81
Antenna ...
....................................................... 4-83
Car phone or CB radio ...
...................................... 4-83
Bluetooth
®Hands-Free Phone System
(models with navigation system) ...
....................... 4-84
Regulatory information ...
................................. 4-85
Voice commands ...
.......................................... 4-86
Control buttons ...
............................................ 4-86