window INFINITI G-CONVERTIBLE 2012 User Guide
[x] Cancel search | Manufacturer: INFINITI, Model Year: 2012, Model line: G-CONVERTIBLE, Model: INFINITI G-CONVERTIBLE 2012Pages: 474, PDF Size: 3.63 MB
Page 99 of 474
2-28Instruments and controls
SIC2045
How to arm the vehicle security
system
GUID-CE9139D0-6229-4D12-B5B7-B83BCD0085811. Close all windows.The system can be armed even if the
windows are open.
2. Push the ignition switch to the OFF position.
3. Remove the Intelligent Key from the vehicle.
4. Close all doors, hood and trunk. Lock all doors. The doors can be locked with
the Intelligent Key, door handle request
switch, power door lock switch or
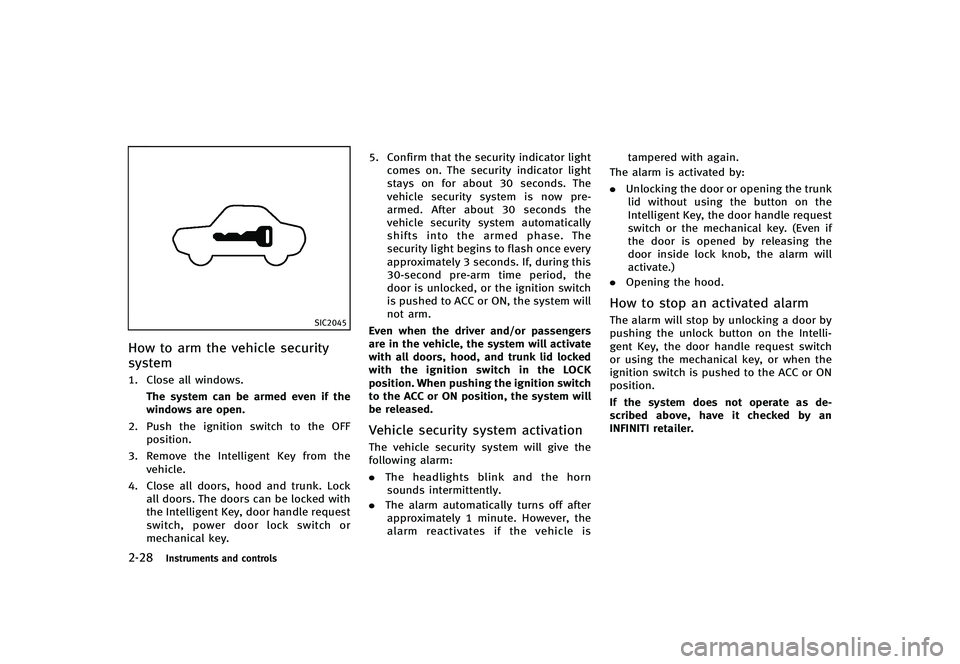
mechanical key. 5. Confirm that the security indicator light
comes on. The security indicator light
stays on for about 30 seconds. The
vehicle security system is now pre-
armed. After about 30 seconds the
vehicle security system automatically
shifts into the armed phase. The
security light begins to flash once every
approximately 3 seconds. If, during this
30-second pre-arm time period, the
door is unlocked, or the ignition switch
is pushed to ACC or ON, the system will
not arm.
Even when the driver and/or passengers
are in the vehicle, the system will activate
with all doors, hood, and trunk lid locked
with the ignition switch in the LOCK
position. When pushing the ignition switch
to the ACC or ON position, the system will
be released.
Vehicle security system activationGUID-54D57BB8-9F18-4163-B041-408144181E15The vehicle security system will give the
following alarm:
. The headlights blink and the horn
sounds intermittently.
. The alarm automatically turns off after
approximately 1 minute. However, the
alarm reactivates if the vehicle is tampered with again.
The alarm is activated by:
. Unlocking the door or opening the trunk
lid without using the button on the
Intelligent Key, the door handle request
switch or the mechanical key. (Even if
the door is opened by releasing the
door inside lock knob, the alarm will
activate.)
. Opening the hood.
How to stop an activated alarmGUID-C1AF44C3-20AE-4AC5-8638-2FC58DC203BFThe alarm will stop by unlocking a door by
pushing the unlock button on the Intelli-
gent Key, the door handle request switch
or using the mechanical key, or when the
ignition switch is pushed to the ACC or ON
position.
If the system does not operate as de-
scribed above, have it checked by an
INFINITI retailer.
Page 101 of 474
2-30Instruments and controls
If the light still remains on and/or the
engine will not start, see an INFINITI
retailer for INFINITI Vehicle Immobilizer
System service as soon as possible.
Please bring all Intelligent Keys that you
have when visiting an INFINITI retailer for
service.
GUID-9B125A7C-7968-427F-9120-D836A73D7D8C
WARNING
In freezing temperatures the washer solu-
tion may freeze on the windshield and
obscure your vision which may lead to an
accident. Warm windshield with the defros-
ter before you wash the windshield.
CAUTION
.Do not operate the washer continuously
for more than 30 seconds.
. Do not operate the washer if the
reservoir tank is empty.
. Do not fill the window washer reservoir
tank with washer fluid concentrates at
full strength. Some methyl alcohol
based washer fluid concentrates may
permanently stain the grille if spilled
while filling the window washer reser-
voir tank.
. Pre-mix washer fluid concentrates with
water to the manufacturer’s recom-
mended levels before pouring the fluid
into the window washer reservoir tank.
Do not use the window washer reservoir tank to mix the washer fluid concentrate
and water.
WINDSHIELD WIPER AND WASHER SWITCH
Page 104 of 474
GUID-7DBA5951-7A07-431B-9E38-2EEF2D178DF7
SIC3239
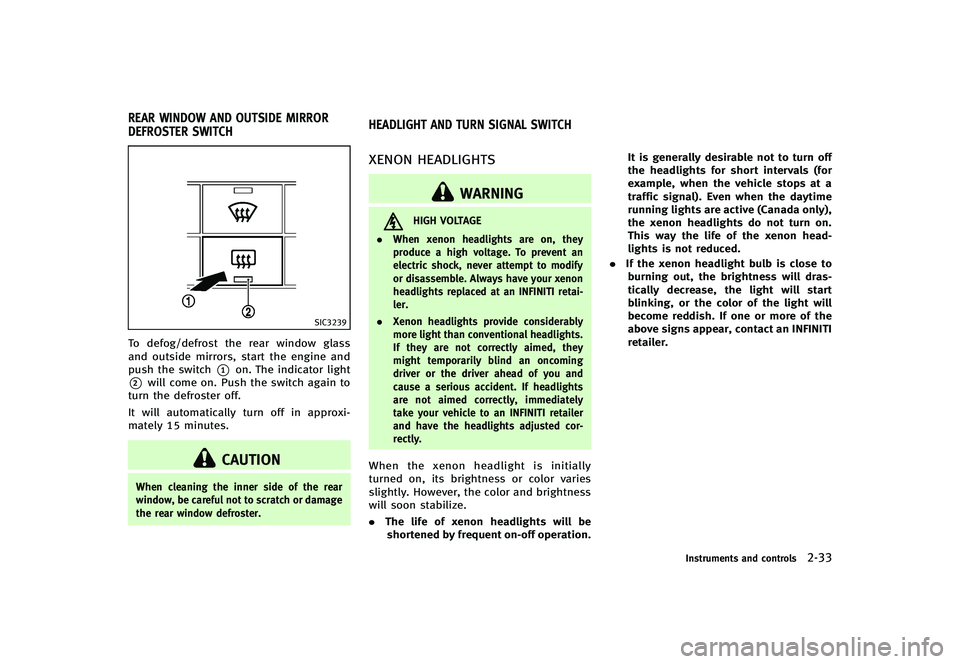
To defog/defrost the rear window glass
and outside mirrors, start the engine and
push the switch
*1on. The indicator light
*2will come on. Push the switch again to
turn the defroster off.
It will automatically turn off in approxi-
mately 15 minutes.
CAUTION
When cleaning the inner side of the rear
window, be careful not to scratch or damage
the rear window defroster.
GUID-B880B927-0D4A-4166-BD8D-A23B5CA4EDFD
XENON HEADLIGHTSGUID-B40150F6-DD79-4915-B6F1-208ABCF3DCF8
WARNING
HIGH VOLTAGE
. When xenon headlights are on, they
produce a high voltage. To prevent an
electric shock, never attempt to modify
or disassemble. Always have your xenon
headlights replaced at an INFINITI retai-
ler.
. Xenon headlights provide considerably
more light than conventional headlights.
If they are not correctly aimed, they
might temporarily blind an oncoming
driver or the driver ahead of you and
cause a serious accident. If headlights
are not aimed correctly, immediately
take your vehicle to an INFINITI retailer
and have the headlights adjusted cor-
rectly.
When the xenon headlight is initially
turned on, its brightness or color varies
slightly. However, the color and brightness
will soon stabilize.
.The life of xenon headlights will be
shortened by frequent on-off operation. It is generally desirable not to turn off
the headlights for short intervals (for
example, when the vehicle stops at a
traffic signal). Even when the daytime
running lights are active (Canada only),
the xenon headlights do not turn on.
This way the life of the xenon head-
lights is not reduced.
. If the xenon headlight bulb is close to
burning out, the brightness will dras-
tically decrease, the light will start
blinking, or the color of the light will
become reddish. If one or more of the
above signs appear, contact an INFINITI
retailer.
Instruments and controls2-33
REAR WINDOW AND OUTSIDE MIRROR
DEFROSTER SWITCH HEADLIGHT AND TURN SIGNAL SWITCH
Page 114 of 474
battery.
. Avoid using power outlet when the air
conditioner, headlights or rear window
defroster is on.
. This power outlet is not designed for use
with a cigarette lighter unit.
. Push the plug in as far as it will go. If
good contact is not made, the plug may
overheat or the internal temperature
fuse may blow.
. Before inserting or disconnecting a plug,
be sure the electrical accessory being
used is turned OFF.
. When not in use, be sure to close the
cap. Do not allow water to contact the
outlet.
GUID-C44CB010-7D5B-48D7-9616-ECB2CBA7FC29
SIC3219
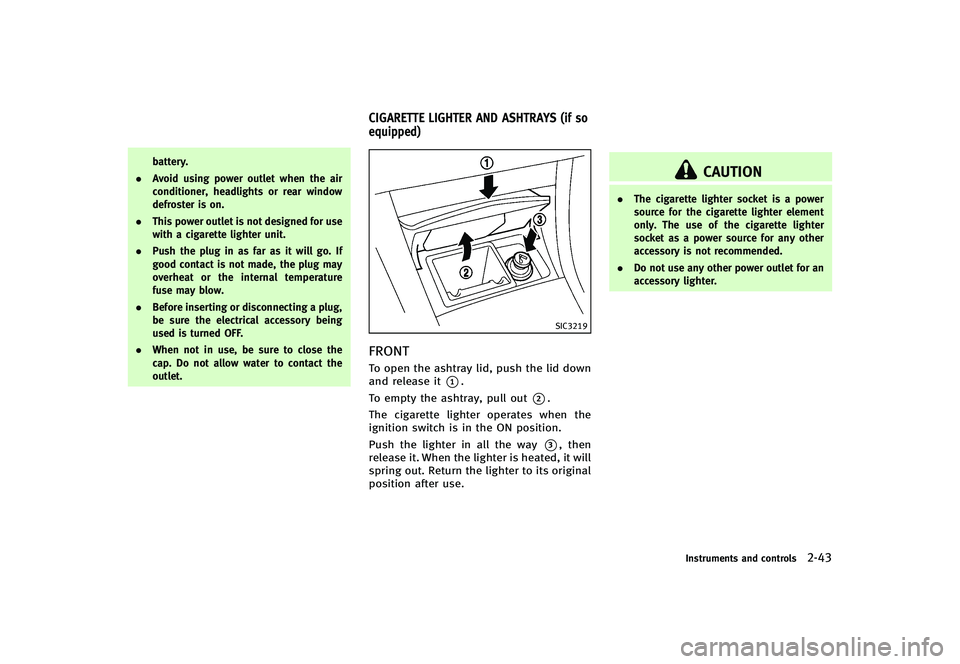
FRONTGUID-AE280F34-4FD9-4712-BE62-1AA5219B76FDTo open the ashtray lid, push the lid down
and release it
*1.
To empty the ashtray, pull out
*2.
The cigarette lighter operates when the
ignition switch is in the ON position.
Push the lighter in all the way
*3, then
release it. When the lighter is heated, it will
spring out. Return the lighter to its original
position after use.
CAUTION
. The cigarette lighter socket is a power
source for the cigarette lighter element
only. The use of the cigarette lighter
socket as a power source for any other
accessory is not recommended.
. Do not use any other power outlet for an
accessory lighter.
Instruments and controls2-43
CIGARETTE LIGHTER AND ASHTRAYS (if so
equipped)
Page 119 of 474
2-48Instruments and controls
GUID-EBB66581-7986-4619-9A20-CC742608F014
POWER WINDOWSGUID-54BA5557-B313-41DB-90B2-0F6E374F28AA
WARNING
.Make sure that all passengers have their
hands, etc. inside the vehicle while it is
in motion and before closing the win-
dows. Use the window lock switch to
prevent unexpected use of the power
windows.
. Do not leave children unattended inside
the vehicle. They could unknowingly
activate switches or controls and be-
come trapped in the window. Unat-
tended children could become involved
in serious accidents.
The power windows operate when the
ignition switch is in the ON position or for
about 45 seconds after the ignition switch
is pushed to the OFF position. If the
driver’s or front passenger’s door is
opened during this period of about 45
seconds, power to the windows is can-
celed.
SIC3279
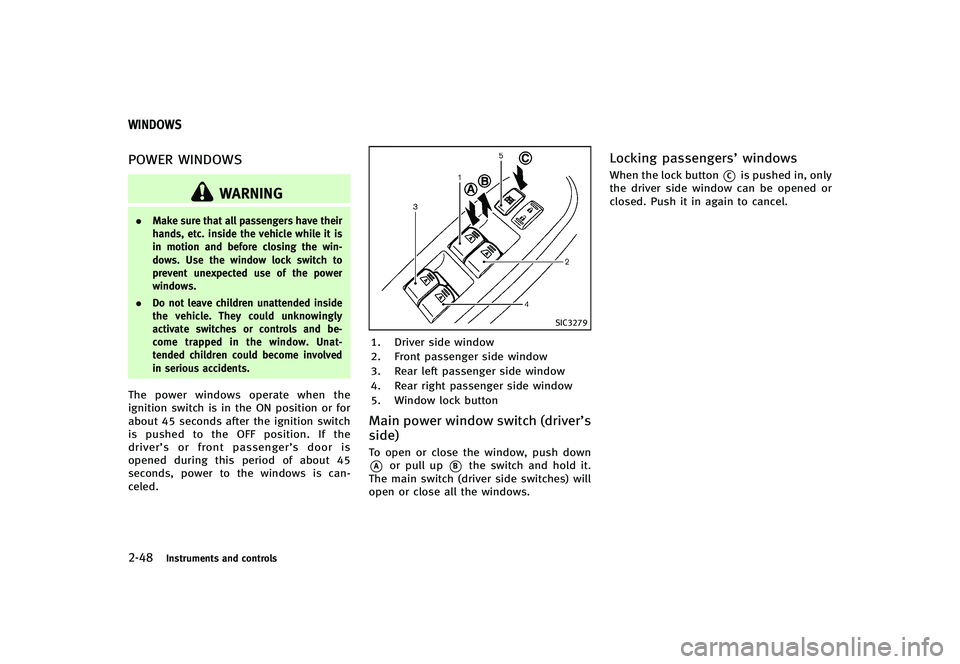
1. Driver side window
2. Front passenger side window
3. Rear left passenger side window
4. Rear right passenger side window
5. Window lock button
Main power window switch (driver’s
side)
GUID-BD751051-1BA6-452D-8836-F9E9453278F8To open or close the window, push down
*Aor pull up*Bthe switch and hold it.
The main switch (driver side switches) will
open or close all the windows.
Locking passengers’ windowsGUID-9220575D-E1D3-4634-88C4-8B7CA4D6F2DDWhen the lock button*Cis pushed in, only
the driver side window can be opened or
closed. Push it in again to cancel.
WINDOWS
Page 120 of 474
SIC3241
Passenger side power window
switch
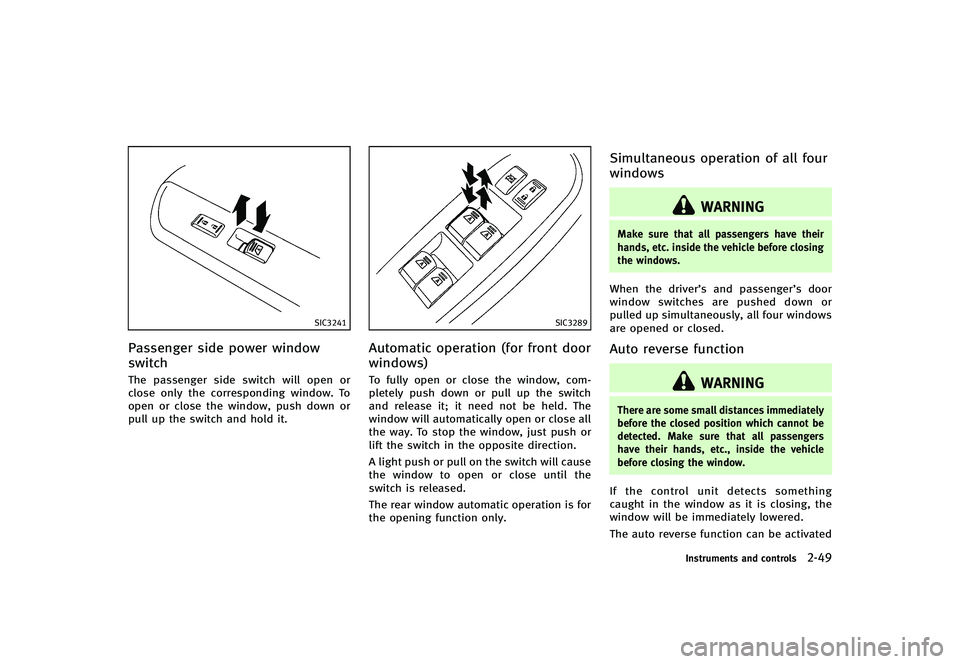
GUID-615CB3E4-0D32-4353-A938-921B374FFA70The passenger side switch will open or
close only the corresponding window. To
open or close the window, push down or
pull up the switch and hold it.
SIC3289
Automatic operation (for front door
windows)
GUID-7673A5D8-462F-4988-A8F4-4875A54F367FTo fully open or close the window, com-
pletely push down or pull up the switch
and release it; it need not be held. The
window will automatically open or close all
the way. To stop the window, just push or
lift the switch in the opposite direction.
A light push or pull on the switch will cause
the window to open or close until the
switch is released.
The rear window automatic operation is for
the opening function only.
Simultaneous operation of all four
windows
GUID-FA6C7C9F-AD5D-41C5-900C-30DEC8C4A209
WARNING
Make sure that all passengers have their
hands, etc. inside the vehicle before closing
the windows.
When the driver’s and passenger’s door
window switches are pushed down or
pulled up simultaneously, all four windows
are opened or closed.
Auto reverse functionGUID-0B4A3267-C122-477F-8069-1C68D02BC904
WARNING
There are some small distances immediately
before the closed position which cannot be
detected. Make sure that all passengers
have their hands, etc., inside the vehicle
before closing the window.
If the control unit detects something
caught in the window as it is closing, the
window will be immediately lowered.
The auto reverse function can be activated
Instruments and controls2-49
Page 121 of 474
2-50Instruments and controls
when the window is closed by automatic
operation when the ignition switch is in the
ON position or for 45 seconds after the
ignition switch is pushed to the OFF
position.
Depending on the environment or driving
conditions, the auto reverse function may
be activated if an impact or load similar to
something being caught in the window
occurs.
Automatic adjusting functionGUID-2870CF42-5EEE-4B1A-8161-CB27BD2B51B1
CAUTION
When the battery cable is removed from the
battery terminal, do not close either of the
front doors. The automatic window adjust-
ing function will not work and the side roof
panel may be damaged.
The power window has an automatic
adjusting function. When the door is being
opened, the window is automatically low-
ered slightly to avoid contact between the
window and the side roof panel. When the
door is closed, the window is automatically
raised slightly.While the automatic adjusting function
does not work, the window will be con-
trolled as follows:
.
When the door is opened, the window
lowers for approximately 0.39 in (10
mm).
. While the door is open, the window
cannot be raised.
If the windows do not close auto-
matically
GUID-2B39C66B-9E36-4EAF-A06B-B44AC3E7ED05If the power window automatic function
(closing only) does not operate properly,
perform the following procedure to initi-
alize the power window system.
1. Push the ignition switch to the ON position.
2. Close the door and hard top.
3. Open the window completely by oper- ating the power window switch.
4. Pull the power window switch and hold it to close the window, and then hold
the switch more than 3 seconds after
the window is closed completely.
5. Release the power window switch.
Operate the window by the automatic
function to confirm the initialization is
complete. 6. Perform steps 2 through 5 above for
other windows.
If the power window automatic function
does not operate properly after performing
the procedure above, have your vehicle
checked by an INFINITI retailer.
Automatic window loweringGUID-EA8FCE69-4B01-4A98-ADAB-1A5BFE61D3BBWhen the retractable hard top operating
switch is pressed, the power windows will
automatically be lowered completely. The
windows do not rise automatically after the
retractable hard top operation is com-
pleted. Use the power window switches
to raise them.
Page 130 of 474
3 Pre-driving checks and adjustments
Keys...
.................................................................... 3-3
Intelligent Key ...
................................................. 3-3
Valet hand-off ...
.................................................. 3-4
Doors ...
.................................................................. 3-5
Locking with mechanical key ...
........................... 3-5
Opening and closing windows with the
mechanical key ...
................................................ 3-5
Locking with inside lock knob ...
......................... 3-6
Locking with power door lock switch ...
............... 3-6
Automatic door locks ...
....................................... 3-6
Intelligent Key system ...
......................................... 3-7
Intelligent key operating range ...
........................ 3-9
Door locks/unlocks precaution ...
........................ 3-9
Intelligent Key operation ...
............................... 3-10
Battery saver system ...
..................................... 3-12
Warning signals ...
............................................. 3-12
Troubleshooting guide ...
................................... 3-13
Remote keyless entry system ...
............................. 3-14
How to use remote keyless entry system ...
....... 3-14
Hood ...
................................................................. 3-18
Retractable hard top ...
.......................................... 3-19
Before operating the retractable hard top ...
...... 3-19
When operating the retractable hard top ...
....... 3-21
Indicators for the retractable hard top ...
........... 3-23
Opening the retractable hard top ...
.................. 3-24 Closing the retractable hard top
...
.................. 3-25
If the retractable hard top does not open or
close electrically ...
.......................................... 3-25
Operating the retractable hard top using the
intelligent key ...
.............................................. 3-26
Initializing of the retractable hard top ...
.......... 3-26
Troubleshooting guide ...
................................. 3-27
Trunk lid ...
........................................................... 3-29
Trunk lid release switch ...
............................... 3-29
Trunk open request switch ...
........................... 3-29
Auto closure ...
................................................ 3-30
Trunk release power cancel switch ...
............... 3-30
Interior trunk lid release ...
.............................. 3-31
Fuel-filler door ...
................................................... 3-31
Opening the fuel-filler door ...
.......................... 3-31
Fuel-filler cap ...
............................................... 3-32
Tilt/telescopic steering ...
...................................... 3-34
Manual operation (if so equipped) ...
............... 3-34
Electric operation (if so equipped) ...
............... 3-34
Sun visors ...
......................................................... 3-35
Mirrors ...
.............................................................. 3-35
Inside mirror ...
................................................ 3-35
Outside mirrors ...
............................................ 3-36
Vanity mirror ...
................................................ 3-37
Page 134 of 474
GUID-D1700013-773E-4812-BA0D-7B828402E838
WARNING
.Always have the doors locked while
driving. Along with the use of seat belts,
this provides greater safety in the event
of an accident by helping to prevent
persons from being thrown from the
vehicle. This also helps keep children
and others from unintentionally opening
the doors, and will help keep out
intruders.
. Before opening any door, always look for
and avoid oncoming traffic.
. Do not leave children unattended inside
the vehicle. They could unknowingly
activate switches or controls. Unat-
tended children could become involved
in serious accidents.
SPA2626
LOCKING WITH MECHANICAL KEYGUID-0664C43A-E4B3-44F4-8486-FA160F98A5F6The power door lock system allows you to
lock or unlock all doors simultaneously
using the mechanical key.
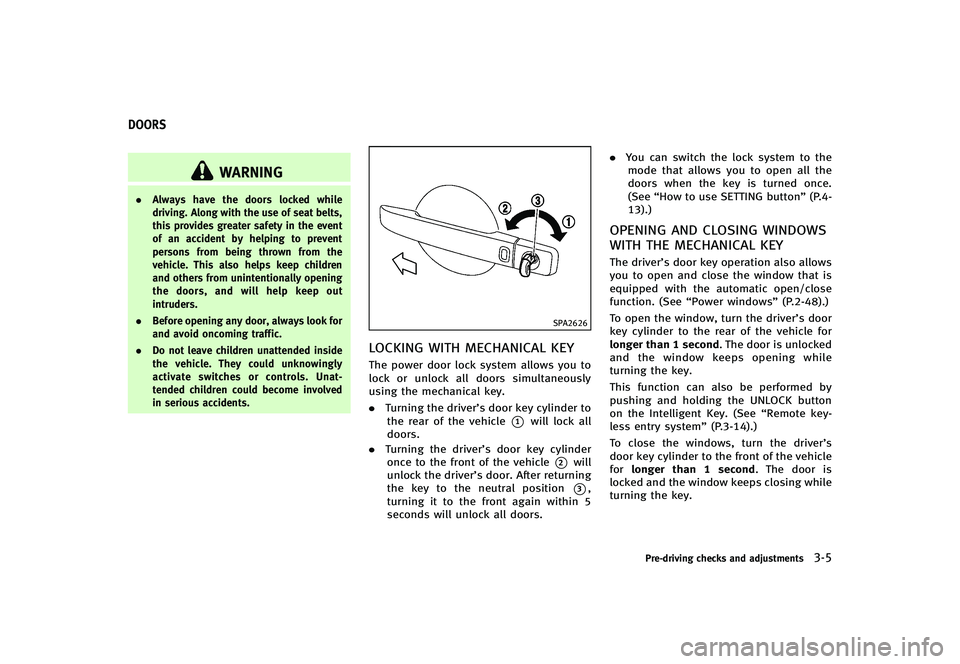
.Turning the driver’s door key cylinder to
the rear of the vehicle
*1will lock all
doors.
. Turning the driver’s door key cylinder
once to the front of the vehicle
*2will
unlock the driver’s door. After returning
the key to the neutral position
*3,
turning it to the front again within 5
seconds will unlock all doors. .
You can switch the lock system to the
mode that allows you to open all the
doors when the key is turned once.
(See “How to use SETTING button” (P.4-
13).)
OPENING AND CLOSING WINDOWS
WITH THE MECHANICAL KEY
GUID-611D6011-59D5-49AF-8BBF-7973BCE9D47FThe driver’s door key operation also allows
you to open and close the window that is
equipped with the automatic open/close
function. (See “Power windows” (P.2-48).)
To open the window, turn the driver’s door
key cylinder to the rear of the vehicle for
longer than 1 second. The door is unlocked
and the window keeps opening while
turning the key.
This function can also be performed by
pushing and holding the UNLOCK button
on the Intelligent Key. (See “Remote key-
less entry system” (P.3-14).)
To close the windows, turn the driver’s
door key cylinder to the front of the vehicle
for longer than 1 second. The door is
locked and the window keeps closing while
turning the key.
Pre-driving checks and adjustments3-5
DOORS
Page 143 of 474
3-14Pre-driving checks and adjustments
GUID-5B7CF9BF-7A03-41EA-88AC-291D9B5AABFA
WARNING
The Intelligent Key transmits radio waves
when the buttons are pushed. The FAA
advises that the radio waves may affect
aircraft navigation and communication sys-
tems. Do not operate the Intelligent Key
while on an airplane. Make sure the buttons
are not operated unintentionally when the
unit is stored during a flight.
It is possible to lock/unlock all doors, fuel-
filler door, activate the panic alarm and
open the windows by pushing the buttons
on the Intelligent Key from outside the
vehicle.
Before locking the doors, make sure the
Intelligent Key is not left in the vehicle.
The LOCK/UNLOCK button on the Intelli-
gent Key can operate at a distance of
approximately 33 ft (10 m) from the
vehicle. (The effective distance depends
upon the conditions around the vehicle.)
As many as 4 Intelligent Keys can be used
with one vehicle. For information concern-
ing the purchase and use of additional
Intelligent Keys, contact an INFINITI retai-
ler.The lock and unlock buttons on the
Intelligent Key will not operate when:
.
the distance between the Intelligent Key
and the vehicle is over 33 ft (10 m).
. the Intelligent Key battery is dis-
charged.
After locking with the remote keyless entry
function, pull the door handle to make sure
the doors are securely locked.
The LOCK/UNLOCK operating range varies
depending on the environment. To securely
operate the lock and unlock buttons,
approach the vehicle to about 3 ft (1 m)
from the door.SPA2100
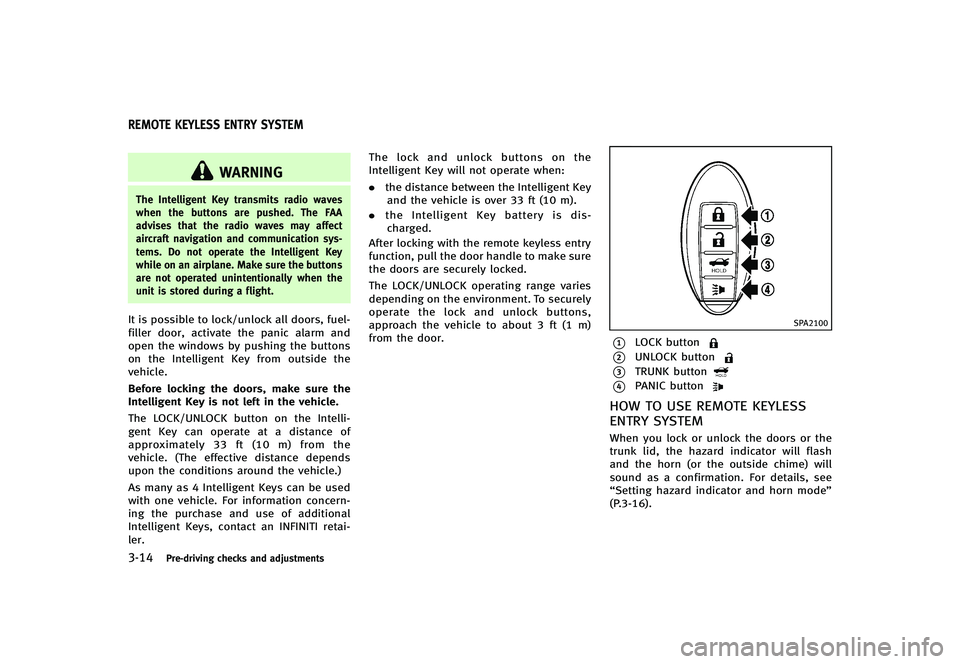
*1LOCK button
*2UNLOCK button
*3TRUNK button
*4PANIC button
HOW TO USE REMOTE KEYLESS
ENTRY SYSTEM
GUID-72F7A347-AFCB-4D69-AB0F-2AD301315111When you lock or unlock the doors or the
trunk lid, the hazard indicator will flash
and the horn (or the outside chime) will
sound as a confirmation. For details, see
“Setting hazard indicator and horn mode”
(P.3-16).
REMOTE KEYLESS ENTRY SYSTEM