oil level INFINITI G35 2003 Owners Manual
[x] Cancel search | Manufacturer: INFINITI, Model Year: 2003, Model line: G35, Model: INFINITI G35 2003Pages: 256, PDF Size: 3.37 MB
Page 64 of 256
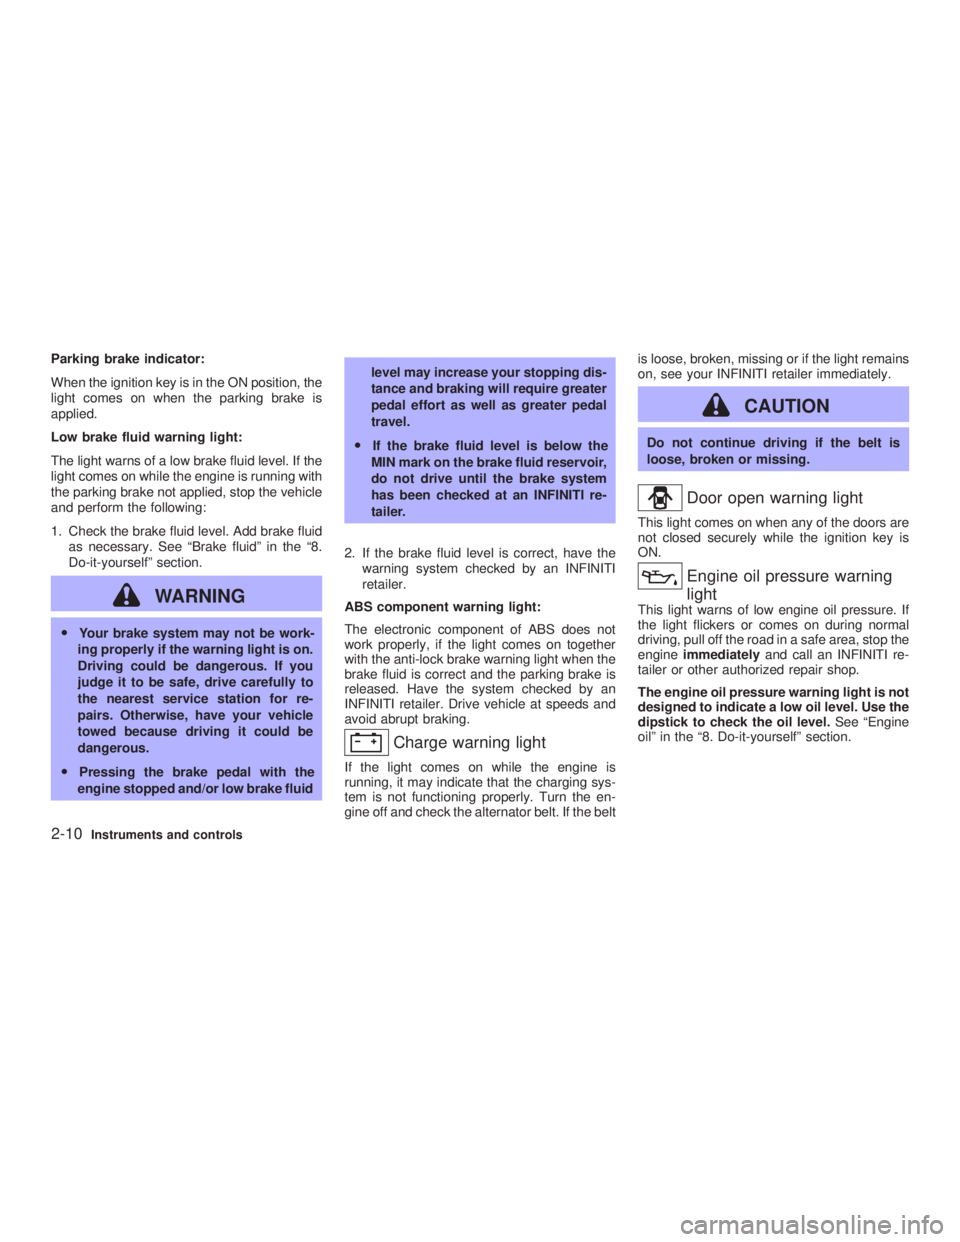
Parking brake indicator:
When the ignition key is in the ON position, the
light comes on when the parking brake is
applied.
Low brake fluid warning light:
The light warns of a low brake fluid level. If the
light comes on while the engine is running with
the parking brake not applied, stop the vehicle
and perform the following:
1. Check the brake fluid level. Add brake fluid
as necessary. See ªBrake fluidº in the ª8.
Do-it-yourselfº section.
WARNINGO Your brake system may not be work-
ing properly if the warning light is on.
Driving could be dangerous. If you
judge it to be safe, drive carefully to
the nearest service station for re-
pairs. Otherwise, have your vehicle
towed because driving it could be
dangerous.
O Pressing the brake pedal with the
engine stopped and/or low brake fluid level may increase your stopping dis-
tance and braking will require greater
pedal effort as well as greater pedal
travel.
O If the brake fluid level is below the
MIN mark on the brake fluid reservoir,
do not drive until the brake system
has been checked at an INFINITI re-
tailer.
2. If the brake fluid level is correct, have the
warning system checked by an INFINITI
retailer.
ABS component warning light:
The electronic component of ABS does not
work properly, if the light comes on together
with the anti-lock brake warning light when the
brake fluid is correct and the parking brake is
released. Have the system checked by an
INFINITI retailer. Drive vehicle at speeds and
avoid abrupt braking.
Charge warning light If the light comes on while the engine is
running, it may indicate that the charging sys-
tem is not functioning properly. Turn the en-
gine off and check the alternator belt. If the belt is loose, broken, missing or if the light remains
on, see your INFINITI retailer immediately.
CAUTION Do not continue driving if the belt is
loose, broken or missing.
Door open warning light This light comes on when any of the doors are
not closed securely while the ignition key is
ON.
Engine oil pressure warning
light This light warns of low engine oil pressure. If
the light flickers or comes on during normal
driving, pull off the road in a safe area, stop the
engine immediately and call an INFINITI re-
tailer or other authorized repair shop.
The engine oil pressure warning light is not
designed to indicate a low oil level. Use the
dipstick to check the oil level. See ªEngine
oilº in the ª8. Do-it-yourselfº section.
2-10 Instruments and controls
Z 02.7.29/V35-D/V5.0
X
Page 65 of 256
CAUTIONRunning the engine with the engine oil
pressure warning light on could cause
serious damage to the engine almost
immediately. Turn off the engine as soon
as it is safe to do so.
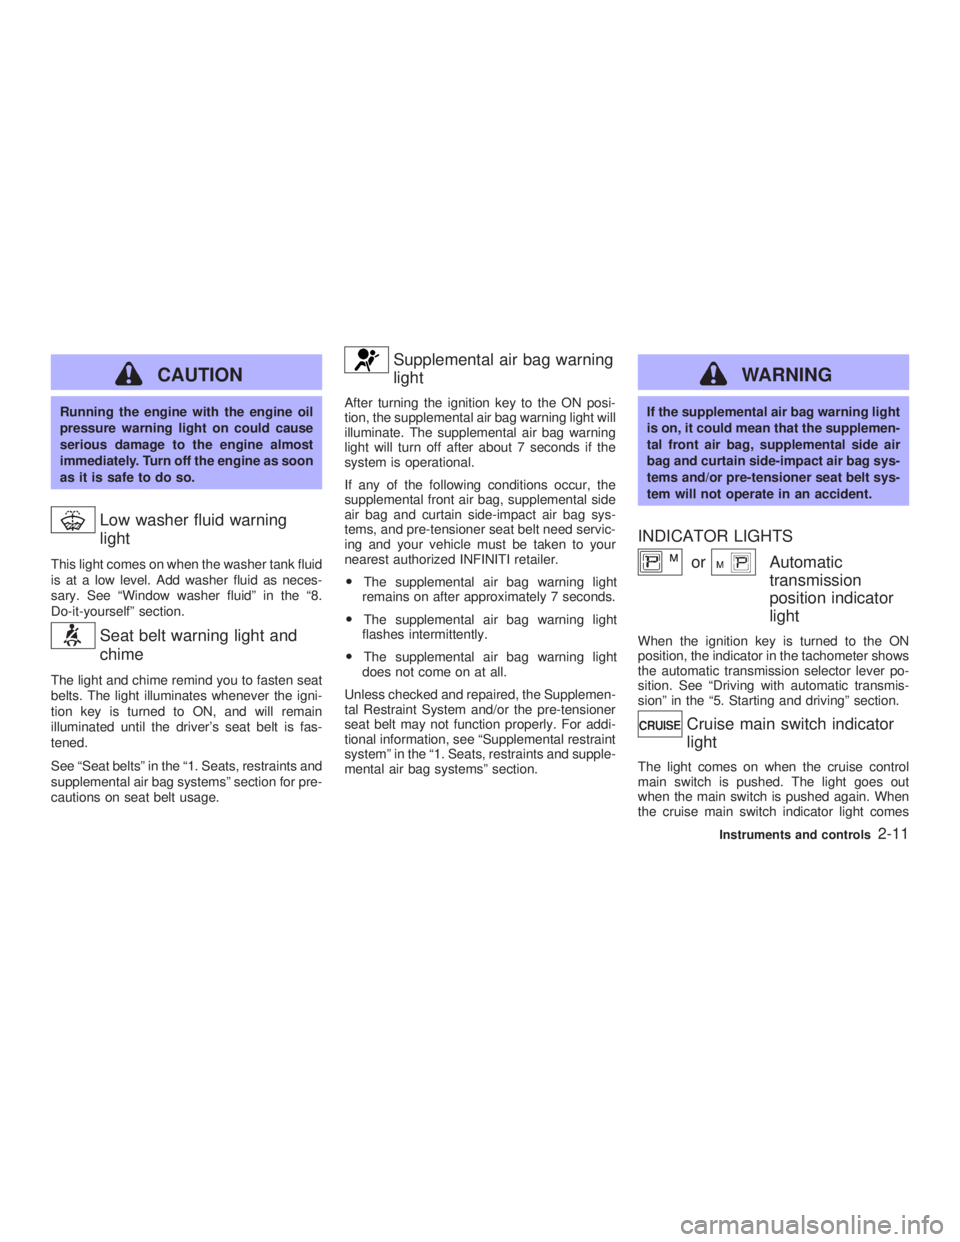
Low washer fluid warning
lightThis light comes on when the washer tank fluid
is at a low level. Add washer fluid as neces-
sary. See ªWindow washer fluidº in the ª8.
Do-it-yourselfº section.
Seat belt warning light and
chimeThe light and chime remind you to fasten seat
belts. The light illuminates whenever the igni-
tion key is turned to ON, and will remain
illuminated until the driver's seat belt is fas-
tened.
See ªSeat beltsº in the ª1. Seats, restraints and
supplemental air bag systemsº section for pre-
cautions on seat belt usage. Supplemental air bag warning
light After turning the ignition key to the ON posi-
tion, the supplemental air bag warning light will
illuminate. The supplemental air bag warning
light will turn off after about 7 seconds if the
system is operational.
If any of the following conditions occur, the
supplemental front air bag, supplemental side
air bag and curtain side-impact air bag sys-
tems, and pre-tensioner seat belt need servic-
ing and your vehicle must be taken to your
nearest authorized INFINITI retailer.
O The supplemental air bag warning light
remains on after approximately 7 seconds.
O The supplemental air bag warning light
flashes intermittently.
O The supplemental air bag warning light
does not come on at all.
Unless checked and repaired, the Supplemen-
tal Restraint System and/or the pre-tensioner
seat belt may not function properly. For addi-
tional information, see ªSupplemental restraint
systemº in the ª1. Seats, restraints and supple-
mental air bag systemsº section. WARNING If the supplemental air bag warning light
is on, it could mean that the supplemen-
tal front air bag, supplemental side air
bag and curtain side-impact air bag sys-
tems and/or pre-tensioner seat belt sys-
tem will not operate in an accident.
INDICATOR LIGHTS
or Automatic
transmission
position indicator
light When the ignition key is turned to the ON
position, the indicator in the tachometer shows
the automatic transmission selector lever po-
sition. See ªDriving with automatic transmis-
sionº in the ª5. Starting and drivingº section.
Cruise main switch indicator
light The light comes on when the cruise control
main switch is pushed. The light goes out
when the main switch is pushed again. When
the cruise main switch indicator light comes Instruments and controls
2-11
Z 02.7.29/V35-D/V5.0
X
Page 179 of 256

8 Do-it-yourself Maintenance precautions .......................................... 8-2
Engine compartment check locations ....................... 8-4
Engine cooling system .............................................. 8-5
Checking engine coolant level ............................. 8-5
Changing engine coolant ..................................... 8-6
Engine oil .................................................................. 8-7
Checking engine oil level ..................................... 8-7
Changing engine oil and filter .............................. 8-8
Automatic transmission fluid ................................... 8-10
Power steering fluid ................................................ 8-10
Brake and clutch fluid ............................................. 8-11
Brake fluid .......................................................... 8-11
Clutch fluid.......................................................... 8-11
Window washer fluid ............................................... 8-12
Battery ..................................................................... 8-13
Jump starting ...................................................... 8-14
Drive belts ............................................................... 8-14
Spark plugs ............................................................. 8-15
Replacing spark plugs ........................................ 8-15
Air cleaner ............................................................... 8-16
Windshield wiper blades ......................................... 8-16
Cleaning ............................................................. 8-16
Replacing............................................................ 8-17 Parking brake and brake pedal ............................... 8-18
Checking parking brake ..................................... 8-18
Checking brake pedal ........................................ 8-18
Brake booster ..................................................... 8-19
Fuses....................................................................... 8-20
Engine compartment .......................................... 8-20
Passenger compartment .................................... 8-21
Keyfob battery replacement .................................... 8-21
Lights ....................................................................... 8-23
Headlights........................................................... 8-25
Exterior and interior lights .................................. 8-26
Wheels and tires ..................................................... 8-30
Tire pressure ...................................................... 8-30
Types of tires...................................................... 8-30
Tire chains .......................................................... 8-31
Changing wheels and tires ................................. 8-32
Z 02.7.29/V35-D/V5.0
X
Page 180 of 256
When performing any inspection or mainte-
nance work on your vehicle, always take care
to prevent serious accidental injury to yourself
or damage to the vehicle. The following are
general precautions which should be closely
observed.
WARNINGO Park the vehicle on a level surface,
apply the parking brake securely and
block the wheels to prevent the ve-
hicle from moving. For a manual
transmission, move the shift lever to
N (Neutral) position. For an automatic
transmission, move the selector lever
to P (Park) position.
O Be sure the ignition key is OFF or
LOCK when performing any parts re-
placement or repairs.
O If you must work with the engine
running, keep your hands, clothing,
hair and tools away from moving
fans, belts and any other moving
parts.
O It is advised to secure or remove any loose clothing and any jewelry, such
as rings, watches, etc. before work-
ing on your vehicle.
O Always wear eye protection when-
ever you work on your vehicle.
O If you must run the engine in an
enclosed space such as a garage, be
sure there is proper ventilation for
exhaust gases to escape.
O Never get under the vehicle while it is
supported only by a jack. If it is nec-
essary to work under the vehicle,
support it with safety stands.
O Keep smoking materials, flame and
sparks away from fuel and the bat-
tery.
O On gasoline engine models with the
Multiport Fuel Injection (MFI) System,
the fuel filter or fuel lines should be
serviced by an INFINITI retailer be-
cause the fuel lines are under high
pressure even when the engine is off. CAUTION O Do not work under the hood while the
engine is hot. Turn off the engine and
wait until it cools down.
O Never connect or disconnect either
the battery or any transistorized com-
ponent connector while the ignition
key is on.
O Never leave any engine or automatic
transmission related component har-
ness connector disconnected while
the ignition key is on.
O Avoid direct contact with used engine
oil and coolant. Improperly disposed
engine oil, engine coolant and/or
other vehicle fluids can hurt the envi-
ronment. Always conform to local
regulations for disposal of vehicle
fluid.
This ª8. Do-it-yourselfº section gives instruc-
tions regarding only those items which are
relatively easy for an owner to perform.
A genuine INFINITI Service Manual is alsoMAINTENANCE PRECAUTIONS
8-2 Do-it-yourself
Z 02.7.29/V35-D/V5.0
X
Page 185 of 256
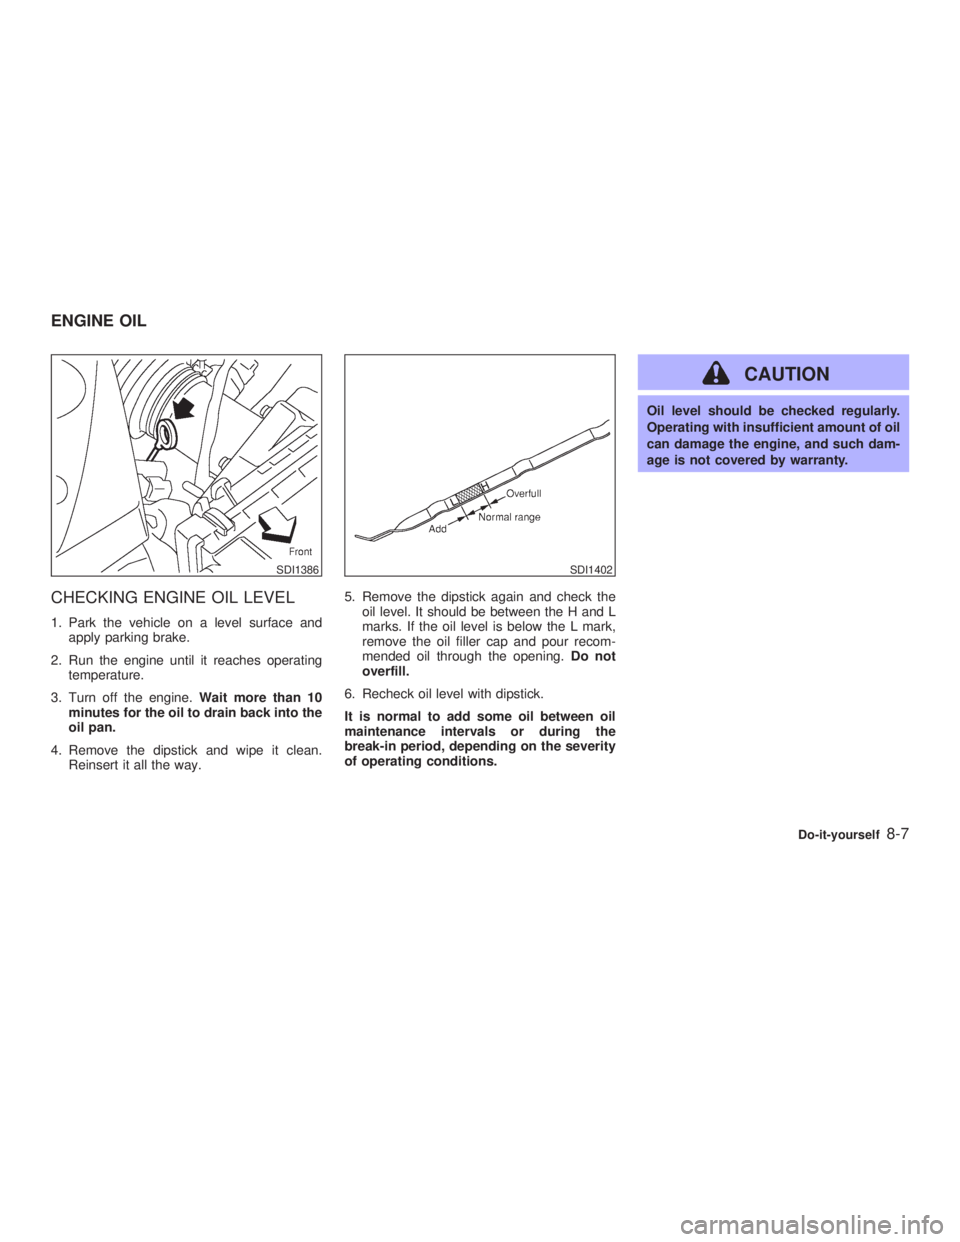
CHECKING ENGINE OIL LEVEL 1. Park the vehicle on a level surface and
apply parking brake.
2. Run the engine until it reaches operating
temperature.
3. Turn off the engine. Wait more than 10
minutes for the oil to drain back into the
oil pan.
4. Remove the dipstick and wipe it clean.
Reinsert it all the way. 5. Remove the dipstick again and check the
oil level. It should be between the H and L
marks. If the oil level is below the L mark,
remove the oil filler cap and pour recom-
mended oil through the opening. Do not
overfill.
6. Recheck oil level with dipstick.
It is normal to add some oil between oil
maintenance intervals or during the
break-in period, depending on the severity
of operating conditions. CAUTION Oil level should be checked regularly.
Operating with insufficient amount of oil
can damage the engine, and such dam-
age is not covered by warranty.SDI1386 SDI1402
ENGINE OIL
Do-it-yourself
8-7
Z 02.7.29/V35-D/V5.0
X
Page 186 of 256
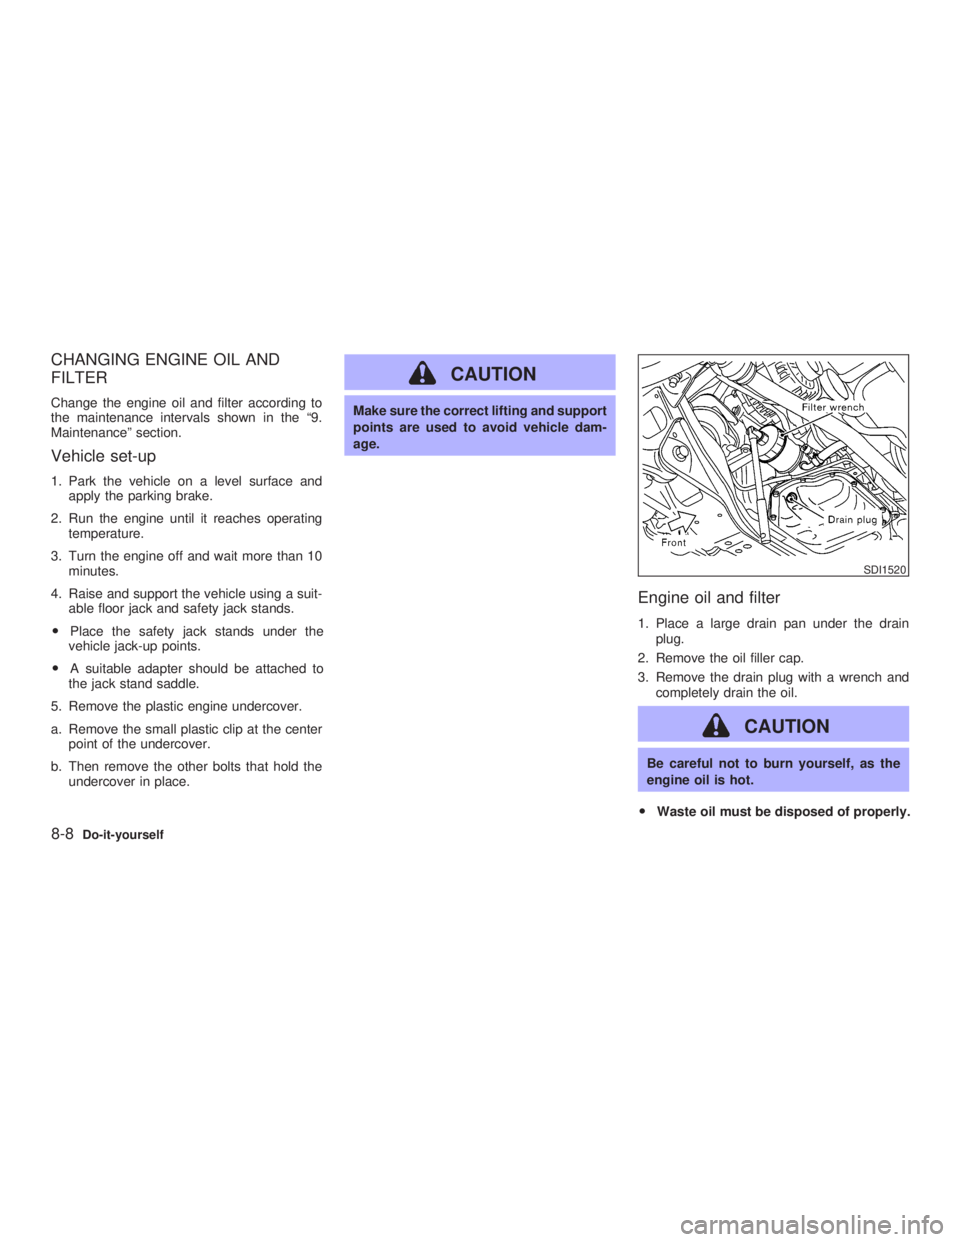
CHANGING ENGINE OIL AND
FILTER Change the engine oil and filter according to
the maintenance intervals shown in the ª9.
Maintenanceº section.
Vehicle set-up 1. Park the vehicle on a level surface and
apply the parking brake.
2. Run the engine until it reaches operating
temperature.
3. Turn the engine off and wait more than 10
minutes.
4. Raise and support the vehicle using a suit-
able floor jack and safety jack stands.
O Place the safety jack stands under the
vehicle jack-up points.
O A suitable adapter should be attached to
the jack stand saddle.
5. Remove the plastic engine undercover.
a. Remove the small plastic clip at the center
point of the undercover.
b. Then remove the other bolts that hold the
undercover in place. CAUTION Make sure the correct lifting and support
points are used to avoid vehicle dam-
age.
Engine oil and filter 1. Place a large drain pan under the drain
plug.
2. Remove the oil filler cap.
3. Remove the drain plug with a wrench and
completely drain the oil.
CAUTION Be careful not to burn yourself, as the
engine oil is hot.
O Waste oil must be disposed of properly. SDI1520
8-8 Do-it-yourself
Z 02.7.29/V35-D/V5.0
X
Page 187 of 256
O Check your local regulations.
4. Loosen the oil filter with an oil filter wrench.
Remove the oil filter by turning it by hand.
5. Wipe the engine oil filter mounting surface
with a clean rag.
Be sure to remove any old rubber gasket
remaining on the mounting surface of
the engine.
6. Coat the gasket on the new filter with clean
engine oil.
7. Screw in the oil filter clockwise until a slight
resistance is felt, then tighten additionally
more than 2/3 turn.
Oil filter tightening torque:
11 to 15 ft-lb
(14.7 to 20.5 N z m)
8. Clean and re-install the drain plug with a
new washer. Securely tighten the drain plug
with a wrench.
Drain plug tightening torque:
22 to 29 ft-lb
(29 to 39 N z m)
Do not use excessive force.
9. Refill engine with recommended oil and
install the cap securely. CAUTION The dipstick must be inserted in place to
prevent oil spillage from the dipstick
hole while filling the engine with oil.
See ªCapacities and recommended fuel/
lubricantsº in the ª9. Technical and con-
sumer informationº section for drain and
refill capacity. The drain and refill capacity
depends on the oil temperature and drain
time. Use these specifications for reference
only. Always use the dipstick to determine
the proper amount of oil in the engine.
CAUTION When filling oil, do not pull out the
dipstick.
10.Start the engine and check for leakage
around the drain plug and the oil filter.
Correct as required.
11.Turn the engine off and wait more than 10
minutes. Check the oil level with the dip-
stick. Add engine oil if necessary. After the operation 1. Install the engine undercover into position
as the following steps.
a. Pull the center of the small plastic clip out.
b. Hold the engine undercover into position.
c. Insert the clip through the undercover into
the hole in the frame, then push the center
of the clip in to lock the clip in place.
d. Install the other bolts that hold the under-
cover in place. Be careful not to strip the
bolts or over-tighten them.
2. Lower the vehicle carefully to the ground.
3. Dispose of waste oil and filter properly.
WARNING O Prolonged and repeated contact with
used engine oil may cause skin can-
cer.
O Try to avoid direct skin contact with
used oil. If skin contact is made, wash
thoroughly with soap or hand cleaner
as soon as possible.
Do-it-yourself
8-9
Z 02.7.29/V35-D/V5.0
X
Page 188 of 256

O Keep used engine oil out of reach of
children. If checking or replacement is required, we
recommend your INFINITI retailer for servic-
ing.
CAUTION O Use only Genuine Nissan ATF Matic
Fluid J. Do not mix with other fluids.
O Using automatic transmission fluid
other than Genuine Nissan ATF Matic
Fluid J will cause deterioration in
driveability and automatic transmis-
sion durability, and may damage the
automatic transmission, which is not
covered by the INFINITI new vehicle
limited warranty.
The specified automatic transmission fluid is
also described on caution labels located in the
engine compartment. Check the fluid level in the reservoir tank.
The fluid level should be checked using the
HOT range at fluid temperatures of 122 to
176ÉF (50 to 80ÉC) or using the COLD range at
fluid temperatures of 32 to 86ÉF (0 to 30ÉC).
CAUTION O Do not overfill.
O Use Genuine Nissan PSF II or equiva-
lent. SDI1408
AUTOMATIC TRANSMISSION
FLUID POWER STEERING FLUID
8-10 Do-it-yourself
Z 02.7.29/V35-D/V5.0
X
Page 216 of 256

Seat belts: Check that all parts of the seat belt
system (For example, buckles, anchors, ad-
justers and retractors) operate properly and
smoothly, and are installed securely. Check
the belt webbing for cuts, fraying, wear or
damage.
Accelerator pedal: Check the pedal for
smooth operation and make sure the pedal
does not catch or require uneven effort. Keep
the floor mat away from the pedal.
Clutch pedal*: Make sure the pedal operates
smoothly and check that it has the proper free
play.
Brakes: Check that the brakes do not pull the
vehicle to one side when applied.
Brake pedal*: Check the pedal for smooth
operation and make sure it has the proper
distance under it when depressed fully. Check
the brake booster function. Be sure to keep the
floor mat away from the pedal.
Parking brake*: Check that the lever has the
proper travel and confirm that your vehicle is
held securely on a fairly steep hill with only the
parking brake applied.
Automatic transmission P (Park) mecha-
nism: On a fairly steep hill check that your
vehicle is held securely with the selector lever in the P (Park) position without applying any
brakes.
Under the hood and vehicle The maintenance items listed here should be
checked periodically (For example, each time
you check the engine oil or refuel).
Windshield washer fluid*: Check that there
is adequate fluid in the tank.
Engine coolant level*: Check the coolant
level when the engine is cold.
Radiator and hoses: Check the front of the
radiator and clean off any dirt, insects, leaves,
etc., that may have accumulated. Make sure
the hoses have no cracks, deformation, dete-
rioration or loose connections.
Brake and clutch fluid level*: Make sure that
the brake and clutch fluid level is between the
MAX and MIN lines on the reservoir.
Battery*: Check the fluid level in each cell.
It should be between the MAX and MIN lines.
Vehicles operated in high temperatures or
under severe conditions require frequent
checks of the battery fluid level.
Engine drive belts*: Make sure that no belt is
frayed, worn, cracked or oily.
Engine oil level*: Check the level after park- ing the vehicle on a level spot and turning off
the engine. (Wait at least 10 minutes for the oil
to drain back into the oil pan.)
Power steering fluid level* and lines: Check
the level when the fluid is cold and the engine
is turned off. Check the lines for proper attach-
ment, leaks, cracks, etc.
Exhaust system: Make sure there are no
loose supports, cracks or holes. If the sound of
the exhaust seems unusual or there is a smell
of exhaust fumes, immediately locate the
trouble and correct it. See ªPrecautions when
starting and drivingº in the ª5. Starting and
drivingº section for exhaust gas (Carbon mon-
oxide).
Underbody: The underbody is frequently ex-
posed to corrosive substances such as those
used on icy roads or to control dust. It is very
important to remove these substances, other-
wise rust will form on the floor pan, frame, fuel
lines and around the exhaust system. At the
end of winter, the underbody should be thor-
oughly flushed with plain water, being careful
to clean those areas where mud and dirt may
accumulate. For additional information, see
ªCleaning exteriorº in the ª7. Appearance and
careº section.
Fluid leaks: Check under the vehicle for fuel,
oil, water or other fluid leaks after the vehicle
9-4 Maintenance
Z 02.7.29/V35-D/V5.0
X
Page 222 of 256

EXPLANATION OF MAINTENANCE
ITEMS Additional information on the following
items with ª*º is found in the ª8. Do-it-
yourselfº section.
Emission control system
maintenance Drive belts*: Check drive belts for wear, fray-
ing or cracking and also for proper tension.
Replace the drive belts if found damaged.
Air cleaner filter: Under normal driving con-
ditions, the air cleaner filter should be replaced
in accordance with the maintenance schedule.
However, driving the vehicle in dusty areas
may cause more rapid clogging of the element.
Consequently, the element may have to be
replaced more frequently.
EVAP vapor lines: Check vapor lines and
connections for failure or looseness. If leaks
are found, replace them.
Fuel lines: Check the fuel hoses, piping and
connections for leaks, looseness or deteriora-
tion. Replace any parts if they are damaged.
Engine coolant*: Drain and flush the cooling
system.
Engine oil & oil filter*: Under normal driving conditions, the engine oil and oil filter should
be replaced in accordance with the mainte-
nance schedule. However, under severe driv-
ing conditions, they may have to be replaced
more frequently.
Spark plugs*: Replace with new plugs having
the correct heat range.
Chassis and body maintenance Brake lines & cables: Check the brake lines
and hoses (including brake booster vacuum
hoses, connections & check valve) and park-
ing brake cables for proper attachment, leaks,
cracks, chafing, abrasion, deterioration, etc.
Brake pads & rotors: Check these and the
other neighboring brake components for wear,
deterioration and leaks. Under severe driving
conditions, they may have to be inspected
more frequently.
Automatic transmission fluid*: Using auto-
matic transmission fluid other than Genuine
Nissan ATF Matic Fluid J will cause deteriora-
tion in driveability and automatic transmission
durability, and may damage the automatic
transmission, which is not covered by the
INFINITI new vehicle limited warranty. If
checking or replacement is required, we rec-
ommend your INFINITI retailer for servicing.
Under severe driving conditions, the fluid should be replaced at the specified interval.
Manual transmission oil & differential gear
oil*: Check the oil level and visually inspect for
signs of leakage.
Under severe driving conditions, the oil should
be replaced at the specified interval.
Steering gear & linkage, axle & suspension
parts: Check for damage, looseness and leak-
age of oil or grease. Under severe driving
conditions, more frequent inspection should be
performed.
Exhaust system: Visually check the exhaust
pipes, muffler, and hangers for proper attach-
ment, leaks, cracks, chafing, abrasion, dete-
rioration, etc. Under severe driving conditions,
inspection should be performed more fre-
quently.
In-cabin microfilter: Under normal condi-
tions, this microfilter should be replaced in
accordance with the maintenance schedule.
However, in some situations, the microfilter
may clog more rapidly (depending on the air
conditioner's working environment). If this hap-
pens, the air flow may decrease, or the win-
dows may fog up easily when the air condi-
tioner is in use, the microfilter should be
replaced immediately at your INFINITI retailer.
9-10 Maintenance
Z 02.7.29/V35-D/V5.0
X