air condition INFINITI M-HEV 2013 User Guide
[x] Cancel search | Manufacturer: INFINITI, Model Year: 2013, Model line: M-HEV, Model: INFINITI M-HEV 2013Pages: 530, PDF Size: 3.71 MB
Page 117 of 530

2-32Instruments and controls
momentarily change the display.
8. Engine coolant temperature
gauge
The gauge indicates the engine coolant
temperature.
This displays the temperature of the
engine coolant. The range of coolant over-
heat is indicated by the horizontal line of
the upper part of the H mark.
The engine coolant temperature varies with
the outside air temperature and driving
conditions.
CAUTION
If the engine is overheated, continued
operation of the vehicle may seriously
damage the engine. See“If your vehicle
overheats” in the“6. In case of emergency”
section for immediate action required.
9. Outside air temperature (ICY —8F
or 8C)
The outside air temperature is displayed in
8For 8C in the range of −22 to 1318F(−30
to 558C). The outside air temperature mode includes
a low temperature warning feature. If the
outside air temperature is below 378
F
(38C), the warning is displayed on the
screen.
The outside temperature sensor is located
in front of the radiator. The sensor may be
affected by road or engine heat, wind
directions and other driving conditions.
The display may differ from the actual
outside temperature or the temperature
displayed on various signs or billboards.
10. Setting
Setting cannot be made while driving. A
message “Setting can only be operated
when stopped” is also displayed on the
dot matrix liquid crystal display.
The
switch*Aandswitch*Bare
used in the setting mode to select and
decide a menu.
SKIP:
Push the
switch*Ato move to the
warning check mode.
Push the
switch*Bto select other
menus. ALERT:
There are 3 submenus under the alert
menu.
. BACK
Select this submenu to return to the top
page of the setting mode.
. TIMER
Select this submenu to specify when
the “TIMER” indicator activates.
. ICY
Select this submenu to display the low
outside temperature warning.
MAINTENANCE:
There are 5 submenus under the main-
tenance menu.
. BACK
Select this submenu to return to the top
page of the setting mode.
. OIL
Select this submenu to set or reset the
distance for changing the engine oil.
. FILTER
Select this submenu to set or reset the
distance for replacing the oil filter.
. TIRE
Select this submenu to set or reset the
distance for replacing tires.
Page 130 of 530

SIC2574
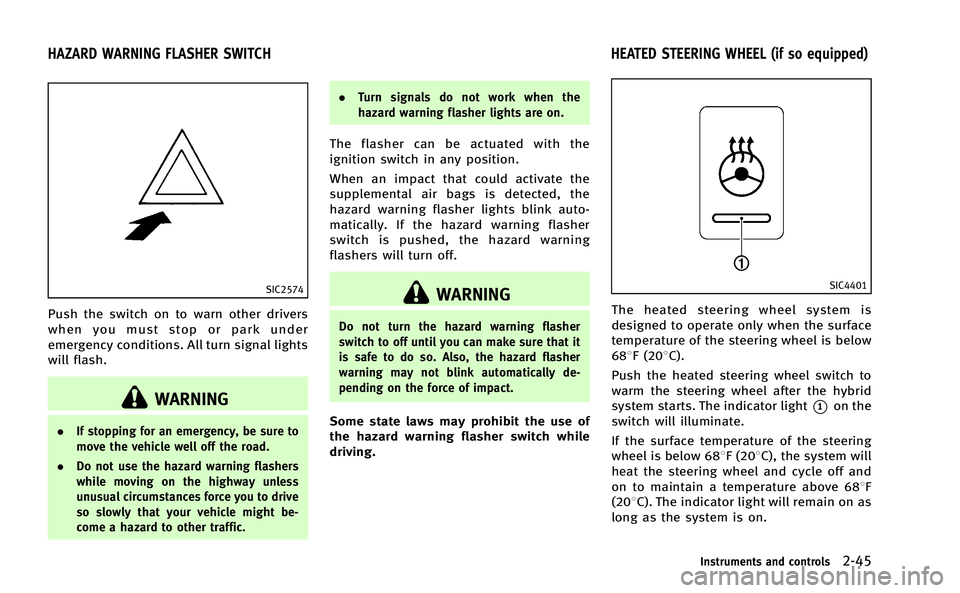
Push the switch on to warn other drivers
when you must stop or park under
emergency conditions. All turn signal lights
will flash.
WARNING
.If stopping for an emergency, be sure to
move the vehicle well off the road.
. Do not use the hazard warning flashers
while moving on the highway unless
unusual circumstances force you to drive
so slowly that your vehicle might be-
come a hazard to other traffic. .
Turn signals do not work when the
hazard warning flasher lights are on.
The flasher can be actuated with the
ignition switch in any position.
When an impact that could activate the
supplemental air bags is detected, the
hazard warning flasher lights blink auto-
matically. If the hazard warning flasher
switch is pushed, the hazard warning
flashers will turn off.
WARNING
Do not turn the hazard warning flasher
switch to off until you can make sure that it
is safe to do so. Also, the hazard flasher
warning may not blink automatically de-
pending on the force of impact.
Some state laws may prohibit the use of
the hazard warning flasher switch while
driving.
SIC4401
The heated steering wheel system is
designed to operate only when the surface
temperature of the steering wheel is below
688F (208C).
Push the heated steering wheel switch to
warm the steering wheel after the hybrid
system starts. The indicator light
*1on the
switch will illuminate.
If the surface temperature of the steering
wheel is below 688F (208C), the system will
heat the steering wheel and cycle off and
on to maintain a temperature above 688F
(208C). The indicator light will remain on as
long as the system is on.
Instruments and controls2-45
HAZARD WARNING FLASHER SWITCH HEATED STEERING WHEEL (if so equipped)
Page 137 of 530

2-52Instruments and controls
battery.
. Avoid using power outlet when the air
conditioner, headlights or rear window
defroster is on.
. This power outlet is not designed for use
with a cigarette lighter unit.
. Push the plug in as far as it will go. If
good contact is not made, the plug may
overheat or the internal temperature
fuse may blow.
. Before inserting or disconnecting a plug,
be sure the electrical accessory being
used is turned OFF.
. When not in use, be sure to close the
cap. Do not allow water or any liquid to
contact the outlet.
. Do not leave the console box open. The
open lid may suddenly close when the
vehicle stops.
SIC4340
FRONT
To open the ashtray lid, push the lid down
and release it
*1.
To empty the ashtray, pull out
*2.
The cigarette lighter operates when the
ignition switch is in the ON position.
Push the lighter in all the way
*3, then
release it. When the lighter is heated, it will
spring out. Return the lighter to its original
position after use.
CAUTION
. The cigarette lighter socket is a power
source for the cigarette lighter element
only. The use of the cigarette lighter
socket as a power source for any other
accessory is not recommended.
. Do not use any other power outlet for an
accessory lighter.
CIGARETTE LIGHTER AND ASHTRAYS
Page 162 of 530

WARNING
.Radio waves could adversely affect
electric medical equipment. Those who
use a pacemaker should contact the
electric medical equipment manufacturer
for the possible influences before use.
. The Intelligent Key transmits radio
waves when the buttons are pushed.
The FAA advises that the radio waves
may affect aircraft navigation and com-
munication systems. Do not operate the
Intelligent Key while on an airplane.
Make sure the buttons are not operated
unintentionally when the unit is stored
during a flight.
The Intelligent Key system can operate all
the doors and the trunk lid using the
remote controller function or pushing the
request switch on the vehicle without
taking the key out from a pocket or purse.
The operating environment and/or condi-
tions may affect the Intelligent Key system
operation.
Be sure to read the following before using
the Intelligent Key system.
CAUTION
.Be sure to carry the Intelligent Key with
you when operating the vehicle.
. Never leave the Intelligent Key in the
vehicle when you leave the vehicle.
The Intelligent Key is always communicat-
ing with the vehicle as it receives radio
waves. The Intelligent Key system trans-
mits weak radio waves. Environmental
conditions may interfere with the operation
of the Intelligent Key system under the
following operating conditions.
.When operating near a location where
strong radio waves are transmitted,
such as a TV tower, power station and
broadcasting station.
. When in possession of wireless equip-
ment, such as a cellular telephone,
transceiver, and CB radio.
. When the Intelligent Key is in contact
with or covered by metallic materials.
. When any type of radio wave remote
control is used nearby.
. When the Intelligent Key is placed near
an electric appliance such as a perso- nal computer.
. When the vehicle is parked near a
parking meter.
In such cases, correct the operating condi-
tions before using the Intelligent Key
function or use the mechanical key.
Although the life of the battery varies
depending on the operating conditions,
the battery’s life is approximately 2 years.
If the battery is discharged, replace it with
a new one.
Since the Intelligent Key is continuously
receiving radio waves, if the key is left near
equipment which transmits strong radio
waves, such as signals from a TV and
personal computer, the battery life may
become shorter.
For information regarding replacement of a
battery, see “Intelligent Key battery repla-
cement” in the“8. Maintenance and do-it-
yourself” section.
For models with a steering wheel lock
mechanism: Because the steering wheel is
locked electrically, unlocking the steering
wheel with the ignition switch in the LOCK
position is impossible when the vehicle
battery is completely discharged. Pay
special attention that the vehicle battery
Pre-driving checks and adjustments3-7
INTELLIGENT KEY SYSTEM
Page 169 of 530

3-14Pre-driving checks and adjustments
WARNING
The Intelligent Key transmits radio waves
when the buttons are pushed. The FAA
advises that the radio waves may affect
aircraft navigation and communication sys-
tems. Do not operate the Intelligent Key
while on an airplane. Make sure the buttons
are not operated unintentionally when the
unit is stored during a flight.
It is possible to lock/unlock all doors, fuel-
filler door, activate the panic alarm and
open the windows by pushing the buttons
on the Intelligent Key from outside the
vehicle.
Before locking the doors, make sure the
Intelligent Key is not left in the vehicle.
The LOCK/UNLOCK button on the Intelli-
gent Key can operate at a distance of
approximately 33 ft (10 m) from the
vehicle. (The effective distance depends
upon the conditions around the vehicle.)
As many as 4 Intelligent Keys can be used
with one vehicle. For information concern-
ing the purchase and use of additional
Intelligent Keys, contact an INFINITI retai-
ler.The lock and unlock buttons on the
Intelligent Key will not operate when:
.
the distance between the Intelligent Key
and the vehicle is over 33 ft (10 m).
. the Intelligent Key battery is dis-
charged.
After locking with the remote keyless entry
function, pull the door handle to make sure
the doors are securely locked.
The LOCK/UNLOCK operating range varies
depending on the environment. To securely
operate the lock and unlock buttons,
approach the vehicle to about 3 ft (1 m)
from the door.SPA2100
1. LOCK button
2. UNLOCK button
3. TRUNK button
4. PANIC button
HOW TO USE REMOTE KEYLESS
ENTRY SYSTEM
When you lock or unlock the doors or the
trunk lid, the hazard indicator will flash
and the horn (or the outside chime) will
sound as a confirmation. For details, see
“Setting hazard indicator and horn mode”
later in this section.
REMOTE KEYLESS ENTRY SYSTEM
Page 221 of 530

4-34Monitor, climate, audio, phone and voice recognition systems
SAA3142
Front
SAA3012
RearOpen or close, and adjust the air flow
direction of ventilators.
: This symbol indicates that the ventilators are
closed.
: This symbol indicates that the ventilators are
open.
WARNING
. The air conditioner cooling function
operates only when the INFINITI Direct
Response Hybrid
TMSystem is running.
. Do not leave children or adults who
would normally require the support of
others alone in your vehicle. Pets should
not be left alone either. On hot, sunny
days, temperatures in a closed vehicle
could quickly become high enough to
cause severe or possibly fatal injuries to
people or animals.
. Do not use the recirculation mode for
long periods as it may cause the interior
air to become stale and the windows to
fog up.
Start the hybrid system and operate the
automatic climate control system.
VENTILATORS AUTOMATIC CLIMATE CONTROL
Page 224 of 530

AUTOMATIC CLIMATE CONTROL
(Type A)
Automatic operation
Cooling and/or dehumidified heating
(AUTO):
This mode may be used all year round. The
system works automatically to control the
inside temperature, air flow distribution
and fan speed after the preferred tempera-
ture is set manually.
1. Push the“AUTO” button on. (The
indicator on the button will illuminate
and AUTO will be displayed.)
2. Push the temperature control button (driver side) to set the desired tem-
perature.
.The temperature can be set withinthe following range.
— For U.S.: 60 to 908F (16 to 328C)
— For Canada: 64 to 908F (18 to
328C)
.The temperature of the passengercompartment will be maintained
automatically. Air flow distribution
and fan speed will also be controlled
automatically. 3. To turn off the climate control system,
push the “OFF”button.
A visible mist may be seen coming from the
ventilators in hot, humid conditions as the
air is cooled rapidly. This does not indicate
a malfunction.
Dehumidified defrosting or defogging: 1. Push the front defroster “
”button.
(The indicator light on the button will
come on.)
2. Push the temperature control button (driver side) to set the desired tem-
perature.
.The temperature can be set withinthe following range.
— For U.S.: 60 to 908F (16 to 328C)
— For Canada: 64 to 908F (18 to
328C)
.The temperature of the passengercompartment will be maintained
automatically. Air flow distribution
and fan speed will also be controlled
automatically.
3. To turn off the climate control system, push the “OFF”button.
. To quickly remove ice from the outside
of the windows, push the fan speed increase
“
”button and set it to
the maximum position.
. As soon as possible after the wind-
shield is clean, push the “AUTO”button
to return to the auto mode.
. When the front defroster “
”button
is pushed, the air conditioner will
automatically be turned on at outside
temperatures above 238 F(−58C) to
defog the windshield, and the air
recirculate mode will automatically be
turned off. Outside air is drawn into the
passenger compartment to improve the
defogging performance.
Manual operation
Fan speed control:
Push the fan speed increase “
”or
decrease “”button to manually control
the fan speed.
Push the “AUTO” button to return to
automatic control of the fan speed.
Air recirculation:
Push the air recirculation “
”button to
change the air circulation mode. When the
indicator light illuminates, the flowing air
is recirculated inside the vehicle.
The air recirculation mode cannot be
Monitor, climate, audio, phone and voice recognition systems4-37
Page 225 of 530

4-38Monitor, climate, audio, phone and voice recognition systems
activated when the air conditioner is in the
front defrosting mode“”.
Depending on the vehicle condition, the air
recirculation mode may be switched to the
outside air circulation mode automatically.
Temperature control:
Turn the temperature control buttons to set
the desired temperature.
The temperature can be set within the
following range.
For U.S.: 60 to 908F (16 to 328C)
For Canada: 64 to 908F (18 to 328C)
Outside air circulation:
Push the outside air circulation “
”
button to change the air circulation mode.
When the indicator light illuminates, the
flowing air is drawn from outside the
vehicle.
Automatic air intake control:
To set the automatic control mode, perform
one of the following operations.
. When the outside air circulation mode
is on, push and hold the outside air
circulation “
”button for more than
2 seconds. .
When the air recirculation mode is on,
push and hold the air recirculation
“
” button for more than 2 seconds.
When setting the automatic control mode,
both indicator lights will blink twice
indicating that the system is in the
automatic control mode.
Air flow control:
Pushing the “
”button selects the air
outlet to:
: Air flows from center and side ventilators.
: Air flows from center and side ventilators and foot outlets.
: Air flows mainly from foot outlets.
: Air flows from defroster and foot outlets.
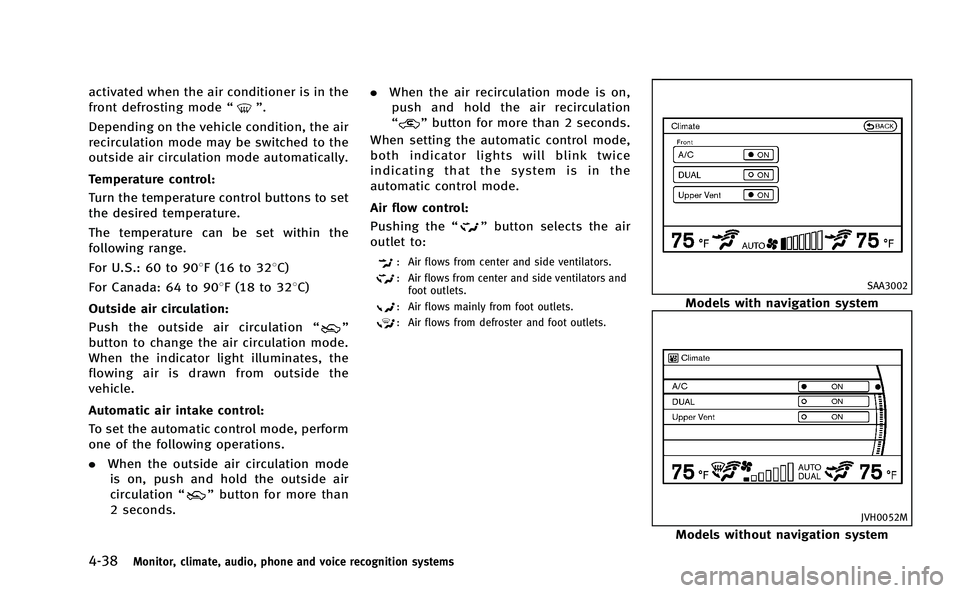
SAA3002
Models with navigation system
JVH0052M
Models without navigation system
Page 226 of 530

CLIMATE setting screen
Climate control settings can be changed on
the screen.
Push the CLIMATE button on the instrument
panel and turn the display to the Climate
mode.
Heating (A/C OFF):
The air conditioner does not activate in this
mode. When you need to heat only, use
this mode.
1. Push the“CLIMATE”button to on.
2. If the “A/C”indicator on the screen
illuminates, select the “A/C”key. (The
“A/C” indicator will turn off.)
3. Push the temperature control button to set the desired temperature.
. The temperature of the passenger
compartment will be maintained auto-
matically. Air flow distribution and fan
speed are also controlled automati-
cally.
. Do not set the temperature lower than
the outside air temperature. Otherwise
the system may not work properly.
. Not recommended if windows fog up.
When the outside temperature decreases
to approximately −238 F(0 8C), the A/C function does not activate even if the
“A/C”
indicator light illuminates.
Dual control mode setting: You can individually set the driver and front
passenger side temperature and air flow
mode using each temperature control
button or manual air flow control button.
1. Push the “CLIMATE”button to on.
2. By selecting the “DUAL”key, or when
the passenger side temperature control
button or manual air control button is
pushed, the “DUAL”indicator on the
screen will illuminate.
3. To turn off the passenger side tempera- ture control, select the “DUAL”key and
the “DUAL” indicator will turn off.
. The Dual control mode cannot be
activated when the air conditioner is
in the front defrosting mode “
”.
Automatic upper ventilator system:
In this mode, air from the center ventilators
flows both straight and upward in order to
control the cabin temperature without
blowing air directly on the occupants.
1. Push the “CLIMATE”button to on.
2. Select the “Upper Vent”key, and the
indicator on the screen will illuminate. The air flow against the driver’sor
passenger’s upper body becomes gen-
tle.
. Distribution between straight and up-
ward flows is determined automatically
by the climate control system. If you
prefer strong air flow against your
upper body, select the “Upper Vent”
key to turn the indicator light off.
. When the outside temperature de-
creases to approximately 148 F
( − 108 C), the “Upper Vent” function
does not activate. The “Upper Vent”
function reactivates automatically when
ambient temperature is 148F( −108C) or
more.
Monitor, climate, audio, phone and voice recognition systems4-39
Page 228 of 530

AUTOMATIC CLIMATE CONTROL
(Type B)
Automatic operation
Cooling and/or dehumidified heating
(AUTO):
This mode may be used year-round as the
system automatically controls constant
temperature, air flow distribution and fan
speed after the desired temperature is set
manually.
1. Push the“AUTO”button.
(The AUTO indicator light on the button
will illuminate and “AUTO”will appear
on the display.)
2. Push the temperature control button (driver’s side) to set the desired tem-
perature.
.The temperature can be set withinthe following range.
— For U.S.: 60 to 908F (16 to 328C)
— For Canada: 64 to 908F (18 to
328C)
.The temperature of the passengercompartment will be maintained
automatically. Air flow distribution
and fan speed will also be controlled
automatically. 3. To turn off the climate control system,
push the “OFF”button.
A visible mist may be seen coming from the
ventilators in hot, humid conditions as the
air is cooled rapidly. This does not indicate
a malfunction.
Dehumidified defrosting/defogging: 1. Push the “
”button. (The indicator
light will illuminate.)
2. Push the temperature control button (driver side) to set the desired tem-
perature.
.To remove frost from the outsidesurface of the windshield quickly,
set the temperature control and fan
speed control to their maximum
position.
.After the windshield is cleared, pushthe “AUTO” button to set to the
automatic mode.
.When the “”button is pushed,
the air conditioner will automatically
turn on when the outside air tem-
perature is above 238F( −58C) to
defog the windshield. The air recir-
culation mode will automatically
turn off. The outside air circulation
mode will be selected to improve the defogging performance.
Manual operation
The manual mode can be used to control
the heater and air conditioner to your
desired settings.
To turn off the heater and air conditioner,
push the
“OFF”button.
Fan speed control:
Push the fan speed control “
”button
to increase the fan speed.
Push the fan speed control “
”button to
decrease the fan speed.
Push the “AUTO”button to change the fan
speed to the automatic mode.
Air flow control:
Push the “
”button to change the air
flow mode.
: Air flows from the center and side ventilators.
: Air flows from the center and side ventilators, and foot outlets.
: Air flows mainly from the foot outlets.
: Air flows from the defroster and foot outlets.
Temperature control:
Turn the temperature control dial to set the
desired temperature.
Monitor, climate, audio, phone and voice recognition systems4-41