brake light INFINITI Q50 HYBRID 2016 Quick Reference Guide
[x] Cancel search | Manufacturer: INFINITI, Model Year: 2016, Model line: Q50 HYBRID, Model: INFINITI Q50 HYBRID 2016Pages: 36, PDF Size: 2.04 MB
Page 6 of 36

4
Tire Pressure Monitoring System (TPMS) with Tire Inflation Indicator
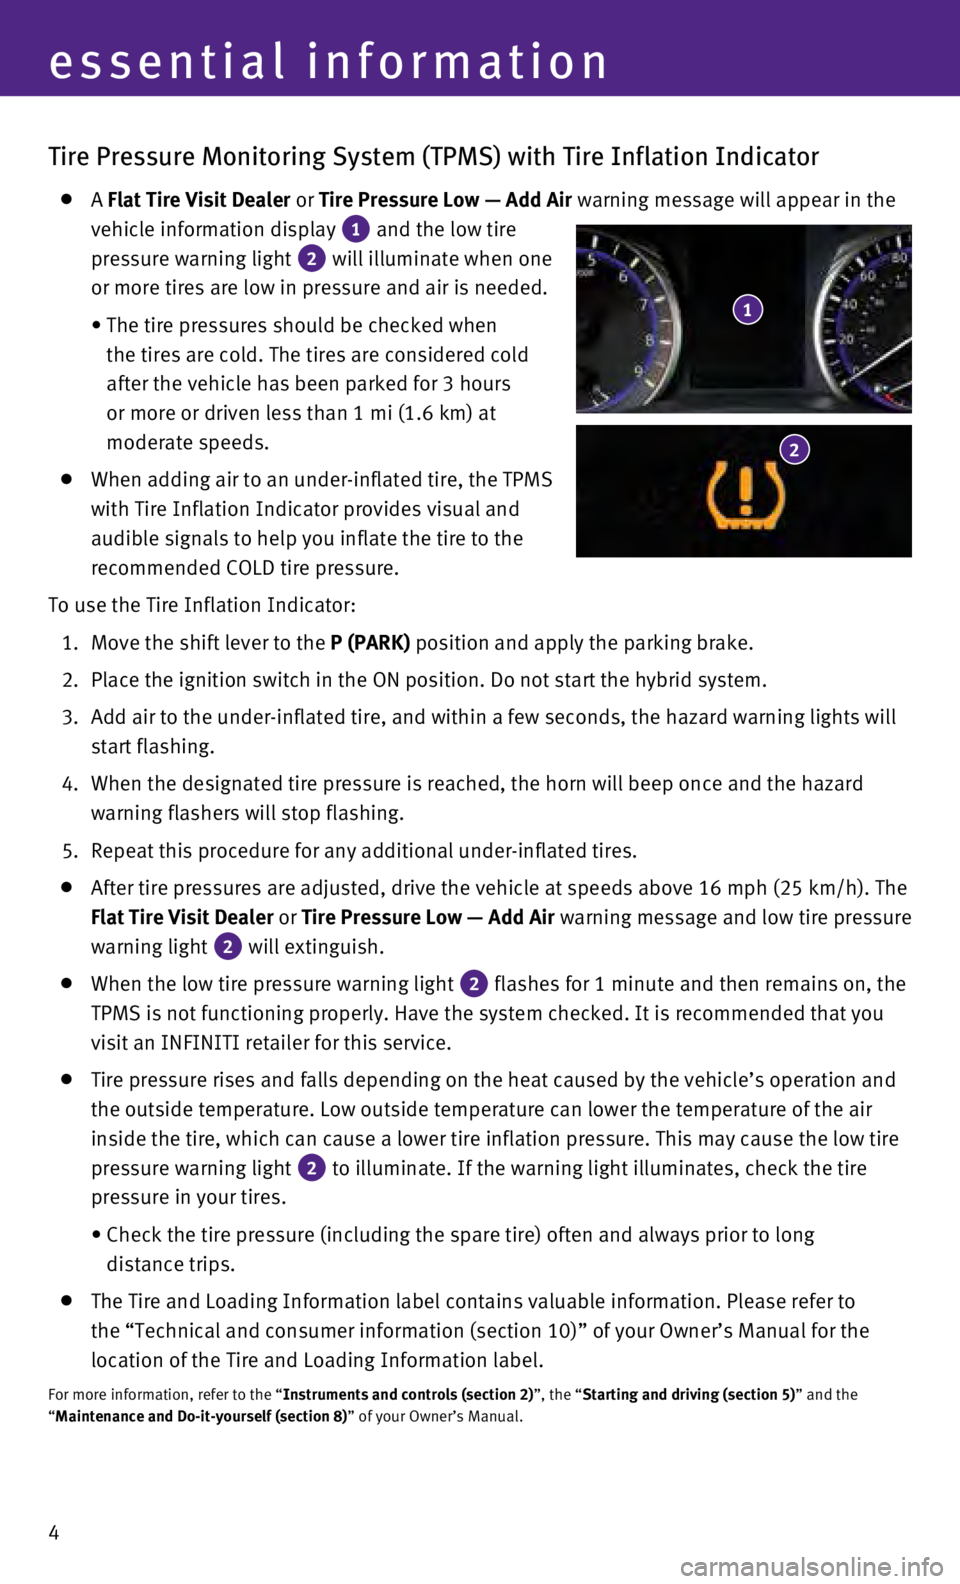
A Flat Tire Visit Dealer or Tire Pressure Low — Add Air warning message will appear in the
vehicle information display
1 and the low tire
pressure warning light
2 will illuminate when one
or more tires are low in pressure and air is needed.
•
The tire pressures should be checked when
the tires are cold. The tires are considered cold
after the vehicle has been parked for 3 hours
or more or driven less than 1 mi (1.6 km) at
moderate speeds.
When adding air to an under-inflated tire, the TPMS
with Tire Inflation Indicator provides visual and
audible signals to help you inflate the tire to the
recommended COLD tire pressure.
To use the Tire Inflation Indicator:
1.
Move the shift lever to the
P (PARK) position and apply the parking brake.
2.
Place the ignition switch in the ON position. Do not start the hybrid sy\
stem.
3.
Add air to the under-inflated tire, and within a few seconds, the hazard\
warning lights will
start flashing.
4.
When the designated tire pressure is reached, the horn will beep once an\
d the hazard
warning flashers will stop flashing.
5.
Repeat this procedure for any additional under-inflated tires.
After tire pressures are adjusted, drive the vehicle at speeds above 16 \
mph (25 km/h). The
Flat Tire Visit Dealer or Tire Pressure Low — Add Air warning message and low tire pressure
warning light
2 will extinguish.
When the low tire pressure warning light 2 flashes for 1 minute and then remains on, the
TPMS is not functioning properly. Have the system checked. It is recomme\
nded that you
visit an INFINITI retailer for this service.
Tire pressure rises and falls depending on the heat caused by the vehicl\
e’s operation and
the outside temperature. Low outside temperature can lower the temperatu\
re of the air
inside the tire, which can cause a lower tire inflation pressure. This m\
ay cause the low tire
pressure warning light
2 to illuminate. If the warning light illuminates, check the tire
pressure in your tires.
•
Check the tire pressure (including the spare tire) often and always pr\
ior to long
distance trips.
The Tire and Loading Information label contains valuable information. Pl\
ease refer to
the “Technical and consumer information (section 10)” of your Ow\
ner’s Manual for the
location of the Tire and Loading Information label.
For more information, refer to the “Instruments and controls (section 2)”, the “Starting and driving (section 5)” and the
“Maintenance and Do-it-yourself (section 8)” of your Owner’s Manual.
1
2
essential information
Page 13 of 36

11
To start your vehicle remotely:
1. Press the button 4.
2.
Within 5 seconds, press and hold the remote engine start button 8 for
at least 2 seconds.
The engine will start, and the parking lights will turn on.
The automatic climate control system will automatically adjust the passe\
nger compartment
to the appropriate set temperature when the Remote Engine Start feature \
is used.
The engine will run for 10 minutes and then turn off.
Repeat steps 1 and 2 to extend the time for an additional 10-minute peri\
od.
•
After two remote starts, the ignition switch must be cycled before the r\
emote start can be
used again.
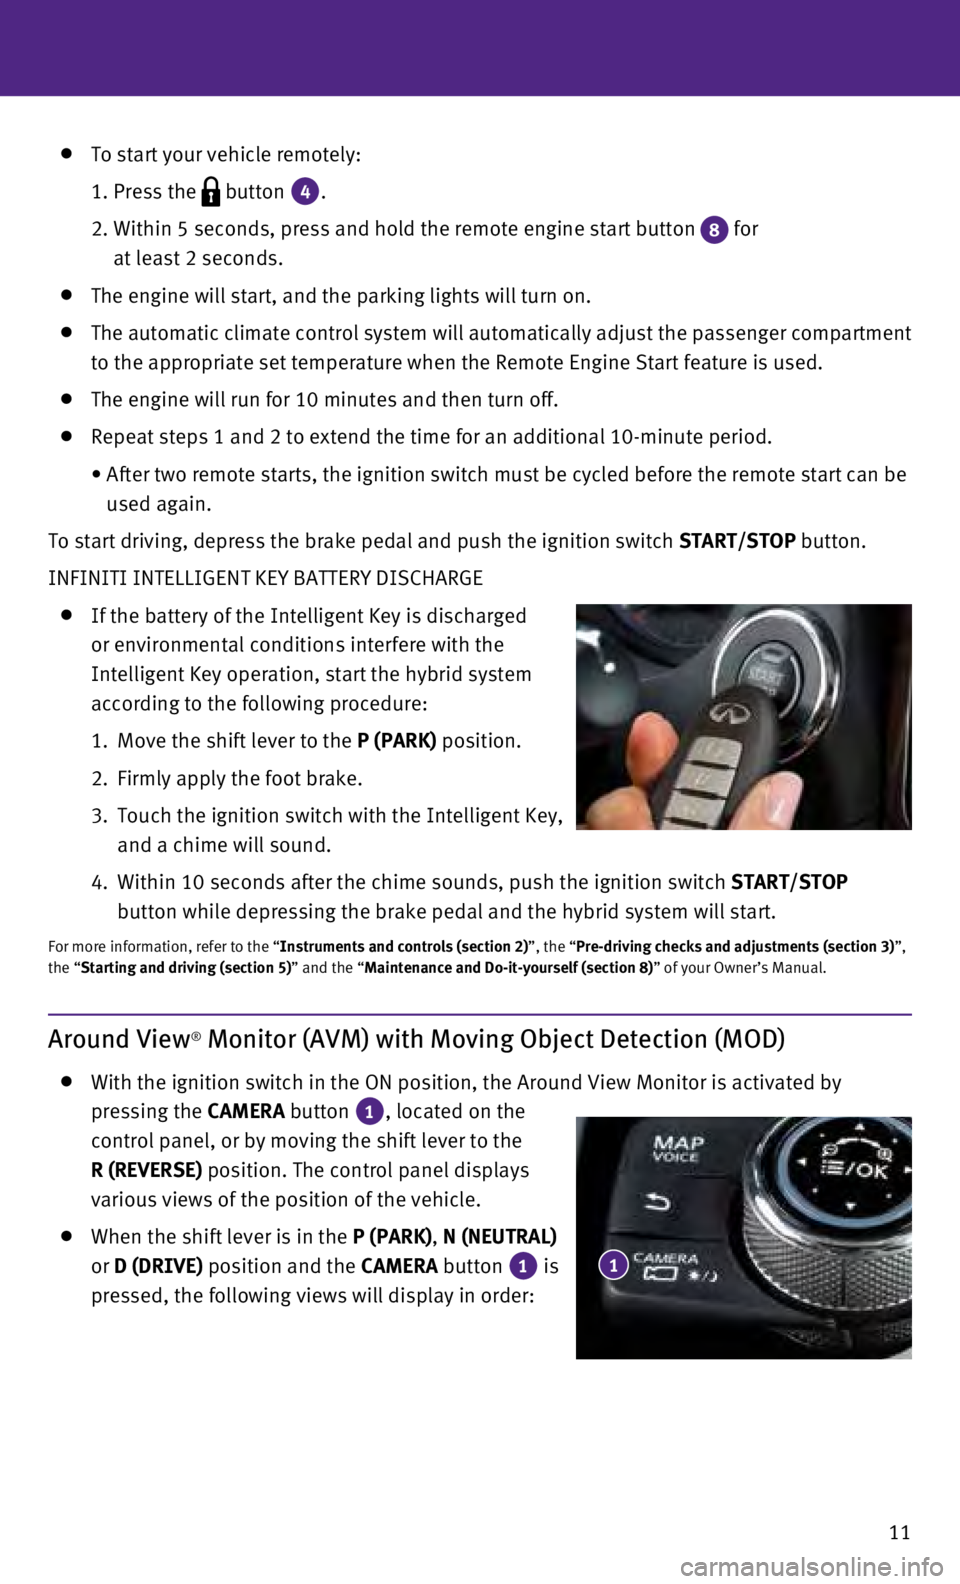
To start driving, depress the brake pedal and push the ignition switch START/STOP
button.
INFINITI INTELLIGENT KEY BATTERY DISCHARGE
If the battery of the Intelligent Key is discharged
or environmental conditions interfere with the
Intelligent Key operation, start the hybrid system
according to the following procedure:
1.
Move the shift lever to the
P (PARK) position.
2.
Firmly apply the foot brake.
3.
Touch the ignition switch with the Intelligent Key,
and a chime will sound.
4.
Within 10 seconds after the chime sounds, push the ignition switch START/STOP
button while depressing the brake pedal and the hybrid system will start\
.
For more information, refer to the “Instruments and controls (section 2)”, the “Pre-driving checks and adjustments (section 3)”,
the “Starting and driving (section 5)” and the “Maintenance and Do-it-yourself (section 8)” of your Owner’s Manual.
Around View® Monitor (AVM) with Moving Object Detection (MOD)
With the ignition switch in the ON position, the Around View Monitor is \
activated by
pressing the CAMERA button
1, located on the
control panel, or by moving the shift lever to the
R (REVERSE) position. The control panel displays
various views of the position of the vehicle.
When the shift lever is in the P (PARK), N (NEUTRAL)
or D (DRIVE) position and the CAMERA button
1 is
pressed, the following views will display in order: 1
Page 17 of 36

15
Automatic Drive Positioner
Two positions for the driver’s seat, steering column
and outside mirrors can be stored in the automatic
drive positioner memory.
Follow this procedure to set the memory positions:
•
Confirm the shift lever is in the
P (PARK) position.
•
Adjust the driver’s seat, steering column and
outside mirrors to the desired positions using the
adjusting switches for each feature.
•
Push the
SET switch, and within 5 seconds, push the memory switch (1 or 2) for at
least 1 second.
•
The indicator light on the memory switch you select will illuminate for \
approximately
5 seconds and a buzzer will sound.
•
The driver’s seat, steering column and outside mirror positions are n\
ow set to
your preferences.
For more information, refer to the “Pre-driving checks and adjustments (section 3)” of your Owner’s Manual.
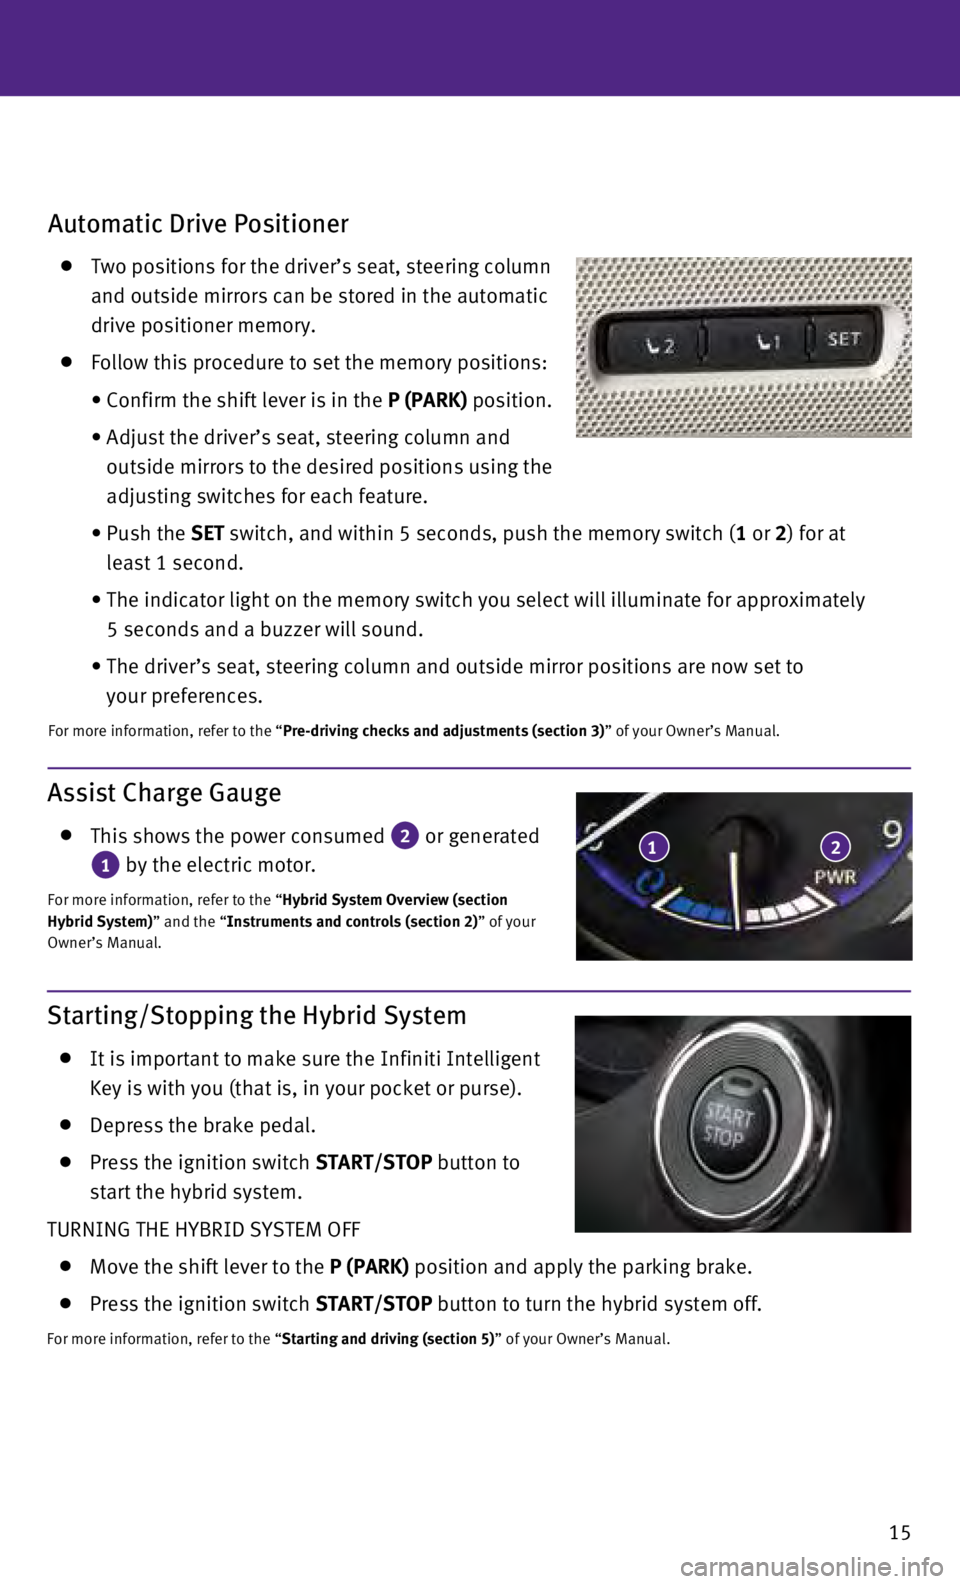
Assist Charge Gauge
This shows the power consumed 2 or generated
1 by the electric motor.
For more information, refer to the “Hybrid System Overview (section
Hybrid System)” and the “Instruments and controls (section 2)” of your
Owner’s Manual.
12
Starting/Stopping the Hybrid System
It is important to make sure the Infiniti Intelligent
Key is with you (that is, in your pocket or purse).
Depress the brake pedal.
Press the ignition switch START/STOP button to
start the hybrid system.
TURNING THE HYBRID SYSTEM OFF
Move the shift lever to the P (PARK) position and apply the parking brake.
Press the ignition switch START/STOP button to turn the hybrid system off.
For more information, refer to the “Starting and driving (section 5)” of your Owner’s Manual.
Page 24 of 36

22
USB (Universal Serial Bus) Connection Port/iPod® Interface
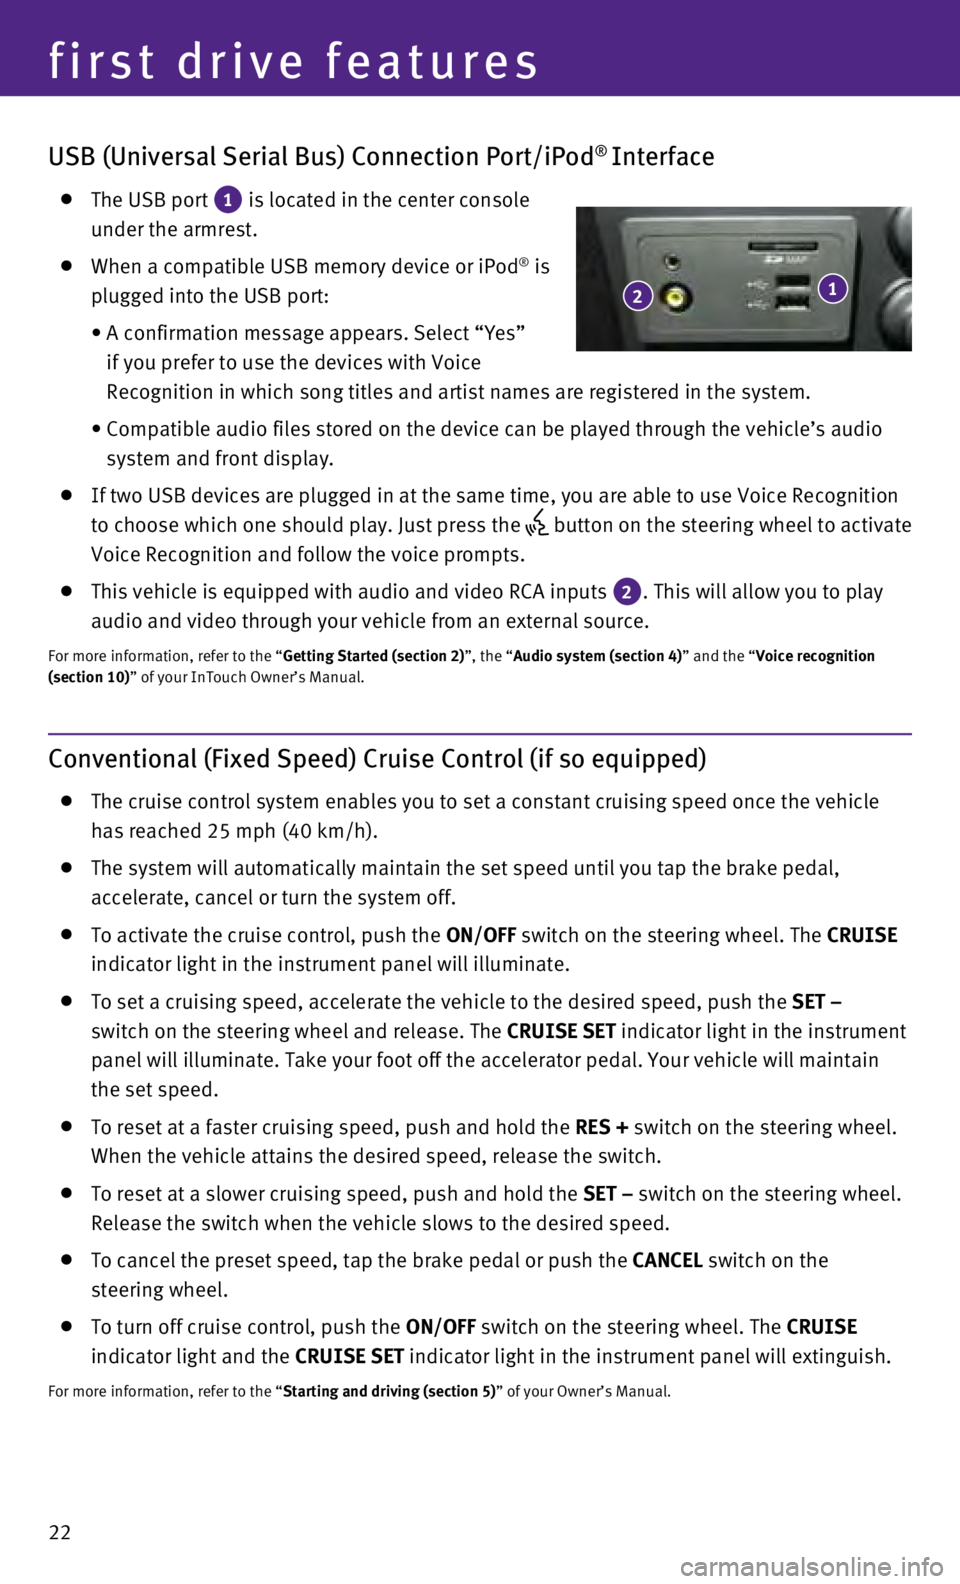
The USB port 1 is located in the center console
under the armrest.
When a compatible USB memory device or iPod® is
plugged into the USB port:
•
A confirmation message appears. Select “Yes”
if you prefer to use the devices with Voice
Recognition in which song titles and artist names are registered in the \
system.
•
Compatible audio files stored on the device can be played through the ve\
hicle’s audio
system and front display.
If two USB devices are plugged in at the same time, you are able to use \
Voice Recognition
to choose which one should play. Just press the
button on the steering wheel to activate
Voice Recognition and follow the voice prompts.
This vehicle is equipped with audio and video RCA inputs 2. This will allow you to play
audio and video through your vehicle from an external source.
For more information, refer to the “Getting Started (section 2)”, the “Audio system (section 4)” and the “Voice recognition
(section 10)” of your InTouch Owner’s Manual.
Conventional (Fixed Speed) Cruise Control (if so equipped)
The cruise control system enables you to set a constant cruising speed o\
nce the vehicle
has reached 25 mph (40 km/h).
The system will automatically maintain the set speed until you tap the b\
rake pedal,
accelerate, cancel or turn the system off.
To activate the cruise control, push the ON/OFF switch on the steering wheel. The CRUISE
indicator light in the instrument panel will illuminate.
To set a cruising speed, accelerate the vehicle to the desired speed, pu\
sh the SET –
switch on the steering wheel and release. The CRUISE SET indicator light in the instrument
panel will illuminate. Take your foot off the accelerator pedal. Your ve\
hicle will maintain
the set speed.
To reset at a faster cruising speed, push and hold the RES + switch on the steering wheel.
When the vehicle attains the desired speed, release the switch.
To reset at a slower cruising speed, push and hold the SET – switch on the steering wheel.
Release the switch when the vehicle slows to the desired speed.
To cancel the preset speed, tap the brake pedal or push the CANCEL switch on the
steering wheel.
To turn off cruise control, push the ON/OFF switch on the steering wheel. The CRUISE
indicator light and the CRUISE SET indicator light in the instrument panel will extinguish.
For more information, refer to the “Starting and driving (section 5)” of your Owner’s Manual.
1 2
first drive features