key fob INFINITI Q50 HYBRID 2016 Quick Reference Guide
[x] Cancel search | Manufacturer: INFINITI, Model Year: 2016, Model line: Q50 HYBRID, Model: INFINITI Q50 HYBRID 2016Pages: 36, PDF Size: 2.04 MB
Page 12 of 36

10
Infiniti Intelligent Key System
The Infiniti Intelligent Key system allows you to lock or
unlock the vehicle, open the trunk and start the hybrid
system. It is important to make sure the Intelligent Key
is with you (that is, in your pocket or purse).
The operating range of the Intelligent Key is within
31.5 in (80 cm) from each request switch.
LOCKING AND UNLOCKING DOORS
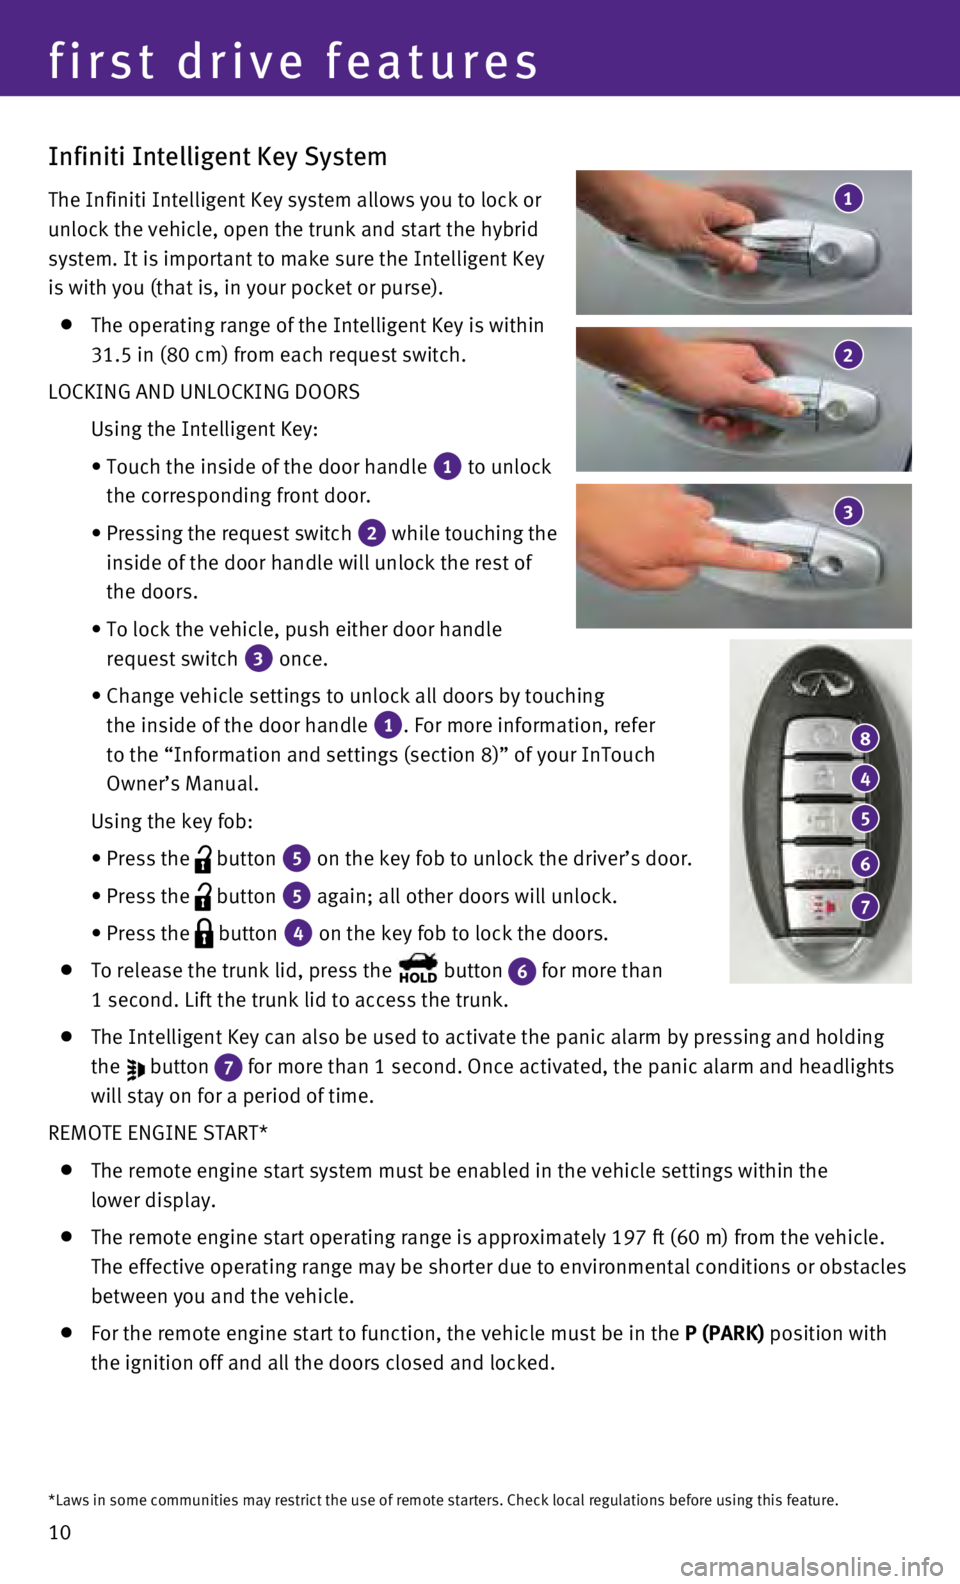
Using the Intelligent Key:
•
Touch the inside of the door handle 1 to unlock
the corresponding front door.
•
Pressing the request switch 2 while touching the
inside of the door handle will unlock the rest of
the doors.
•
To lock the vehicle, push either door handle
request switch
3 once.
•
Change vehicle settings to unlock all doors by touching
the inside of the door handle
1. For more information, refer
to the “Information and settings (section 8)” of your InTouch
Owner’s Manual.
Using the key fob:
•
Press the button 5 on the key fob to unlock the driver’s door.
•
Press the button 5 again; all other doors will unlock.
• Press the button 4 on the key fob to lock the doors.
To release the trunk lid, press the button 6 for more than
1 second. Lift the trunk lid to access the trunk.
The Intelligent Key can also be used to activate the panic alarm by pres\
sing and holding
the
button 7 for more than 1 second. Once activated, the panic alarm and headlights \
will stay on for a period of time.
REMOTE ENGINE START*
The remote engine start system must be enabled in the vehicle settings w\
ithin the
lower display.
The remote engine start operating range is approximately 197 ft (60 m)\
from the vehicle.
The effective operating range may be shorter due to environmental condit\
ions or obstacles
between you and the vehicle.
For the remote engine start to function, the vehicle must be in the P (PARK) position with
the ignition off and all the doors closed and locked.
4
8
5
6
7
3
1
2
first drive features
*Laws in some communities may restrict the use of remote starters. Check\
local regulations before using this feature.
Page 15 of 36

13
•
When in the bird’s-eye view, a tall object near the seam of the camer\
a viewing areas 3
will not appear in the monitor.
The distance between objects viewed on the Around View Monitor differs f\
rom the
actual distance.
Objects in the bird’s-eye view will appear further than the actual di\
stance.
MOVING OBJECT DETECTION (MOD)
If the MOD system detects moving objects surrounding the vehicle, a yell\
ow frame 4 will
be displayed on the camera image and a chime will sound.
In the bird’s-eye view, a yellow frame is displayed on those camera i\
mages (front, rear,
right, left) where moving objects are detected.
When the following are displayed:
•
Blue MOD icon 5; the system is operative in
this view.
•
Gray MOD icon 6; the system is not operative in
this view.
•
No MOD icon; the system is off.
To temporarily turn the system on or off, touch the
Sonar-MOD key
7.
For more information, refer to the “Monitor system (section 7)” of your InTouch Owner’s Manual.
4 5 6
7
Trunk Lid Release
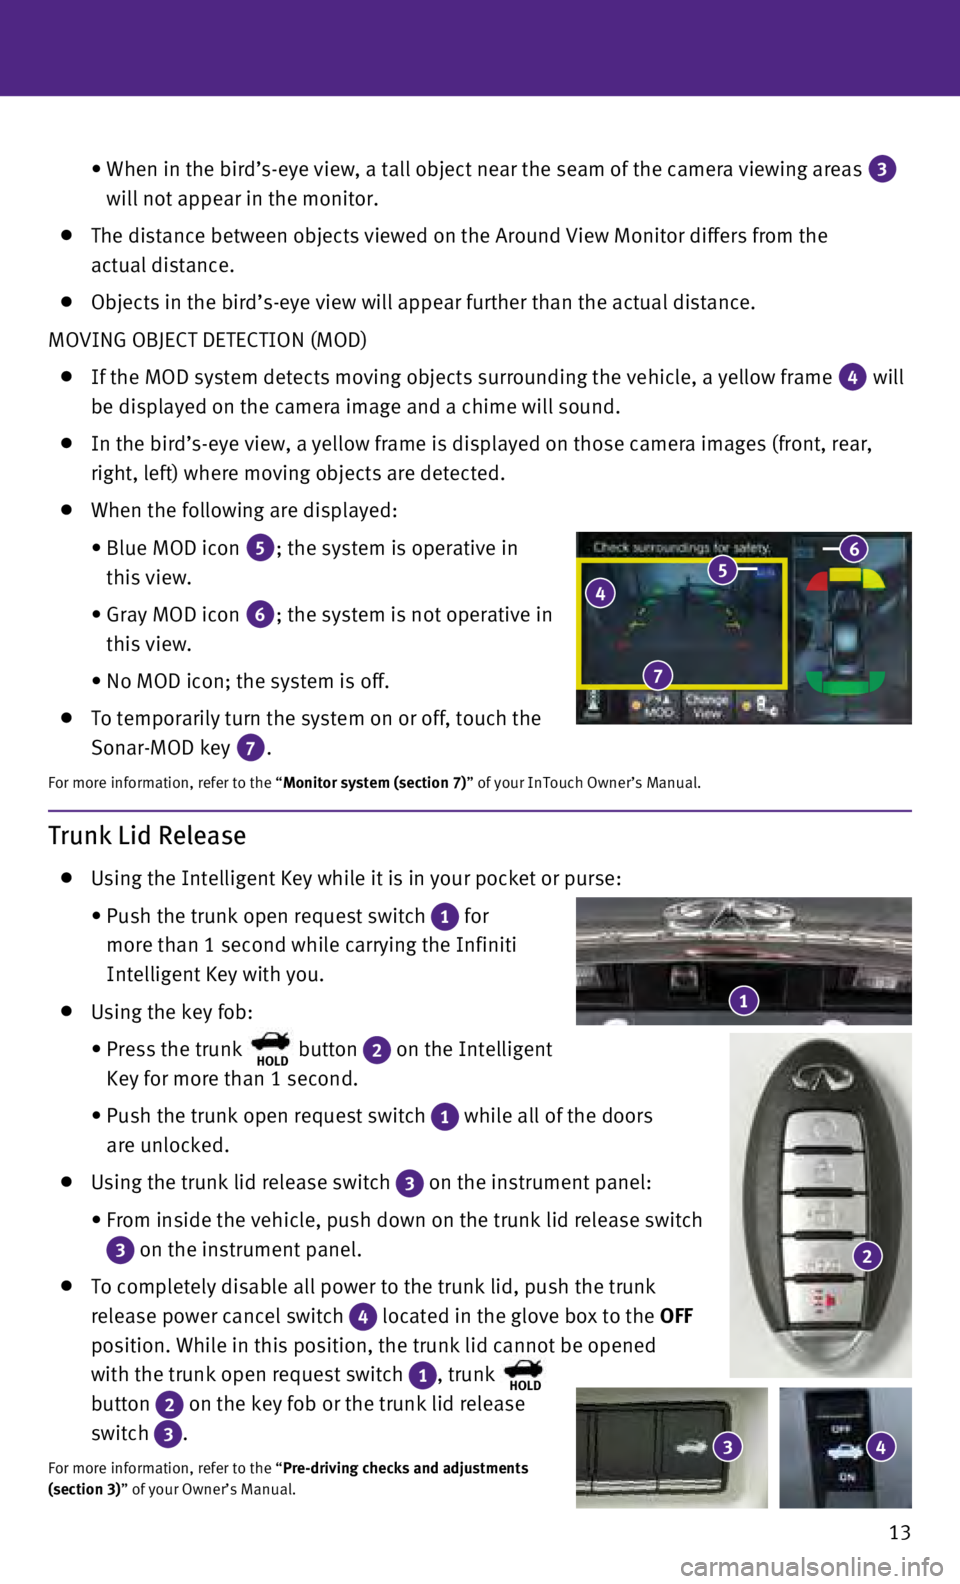
Using the Intelligent Key while it is in your pocket or purse:
•
Push the trunk open request switch 1 for
more than 1 second while carrying the Infiniti
Intelligent Key with you.
Using the key fob:
•
Press the trunk HOLD button 2 on the Intelligent
Key for more than 1 second.
•
Push the trunk open request switch 1 while all of the doors
are unlocked.
Using the trunk lid release switch 3 on the instrument panel:
•
From inside the vehicle, push down on the trunk lid release switch
3 on the instrument panel.
To completely disable all power to the trunk lid, push the trunk
release power cancel switch
4 located in the glove box to the OFF
position. While in this position, the trunk lid cannot be opened
with the trunk open request switch
1, trunk HOLD
button 2 on the key fob or the trunk lid release
switch
3.
For more information, refer to the “Pre-driving checks and adjustments
(section 3)” of your Owner’s Manual.
1
3 4
2