battery INFINITI Q60 COUPE 2015 Quick Reference Guide
[x] Cancel search | Manufacturer: INFINITI, Model Year: 2015, Model line: Q60 COUPE, Model: INFINITI Q60 COUPE 2015Pages: 28, PDF Size: 1.43 MB
Page 6 of 28

4
essential information
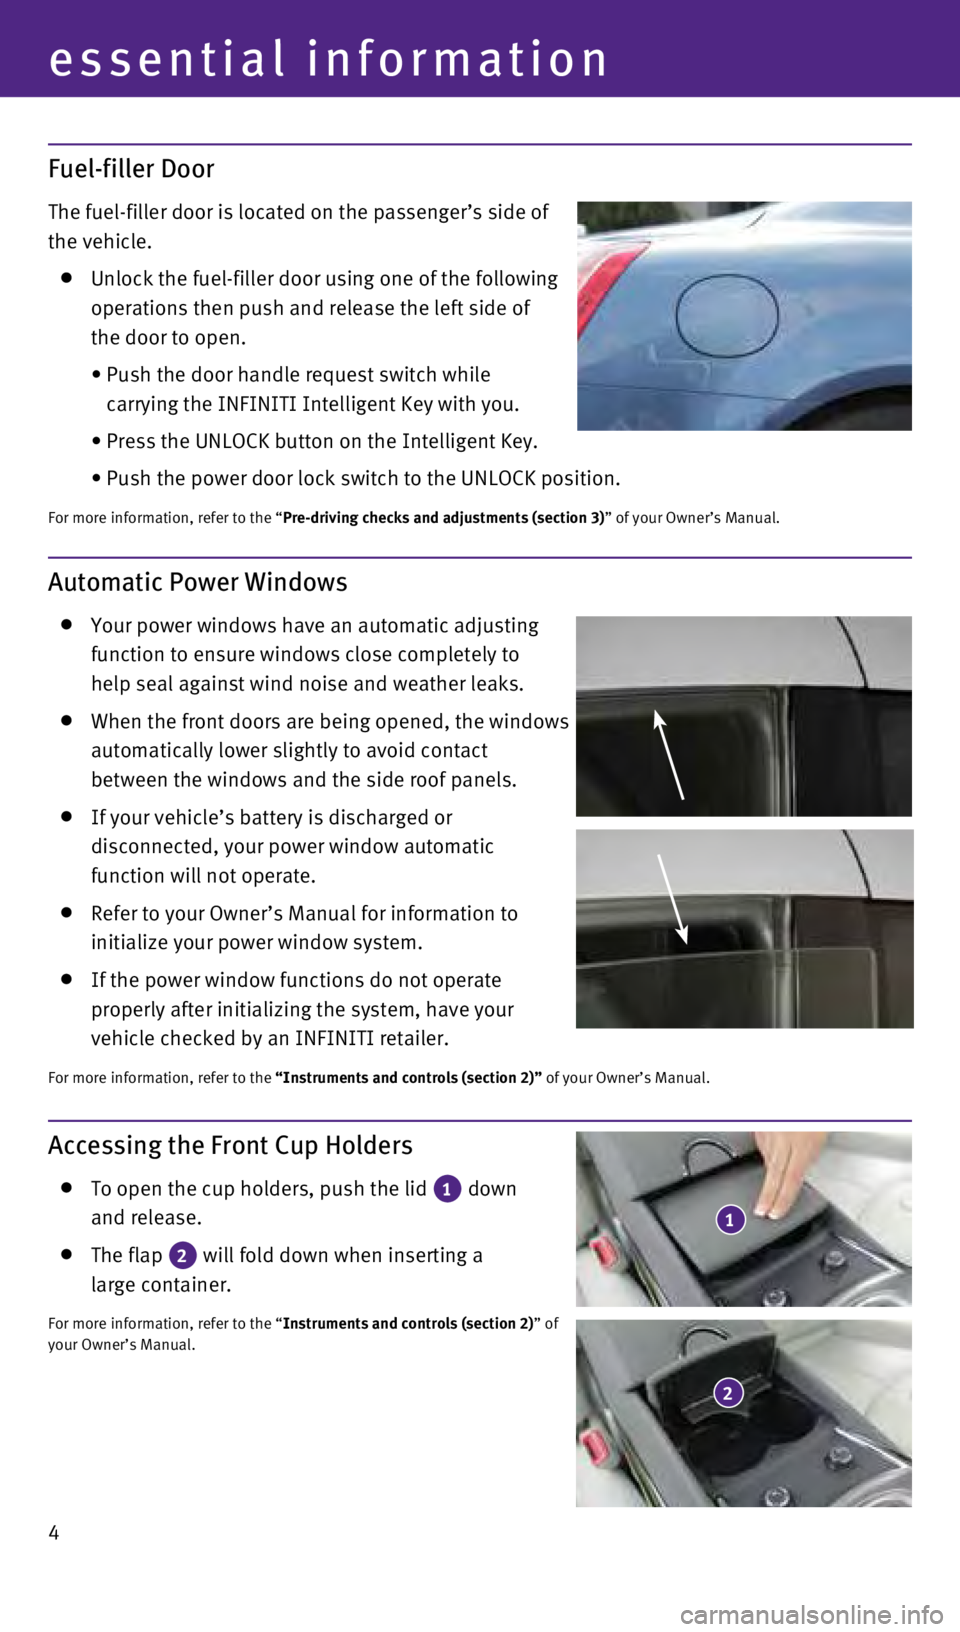
Accessing the Front Cup Holders
To open the cup holders, push the lid 1 down
and release.
The flap 2 will fold down when inserting a
large container.
For more information, refer to the “Instruments and controls (section 2)” of
your Owner’s Manual.
Automatic Power Windows
Your power windows have an automatic adjusting
function to ensure windows close completely to
help seal against wind noise and weather leaks.
When the front doors are being opened, the windows
automatically lower slightly to avoid contact
between the windows and the side roof panels.
If your vehicle’s battery is discharged or
disconnected, your power window automatic
function will not operate.
Refer to your Owner’s Manual for information to
initialize your power window system.
If the power window functions do not operate
properly after initializing the system, have your
vehicle checked by an INFINITI retailer.
For more information, refer to the “Instruments and controls (section 2)” of your Owner’s Manual.
Fuel-filler Door
The fuel-filler door is located on the passenger’s side of
the vehicle.
Unlock the fuel-filler door using one of the following
operations then push and release the left side of
the door to open.
•
Push the door handle request switch while
carrying the INFINITI Intelligent Key with you.
•
Press the UNLOCK button on the Intelligent Key.
•
Push the power door lock switch to the UNLOCK position.
For more information, refer to the “Pre-driving checks and adjustments (section 3)” of your Owner’s Manual.
1
2
1811810_15b_Q60_G_Coupe_Convert_QRG_091514.indd 49/15/14 1:25 PM
Page 8 of 28

6
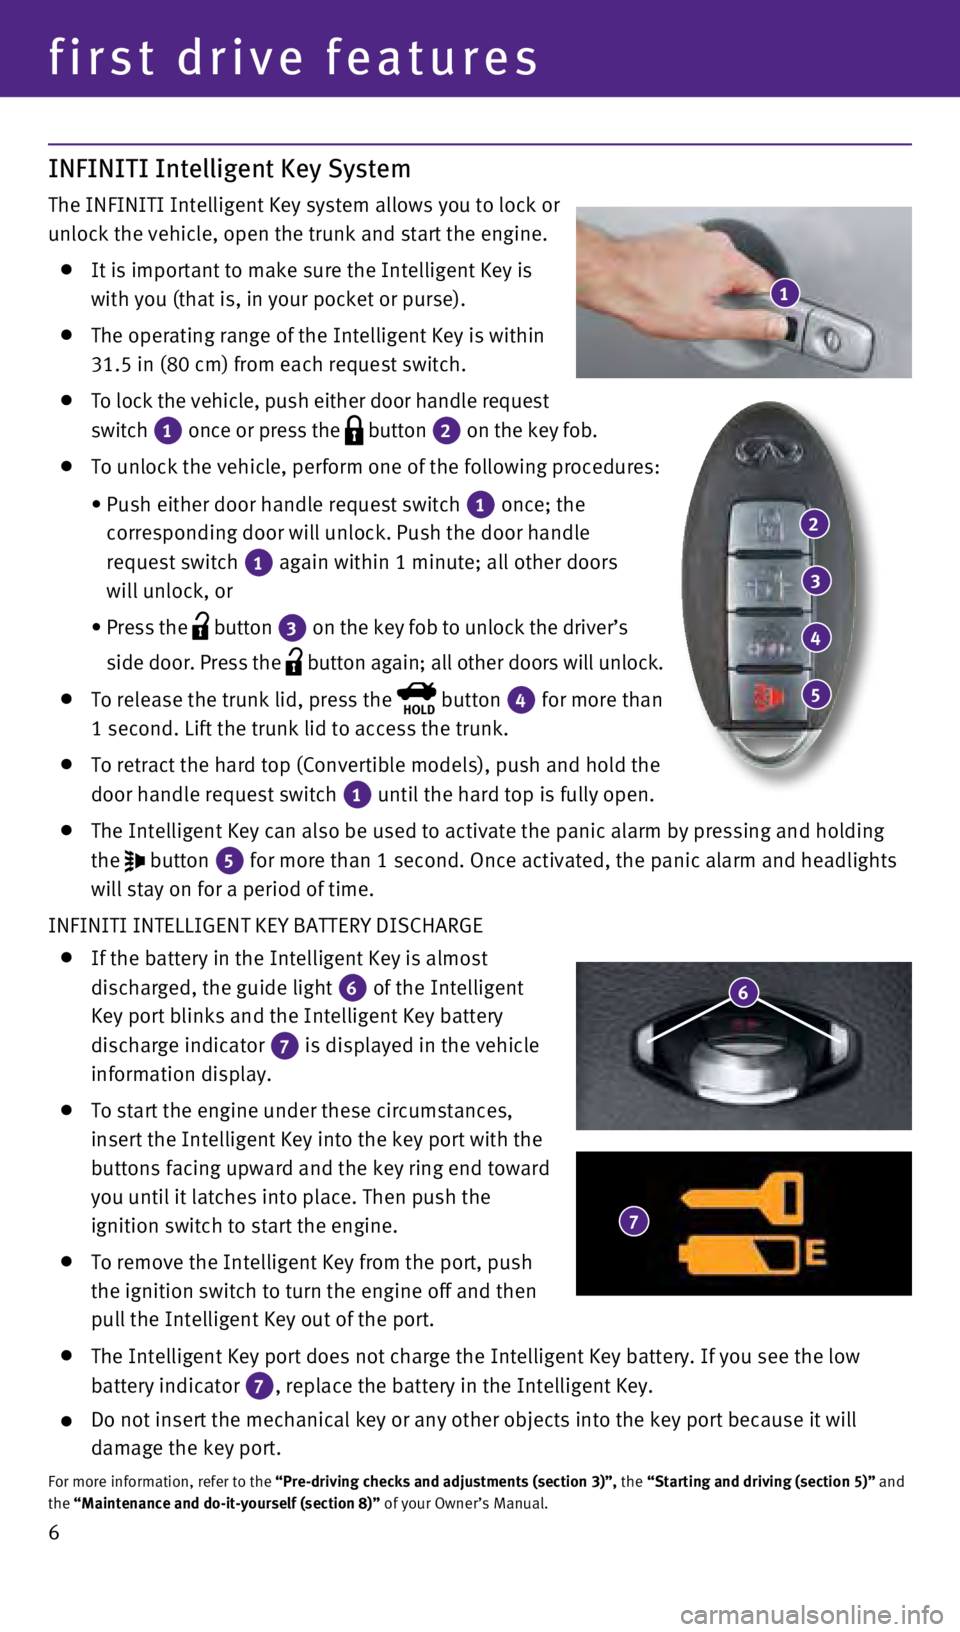
INFINITI Intelligent Key System
The INFINITI Intelligent Key system allows you to lock or
unlock the vehicle, open the trunk and start the engine.
It is important to make sure the Intelligent Key is
with you (that is, in your pocket or purse).
The operating range of the Intelligent Key is within
31.5 in (80 cm) from each request switch.
To lock the vehicle, push either door handle request
switch
1 once or press the button 2 on the key fob.
To unlock the vehicle, perform one of the following procedures:
•
Push either door handle request switch
1 once; the
corresponding door will unlock. Push the door handle
request switch
1 again within 1 minute; all other doors
will unlock, or
•
Press the button 3 on the key fob to unlock the driver’s
side door. Press the
button again; all other doors will unlock.
To release the trunk lid, press the HOLD button 4 for more than
1 second. Lift the trunk lid to access the trunk.
To retract the hard top (Convertible models), push and hold the
door handle request switch
1 until the hard top is fully open.
The Intelligent Key can also be used to activate the panic alarm by pres\
sing and holding
the
button 5 for more than 1 second. Once activated, the panic alarm and headlights
will stay on for a period of time.
INFINITI INTELLIGENT KEY BATTERY DISCHARGE
If the battery in the Intelligent Key is almost
discharged, the guide light
6 of the Intelligent
Key port blinks and the Intelligent Key battery
discharge indicator
7 is displayed in the vehicle
information display.
To start the engine under these circumstances,
insert the Intelligent Key into the key port with the
buttons facing upward and the key ring end toward
you until it latches into place. Then push the
ignition switch to start the engine.
To remove the Intelligent Key from the port, push
the ignition switch to turn the engine off and then
pull the Intelligent Key out of the port.
The Intelligent Key port does not charge the Intelligent Key battery. If\
you see the low
battery indicator
7, replace the battery in the Intelligent Key.
Do not insert the mechanical key or any other objects into the key port \
because it will
damage the key port.
For more information, refer to the “Pre-driving checks and adjustments (section 3)”, the “Starting and driving (section 5)” and
the “Maintenance and do-it-yourself (section 8)” of your Owner’s Manual.
1
first drive features
2
3
4
5
6
7
1811810_15b_Q60_G_Coupe_Convert_QRG_091514.indd 69/15/14 1:26 PM